
Pump Parts Explained: The Ultimate Easy Guide
Quick Summary:
Bike pumps have several key parts: a cylinder, piston, seals, hose, and valve connector. The cylinder holds air, the piston compresses it, and seals prevent leaks. The hose connects the pump to your tire valve (Presta or Schrader), and the valve connector ensures a secure fit. Understanding these parts helps with maintenance and repairs, keeping your tires properly inflated!
Ever struggled with a bike pump that just won’t inflate your tires properly? It’s a common frustration! Many cyclists find themselves battling leaky pumps or incompatible valve connectors. But don’t worry! Understanding the different parts of your bike pump and how they work together is the first step to solving these issues.
In this guide, we’ll break down each component of a typical bike pump. We’ll explain what it does, how to maintain it, and what to do if it breaks. Get ready to take control of your bike maintenance – properly inflated tires await!
Understanding the Core Components of Your Bike Pump

Let’s dive into the essential parts that make your bike pump work. Knowing these components will empower you to troubleshoot issues and keep your pump in top condition.
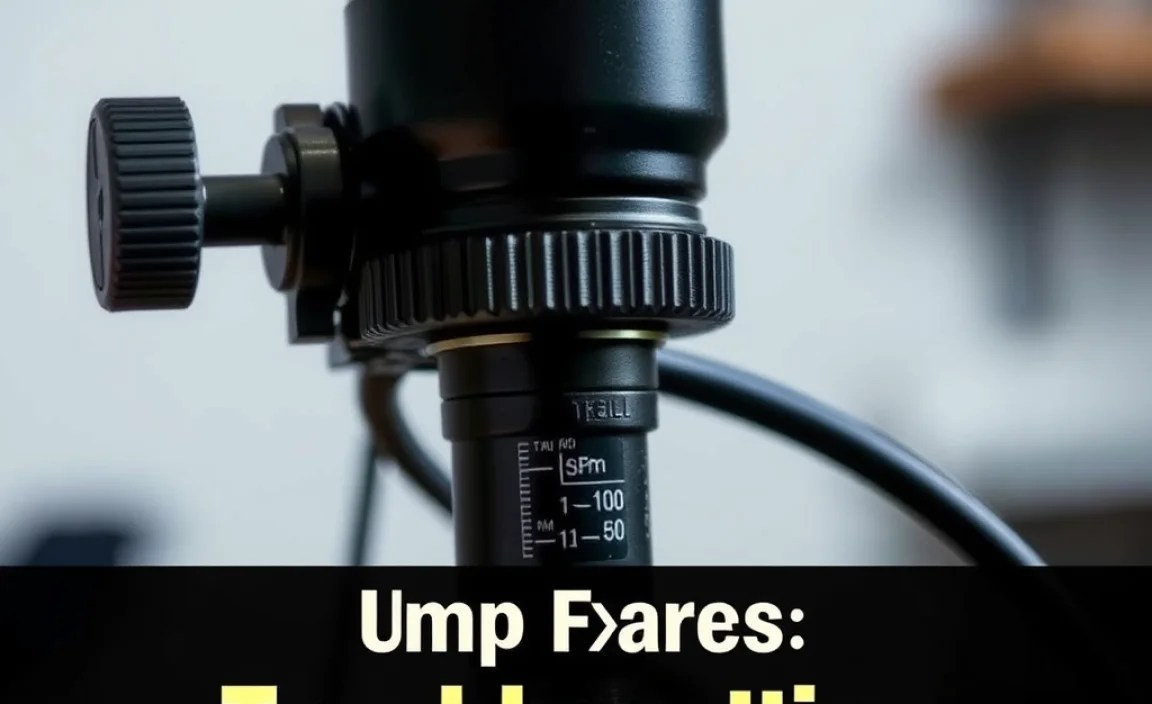
1. The Cylinder: The Pump’s Body
The cylinder is the main body of the pump. It’s a hollow tube, usually made of steel, aluminum, or plastic, that houses the piston. Its primary function is to contain the air that will be compressed and forced into your tire. Think of it as the engine block of your pump.
- Material: Steel cylinders are durable but heavier. Aluminum cylinders are lighter but can be more prone to dents. Plastic cylinders are the lightest but least durable.
- Maintenance: Keep the cylinder clean and free from debris. Wipe it down regularly with a damp cloth.
- Troubleshooting: If the cylinder is dented or cracked, the pump may not function correctly. Replacement is usually necessary.
2. The Piston: The Compressor
The piston is a movable component inside the cylinder that compresses the air. It’s connected to the handle and moves up and down as you pump. The piston’s movement creates pressure, forcing air through the hose and into your tire.
- Material: Pistons are often made of plastic or metal.
- Maintenance: Keep the piston clean and lubricated. A dry piston can cause friction and reduce pumping efficiency. A small amount of silicone-based lubricant can work wonders.
- Troubleshooting: If the piston is stiff or doesn’t move smoothly, it may need lubrication or replacement.
3. Seals and O-Rings: Preventing Air Leaks
Seals and O-rings are crucial for maintaining air pressure within the pump. They create airtight barriers between the cylinder, piston, and other components. Without these seals, air would leak out, making it impossible to inflate your tires.
- Types: Seals can be made of rubber, silicone, or other flexible materials. O-rings are circular seals that fit into grooves.
- Maintenance: Seals can dry out and crack over time. Regularly inspect them for wear and tear. Lubricate them with silicone grease to keep them pliable.
- Troubleshooting: If you notice air leaking from the pump, the seals are likely the culprit. Replacing worn or damaged seals is often a simple and cost-effective repair.
4. The Hose: Connecting the Pump to Your Tire
The hose is a flexible tube that connects the pump to your tire valve. It allows the compressed air to flow from the pump to the tire. The hose needs to be durable enough to withstand pressure and flexible enough to maneuver easily.
- Material: Hoses are typically made of rubber or plastic.
- Length: Hose length varies; longer hoses can reach valves more easily, especially on bikes with awkward valve placements.
- Maintenance: Inspect the hose for cracks or kinks. Replace it if it’s damaged.
- Troubleshooting: A cracked or punctured hose will leak air, preventing proper inflation. Replacing the hose is usually the best solution.
5. The Valve Connector (Head): The Interface
The valve connector, also known as the pump head, is the part that attaches to your tire valve. It’s designed to create an airtight seal around the valve, allowing air to flow into the tire without leaking. There are two main types of valve connectors: Presta and Schrader.
- Presta Valves: These are narrow valves with a small locking nut at the tip. They are commonly found on road bikes and high-performance bikes.
- Schrader Valves: These are wider valves similar to those found on car tires. They are common on mountain bikes, hybrid bikes, and kids’ bikes.
- Dual-Head Connectors: Some pumps have dual-head connectors that can accommodate both Presta and Schrader valves. These are convenient for households with multiple bikes.
- Maintenance: Keep the valve connector clean and free from debris. Inspect the rubber seals inside the connector for wear and tear.
- Troubleshooting: If the valve connector doesn’t seal properly, air will leak out. Try tightening the connector or replacing the rubber seals.
6. The Base: Stability and Leverage
The base provides stability for the pump while you’re using it. It’s typically made of steel or plastic and is designed to be placed on the ground. A wide, stable base makes pumping easier and more efficient.
- Material: Steel bases are more durable but heavier. Plastic bases are lighter but can be less stable.
- Design: Some bases have footpads for added grip.
- Maintenance: Keep the base clean and free from debris.
- Troubleshooting: If the base is cracked or broken, the pump may be unstable. Replacement is usually necessary.
7. The Handle: Applying Force
The handle is the part you grip to operate the pump. It’s connected to the piston and allows you to apply force to compress the air. The handle should be comfortable to grip and easy to use.
- Material: Handles are often made of plastic, wood, or rubber.
- Ergonomics: Ergonomic handles are designed to reduce hand fatigue.
- Maintenance: Keep the handle clean and dry.
- Troubleshooting: If the handle is loose or broken, it can be difficult to pump efficiently. Tighten any loose screws or replace the handle if necessary.
Types of Bike Pumps and Their Specific Parts

While the core components remain the same, different types of bike pumps have specific features and parts tailored to their intended use. Here’s a breakdown:
1. Floor Pumps (Track Pumps)
Floor pumps are designed for home use and provide the most efficient way to inflate tires. They have a large cylinder, a long hose, and a stable base. Key features include:
- Pressure Gauge: Most floor pumps have a built-in pressure gauge that allows you to accurately inflate your tires to the desired pressure (PSI or BAR).
- Dual-Head Connector: Many floor pumps have dual-head connectors that can accommodate both Presta and Schrader valves.
- Ergonomic Handle: Floor pumps often have ergonomic handles for comfortable pumping.
2. Hand Pumps (Mini Pumps)
Hand pumps are compact and portable, making them ideal for carrying on rides. They are less efficient than floor pumps but can still inflate tires to a usable pressure. Key features include:
- Compact Size: Hand pumps are designed to be small and lightweight.
- Mounting Bracket: Many hand pumps come with a mounting bracket that allows you to attach them to your bike frame.
- Telescoping Design: Some hand pumps have a telescoping design that allows you to extend the pump for more efficient pumping.
3. CO2 Inflators
CO2 inflators use compressed carbon dioxide cartridges to quickly inflate tires. They are lightweight and easy to use, making them popular among racers and riders who want to get back on the road quickly. Key features include:
- CO2 Cartridge: CO2 inflators use disposable CO2 cartridges.
- Regulator: The regulator controls the flow of CO2 from the cartridge to the tire.
- Compact Size: CO2 inflators are very small and lightweight.
4. Frame Pumps
Frame pumps are longer than mini-pumps and designed to fit alongside a bike frame tube, offering a blend of portability and efficiency. Frame pumps often don’t have hoses, and require direct contact with the valve, which can be a challenge in tight spaces.
- Integrated Design: Securely attaches along the bike frame, always ready for use.
- Higher Volume: Generally moves more air per stroke than mini-pumps, making inflation quicker.
- Valve Compatibility: May require adapters for different valve types (Presta/Schrader).
Comparing Pump Types: Parts and Features
Here’s a quick comparison table to highlight the key differences in parts and features across different pump types:
| Pump Type | Key Parts | Unique Features | Best For |
|---|---|---|---|
| Floor Pump | Cylinder, Piston, Hose, Valve Connector, Base, Gauge | Pressure gauge, dual-head connector, ergonomic handle | Home use, accurate inflation |
| Hand Pump | Cylinder, Piston, Hose, Valve Connector | Compact size, mounting bracket, telescoping design | On-the-go inflation, emergencies |
| CO2 Inflator | CO2 Cartridge, Regulator, Valve Connector | Rapid inflation, lightweight | Racing, quick repairs |
| Frame Pump | Cylinder, Piston, Valve Connector | Integrated design, higher volume | Everyday riding, moderate inflation needs |
Step-by-Step: How to Maintain Your Bike Pump

Regular maintenance will keep your bike pump working smoothly and extend its lifespan. Here’s a step-by-step guide:
Step 1: Gather Your Supplies
You’ll need a few basic supplies:
- Silicone grease or lubricant
- Clean rags
- Small screwdriver set
- Warm, soapy water
Step 2: Disassemble the Pump
Carefully disassemble the pump, taking note of how the parts fit together. Refer to your pump’s manual or online resources for specific instructions.
Step 3: Clean the Parts
Clean all the parts with warm, soapy water. Use a rag to remove dirt and grime. Pay special attention to the cylinder, piston, and valve connector.
Step 4: Inspect the Seals and O-Rings
Inspect the seals and O-rings for wear and tear. Replace any that are cracked, dried out, or damaged. You can often find replacement seal kits online or at your local bike shop.
Step 5: Lubricate the Moving Parts
Apply a small amount of silicone grease or lubricant to the piston, seals, and other moving parts. This will help them move smoothly and prevent friction.
Step 6: Reassemble the Pump
Carefully reassemble the pump, making sure all the parts are in the correct position. Tighten any screws or fasteners.
Step 7: Test the Pump
Test the pump to make sure it’s working correctly. Inflate a tire and check for air leaks. If you notice any problems, disassemble the pump and check for any issues.
Troubleshooting Common Bike Pump Problems
Even with regular maintenance, bike pumps can sometimes experience problems. Here are some common issues and how to fix them:
1. Pump Won’t Inflate
- Possible Cause: Leaky seals, clogged valve connector, or damaged hose.
- Solution: Replace the seals, clean the valve connector, or replace the hose.
2. Air Leaks from the Valve Connector
- Possible Cause: Worn or damaged rubber seals inside the connector.
- Solution: Replace the rubber seals.
3. Stiff Piston Movement
- Possible Cause: Dry or dirty piston.
- Solution: Lubricate the piston with silicone grease.
4. Pressure Gauge Not Working
- Possible Cause: Damaged gauge or faulty connection.
- Solution: Replace the gauge or check the connection.
5. Hose Cracks or Breaks
- Possible Cause: Wear and tear, exposure to sunlight.
- Solution: Replace the hose.
DIY Repairs vs. Professional Service

Many bike pump repairs can be done at home with basic tools and supplies. However, some repairs may require specialized knowledge or equipment. Here’s a guideline:
| Repair | DIY Difficulty | When to Seek Professional Help |
|---|---|---|
| Replacing Seals | Easy | If you can’t find the correct replacement seals |
| Cleaning Valve Connector | Easy | If the connector is severely corroded or damaged |
| Lubricating Piston | Easy | N/A |
| Replacing Hose | Medium | If you need special tools to disconnect the old hose |
| Replacing Pressure Gauge | Medium | If you’re not comfortable working with small parts |
| Cylinder Damage | Hard | Always seek professional help for cylinder repairs |
Tips for Choosing a Durable Bike Pump
When buying a new bike pump, consider these factors to ensure you get a durable and reliable model:
- Material: Look for pumps made of high-quality materials like steel or aluminum.
- Construction: Check for solid construction and tight seals.
- Valve Compatibility: Choose a pump that is compatible with both Presta and Schrader valves, or select one that matches your specific needs.
- Pressure Gauge: A built-in pressure gauge is essential for accurate inflation.
- Warranty: Look for a pump with a good warranty.
- Read Reviews: Check online reviews to see what other cyclists say about the pump’s durability and performance.
FAQ: Common Questions About Bike Pump Parts
Q1: What’s the difference between Presta and Schrader valves?
Raymond Says: Presta valves are narrow with a locking nut, mostly on road bikes. Schrader valves are wider, like car tires, found on mountain and hybrid bikes.
Q2: How often should I maintain my bike pump?
Raymond Says: Give your pump a quick check every few months and a deep clean once a year to keep it in great shape.
Q3: Can I use any lubricant on my pump’s seals?
Raymond Says: Nope! Use only silicone-based lubricants to avoid damaging the rubber seals.
Q4: What do I do if my pump hose gets a crack?
Raymond Says: Time for a new hose! Cracks cause leaks, so replacement is the only fix.
Q5: Why is my pump so hard to push down?
Raymond Says: The piston might be dry. A little silicone lubricant will get it moving smoothly again.
Q6: My pump head won’t stay on the valve. What’s wrong?
Raymond Says: The rubber seals inside the pump head are likely worn out. Replace them to get a snug fit.
Q7: Can I convert my pump from Schrader to Presta?
Raymond Says: Some pumps have dual heads. If yours doesn’t, you can buy adapter heads at most bike shops to switch between valve types.
Conclusion
Understanding the parts of your bike pump and how they work empowers you to keep your tires properly inflated and your rides smooth. Regular maintenance, like cleaning and lubricating the moving parts, can significantly extend the life of your pump. Don’t be afraid to tackle simple repairs yourself, such as replacing seals or hoses. With a little knowledge and effort, you can keep your bike pump in top condition and avoid the frustration of flat tires. So, grab your tools, get to know your pump, and enjoy the ride!


