
Cycle Air Pump Parts: Find the Perfect Fit!
Quick Summary: Cycle air pumps have a few key parts that often need replacing: hoses, pump heads (nozzles), seals, and gauges. Knowing how to identify and replace these parts can save you money and keep your tires properly inflated. With the right replacement parts and a few simple tools, you can keep your pump working like new!
Ever tried pumping up your bike tires only to find your pump isn’t working right? It’s a common problem, and often, it’s just one or two parts that need fixing. Instead of buying a whole new pump, you can easily replace the worn-out parts yourself. It’s easier than you think, and you’ll save money.
This guide will walk you through the most common cycle air pump parts, how to identify when they need replacing, and how to replace them. Let’s get started and keep you rolling!
Understanding Cycle Air Pump Parts

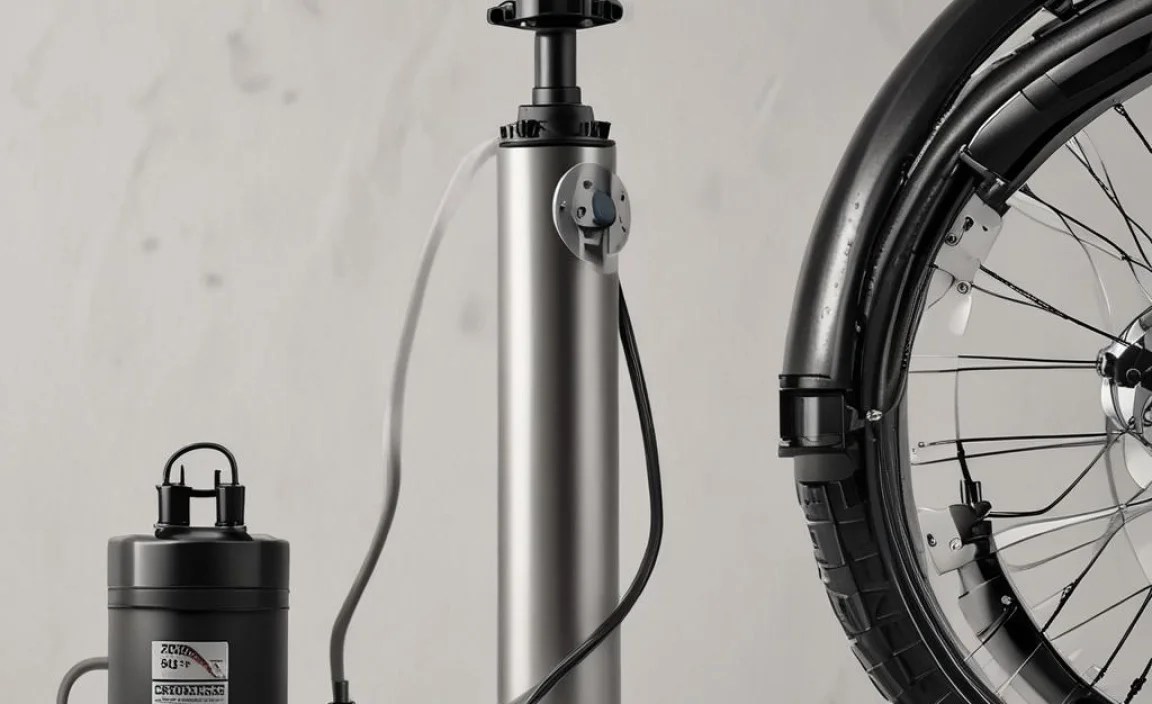
Just like any tool, a cycle air pump has several parts that work together to inflate your tires. Knowing these parts and their functions will help you diagnose problems and fix them quickly.
Essential Components
Here are the main parts you’ll find in most cycle air pumps:
- Hose: Connects the pump to the tire valve.
- Pump Head (Nozzle): Attaches to the valve and allows air to flow in.
- Seals and O-rings: Create airtight connections to prevent leaks.
- Piston: Moves up and down to push air into the tire.
- Gauge: Displays the current tire pressure.
- Base and Handle: Provide stability and leverage for pumping.
Types of Pumps
There are two main types of cycle air pumps:
- Floor Pumps: Larger pumps with a base and handle, used for inflating tires quickly and easily.
- Hand Pumps: Smaller, portable pumps for on-the-go inflation.
While the basic parts are the same, their design and construction can vary.
Identifying Common Cycle Air Pump Problems
Knowing when a part needs replacing is the first step in maintaining your cycle air pump. Here are some common signs of trouble:
- Air Leaks: If you hear or feel air escaping while pumping, it could be a damaged hose, a faulty pump head, or worn-out seals.
- Difficulty Pumping: If the pump feels harder to push or pull, the piston or seals may be worn.
- Inaccurate Gauge Readings: If the gauge shows incorrect pressure, it may be damaged or miscalibrated.
- Loose Connections: If the pump head doesn’t attach securely to the valve, it may need replacement.
- Visible Damage: Cracks, breaks, or wear on any part indicate it’s time for a replacement.
Tools and Materials Needed for Cycle Air Pump Repair

Before you start, gather the necessary tools and materials. This will make the repair process smoother and more efficient.
- Replacement Parts: Purchase the correct replacement parts for your pump model.
- Screwdrivers: Both Phillips head and flathead screwdrivers may be needed.
- Pliers: For gripping and removing small parts.
- Wrench Set: For tightening or loosening nuts and bolts.
- Lubricant: Silicone grease or oil to lubricate moving parts.
- Rag or Cloth: For cleaning and wiping surfaces.
- Work Gloves: To protect your hands.
Step-by-Step Guide to Replacing Common Cycle Air Pump Parts

Now, let’s get into the actual repair process. Here’s how to replace some of the most common cycle air pump parts.
Replacing the Hose
A damaged or cracked hose can cause air leaks and reduce pumping efficiency. Here’s how to replace it:
- Disconnect the Old Hose: Use a wrench or pliers to loosen the fittings at both ends of the hose.
- Remove the Old Hose: Gently pull the hose away from the pump and the pump head.
- Install the New Hose: Attach the new hose to the pump and the pump head, tightening the fittings securely.
- Test for Leaks: Inflate a tire and check for any air leaks around the hose connections.
Replacing the Pump Head (Nozzle)
A faulty pump head can make it difficult to attach to the tire valve. Here’s how to replace it:
- Remove the Old Pump Head: Unscrew or detach the old pump head from the hose.
- Install the New Pump Head: Attach the new pump head to the hose, tightening it securely.
- Test the Connection: Attach the pump head to a tire valve and check for a secure fit.
- Inflate and Check: Inflate the tire and check for any air leaks around the pump head.
Replacing Seals and O-rings
Worn-out seals and O-rings can cause air leaks and reduce pumping efficiency. Here’s how to replace them:
- Disassemble the Pump: Follow the manufacturer’s instructions to disassemble the pump and access the seals and O-rings.
- Remove the Old Seals: Use a small tool or pick to carefully remove the old seals and O-rings.
- Install the New Seals: Lubricate the new seals and O-rings with silicone grease and install them in their proper locations.
- Reassemble the Pump: Reassemble the pump, making sure all parts are properly aligned and tightened.
- Test for Leaks: Inflate a tire and check for any air leaks around the seals and O-rings.
Replacing the Gauge
An inaccurate gauge can lead to over- or under-inflated tires. Here’s how to replace it:
- Locate the Gauge: Find the gauge on your pump and note how it’s attached.
- Disconnect the Old Gauge: Use a wrench or screwdriver to disconnect the old gauge.
- Install the New Gauge: Attach the new gauge, making sure it’s securely connected.
- Calibrate the Gauge: Use a separate, reliable gauge to calibrate the new gauge if necessary.
- Test the Gauge: Inflate a tire and compare the gauge reading to a known accurate gauge.
Maintenance Tips to Extend the Life of Your Cycle Air Pump

Regular maintenance can help prevent problems and extend the life of your cycle air pump. Here are some tips:
- Clean Regularly: Wipe down the pump with a damp cloth to remove dirt and debris.
- Lubricate Moving Parts: Apply silicone grease or oil to the piston and other moving parts to keep them working smoothly.
- Store Properly: Store the pump in a dry, protected area to prevent damage.
- Check for Wear: Regularly inspect the hose, pump head, and seals for signs of wear and replace them as needed.
- Use Correctly: Avoid overextending the pump or using excessive force.
Choosing the Right Replacement Parts
Selecting the correct replacement parts is crucial for ensuring your pump works properly. Here’s what to consider:
- Pump Model: Identify the make and model of your pump to ensure compatibility.
- Part Type: Determine the specific part you need (hose, pump head, seals, etc.).
- Material Quality: Choose high-quality parts made from durable materials.
- Manufacturer Recommendations: Follow the manufacturer’s recommendations for replacement parts.
- Reviews and Ratings: Check online reviews and ratings to ensure the parts are reliable.
Troubleshooting Common Issues After Replacing Parts
Even after replacing parts, you might encounter some issues. Here’s how to troubleshoot them:
- Air Leaks: Check all connections to make sure they’re tight and secure.
- Difficulty Pumping: Lubricate the piston and seals to reduce friction.
- Inaccurate Gauge Readings: Calibrate the gauge or replace it if necessary.
- Loose Connections: Tighten the connections or replace worn-out parts.
Cost Considerations for Cycle Air Pump Repair
Repairing your cycle air pump can save you money compared to buying a new one. Here’s a breakdown of the costs:
| Part | Estimated Cost | Notes |
|---|---|---|
| Hose | $10 – $20 | Price varies by length and material. |
| Pump Head | $15 – $30 | Dual-head models may cost more. |
| Seal Kit | $5 – $15 | Includes multiple O-rings and seals. |
| Gauge | $20 – $40 | Digital gauges are typically more expensive. |
By doing the repairs yourself, you’ll save on labor costs, which can add up quickly at a bike shop. Refer to reputable online retailers like Amazon, BikeTiresDirect, or local bike shops for parts pricing.
When to Consider Replacing the Entire Pump
While replacing individual parts can extend the life of your pump, there are times when it’s more cost-effective to replace the entire unit. Consider replacing the pump if:
- Multiple Parts Need Replacing: If several parts are worn out or damaged, the cost of replacement parts may exceed the cost of a new pump.
- Pump is Old: If the pump is very old and outdated, a new pump may offer better performance and features.
- Extensive Damage: If the pump has significant damage to the base, handle, or other major components, it may not be worth repairing.
- Newer Models Offer Better Features: Sometimes, upgrading to a newer model can provide features like digital gauges, improved efficiency, or compatibility with different valve types.
Where to Buy Cycle Air Pump Parts
You can find cycle air pump parts at various locations, both online and in-store:
- Local Bike Shops: Offer expert advice and a wide selection of parts.
- Online Retailers: Provide convenience and competitive prices.
- Manufacturer Websites: Ensure compatibility and quality.
- Hardware Stores: May carry generic parts like hoses and fittings.
<Frequently Asked Questions (FAQs)
What type of lubricant should I use on my cycle air pump?
Use silicone grease or oil. Avoid petroleum-based lubricants, as they can damage rubber seals.
How often should I lubricate my cycle air pump?
Lubricate your pump every few months, or whenever you notice it’s becoming harder to pump.
Can I use a car tire inflator on my bicycle?
While you can, it’s not recommended. Car tire inflators deliver air at a much higher volume and pressure, which can easily overinflate and damage bicycle tires. It’s always best to use a pump designed for bicycles.
How do I know what size O-ring to buy for my pump?
Check your pump’s manual or contact the manufacturer for the correct size. You can also take the old O-ring to a local bike shop or hardware store to find a match.
What is the difference between Presta and Schrader valves?
Presta valves are narrow and have a locking nut at the tip, commonly found on road bikes. Schrader valves are wider and similar to those on car tires, often used on mountain and hybrid bikes. Make sure your pump head is compatible with the valve type on your bike.
How do I prevent my pump from rusting?
Store your pump in a dry place and wipe it down regularly to remove moisture. Applying a thin coat of lubricant to metal parts can also help prevent rust.
Why is my pump head leaking air when I try to inflate my tire?
The pump head may not be properly attached to the valve, or the rubber seal inside the pump head may be worn out. Try repositioning the pump head and ensuring a tight seal. If the problem persists, replace the pump head or the seal.
Conclusion
Maintaining your cycle air pump doesn’t have to be a daunting task. By understanding the different parts, identifying common problems, and following the step-by-step guides, you can keep your pump working smoothly and efficiently for years to come. Don’t be afraid to get your hands dirty and tackle those repairs yourself. You’ll save money, gain valuable skills, and enjoy the satisfaction of keeping your bike in top condition. Happy riding!


