
How to Make a Cycle Pump at Home: A DIY Guide
Quick Summary: Building a basic bike pump at home is possible with simple materials! You’ll need a sturdy tube, a one-way valve, a piston, and a handle. By assembling these parts carefully, you can create a functional pump for inflating your tires in a pinch. This DIY project can save you money and teach you about basic mechanics.
Ever been stuck with a flat tire and no pump in sight? It’s a cyclist’s worst nightmare! Store-bought pumps are great, but what if you need a quick fix or just enjoy a good DIY project? Making your own cycle pump at home is easier than you think. It’s a fantastic way to understand how pumps work and save some cash. Plus, it’s a great project to teach kids about simple machines. Ready to get started? Let’s dive in and build a functional bike pump from scratch!
Why Make Your Own Cycle Pump?
Before we get our hands dirty, let’s talk about why you might want to build your own bike pump. It’s not just about saving money (although that’s a nice perk!). There are several compelling reasons:
- Cost-Effective: Store-bought pumps can be expensive. Making your own can save you money.
- Educational: Learn about the mechanics of pumps and how they work.
- Customization: Tailor the pump to your specific needs and preferences.
- Emergency Situations: A homemade pump can be a lifesaver if you’re stranded with a flat tire.
- Sustainability: Repurpose materials and reduce waste by building instead of buying.
Materials You’ll Need
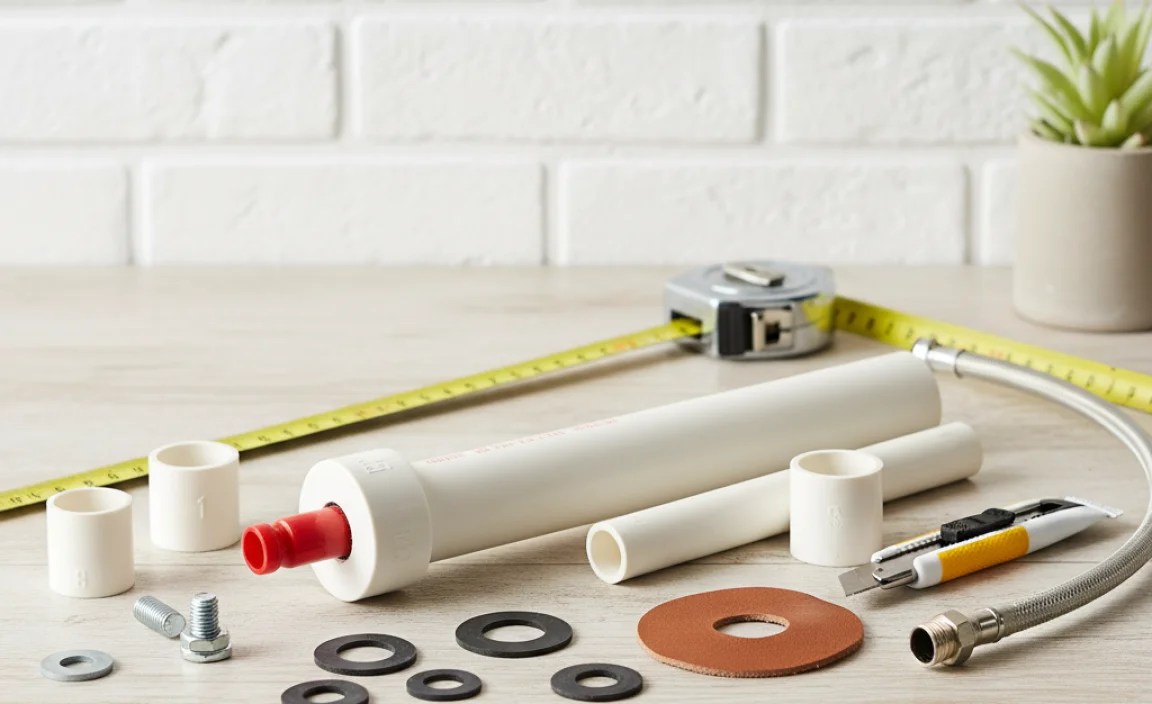
Gathering the right materials is the first step to a successful DIY project. Here’s a list of what you’ll need to build a basic cycle pump. Don’t worry; most of these items are easy to find at your local hardware store or even around your home.
- Sturdy Tube: A length of PVC pipe (around 12-18 inches long and 1-2 inches in diameter) will serve as the pump’s body.
- Piston: A rubber or plastic stopper that fits snugly inside the tube.
- Piston Rod: A metal or wooden rod to attach to the piston and act as the handle.
- One-Way Valve: A valve that allows air to flow in one direction only. These can be salvaged from old pumps or purchased online.
- Air Hose: A flexible tube to connect the pump to the tire valve.
- Tire Valve Connector: A connector that fits onto the tire valve (Presta or Schrader).
- End Cap: A cap to seal the end of the PVC pipe.
- Epoxy or Strong Adhesive: To secure the valve and end cap.
- Drill: For creating holes for the valve and hose.
- Saw: To cut the PVC pipe to the desired length.
- Sandpaper: To smooth any rough edges.
- Measuring Tape: For accurate measurements.
- Safety Glasses: To protect your eyes.
Step-by-Step Guide to Building Your Cycle Pump
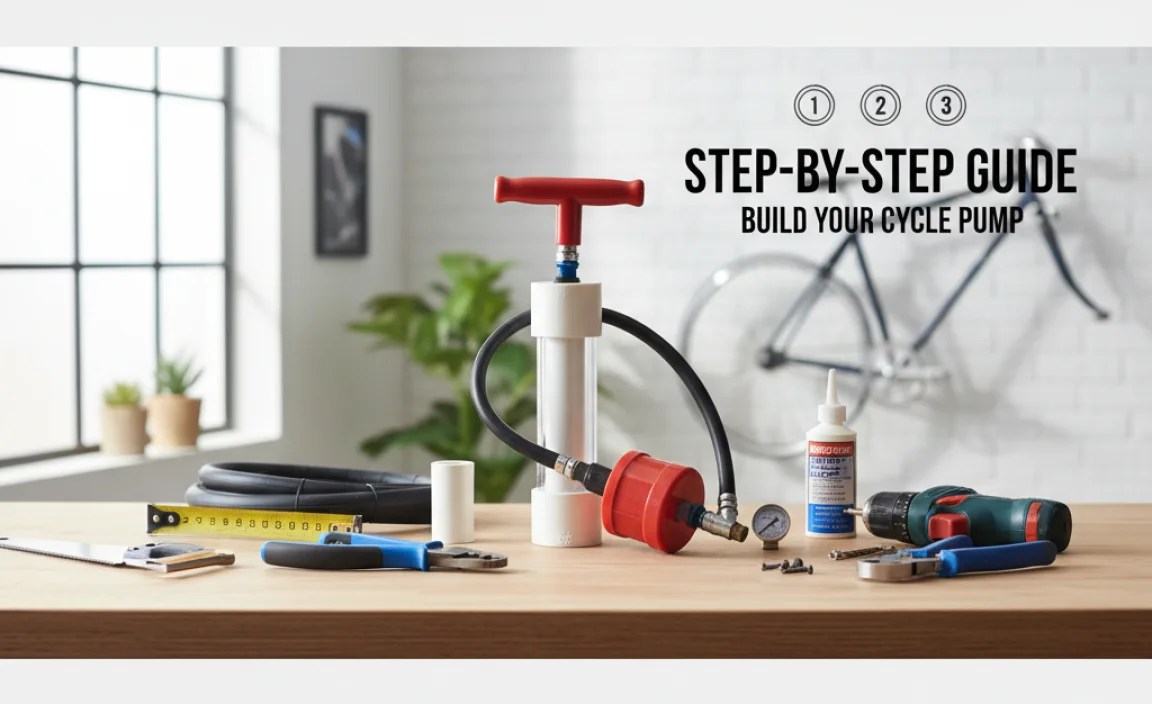
Now that you have all your materials, let’s get to the fun part: building the pump! Follow these steps carefully, and you’ll have a functional cycle pump in no time.
Step 1: Prepare the PVC Pipe
First, cut the PVC pipe to your desired length (12-18 inches is a good starting point). Use a saw for this step. Once cut, use sandpaper to smooth any rough edges. This will ensure a safe and comfortable grip.
Step 2: Create the Piston
The piston is what pushes the air through the pump. Attach the rubber or plastic stopper to the piston rod. Make sure the stopper fits snugly inside the PVC pipe. You might need to experiment with different sizes to find the perfect fit. A tight fit is crucial for creating pressure.
Step 3: Install the One-Way Valve
Drill a hole near one end of the PVC pipe. This is where you’ll install the one-way valve. The valve should allow air to flow out of the pump but not back in. Secure the valve with epoxy or a strong adhesive. Make sure the valve is properly oriented to allow airflow in the correct direction.
Step 4: Attach the Air Hose and Tire Valve Connector
Connect the air hose to the one-way valve. Use a clamp or adhesive to ensure a secure connection. Attach the tire valve connector to the other end of the air hose. Make sure the connector is compatible with your bike’s tire valves (Presta or Schrader). You can find valve connectors at most bike shops or online retailers.
Step 5: Seal the End Cap
Attach the end cap to the opposite end of the PVC pipe. This will seal the pump and allow pressure to build up. Use epoxy or a strong adhesive to ensure a tight seal. A secure end cap is essential for efficient pumping.
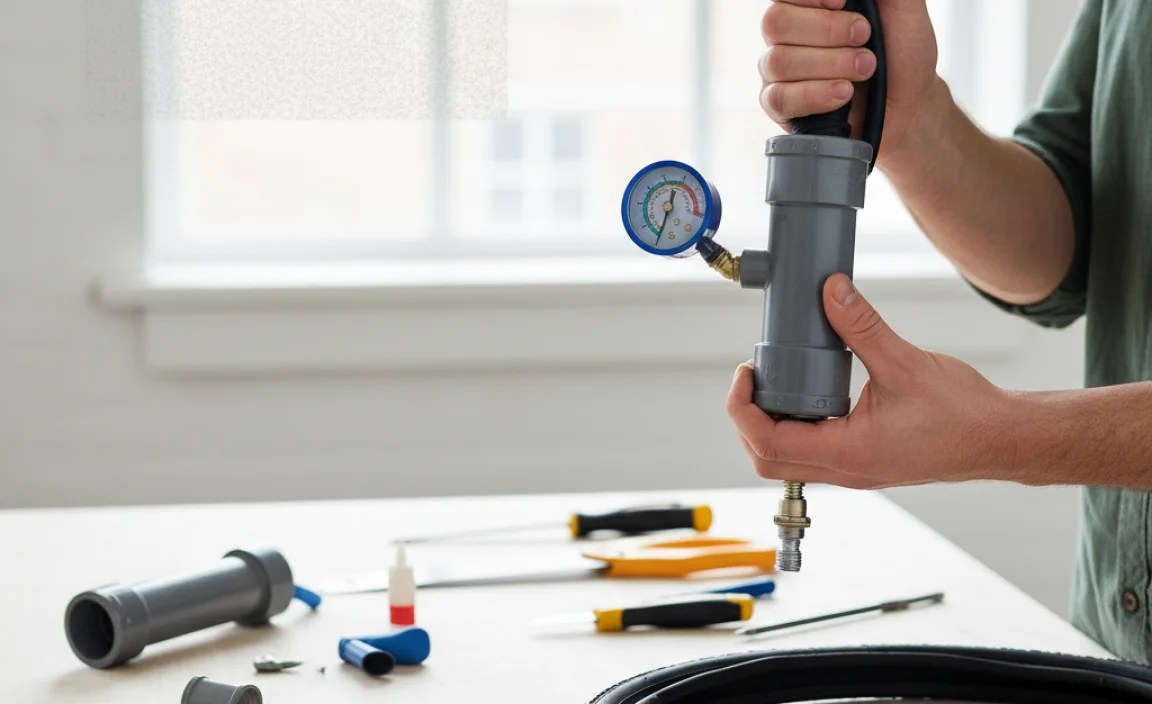
Step 6: Test Your Pump
Now comes the moment of truth! Insert the piston into the PVC pipe and start pumping. Check for any air leaks and make sure the tire inflates properly. If you notice any leaks, seal them with additional adhesive or tape. A successful test means you’ve built a functional cycle pump!
Troubleshooting Tips
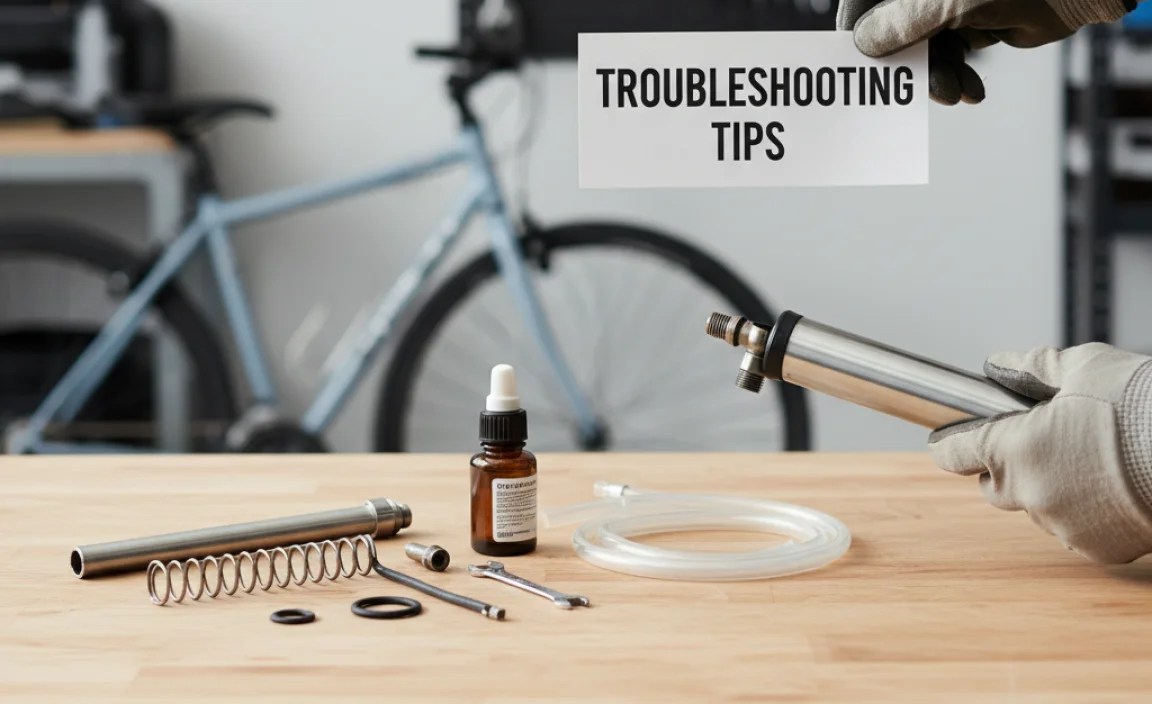
Even with careful construction, you might encounter some issues. Here are a few troubleshooting tips to help you get your homemade pump working perfectly.
- Air Leaks: Check all connections (valve, hose, end cap) and seal any leaks with adhesive or tape.
- Piston Slippage: Ensure the piston fits snugly inside the PVC pipe. If it’s too loose, try a larger stopper or wrap the existing one with tape.
- Valve Malfunction: Make sure the one-way valve is oriented correctly and functioning properly. If it’s not working, replace it with a new one.
- Insufficient Pressure: Check for any obstructions in the hose or valve. Make sure the end cap is securely sealed.
Alternative Designs and Enhancements
Once you’ve mastered the basic design, you can explore alternative designs and enhancements to improve your homemade pump. Here are a few ideas:
- Foot-Operated Pump: Modify the design to create a foot-operated pump for easier inflation.
- Pressure Gauge: Add a pressure gauge to monitor the tire pressure.
- Two-Stage Pump: Design a two-stage pump for faster inflation.
- Portable Design: Create a compact and lightweight pump for easy transport.
Comparing Homemade vs. Store-Bought Pumps
While making your own pump is a fun and educational project, it’s essential to understand the differences between homemade and store-bought pumps. Here’s a comparison:
| Feature | Homemade Pump | Store-Bought Pump |
|---|---|---|
| Cost | Lower | Higher |
| Customization | High | Low |
| Durability | Variable | High |
| Efficiency | Lower | Higher |
| Convenience | Lower | Higher |
As you can see, homemade pumps are more cost-effective and customizable, but store-bought pumps offer better durability, efficiency, and convenience. The best choice depends on your individual needs and preferences.
Safety Precautions
Before you start building your cycle pump, it’s essential to keep safety in mind. Here are some precautions to follow:
- Wear Safety Glasses: Protect your eyes from debris when cutting or drilling.
- Use Tools Carefully: Follow the manufacturer’s instructions for all tools.
- Work in a Well-Ventilated Area: Avoid inhaling fumes from adhesives or solvents.
- Supervise Children: Keep children away from tools and materials.
- Dispose of Waste Properly: Dispose of any waste materials in an environmentally responsible manner.
Tools and Materials Sourcing
Finding the right tools and materials is crucial for a successful DIY project. Here are some tips for sourcing them:
- Local Hardware Store: Your local hardware store is a great place to find PVC pipes, valves, adhesives, and other basic materials.
- Online Retailers: Online retailers like Amazon and eBay offer a wide variety of specialized parts, such as one-way valves and tire valve connectors.
- Recycling Centers: Check recycling centers for used materials that can be repurposed for your pump.
- Bike Shops: Bike shops may have spare parts or be able to offer advice on sourcing materials.
The Science Behind a Cycle Pump
Understanding the science behind a cycle pump can help you appreciate the ingenuity of this simple device. Here’s a brief overview of the principles involved:
- Air Pressure: A pump works by increasing the air pressure inside the pump chamber and then forcing that air into the tire.
- One-Way Valve: The one-way valve ensures that air flows in only one direction, preventing it from escaping back into the pump.
- Piston Action: The piston creates a vacuum that draws air into the pump and then compresses it to increase the pressure.
- Pascal’s Law: Pascal’s Law states that pressure applied to a fluid in a closed container is transmitted equally to every point of the fluid and the walls of the container. This principle is essential for understanding how a pump works.
Maintenance Tips for Your Homemade Pump
To keep your homemade pump working smoothly, follow these maintenance tips:
- Clean Regularly: Clean the pump regularly to remove any dirt or debris that may accumulate inside.
- Lubricate the Piston: Lubricate the piston with a silicone-based lubricant to ensure smooth operation.
- Check for Leaks: Regularly check for air leaks and seal them promptly.
- Store Properly: Store the pump in a dry and protected place to prevent damage.
Real-World Applications
While building your own cycle pump is a great project, it also has real-world applications beyond just inflating bike tires. Here are a few examples:
- Inflating Sports Equipment: Use your pump to inflate basketballs, soccer balls, and other sports equipment.
- Inflating Air Mattresses: Inflate air mattresses for camping or guests.
- Emergency Situations: Use your pump to inflate car tires in an emergency.
Cost Breakdown
Here’s an estimated cost breakdown for building your own cycle pump:
| Item | Estimated Cost |
|---|---|
| PVC Pipe | $5 |
| Piston | $3 |
| One-Way Valve | $5 |
| Air Hose | $2 |
| Tire Valve Connector | $4 |
| End Cap | $1 |
| Adhesive | $3 |
| Total | $23 |
Keep in mind that these are just estimates, and the actual cost may vary depending on where you source your materials.
FAQ: Making a Cycle Pump at Home
Here are some frequently asked questions about making a cycle pump at home:
- Is it really cheaper to make a pump than to buy one?
- Yes, generally. The cost of materials is usually lower than buying a new pump, especially a high-quality one.
- What if I can’t find a one-way valve?
- You can salvage one from an old pump or buy one online. Make sure it’s the right size for your hose.
- Can I use a different type of pipe instead of PVC?
- Yes, but PVC is recommended for its durability and ease of use. Other rigid pipes could work, but ensure they can handle the pressure.
- How much pressure can a homemade pump generate?
- It depends on the design and materials, but typically less than a store-bought pump. Expect enough pressure for basic tire inflation.
- Is it difficult to attach the tire valve connector?
- No, it’s usually a simple screw-on or clip-on attachment. Make sure you have the correct connector type (Presta or Schrader) for your bike tires.
- What kind of adhesive should I use?
- Epoxy or a strong multi-purpose adhesive works best for creating durable, airtight seals.
- How long will my homemade pump last?
- With proper care and maintenance, it can last for several years. Regularly check for leaks and replace worn parts as needed.
Conclusion
Building your own cycle pump at home is a rewarding and educational project. Not only will you save money and learn about basic mechanics, but you’ll also have a functional tool that can come in handy in emergency situations. While homemade pumps may not be as efficient or durable as store-bought ones, they offer a unique level of customization and a sense of accomplishment. So, gather your materials, follow the steps outlined in this guide, and get ready to pump up your tires with your very own DIY cycle pump! Happy cycling!
“`


