
How to Make a Cycle Pump: A Beginner’s Guide
Quick Summary: Building a basic cycle pump involves assembling a cylinder, piston, valve, and hose. You’ll need common materials like PVC pipes, rubber washers, and a check valve. Cut the pipe, create an airtight seal for the piston, and securely attach the hose and valve. With some simple tools, you can create a functional pump for your bike tires!
Ever been stuck with a flat tire and no pump? It’s a cyclist’s worst nightmare! Store-bought pumps can be expensive or unreliable. But what if you could make your own? Building a simple cycle pump is easier than you think. It’s a great DIY project that saves money and teaches you about basic mechanics. Follow this step-by-step guide, and you’ll be inflating your tires in no time!
Understanding the Basics of a Cycle Pump

Before we start building, let’s understand how a cycle pump works. A pump is essentially a device that moves air from one place to another. In a bike pump, you create a vacuum to suck air in and then compress it to force it into the tire.
- Cylinder: The main body of the pump where the piston moves.
- Piston: A component that slides inside the cylinder to compress air.
- Valve: Controls the direction of airflow, preventing backflow.
- Hose: Connects the pump to the tire valve.
Materials and Tools You’ll Need
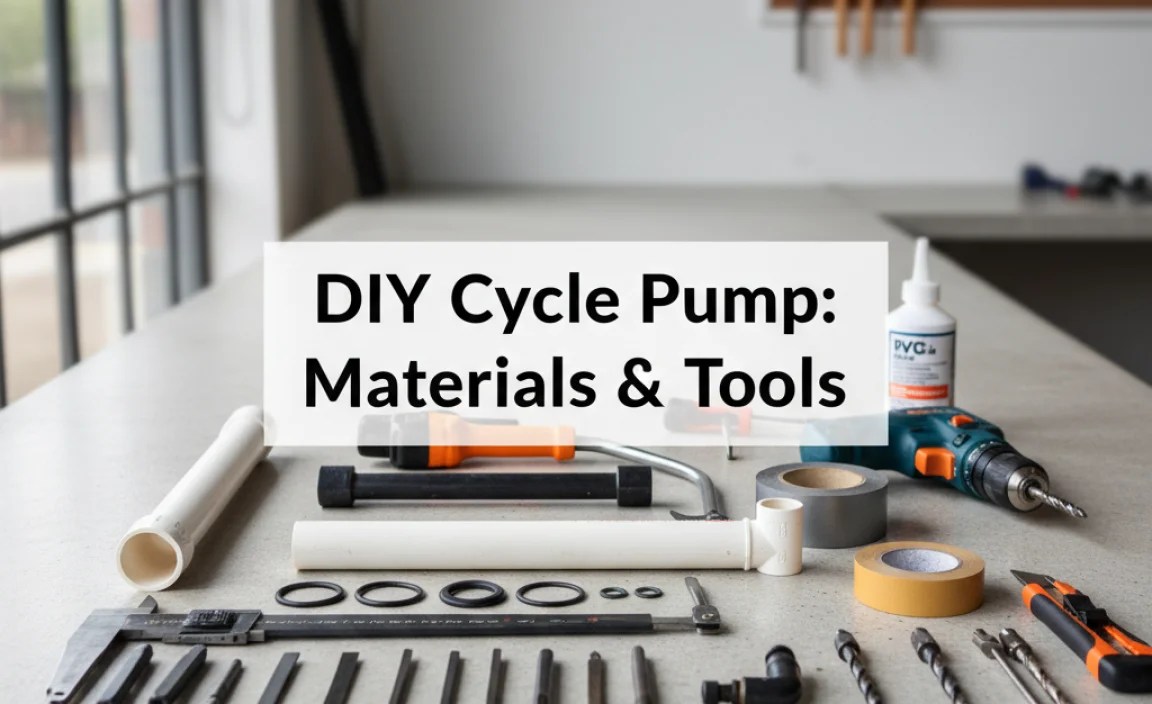
Gather these materials and tools to get started. You can find most of these items at your local hardware store.
- PVC pipe (1-2 inch diameter, 12-18 inches long)
- PVC end cap
- Rubber or leather washers (to fit snugly inside the PVC pipe)
- Wooden dowel (slightly smaller diameter than the washers)
- Check valve (one-way valve)
- Bicycle tire valve connector (Presta or Schrader, depending on your tires)
- Flexible tubing (to connect the pump to the tire valve)
- Epoxy or strong adhesive
- Drill with various sized drill bits
- Saw
- Sandpaper
- Measuring tape
- Pencil or marker
- Clamps (optional, but helpful)
Step-by-Step Guide to Building Your Cycle Pump

Follow these steps to assemble your DIY cycle pump.
Step 1: Prepare the Cylinder
The cylinder is the main body of the pump. It needs to be airtight and strong enough to handle pressure.
- Cut the PVC pipe: Use a saw to cut the PVC pipe to the desired length (12-18 inches). A longer cylinder will allow for more air displacement with each pump.
- Smooth the edges: Use sandpaper to smooth the cut edges of the PVC pipe. This will prevent any sharp edges from causing injury or damaging the piston.
Step 2: Create the Piston Assembly
The piston is what moves inside the cylinder to create pressure. It needs to fit snugly but move freely.
- Prepare the washers: The washers will form the seal for the piston. Make sure they fit snugly inside the PVC pipe. You might need to try different sizes to find the best fit.
- Attach the washers to the dowel: Drill a hole through the center of the wooden dowel. The hole should be large enough to accommodate a bolt or screw. Then, attach the washers to the dowel using the bolt or screw. Make sure the washers are securely fastened and evenly spaced.
- Test the fit: Insert the piston assembly into the PVC pipe. It should slide smoothly without too much resistance. If it’s too tight, sand down the washers slightly. If it’s too loose, try using thicker washers.
Step 3: Install the End Cap
The end cap seals one end of the cylinder and provides a place to attach the hose and valve.
- Drill a hole in the end cap: Drill a hole in the center of the PVC end cap. The hole should be large enough to accommodate the check valve.
- Attach the check valve: Insert the check valve into the hole in the end cap. Use epoxy or strong adhesive to secure the valve in place. Make sure the valve is oriented correctly, allowing air to flow out of the pump but not back in. Check online resources like Engineering ToolBox for detailed valve specs.
- Attach the end cap to the cylinder: Apply epoxy or strong adhesive to the inside of the end cap and the outside of the PVC pipe. Slide the end cap onto the pipe and hold it in place with clamps until the adhesive dries.
Step 4: Connect the Hose and Valve Connector
The hose and valve connector allow you to attach the pump to your tire.
- Attach the flexible tubing to the check valve: Slide one end of the flexible tubing onto the check valve. Use a clamp or zip tie to secure the tubing in place.
- Attach the valve connector to the other end of the tubing: Slide the other end of the flexible tubing onto the bicycle tire valve connector. Use a clamp or zip tie to secure the connector in place.
Step 5: Test Your Pump
Before you rely on your DIY pump, test it to make sure it works properly.
- Insert the piston into the cylinder: Slide the piston assembly into the open end of the PVC pipe.
- Attach the valve connector to your tire: Connect the bicycle tire valve connector to the valve on your bike tire.
- Pump the piston: Push and pull the piston to pump air into the tire. Check the pressure with a separate tire pressure gauge to make sure it’s inflating properly.
- Check for leaks: Listen for any air leaks around the end cap, check valve, or hose connections. If you find any leaks, apply more epoxy or tighten the clamps.
Alternative Design: Using a Syringe
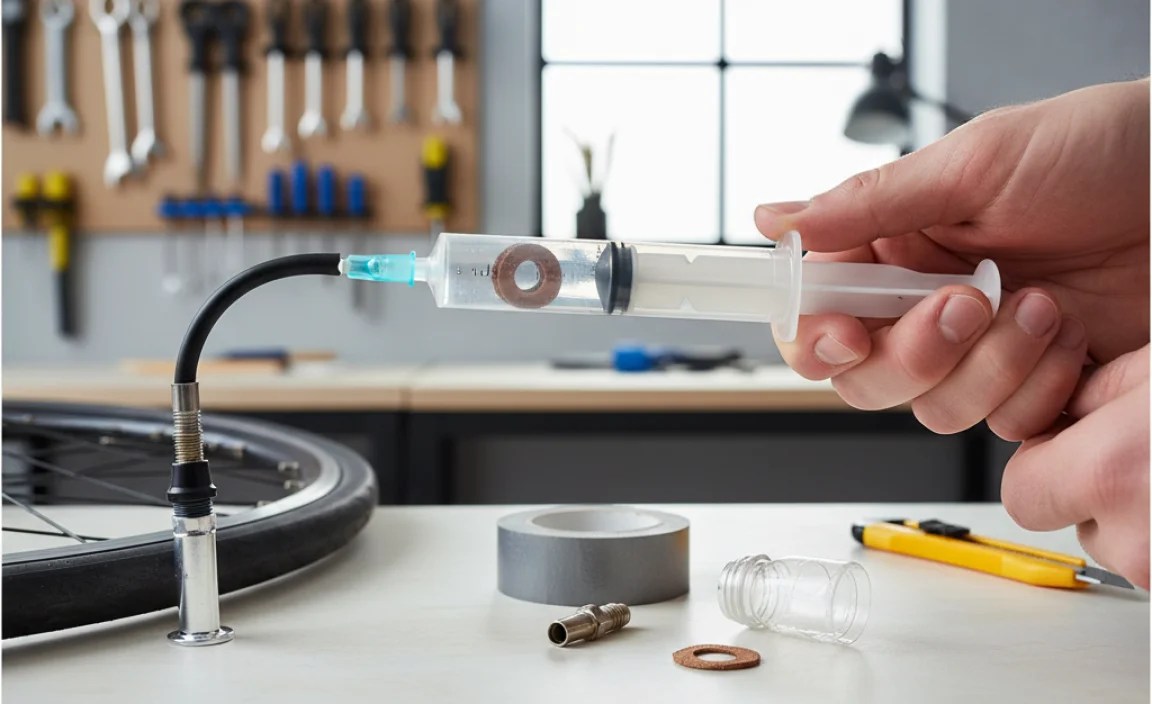
Another simple design involves using a large syringe as the pump’s core. This method is particularly useful for achieving higher pressures, although the air volume per stroke may be lower.
Materials Needed
- Large syringe (60ml or larger)
- Flexible tubing
- Bicycle tire valve connector (Presta or Schrader)
- Epoxy or strong adhesive
- Drill with small drill bits
Steps
- Prepare the Syringe: Ensure the syringe is clean and the plunger moves smoothly.
- Drill a Hole: Carefully drill a small hole in the syringe nozzle, if one doesn’t already exist.
- Attach Tubing: Connect the flexible tubing to the syringe nozzle using epoxy for an airtight seal.
- Connect Valve Connector: Attach the bicycle tire valve connector to the other end of the tubing, again ensuring a secure and airtight connection.
- Test: Insert the plunger into the syringe and test the pump on your bike tire, checking for leaks and proper inflation.
Tips for Improving Your DIY Cycle Pump
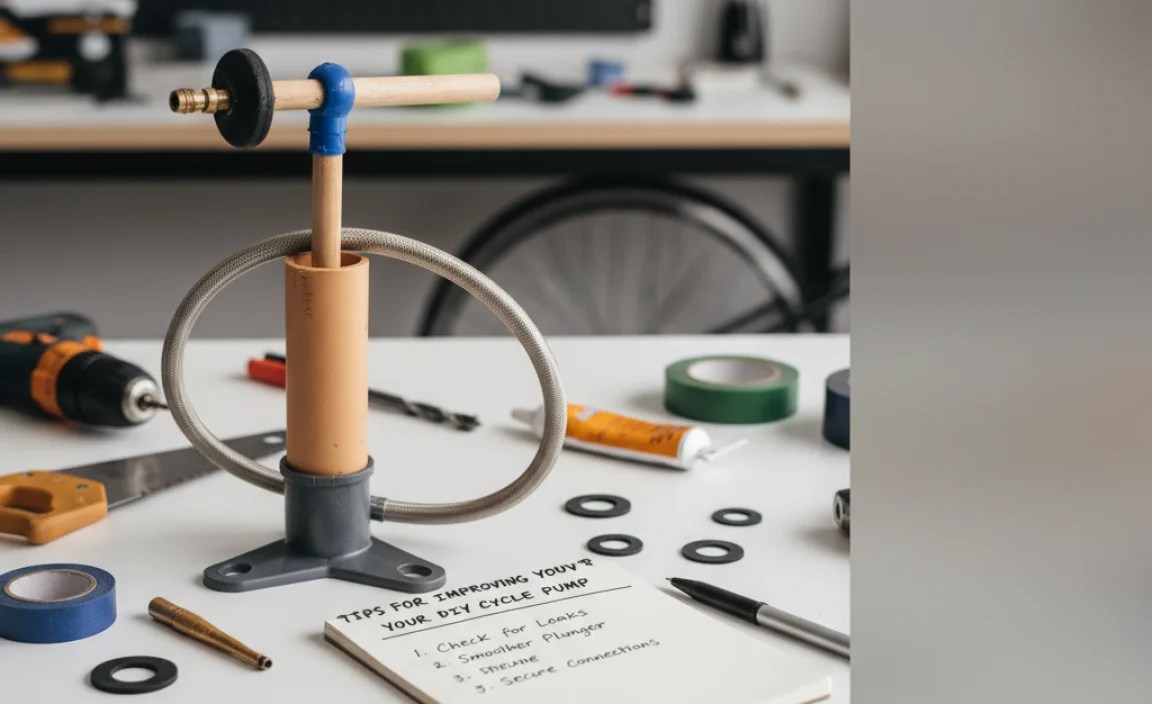
Here are some tips to make your DIY cycle pump even better.
- Use high-quality materials: Using durable materials will ensure your pump lasts longer and performs better.
- Ensure airtight seals: Make sure all connections are airtight to prevent air leaks. Use plenty of epoxy or sealant.
- Add a handle: Attach a handle to the end of the piston rod to make it easier to grip and pump.
- Consider a two-stage pump: A two-stage pump has two cylinders, one for high volume and one for high pressure. This can make it easier to inflate tires to high pressures.
- Regular maintenance: Lubricate the piston regularly to keep it moving smoothly. Check for wear and tear on the washers and replace them as needed.
Troubleshooting Common Problems
Even with careful construction, you might encounter some problems with your DIY cycle pump.
- Pump doesn’t inflate the tire: Check for air leaks around the end cap, check valve, or hose connections. Make sure the check valve is oriented correctly.
- Piston is hard to move: Lubricate the piston with silicone grease or oil. Make sure the washers are not too tight.
- Hose keeps popping off: Use clamps or zip ties to secure the hose to the check valve and valve connector.
- Valve connector doesn’t fit: Make sure you are using the correct type of valve connector for your tires (Presta or Schrader).
Cost Comparison: DIY vs. Store-Bought Pumps
One of the biggest advantages of building your own cycle pump is the cost savings. Here’s a comparison of the costs involved.
| Item | DIY Pump Cost | Store-Bought Pump Cost |
|---|---|---|
| PVC Pipe | $5 | N/A |
| End Cap | $1 | N/A |
| Washers | $3 | N/A |
| Wooden Dowel | $4 | N/A |
| Check Valve | $6 | N/A |
| Valve Connector | $5 | N/A |
| Flexible Tubing | $3 | N/A |
| Epoxy/Adhesive | $7 | N/A |
| Basic Hand Pump | N/A | $15-30 |
| High-Quality Floor Pump | N/A | $40-100+ |
| Total Cost | $34 | Varies |
As you can see, building your own pump can be a cost-effective alternative to buying a store-bought one, especially if you already have some of the materials on hand. However, store-bought pumps often offer features like pressure gauges and more efficient pumping mechanisms.
Advantages and Disadvantages of DIY Cycle Pumps
Before you decide to build your own pump, consider the pros and cons.
| Advantages | Disadvantages |
|---|---|
| Cost-effective | Requires time and effort to build |
| Customizable to your needs | May not be as efficient as store-bought pumps |
| Teaches you about basic mechanics | May not be as durable as store-bought pumps |
| Environmentally friendly (reusing materials) | Requires some DIY skills |
FAQ About Making Cycle Pumps
Q: What size PVC pipe should I use?
A: A 1-2 inch diameter PVC pipe works well for a cycle pump. The length can be between 12-18 inches.
Q: What type of valve connector do I need?
A: You need a Presta or Schrader valve connector, depending on the type of valves on your bike tires.
Q: How do I make sure the piston is airtight?
A: Use rubber or leather washers that fit snugly inside the PVC pipe. Apply grease to ensure smooth movement and a good seal.
Q: Where can I find a check valve?
A: You can find check valves at most hardware stores or online retailers.
Q: Can I use a different material instead of PVC pipe?
A: Yes, you can use other materials like metal pipes, but PVC is lightweight, inexpensive, and easy to work with.
Q: How do I know if my pump is working correctly?
A: Check if the tire is inflating and use a separate tire pressure gauge to ensure it reaches the desired pressure.
Q: What if my pump is not generating enough pressure?
A: Ensure all connections are airtight, the piston seal is effective, and the check valve is correctly installed. A longer cylinder can also help.
Conclusion
Building your own cycle pump is a rewarding DIY project that saves you money and teaches you about basic mechanics. While it might not be as polished as a store-bought pump, it’s a functional and customizable alternative. By following these steps and tips, you can create a reliable pump for your bike tires. So, gather your materials, get your hands dirty, and enjoy the satisfaction of inflating your tires with a pump you built yourself! Happy cycling!
“`


