
How Do RV Water Pumps Cycle? A Beginner’s Guide
Quick Summary: RV water pumps cycle by using a pressure-sensing switch. When you open a faucet, the pressure drops, triggering the pump to turn on. It pumps water until the pressure builds back up to a set level, then shuts off. This on-off process maintains water pressure throughout your RV’s plumbing system, providing water when and where you need it.
RV water pumps are essential for enjoying running water while on the road. But have you ever wondered exactly how they work? It can be frustrating when your water pump acts up, making it hard to wash dishes or take a shower. Fortunately, understanding the pump’s cycling process can help you troubleshoot common issues and keep your RV’s water system running smoothly. This guide breaks down the basics of how RV water pumps cycle, so you can maintain and even repair your system with confidence.
We’ll cover the key components, the steps involved in the cycling process, and common problems that can disrupt the cycle. By the end, you’ll have a clear understanding of how your RV water pump works and how to keep it in top shape. Let’s dive in!
Understanding the Basics of RV Water Pumps

Before we get into the cycling process, let’s cover the essential components of an RV water pump system:
- Water Tank: The fresh water reservoir for your RV.
- Water Pump: A diaphragm pump that moves water from the tank to your faucets and appliances.
- Pressure Switch: A sensor that detects water pressure in the system and tells the pump when to turn on or off.
- Faucets and Fixtures: The points where you access water, such as sinks, showers, and toilets.
- Pipes and Hoses: Connect all the components, allowing water to flow throughout the RV.
The water pump is the heart of the system. It’s usually a 12V DC diaphragm pump, chosen for its ability to self-prime and handle small amounts of air without damage. The pressure switch is equally crucial, acting as the brain that controls the pump’s operation.
The RV Water Pump Cycling Process: Step-by-Step

The cycling process is how the water pump maintains water pressure in your RV’s plumbing system. Here’s how it works:
- Initial State: When no water is being used, the system is pressurized. The pump is off, and the pressure switch senses that the water pressure is at its set point (typically around 40-50 PSI).
- Opening a Faucet: When you open a faucet, water flows out, and the pressure in the pipes drops.
- Pressure Drop Detection: The pressure switch detects this drop in pressure.
- Pump Activation: Once the pressure falls below a certain threshold (the “cut-in” pressure), the pressure switch activates the pump.
- Pumping Water: The pump starts drawing water from the fresh water tank and pushing it through the pipes to the open faucet.
- Pressure Increase: As the pump runs, it increases the water pressure in the system.
- Faucet Closure: When you close the faucet, water stops flowing, and the pressure starts to build up throughout the system.
- Pump Shut-Off: Once the pressure reaches the upper limit (the “cut-out” pressure), the pressure switch turns off the pump.
- System Pressurized: The system remains pressurized until the next time you open a faucet.
This on-off cycle repeats every time you use water, ensuring you have consistent water pressure whenever you need it.
Troubleshooting Common Cycling Issues
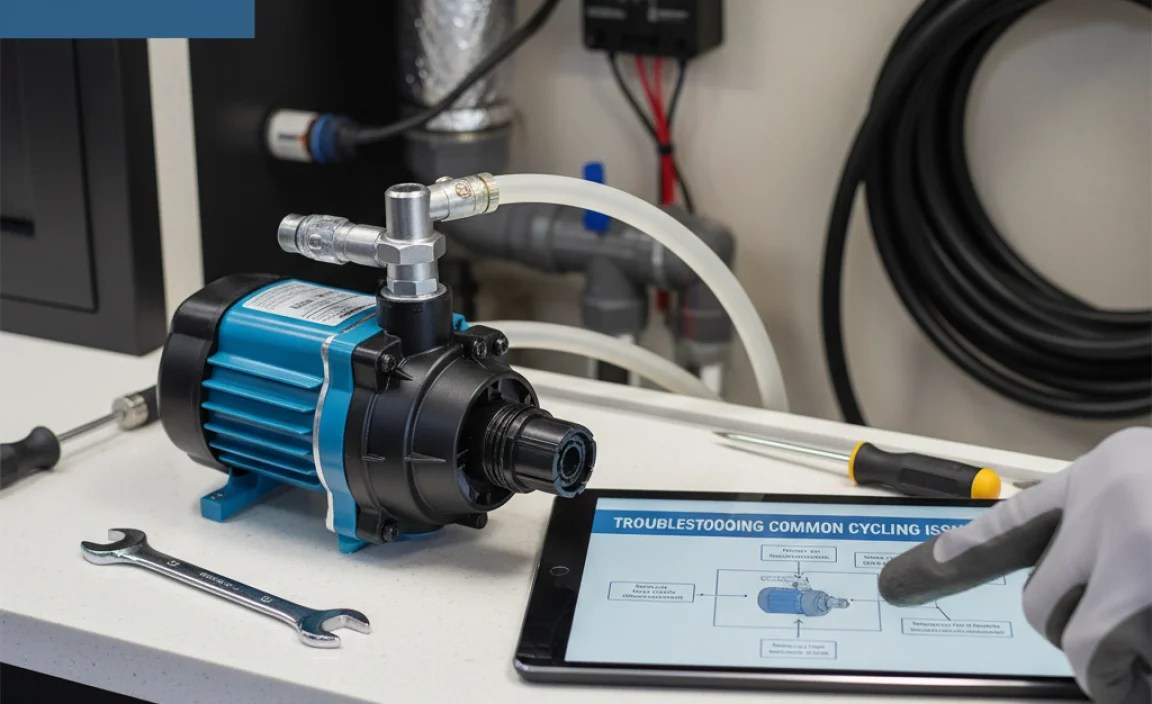
Sometimes, the water pump might not cycle correctly. Here are some common issues and how to troubleshoot them:
Rapid Cycling (Pump Turns On and Off Quickly)
Rapid cycling, also known as “chattering,” is when the pump turns on and off very quickly, even when no water is being used. This can be annoying and can shorten the life of the pump. Here are some potential causes:
- Low Water Level: If the water level in your fresh water tank is low, the pump might suck in air, causing it to cycle rapidly.
- Air in the Lines: Air trapped in the plumbing can compress and decompress, causing pressure fluctuations.
- Leaky Fixtures: A dripping faucet or a leaky toilet can cause a constant small pressure drop, triggering the pump to cycle.
- Faulty Check Valve: The check valve prevents water from flowing back into the tank when the pump is off. If it’s faulty, water can leak back, causing pressure to drop.
- Incorrect Pump Pressure Setting: If the pump’s pressure switch is improperly set, it might cycle too frequently.
Troubleshooting Steps:
- Check Water Level: Ensure your fresh water tank is adequately filled.
- Bleed the Lines: Open all faucets one at a time to purge any air from the system. Start with the faucet closest to the pump and work your way further away.
- Inspect for Leaks: Check all faucets, toilets, and plumbing connections for leaks. Repair any leaks you find.
- Check the Check Valve: The check valve is usually located at the pump inlet. Inspect it for debris or damage. Clean or replace it if necessary.
- Adjust Pressure Switch: Consult your pump’s manual for instructions on adjusting the pressure switch. Use caution when making adjustments, and avoid setting the pressure too high.
Pump Not Cycling (Pump Runs Constantly)
If the pump runs continuously and doesn’t shut off, even when all faucets are closed, it indicates a different set of problems:
- Large Leak: A significant leak in the system will prevent the pressure from building up enough to trigger the pressure switch.
- Faulty Pressure Switch: The pressure switch might be stuck in the “on” position.
- Pump Failure: The pump might be unable to generate enough pressure to reach the cut-out point, even without a leak.
Troubleshooting Steps:
- Check for Major Leaks: Inspect all plumbing connections, faucets, and appliances for significant leaks. Look for water pooling under the RV.
- Inspect Pressure Switch: Check the pressure switch for any visible damage or corrosion. If possible, test the switch with a multimeter to see if it’s functioning correctly. Replace it if necessary.
- Evaluate Pump Performance: Disconnect the outlet side of the pump and run it briefly into a bucket. Observe the flow rate and pressure. If the pump seems weak, it might be failing and need replacement.
Pump Not Priming
Sometimes, the pump might run but fail to draw water from the tank. This is known as “not priming.”
- Empty Tank: The most common cause is simply an empty fresh water tank.
- Air Leak in Suction Line: A loose connection or crack in the line between the tank and the pump can allow air to enter, preventing the pump from creating suction.
- Debris in Pump: Debris can clog the pump’s impeller, preventing it from drawing water.
Troubleshooting Steps:
- Check Water Level: Ensure your fresh water tank has water in it.
- Inspect Suction Line: Check the hose and connections between the tank and the pump for any leaks or damage. Tighten any loose connections and replace damaged hoses.
- Clean Pump: Disconnect the pump and inspect the impeller for debris. Clean it carefully.
Maintaining Your RV Water Pump

Regular maintenance can prevent many common water pump problems. Here are some tips:
- Winterize Properly: When storing your RV for the winter, drain the water system completely and add RV antifreeze to protect the pump and pipes from freezing.
- Use a Water Filter: Install a water filter to prevent debris from entering the pump and plumbing system.
- Inspect Regularly: Periodically inspect the pump, hoses, and connections for leaks or damage.
- Clean Strainer: Most RV water pumps have a small strainer at the inlet. Clean this strainer regularly to remove any debris.
Choosing the Right RV Water Pump

If you need to replace your RV water pump, consider these factors when choosing a new one:
- Flow Rate: Measured in gallons per minute (GPM), the flow rate determines how much water the pump can deliver. Choose a pump with a flow rate that meets your RV’s needs.
- Pressure: Measured in pounds per square inch (PSI), the pressure determines the force of the water flow. Most RVs use pumps with a pressure of 40-50 PSI.
- Noise Level: Some pumps are quieter than others. If noise is a concern, look for a pump with noise-dampening features.
- Reliability: Read reviews and choose a pump from a reputable brand known for reliability.
Here’s a quick comparison of common RV water pump types:
| Pump Type | Pros | Cons | Typical Applications |
|---|---|---|---|
| Diaphragm Pump | Self-priming, handles air well, reliable | Can be noisy, pulsating flow | Most RVs |
| Centrifugal Pump | Quiet, smooth flow | Not self-priming, susceptible to damage from air | Larger RVs with complex plumbing |
| Variable Speed Pump | Quiet, energy-efficient, maintains constant pressure | More expensive, complex | High-end RVs |
Advanced Troubleshooting Techniques
For more complex issues, you might need to use some advanced troubleshooting techniques:
Using a Multimeter
A multimeter can help you diagnose electrical problems with the pump and pressure switch. You can use it to check for voltage at the pump, test the continuity of the pressure switch, and identify any wiring issues. Refer to your RV’s wiring diagram and the multimeter’s manual for instructions.
Pressure Testing
A pressure tester can help you pinpoint leaks in the plumbing system. Connect the tester to a faucet or fitting and pressurize the system. Then, inspect all connections and fixtures for leaks. This can be especially useful for finding small, hidden leaks.
Consulting a Professional
If you’re unable to diagnose or repair the problem yourself, don’t hesitate to consult a qualified RV technician. They have the expertise and tools to handle complex water system issues.
Extending the Life of Your RV Water Pump
Taking good care of your RV water pump will ensure it lasts longer and performs reliably. Here are some tips to maximize its lifespan:
- Avoid Running the Pump Dry: Running the pump without water can damage the impeller and other internal components. Always ensure there’s water in the tank before turning on the pump.
- Use the Pump Sparingly When Hooked to City Water: When connected to city water, you don’t need to use the pump. Turn it off to reduce wear and tear.
- Protect from Freezing: Freezing temperatures can crack the pump housing and damage internal components. Always winterize the pump properly before storing your RV in cold weather.
- Regularly Inspect and Clean: Periodically inspect the pump for leaks, corrosion, or damage. Clean the strainer and pump housing to remove any debris.
Essential Tools for RV Water Pump Maintenance
Having the right tools on hand can make RV water pump maintenance much easier. Here are some essential tools to keep in your RV toolkit:
- Multimeter: For testing electrical components.
- Adjustable Wrench: For tightening and loosening fittings.
- Screwdrivers: Both Phillips and flathead.
- Pliers: For gripping and manipulating small parts.
- Thread Sealant Tape: For sealing plumbing connections.
- Spare Parts: Such as a replacement check valve and strainer.
Safety Precautions
When working on your RV’s water system, always take these safety precautions:
- Disconnect Power: Before working on any electrical components, disconnect the RV from shore power and turn off the 12V DC power at the battery.
- Relieve Pressure: Before disconnecting any plumbing connections, relieve the pressure in the system by opening a faucet.
- Wear Safety Glasses: Protect your eyes from water and debris.
- Follow Instructions: Always follow the manufacturer’s instructions for the pump and any replacement parts.
RV Water Pump FAQs
Here are some frequently asked questions about RV water pumps:
What is the average lifespan of an RV water pump?
The average lifespan of an RV water pump is about 5 to 10 years, depending on usage and maintenance. Regular maintenance, such as winterizing and cleaning, can extend its lifespan.
How do I know if my RV water pump is going bad?
Signs of a failing RV water pump include reduced water pressure, erratic cycling, unusual noises, leaks, or the pump not turning on at all.
Can I run my RV water pump while connected to city water?
It’s generally not necessary to run your RV water pump when connected to city water, as the city water pressure should be sufficient. Running the pump in this situation can cause unnecessary wear and tear.
How do I winterize my RV water pump?
To winterize your RV water pump, drain all the water from the fresh water tank and water lines. Then, bypass the water heater and pump RV antifreeze through the water lines and pump until it comes out of all the faucets. This prevents freezing and damage during cold weather.
What is the correct pressure setting for my RV water pump?
The correct pressure setting for most RV water pumps is between 40 and 50 PSI. Check your pump’s manual for the recommended pressure setting. Adjusting the pressure switch can help you fine-tune the pressure.
Why is my RV water pump so noisy?
A noisy RV water pump can be caused by several factors, including loose mounting, air in the lines, or a worn-out pump. Try tightening the mounting screws, bleeding the lines, or replacing the pump if necessary.
Can I replace my RV water pump myself?
Yes, replacing an RV water pump is a DIY project that most RV owners can handle with basic tools and some mechanical knowledge. Just be sure to follow the manufacturer’s instructions and take the necessary safety precautions.
Conclusion
Understanding how your RV water pump cycles is essential for maintaining a reliable water system on the road. By knowing the components, the cycling process, and common troubleshooting steps, you can address many issues yourself and keep your pump running smoothly. Regular maintenance, proper winterization, and prompt attention to problems will extend the life of your pump and ensure you have access to fresh water whenever you need it. Now you’re well-equipped to tackle any RV water pump challenges that come your way!
“`


