
RockShox High Pressure Shock Pump: Ride Smoother Now!
Using a RockShox high-pressure shock pump is simple. Connect it to your bike’s air valve, tighten the valve, and pump to your desired PSI. Check the pressure with the gauge. When done, slowly release the pressure. It’s the easiest way to keep your bike’s suspension dialed for peak performance!
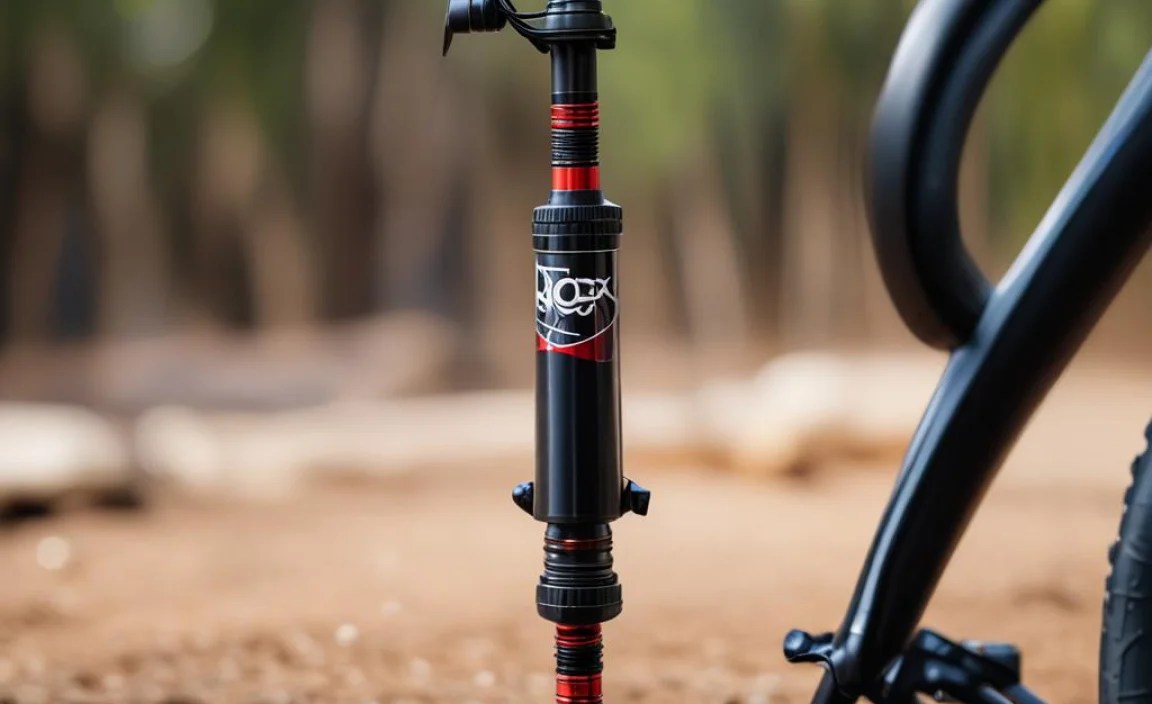
Is your mountain bike feeling a bit soft? Or maybe a little too bouncy? Getting your suspension dialed in just right can make a world of difference. But adjusting your air shocks can seem confusing. Don’t worry! It’s actually quite easy, especially with a RockShox high-pressure shock pump. This tool lets you fine-tune your bike’s suspension for the perfect ride.
In this guide, I’ll walk you through each step. From attaching the pump to setting the correct pressure, you’ll learn everything you need to keep your suspension working its best. Let’s get started and make your next ride the best one yet!
Why Use a RockShox High-Pressure Shock Pump?

A high-pressure shock pump is key to adjusting your bike’s suspension. Here’s why it’s a must-have tool:
- Precision: These pumps have gauges that show the exact air pressure. This helps you set your suspension to the right level.
- Fine-tuning: Small pressure changes can make a big difference in how your bike feels. Shock pumps let you make these small adjustments easily.
- Performance: Proper suspension settings improve your control and comfort. This means better handling and a smoother ride.
- Safety: Correct pressure ensures your suspension works as intended. This helps prevent damage and keeps you safe on the trails.
Understanding Your RockShox Suspension

Before you start pumping, it’s important to know what you’re adjusting. Your bike’s suspension includes:
- Fork: The front suspension that absorbs bumps and helps you steer.
- Shock: The rear suspension (if your bike has one) that smooths out the ride.
Both the fork and shock use air pressure to control how they compress and rebound. By adjusting this pressure, you can change how your bike handles different types of terrain. To learn more about suspension basics, check out resources like the RockShox website.
Tools You’ll Need
Here’s what you’ll need to get the job done:
- RockShox High-Pressure Shock Pump: This is a must-have for adjusting air pressure in your suspension.
- Rag or Shop Towel: To clean the valve before and after pumping.
- Your Bike’s Manual: This will give you recommended pressure settings for your weight and riding style.
Step-by-Step Guide: Using a RockShox High-Pressure Shock Pump

Ready to get started? Follow these steps to adjust your suspension:
Step 1: Prepare Your Bike
First, make sure your bike is clean, especially around the air valves. Use a rag to wipe away any dirt or grime. This helps ensure a good seal when you attach the pump.
Step 2: Locate the Air Valve
Find the air valve on your fork or shock. It’s usually covered by a small cap. Unscrew the cap and set it aside in a safe place.
Step 3: Attach the Pump
Connect the pump’s hose to the valve. Most RockShox pumps have a threaded end that screws onto the valve. Make sure it’s snug but not too tight. You don’t want to damage the valve.
Step 4: Tighten the Valve (If Applicable)
Some pumps have a small lever or knob that you need to tighten. This ensures a secure connection and prevents air from leaking.
Step 5: Start Pumping
Begin pumping the handle. Watch the gauge as the pressure increases. Pump slowly and steadily to avoid overheating the pump. Keep an eye on the pressure and refer to your bike’s manual for the recommended PSI.
Step 6: Check the Pressure
Once you reach the desired pressure, stop pumping. Double-check the gauge to make sure you’re at the right level. It’s better to start with a lower pressure and add more if needed.
Step 7: Detach the Pump
Carefully detach the pump. If your pump has a release valve, use it to bleed off any excess pressure in the hose. This makes it easier to remove the pump without losing air from the suspension.
Step 8: Reinstall the Valve Cap
Screw the valve cap back on. This protects the valve from dirt and damage.
Step 9: Test Your Suspension
Give your suspension a few test bounces. Does it feel better? If not, repeat the steps to fine-tune the pressure. Remember, small changes can make a big difference.
Understanding Air Pressure and Sag

Air pressure is just one part of the equation. You also need to consider “sag.” Sag is how much your suspension compresses when you’re sitting on the bike. Here’s how to measure and adjust it:
What is Sag?
Sag is the amount the suspension compresses under your weight. It’s usually measured in millimeters or as a percentage of the total travel. Proper sag ensures your suspension can absorb bumps and maintain traction.
How to Measure Sag
- Set a reference point: Place a zip tie around the stanchion of your fork or shock. Push it down to the seal.
- Get on your bike: Sit on your bike in your normal riding position.
- Get off carefully: Without bouncing, carefully get off your bike.
- Measure the sag: Measure the distance between the zip tie and the seal. This is your sag.
Recommended Sag Values
Here are some general guidelines for sag:
- Mountain Bikes: 20-30% of total travel
- Road Bikes: 15-20% of total travel
Refer to your bike’s manual for specific recommendations.
Adjusting Sag
- Too little sag: If the sag is too little, release some air from the suspension.
- Too much sag: If the sag is too much, add some air to the suspension.
Recheck the sag after each adjustment. It may take a few tries to get it just right.
Troubleshooting Common Issues
Sometimes things don’t go as planned. Here are some common issues and how to fix them:
- Air Leaks: If you hear air leaking when you attach the pump, make sure the connection is tight. Check the valve core for damage.
- Pump Not Building Pressure: Make sure the pump is properly connected. Check the pump’s seals for wear or damage.
- Incorrect Pressure Readings: Ensure the gauge is working correctly. Try a different pump to verify the reading.
Maintaining Your RockShox Shock Pump
A little maintenance can keep your pump working its best. Here’s what you need to do:
- Clean the Nozzle: Use a clean cloth to wipe the nozzle after each use. This removes dirt and grime that can damage the valve.
- Check the Seals: Inspect the seals regularly for wear or damage. Replace them if needed.
- Store Properly: Store the pump in a clean, dry place. Avoid extreme temperatures.
Advanced Suspension Tuning
Once you’re comfortable with basic adjustments, you can start experimenting with more advanced techniques:
- Volume Spacers: These change the air volume inside the fork or shock. They can make the suspension feel more progressive (harder to bottom out).
- Rebound Damping: This controls how quickly the suspension returns after compression. Adjusting rebound can improve traction and control.
- Compression Damping: This controls how easily the suspension compresses. Adjusting compression can improve pedaling efficiency and bump absorption.
Experiment with these settings one at a time. Keep notes on what works and what doesn’t. Over time, you’ll develop a feel for what works best for you.
RockShox High-Pressure Shock Pump: Features and Specs
Here’s a detailed look at the features and specifications of a typical RockShox high-pressure shock pump:
| Feature | Description |
|---|---|
| Maximum Pressure | Typically up to 300 PSI (20.7 bar) |
| Gauge Type | Analog or Digital options available |
| Hose Length | Varies, usually around 10-12 inches for easy access |
| Valve Compatibility | Schrader valve |
| Bleed Valve | For precise pressure adjustments |
| Material | Aluminum alloy for durability |
| Weight | Around 200-300 grams |
Comparing Different Shock Pumps
Not all shock pumps are created equal. Here’s a comparison of some popular models:
| Brand | Model | Key Features | Price Range |
|---|---|---|---|
| RockShox | High-Pressure Shock Pump | Precise gauge, bleed valve, durable construction | $40 – $60 |
| Topeak | PocketShock DXG | Compact design, rotating hose, accurate gauge | $35 – $55 |
| Fox Racing Shox | High-Pressure Pump | Ergonomic handle, swivel head, reliable performance | $50 – $70 |
| Lezyne | Digital Shock Drive | Digital gauge, compact size, high accuracy | $60 – $80 |
Alternative Tools and Methods
While a shock pump is the best tool for the job, here are some alternatives:
- Air Compressor with Pressure Regulator: An air compressor can be used with a regulator to control the pressure. However, it’s easy to over-inflate, so proceed with caution.
- Hand Pump with Gauge: Some high-quality hand pumps have gauges that can be used to inflate shocks. However, they may not be as accurate or easy to use as a dedicated shock pump.
Remember, using the right tool makes the job easier and safer.
Where to Buy a RockShox High-Pressure Shock Pump
You can find RockShox high-pressure shock pumps at:
- Local Bike Shops: Support your local shop and get expert advice.
- Online Retailers: Websites like Amazon, REI, and Backcountry offer a wide selection.
- Manufacturer Websites: Check the RockShox website for authorized dealers.
Safety Tips
Follow these safety tips when using a shock pump:
- Wear Safety Glasses: Protect your eyes from debris.
- Don’t Over-Inflate: Exceeding the maximum pressure can damage the suspension.
- Inspect Equipment: Check the pump and suspension for damage before each use.
- Follow Instructions: Always follow the manufacturer’s instructions.
FAQ: RockShox High-Pressure Shock Pump
What is a RockShox high-pressure shock pump used for?
It’s used to add air to your bike’s suspension fork and rear shock. This lets you adjust the firmness and performance of your suspension.
How do I know what pressure to put in my suspension?
Check your bike’s manual or the RockShox website. They usually have charts based on rider weight. Start there and fine-tune to your liking.
What happens if I put too much air in my suspension?
The ride will be harsh and uncomfortable. It could also damage the seals or other parts of the suspension.
Can I use a regular tire pump for my suspension?
No! Regular pumps don’t have the precise gauge you need. They can also damage the suspension valve.
How often should I check my suspension pressure?
Check it before every ride, especially if you notice a change in performance. Air can leak out over time.
What is sag, and why is it important?
Sag is how much your suspension compresses when you sit on the bike. It’s important for maintaining traction and a comfortable ride.
Where can I find the right pressure for my RockShox fork?
You can typically find a sticker on the fork itself with a QR code to scan, or a chart indicating recommended pressures based on your weight.
Conclusion
Using a RockShox high-pressure shock pump is a simple way to improve your bike’s performance and comfort. By following these steps, you can fine-tune your suspension for a smoother, more controlled ride. Remember to check your pressure regularly and maintain your pump for years of reliable use. Now go out there and enjoy the trails!


