
How to Use a Bike Shock Pump: Easy Guide
Have you ever seen a bike with super bouncy tires? Some bikes have special air shocks. These shocks make the ride smooth. Do you know {how to use a bike shock pump}? It’s a tool to add air to these shocks. Let’s learn about it!
These pumps are not like regular tire pumps. They help keep your ride comfy. They also help your bike work well.
Why are bike shocks important? They soak up bumps. They keep your tires on the ground. This helps you stay in control. Learning {how to use a bike shock pump} is easy. Let’s dive in!
Key Takeaways
- Using a bike shock pump ensures optimal suspension performance and ride comfort.
- Always check the recommended PSI for your bike’s shocks before pumping.
- Knowing {how to use a bike shock pump} helps maintain your mountain bike.
- Be careful not to over-inflate, as this can damage the shocks.
- Regular maintenance with a shock pump extends the life of your bike’s suspension.
Understanding What a Bike Shock Pump Is


A bike shock pump is a special tool. It adds air to your bike’s shocks. These shocks are on mountain bikes. They help smooth out bumpy rides. A regular tire pump won’t work. Shock pumps have a special design. They deliver high pressure with small amounts of air. This lets you fine-tune the suspension. Suspension is the system that absorbs bumps. You need the right pressure. Too much or too little air can cause problems. Learning {how to use a bike shock pump} helps you stay safe. It also makes your bike last longer. These pumps often have a gauge. The gauge shows the air pressure. It helps you add just the right amount. Some pumps have a bleed valve. This lets you release small amounts of air. This is helpful for getting the perfect pressure.
- A bike shock pump is for adding air to bike shocks.
- It’s different from a regular tire pump.
- It delivers high pressure in small amounts.
- It helps fine-tune the suspension.
- A gauge shows the air pressure.
- A bleed valve releases small amounts of air.
Think of your bike’s shocks like tiny balloons. These balloons need just the right amount of air. Too much air, and they might pop! Too little air, and they won’t bounce right. That’s where the bike shock pump comes in. It’s like a tiny air doctor for your bike! It helps you add just the right amount of air. This keeps your ride smooth and comfy. With a bike shock pump, you can adjust the shocks for different trails. Are you riding on a rocky path? Add a little more air. Are you on a smooth trail? Take a little air out. This makes your bike work its best. Knowing {how to use a bike shock pump} is super useful.
Fun Fact or Stat: Did you know that a bike shock pump can deliver air pressure up to 300 PSI (pounds per square inch)?
Why Bike Shocks Need Air
Have you ever bounced on a trampoline? The springs help you bounce high. Bike shocks are kind of like those springs. They use air to absorb bumps. This makes your ride smoother. Without enough air, the shocks won’t work well. You’ll feel every bump on the trail. Too much air can also be bad. It can make the ride too stiff. The right amount of air is important. Air pressure helps the shocks work properly. It keeps your tires on the ground. This gives you better control. Bike shocks need air to do their job. They keep you safe and comfortable. Learning {how to use a bike shock pump} helps you keep your shocks in good shape. It also helps you have more fun on your bike.
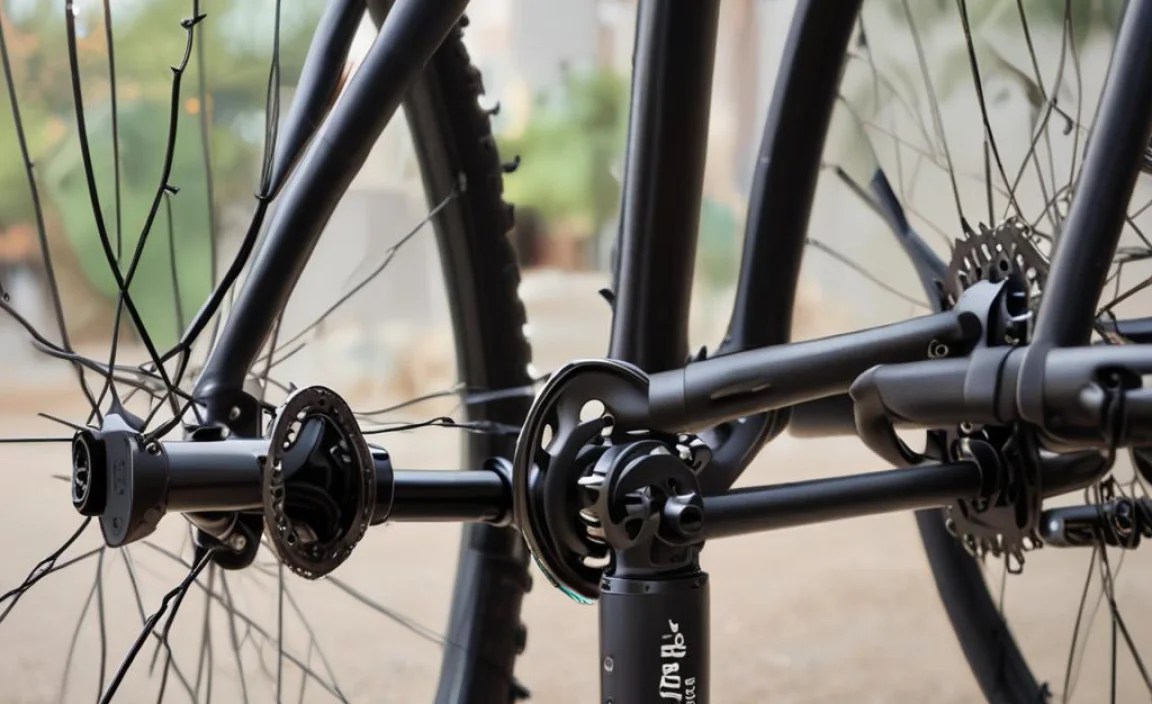
Parts of a Bike Shock Pump
Bike shock pumps have a few key parts. First, there’s the handle. You use the handle to pump air. Then, there’s the hose. The hose connects to the bike’s shock. There’s also a valve. The valve lets air in but not out. The gauge is very important. It shows how much air is in the shock. Some pumps have a bleed valve. This lets you release air. Knowing the parts helps you use the pump. The handle should be easy to grip. The hose should be strong and flexible. The gauge should be easy to read. {How to use a bike shock pump} becomes easier when you know the parts. Each part plays a role in getting the right air pressure. It’s like a team working together!
Different Types of Bike Shock Pumps
There are different types of bike shock pumps. Some are small and easy to carry. These are good for taking on rides. Others are bigger and more powerful. These are good for home use. Some pumps have digital gauges. These show the pressure very precisely. Others have analog gauges. These use a needle to show the pressure. Some pumps have special features. Some have a swivel head. This makes it easier to connect to the shock. Some have a pressure release button. This lets you fine-tune the pressure. The best pump depends on your needs. {How to use a bike shock pump} might be slightly different for each type. Choose the one that works best for you. Think about where you’ll use it and what features you need.
Fun Fact or Stat: Some professional mountain bikers adjust their shock pressure before every race to optimize performance!
Preparing Your Bike and Pump for Use


Before you start, make sure your bike is ready. Clean the area around the shock valve. This keeps dirt out of the valve. Check the valve on the shock. Make sure it’s clean and undamaged. Now, check your shock pump. Make sure the hose is connected tightly. Check the gauge. Make sure it’s working. Read the instructions for your pump. Each pump might be a little different. Find out the recommended air pressure. This is usually on the bike or in the owner’s manual. Knowing the right pressure is important. Too much or too little can be bad. Preparing your bike and pump helps you get it right. Learning {how to use a bike shock pump} starts with preparation. A little preparation saves time and trouble later.
- Clean the area around the shock valve.
- Check the valve for damage.
- Make sure the pump hose is connected.
- Check the pump gauge.
- Read the pump instructions.
- Find the recommended air pressure.
Imagine you are about to bake a cake. You wouldn’t just throw all the ingredients together, right? You’d get everything ready first. You’d measure the flour, sugar, and eggs. This makes sure the cake turns out great. It’s the same with your bike shocks! Before you pump air, you need to prepare. Clean the area, check the valve, and read the instructions. This helps you get the air pressure just right. It keeps your bike working its best. {How to use a bike shock pump} is like baking a cake. Preparation is key! A little effort at the start makes a big difference in the end.
Fun Fact or Stat: Many bike shops offer free clinics on basic bike maintenance, including how to use a shock pump!
Finding the Right Air Pressure
Finding the right air pressure is like Goldilocks and the Three Bears. Too much air is too hard. Too little air is too soft. You want it just right! The right pressure depends on your weight. It also depends on your riding style. The bike’s manual will give you a starting point. Start with the recommended pressure. Then, adjust it to fit your needs. If the ride feels too bumpy, let some air out. If it feels too soft, add some air. It might take a few tries to get it perfect. {How to use a bike shock pump} to adjust the pressure. Experiment until you find what works best for you. The right pressure makes a big difference. It makes your ride more comfortable and controlled.
Connecting the Pump to the Shock Valve
Connecting the pump is like plugging in a charger. You want it to fit snugly. First, find the valve on the bike shock. It usually has a cap on it. Take the cap off. Now, line up the pump hose with the valve. Push the hose onto the valve. You should hear a click. This means it’s connected properly. Make sure it’s on tight. If it’s loose, air will leak out. Some pumps have a locking lever. This helps keep the hose connected. If your pump has one, use it. Connecting the pump properly is important. It helps you get an accurate reading. It also prevents air from leaking. {How to use a bike shock pump} starts with a good connection.
Checking for Leaks
After you connect the pump, check for leaks. Listen for a hissing sound. This means air is escaping. If you hear a hiss, check the connection. Make sure the hose is on tight. If it’s still leaking, try again. Disconnect the hose and reconnect it. Sometimes, dirt can get in the way. Clean the valve and try again. If it keeps leaking, the valve might be damaged. You might need to replace the valve. Checking for leaks is important. It helps you get an accurate reading. It also prevents you from wasting air. {How to use a bike shock pump} includes checking for leaks. A small leak can make a big difference.
Step-by-Step Guide on Using the Pump
Using a bike shock pump is easy. First, connect the pump to the shock valve. Make sure it’s on tight. Now, look at the gauge. It will show the current air pressure. Start pumping the handle. Watch the gauge as you pump. The pressure will go up. Pump until you reach the desired pressure. Be careful not to over-pump. Too much air can damage the shock. If you add too much air, use the bleed valve. This lets you release small amounts of air. Once you reach the right pressure, disconnect the pump. Put the cap back on the valve. Now, you’re ready to ride! {How to use a bike shock pump} is a simple process. Practice makes perfect. With a little practice, you’ll be a pro!
- Connect the pump to the shock valve.
- Look at the gauge to see the pressure.
- Pump the handle to add air.
- Watch the gauge as you pump.
- Use the bleed valve to release air.
- Disconnect the pump and replace the cap.
Let’s say you are filling a balloon with water. You wouldn’t just keep filling it until it bursts, right? You’d watch the balloon carefully. You’d stop when it’s full enough. It’s the same with your bike shocks! You need to watch the gauge as you pump. You need to stop when you reach the right pressure. If you add too much air, you can use the bleed valve to let some out. {How to use a bike shock pump} is like filling a balloon. You need to be careful and watch closely. This helps you get the pressure just right. It keeps your bike shocks in good shape.
Fun Fact or Stat: The pressure in your bike shocks can change with temperature. Colder temperatures can decrease the pressure.
Pumping Air into the Shock
Pumping air is like inflating a basketball. You push down on the pump handle. This forces air into the shock. Do it smoothly and steadily. Don’t pump too fast. This can make the gauge jump around. Watch the gauge as you pump. Stop when you reach the desired pressure. It’s better to pump a little at a time. Then, check the pressure. This helps you avoid over-pumping. {How to use a bike shock pump} involves smooth, steady pumping. The right technique makes it easier. It also helps you get the pressure right. Remember, slow and steady wins the race!
Using the Bleed Valve
The bleed valve is like a tiny escape hatch. It lets you release small amounts of air. This is helpful if you over-pumped the shock. Or, if you want to fine-tune the pressure. To use the bleed valve, press it gently. You’ll hear a little hiss of air. Watch the gauge as you press the valve. The pressure will go down. Release the valve when you reach the desired pressure. Be careful not to release too much air. A little goes a long way. {How to use a bike shock pump} sometimes involves using the bleed valve. It’s a helpful tool for getting the pressure just right. Think of it as a tiny eraser for your air pressure mistakes!
Disconnecting the Pump
Disconnecting the pump is like unplugging a phone charger. You want to do it carefully. First, make sure you’ve reached the right pressure. Then, if your pump has a locking lever, unlock it. Now, gently pull the hose off the valve. Some air might escape when you disconnect. This is normal. Don’t worry about it. Quickly put the cap back on the valve. This keeps dirt out. Disconnecting the pump carefully is important. It helps protect the valve. It also prevents air from leaking. {How to use a bike shock pump} ends with a careful disconnect. A little care goes a long way.
Understanding Pressure Readings and Adjustments


The pressure reading on the gauge is important. It tells you how much air is in the shock. The reading is in PSI (pounds per square inch). Knowing the right PSI is key. Too much PSI can damage the shock. Too little PSI can make the ride bumpy. The right PSI depends on your weight. It also depends on your riding style. Start with the recommended PSI. Then, adjust it as needed. If the ride feels too stiff, lower the PSI. If it feels too soft, raise the PSI. {How to use a bike shock pump} to adjust the pressure. Keep track of your adjustments. This helps you find the perfect setting. Understanding pressure readings is like learning a new language. Once you understand it, you can communicate with your bike!
- The pressure reading is in PSI.
- The right PSI depends on your weight.
- Adjust the pressure for your riding style.
- Lower the PSI if the ride is too stiff.
- Raise the PSI if the ride is too soft.
- Keep track of your adjustments.
Imagine you are tuning a guitar. You wouldn’t just turn the knobs randomly, right? You’d look at the tuner. You’d listen to the sound. You’d adjust the knobs until the guitar sounds perfect. It’s the same with your bike shocks! You need to look at the gauge. You need to feel the ride. You need to adjust the pressure until it feels perfect. {How to use a bike shock pump} to fine-tune the pressure. It might take some time and practice. But, in the end, it’s worth it. A well-tuned bike is a joy to ride!
Fun Fact or Stat: Some advanced riders use data logging devices to track shock performance and make precise adjustments!
Reading the Pressure Gauge
The pressure gauge is like a speedometer. It tells you how fast you’re going. But instead of speed, it tells you the air pressure. Most gauges have two scales. One is in PSI. The other is in bar. PSI is more common in the US. Bar is more common in Europe. Look at the PSI scale. Find the number that matches your desired pressure. The needle on the gauge points to the current pressure. If the needle is below your desired pressure, add air. If it’s above, release air. {How to use a bike shock pump} involves reading the pressure gauge. A clear gauge makes it easier. Make sure you can see the gauge clearly. Good lighting helps!
Making Small Adjustments
Making small adjustments is like adding spices to a dish. A little spice can make a big difference. It’s the same with air pressure. Small changes can make a big difference in the ride. If the ride feels a little too bumpy, release a little air. If it feels a little too soft, add a little air. Use the bleed valve to release air. Pump the handle to add air. Check the gauge after each adjustment. Don’t make big changes all at once. Small steps are better. {How to use a bike shock pump} for small adjustments. It helps you fine-tune the ride. It’s all about finding the perfect balance.
Understanding Sag
Sag is like the amount your bike sinks when you sit on it. It’s a sign of how well the shocks are set up. Too much sag means the shocks are too soft. Too little sag means they are too stiff. To measure sag, put on your riding gear. Get on your bike. Have a friend measure how much the shocks compress. Compare the measurement to the recommended sag. Adjust the air pressure to get the right sag. {How to use a bike shock pump} to adjust the sag. Sag helps you find the right balance. It makes your ride more comfortable and controlled. Think of sag as the sweet spot for your suspension.
Maintaining Your Bike Shock Pump


A bike shock pump needs care. Keep it clean and dry. Wipe it down after each use. Store it in a safe place. This prevents damage. Check the hose regularly. Look for cracks or leaks. Replace the hose if needed. Check the gauge. Make sure it’s accurate. If it’s not accurate, replace the pump. Lubricate the pump occasionally. This keeps it working smoothly. Use a silicone-based lubricant. Don’t use oil-based lubricants. {How to use a bike shock pump} includes taking care of it. A well-maintained pump lasts longer. It also works better. Treat your pump well, and it will treat you well!
- Keep the pump clean and dry.
- Store it in a safe place.
- Check the hose for cracks.
- Check the gauge for accuracy.
- Lubricate the pump occasionally.
Imagine you have a favorite toy. You wouldn’t just leave it outside in the rain, right? You’d take care of it. You’d keep it clean. You’d store it in a safe place. This makes it last longer. It’s the same with your bike shock pump! You need to take care of it. Keep it clean, check the parts, and store it safely. This helps it last longer. It also keeps it working its best. {How to use a bike shock pump} includes taking care of the pump. A little care goes a long way. It saves you money in the long run.
Fun Fact or Stat: Some bike shock pumps come with rebuild kits, allowing you to replace worn-out parts and extend the pump’s lifespan!
Cleaning the Pump
Cleaning the pump is like washing your hands. It removes dirt and grime. Use a clean, damp cloth to wipe down the pump. Pay attention to the hose and valve. These areas can get dirty easily. Don’t use harsh chemicals. These can damage the pump. Dry the pump after cleaning. This prevents rust. Cleaning the pump regularly keeps it working well. It also prevents dirt from getting into the shock. {How to use a bike shock pump} includes keeping the pump clean. A clean pump is a happy pump!
Storing the Pump Properly
Storing the pump properly is like putting your toys away. It keeps them safe and organized. Store the pump in a dry place. This prevents rust. Keep it out of direct sunlight. This can damage the hose. Store it where it won’t get knocked around. This prevents damage to the gauge. A good place is in a toolbox or on a shelf. {How to use a bike shock pump} includes storing it properly. A well-stored pump is ready to use when you need it. It’s like having a tool that’s always ready for action!
Checking for Wear and Tear
Checking for wear and tear is like giving your bike a checkup. Look at the hose for cracks or leaks. Check the gauge for accuracy. Make sure the handle moves smoothly. If you see any problems, fix them right away. Ignoring problems can make them worse. Replacing worn parts is better than replacing the whole pump. {How to use a bike shock pump} includes checking for wear and tear. Regular checkups keep your pump in good shape. It’s like visiting the doctor to stay healthy!
Troubleshooting Common Issues
Sometimes, things go wrong. The pump might not connect properly. The gauge might not work. Air might leak out. Don’t worry! These problems are often easy to fix. If the pump doesn’t connect, make sure the hose is on tight. Clean the valve on the shock. If the gauge doesn’t work, check the battery. Some pumps have a battery. If air is leaking, check the connection. Make sure the hose is not damaged. {How to use a bike shock pump} sometimes involves troubleshooting. Knowing how to fix problems saves time and money. It also keeps you riding!
- Pump doesn’t connect: Check the hose and valve.
- Gauge doesn’t work: Check the battery.
- Air is leaking: Check the connection and hose.
Imagine you are playing a video game. Sometimes, the game freezes or crashes. You don’t just give up, right? You try to fix it. You might restart the game. You might check the connections. You might even ask for help. It’s the same with your bike shock pump! If something goes wrong, don’t panic. Try to figure out the problem. Check the connections, the battery, and the hose. {How to use a bike shock pump} sometimes means fixing problems. A little troubleshooting can get you back on the trail.
Fun Fact or Stat: Many online forums and communities are dedicated to bike maintenance, offering advice and solutions to common problems.
Pump Not Connecting to the Valve
If the pump won’t connect, don’t force it. Check the valve first. Make sure it’s clean and undamaged. Clean it with a cloth. Then, check the pump hose. Make sure it’s not blocked. Try connecting the pump again. Push it on firmly. If it still won’t connect, the valve might be damaged. You might need to replace it. {How to use a bike shock pump} starts with a good connection. A little patience can solve the problem. Don’t give up easily!
Gauge Not Showing a Reading
If the gauge isn’t showing a reading, something is wrong. First, check the battery. Some pumps have a battery. If the battery is dead, replace it. If the pump doesn’t have a battery, the gauge might be broken. Try connecting the pump to a different shock. If the gauge still doesn’t work, you need a new pump. {How to use a bike shock pump} requires a working gauge. An accurate gauge is important for safety. Don’t ride with a broken gauge!
Air Leaking During Pumping
Air leaking during pumping is frustrating. Check the connection first. Make sure the hose is on tight. If it’s still leaking, the hose might be damaged. Look for cracks or holes. Replace the hose if needed. The valve on the shock might also be leaking. Clean the valve and try again. If it still leaks, replace the valve. {How to use a bike shock pump} is easier with a good seal. Leaks waste air and make it hard to get the right pressure. Fix the leak before you ride!
| Problem | Possible Cause | Solution |
|---|---|---|
| Pump not connecting | Dirty or damaged valve | Clean or replace valve |
| Gauge not working | Dead battery | Replace battery |
| Air leaking | Loose connection | Tighten connection |
| Incorrect pressure | Faulty gauge | Replace the pump |
| Hard to pump | Dry seals | Lubricate the pump |
Summary
Using a bike shock pump is an easy way to keep your mountain bike riding smooth. These pumps are different from regular tire pumps. They add air to your bike’s shocks. This helps soak up bumps. Learning {how to use a bike shock pump} involves a few steps. First, connect the pump to the shock valve. Then, pump the handle to add air. Watch the gauge to see the pressure. If you add too much air, use the bleed valve. Knowing how to maintain your pump is also important. Keep it clean and dry. Check for wear and tear. With a little practice, you’ll be a pro at using a bike shock pump. This keeps your bike in top shape!
Conclusion
Learning {how to use a bike shock pump} is a great skill. It helps you keep your bike running smoothly. You can adjust your shocks for different trails. This makes your ride more comfortable and fun. Remember to check your pressure often. Take care of your pump. With these tips, you’ll be ready to hit the trails. Happy riding!
Frequently Asked Questions
Question No 1: What is a bike shock pump used for?
Answer: A bike shock pump is used to add air to your bike’s shocks. These shocks are on mountain bikes. They help smooth out bumpy rides. A regular tire pump won’t work for this. Shock pumps deliver high pressure. This lets you fine-tune the suspension. The suspension absorbs bumps. This helps you stay in control. Without enough air, you’ll feel every bump. Too much air can make the ride too stiff. The right amount of air is important. {How to use a bike shock pump} helps you get the right amount of air.
Question No 2: How often should I check my bike’s shock pressure?
Answer: You should check your bike’s shock pressure regularly. Check it before each ride. This ensures the shocks are working properly. Air pressure can change over time. Temperature can also affect the pressure. Check more often if you ride frequently. If you notice the ride feels different, check the pressure. {How to use a bike shock pump} to adjust the pressure as needed. Keeping the pressure right makes your ride safer. It also makes it more comfortable. Regular checks help you catch problems early.
Question No 3: Can I use a regular tire pump for my bike shocks?
Answer: No, you cannot use a regular tire pump for your bike shocks. Regular tire pumps don’t deliver enough pressure. They also don’t have a gauge. Bike shocks need high pressure. A shock pump delivers this pressure. It also has a gauge to show the pressure. Using a tire pump can damage the shock. It won’t give you the right pressure. Always use a bike shock pump. It’s the right tool for the job. {How to use a bike shock pump} ensures you get the correct pressure. This keeps your shocks working well.
Question No 4: What does PSI mean on a bike shock pump?
Answer: PSI stands for pounds per square inch. It’s a unit of pressure. The PSI reading on the gauge tells you how much air is in the shock. The right PSI is important. Too much can damage the shock. Too little can make the ride bumpy. The recommended PSI depends on your weight. It also depends on your riding style. Check the bike’s manual for the right PSI. {How to use a bike shock pump} to reach the right PSI. The PSI reading helps you fine-tune the suspension.
Question No 5: What should I do if I over-inflate my bike shocks?
Answer: If you over-inflate your bike shocks, don’t panic. Use the bleed valve on the pump. The bleed valve releases small amounts of air. Press the valve gently. Watch the gauge as you release air. Stop when you reach the desired pressure. Be careful not to release too much air. A little goes a long way. If you don’t have a bleed valve, disconnect the pump. Then, gently press the valve on the shock. This releases a little air. {How to use a bike shock pump} includes using the bleed valve. It’s a helpful tool for fixing mistakes.
Question No 6: How do I know what the correct pressure should be for my bike shocks?
Answer: Finding the correct pressure for your bike shocks is important. Start by checking your bike’s manual. It will give you a recommended pressure range. This range depends on your weight and riding style. If you don’t have the manual, search online for your bike model. You can also ask your local bike shop. They can help you find the right pressure. {How to use a bike shock pump} to experiment with different pressures. Start with the recommended pressure. Then, adjust it until the ride feels right. It’s all about finding the perfect balance for your needs.


