
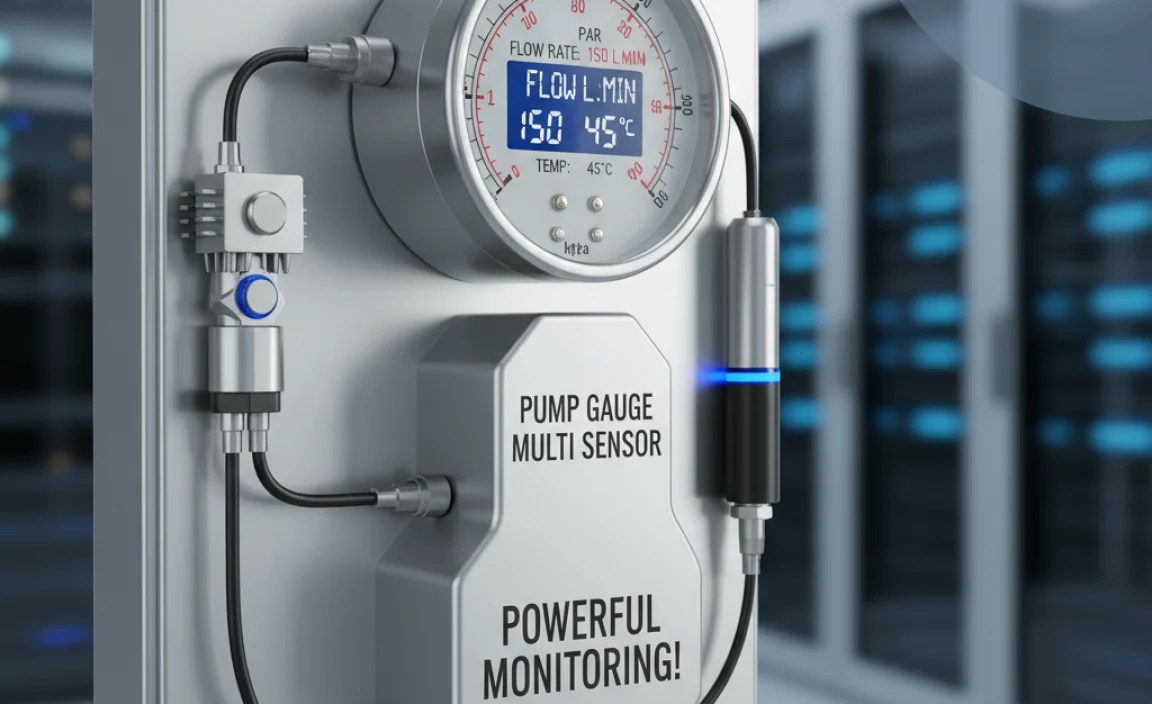
Pump Gauge Multi Sensor: Powerful Monitoring!
Quick Summary: A pump gauge multi-sensor combines several functions into one device, measuring pressure, temperature, and sometimes even flow. This simplifies monitoring and control in various systems. To understand, maintain, or troubleshoot these sensors, you’ll need to know their components, how they work, and common issues. This guide will walk you through everything you need to know to keep your systems running smoothly.
Ever feel overwhelmed by the number of gauges and sensors you need to monitor your bike’s tire pressure, suspension, or even the pressure in your home’s water system? A pump gauge multi-sensor can simplify things. These devices combine multiple readings into one unit, giving you a comprehensive overview with less clutter. Whether you’re a cyclist, a DIY enthusiast, or a homeowner, understanding these sensors can save you time and prevent headaches. Let’s dive into how they work and how to troubleshoot common problems.
Understanding Pump Gauge Multi-Sensors

A pump gauge multi-sensor integrates multiple sensing capabilities into a single device. Instead of having separate gauges for pressure, temperature, and flow, you get one unit that provides all these readings. This is particularly useful in applications where space is limited or where a comprehensive overview of system conditions is needed at a glance.
Key Components
A typical pump gauge multi-sensor includes several key components:
- Pressure Sensor: Measures the pressure of the fluid or gas.
- Temperature Sensor: Measures the temperature of the fluid or gas.
- Flow Sensor (Optional): Measures the rate of flow of the fluid or gas.
- Signal Conditioning Circuit: Amplifies and filters the signals from the sensors.
- Microcontroller: Processes the sensor data and converts it into a readable format.
- Display: Shows the readings (can be analog or digital).
- Housing: Protects the internal components from the environment.
How It Works
Here’s a simplified explanation of how a pump gauge multi-sensor works:
- Each sensor (pressure, temperature, flow) detects the respective parameter and generates an electrical signal.
- The signal conditioning circuit amplifies and filters these signals to improve accuracy.
- The microcontroller processes the signals, converting them into meaningful readings.
- The readings are then displayed on the gauge, allowing you to monitor the system’s condition.
Applications
Pump gauge multi-sensors are used in a variety of applications:
- Bicycle Maintenance: Monitoring tire pressure and suspension performance.
- Automotive: Checking tire pressure, oil pressure, and coolant temperature.
- HVAC Systems: Monitoring pressure and temperature in heating and cooling systems.
- Industrial Processes: Monitoring pressure, temperature, and flow in various industrial applications.
- Home Water Systems: Monitoring water pressure and temperature.
Choosing the Right Multi-Sensor
Selecting the right multi-sensor depends on your specific needs. Here are some factors to consider:
- Measurement Range: Ensure the sensor can measure the range of pressures, temperatures, and flows you need.
- Accuracy: Look for sensors with high accuracy to ensure reliable readings.
- Environmental Conditions: Choose a sensor that can withstand the environmental conditions in which it will be used (e.g., temperature, humidity, exposure to chemicals).
- Display Type: Decide whether you prefer an analog or digital display, depending on your preference and the level of detail you need.
- Power Requirements: Consider the power requirements of the sensor and whether it can be easily integrated into your system.
- Connectivity: Some sensors offer connectivity options like Bluetooth or Wi-Fi, allowing you to monitor readings remotely.
Types of Sensors
Understanding the different types of sensors can help you make an informed decision:
- Pressure Sensors:
- Strain Gauge: Measures pressure by detecting the deformation of a strain gauge.
- Piezoelectric: Generates an electrical charge when subjected to pressure.
- Capacitive: Measures pressure by detecting changes in capacitance.
- Temperature Sensors:
- Thermocouple: Measures temperature based on the Seebeck effect.
- RTD (Resistance Temperature Detector): Measures temperature by detecting changes in resistance.
- Thermistor: A type of resistor whose resistance varies significantly with temperature.
- Flow Sensors:
- Turbine Flow Meter: Measures flow rate by detecting the rotation of a turbine.
- Paddle Wheel Flow Meter: Similar to a turbine flow meter, but uses a paddle wheel.
- Ultrasonic Flow Meter: Measures flow rate by analyzing the time it takes for ultrasonic waves to travel through the fluid.
Installing a Pump Gauge Multi-Sensor
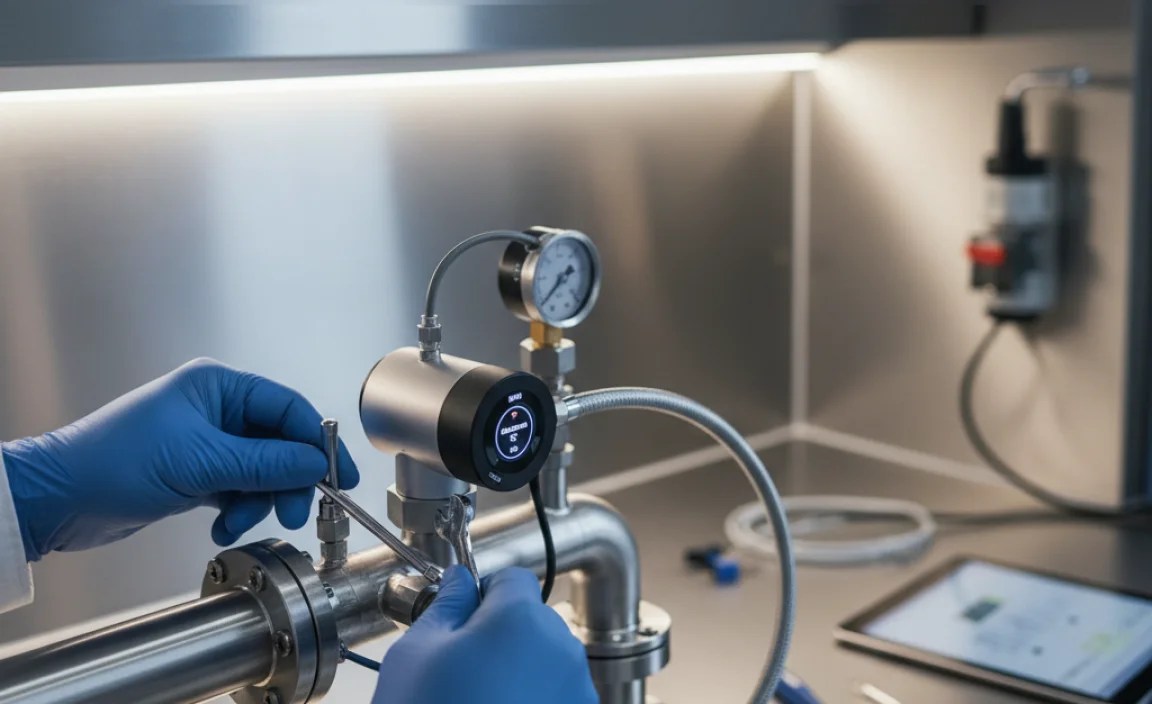
Installing a pump gauge multi-sensor requires careful planning and execution. Here’s a step-by-step guide:
Step 1: Gather Your Tools and Materials
Before you begin, make sure you have all the necessary tools and materials:
- Pump gauge multi-sensor
- Wrench or adjustable spanner
- Thread sealant tape (Teflon tape)
- Screwdriver (if needed for mounting)
- Wiring (if needed for electrical connections)
- Multimeter (for testing connections)
- Safety glasses
- Gloves
Step 2: Prepare the Installation Site
Prepare the location where you will install the sensor:
- Ensure the area is clean and free of debris.
- Turn off the system to which you will be connecting the sensor (e.g., water supply, air compressor).
- Depressurize the system to prevent leaks or damage.
Step 3: Apply Thread Sealant
Apply thread sealant tape to the threads of the sensor:
- Wrap the Teflon tape around the threads in a clockwise direction.
- Apply several layers of tape to ensure a good seal.
Step 4: Connect the Sensor
Connect the sensor to the system:
- Carefully screw the sensor into the threaded port.
- Use a wrench or adjustable spanner to tighten the sensor.
- Do not overtighten, as this can damage the sensor or the port.
Step 5: Make Electrical Connections (If Applicable)
If the sensor requires electrical connections, follow these steps:
- Consult the sensor’s wiring diagram.
- Connect the wires according to the diagram, ensuring correct polarity.
- Use a multimeter to test the connections and ensure they are secure.
Step 6: Secure the Sensor
Secure the sensor to prevent movement or vibration:
- Use screws or mounting brackets to secure the sensor to a stable surface.
- Ensure the sensor is properly aligned and will not be subjected to excessive stress.
Step 7: Test the Installation
Test the installation to ensure it is working correctly:
- Turn on the system to which the sensor is connected.
- Check for leaks around the sensor.
- Monitor the sensor readings to ensure they are accurate.
- Make any necessary adjustments to the sensor or the system.
Maintaining Your Multi-Sensor
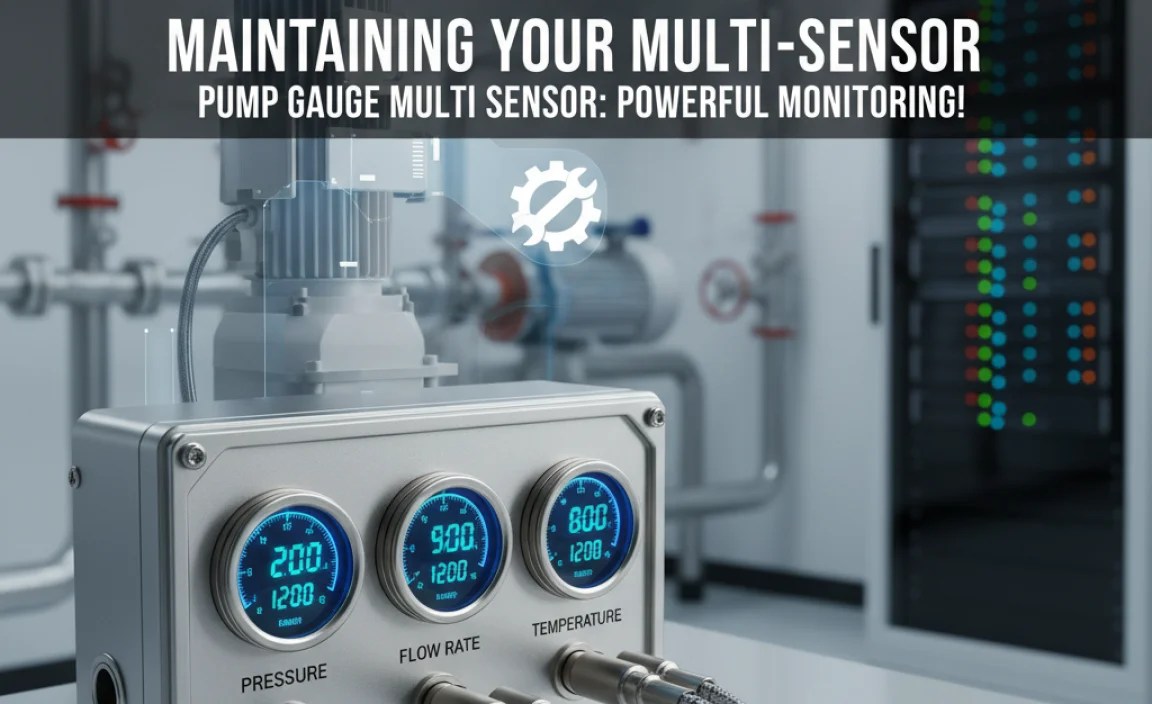
Regular maintenance is essential to ensure the accuracy and longevity of your pump gauge multi-sensor. Here are some maintenance tips:
- Clean the Sensor: Regularly clean the sensor to remove dirt, dust, and debris. Use a soft cloth and a mild cleaning solution.
- Check for Leaks: Inspect the sensor for leaks and address them promptly. Leaks can damage the sensor and affect its accuracy.
- Calibrate the Sensor: Calibrate the sensor periodically to ensure accurate readings. Follow the manufacturer’s instructions for calibration.
- Inspect Wiring: Check the wiring for damage or corrosion. Replace any damaged wires.
- Replace Batteries: If the sensor is battery-powered, replace the batteries regularly to ensure continuous operation.
- Protect from Extreme Conditions: Protect the sensor from extreme temperatures, humidity, and exposure to chemicals.
Troubleshooting Common Issues
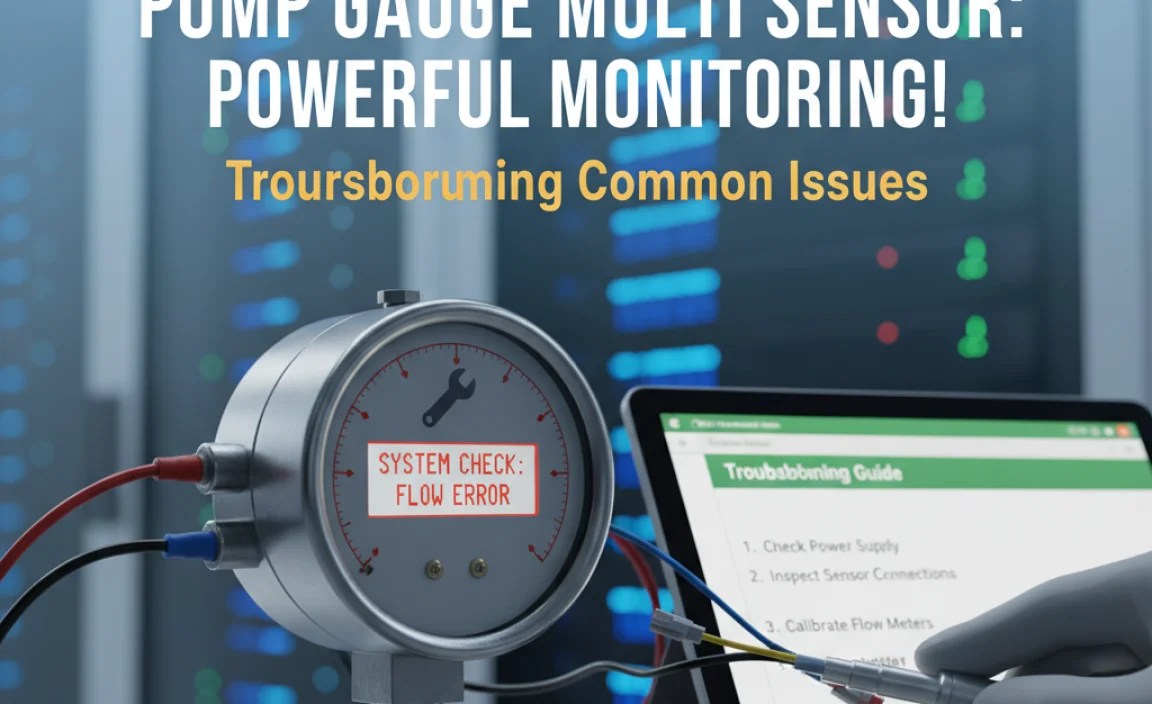
Even with proper maintenance, you may encounter issues with your pump gauge multi-sensor. Here are some common problems and how to troubleshoot them:
| Problem | Possible Cause | Solution |
|---|---|---|
| Inaccurate Readings | Sensor is not calibrated | Calibrate the sensor according to the manufacturer’s instructions. |
| No Readings | Power supply issue | Check the power supply and ensure it is providing the correct voltage. |
| Erratic Readings | Wiring issue | Check the wiring for damage or corrosion. Ensure the connections are secure. |
| Leaks | Loose connection or damaged threads | Tighten the connection or replace the thread sealant tape. |
| Sensor Failure | Sensor has reached the end of its lifespan | Replace the sensor. |
| Display Not Working | Display malfunction or power issue | Check the display connections and power supply. Replace the display if necessary. |
Specific Troubleshooting Steps
Let’s go into a little more detail for some of these common issues:
Inaccurate Readings
If your sensor is giving inaccurate readings, the first step is to check the calibration. Many sensors require periodic calibration to maintain accuracy. Refer to the manufacturer’s instructions for the correct calibration procedure. Additionally, ensure that the sensor is not exposed to conditions outside of its specified operating range, as this can also affect accuracy.
No Readings
When the sensor is not providing any readings at all, the issue is often related to the power supply. Use a multimeter to check the voltage at the sensor’s power terminals. If the voltage is incorrect or absent, trace the power supply back to its source and troubleshoot any issues along the way, such as blown fuses or disconnected wires.
Erratic Readings
Erratic or unstable readings can indicate a wiring problem. Inspect all wiring connections for corrosion, loose terminals, or damaged insulation. Use a multimeter to check the continuity of each wire and ensure that there are no shorts or open circuits. Also, make sure that the sensor is properly grounded, as poor grounding can cause signal interference.
Leaks
Leaks around the sensor are usually caused by loose connections or damaged threads. Tighten the connection using a wrench, but be careful not to overtighten, as this can damage the sensor or the fitting. If tightening doesn’t solve the problem, remove the sensor and inspect the threads for damage. Apply new thread sealant tape before reinstalling the sensor.
Advanced Tips and Tricks
For those looking to get the most out of their pump gauge multi-sensors, here are some advanced tips:
- Data Logging: Use a data logger to record sensor readings over time. This can help you identify trends and patterns in your system.
- Remote Monitoring: Set up remote monitoring using a sensor with connectivity options like Bluetooth or Wi-Fi. This allows you to monitor readings from anywhere.
- Integration with Control Systems: Integrate the sensor with a control system to automate tasks based on sensor readings. For example, you could use the sensor to automatically adjust the temperature in a room based on the temperature reading.
- Regular Calibration: Invest in a calibration tool and perform regular calibrations to maintain accuracy.
- Advanced Diagnostics: Use diagnostic tools to analyze sensor data and identify potential issues before they become major problems.
Resources and Further Reading
To deepen your understanding of pump gauge multi-sensors, here are some resources:
- Manufacturer’s Documentation: Always refer to the manufacturer’s documentation for detailed information about your specific sensor.
- Online Forums: Join online forums and communities to ask questions and share your experiences with other users.
- Technical Articles: Read technical articles and publications to learn about the latest advancements in sensor technology.
- Educational Websites: Explore educational websites and resources to expand your knowledge of sensors and instrumentation. A great place to start is the International Society of Automation (ISA), which provides standards and publications on various types of sensors.
FAQ
What is a pump gauge multi-sensor?
A pump gauge multi-sensor combines multiple sensing functions, like pressure, temperature, and flow, into one device for simplified monitoring.
How do I choose the right multi-sensor?
Consider the measurement range, accuracy, environmental conditions, display type, power requirements, and connectivity options when selecting a multi-sensor.
How often should I calibrate my multi-sensor?
Calibrate your multi-sensor periodically, following the manufacturer’s instructions, to ensure accurate readings.
What are common issues with multi-sensors?
Common issues include inaccurate readings, no readings, erratic readings, and leaks. Troubleshooting steps vary depending on the problem.
Can I install a multi-sensor myself?
Yes, with the right tools and following a step-by-step guide, you can install a multi-sensor. Ensure you prepare the installation site and test the installation afterward.
How do I maintain a multi-sensor?
Regular maintenance includes cleaning the sensor, checking for leaks, calibrating the sensor, inspecting wiring, and protecting it from extreme conditions.
What if my sensor gives inaccurate readings?
First, check if the sensor needs calibration. Also, ensure that the sensor is not exposed to conditions outside its specified operating range.
Conclusion
Pump gauge multi-sensors are invaluable tools for simplifying monitoring and control in a variety of applications. By understanding their components, installation, maintenance, and troubleshooting, you can ensure accurate and reliable performance. Whether you’re a seasoned cyclist, a DIY enthusiast, or a professional in an industrial setting, mastering the use of these sensors will enhance your ability to manage and optimize your systems. So go ahead, take the plunge, and start leveraging the power of multi-sensors to make your life easier and more efficient.


