
Pump Gauge for Shock: Get the Perfect Pressure!
Quick Summary: A shock pump gauge helps you accurately inflate your bike’s suspension. To use it, attach the pump to your shock valve, check the current pressure, and pump to your desired PSI. Always detach the pump carefully to avoid air loss, and consult your bike’s manual for recommended pressure settings. With a little practice, you’ll dial in your ride for maximum comfort and performance.
Have you ever struggled to get your bike’s suspension feeling just right? It’s a common problem! Overinflated shocks can make your ride harsh, while underinflated shocks can lead to bottoming out. The key to a smooth, controlled ride lies in precise pressure adjustments, and that’s where a shock pump with a gauge comes in handy. Don’t worry, it’s easier than you think! This guide will walk you through everything you need to know to use a pump gauge for your bike’s shock, from choosing the right pump to fine-tuning your suspension like a pro. Let’s get started and make your next ride the best one yet!
Understanding Shock Pumps and Gauges

Before we dive into the how-to, let’s cover the basics. A shock pump isn’t your regular tire pump. It’s designed to handle the high pressures found in air suspension systems. The gauge is what allows you to precisely measure and adjust that pressure.
What is a Shock Pump?
A shock pump is a specialized hand pump designed for inflating air shocks and forks on bicycles. Unlike regular tire pumps, shock pumps are built to handle much higher pressures, often up to 300 PSI or more. They also feature a unique valve system that minimizes air loss when attaching or detaching the pump. This precision is crucial for fine-tuning your suspension.
Why is a Gauge Important?
The gauge on a shock pump is what allows you to accurately measure the pressure inside your suspension components. Without a gauge, you’d be guessing, which can lead to poor performance or even damage to your suspension. A gauge ensures you’re within the recommended pressure range for your weight and riding style, resulting in a smoother, more controlled ride.
Types of Gauges
Shock pump gauges come in two main types:
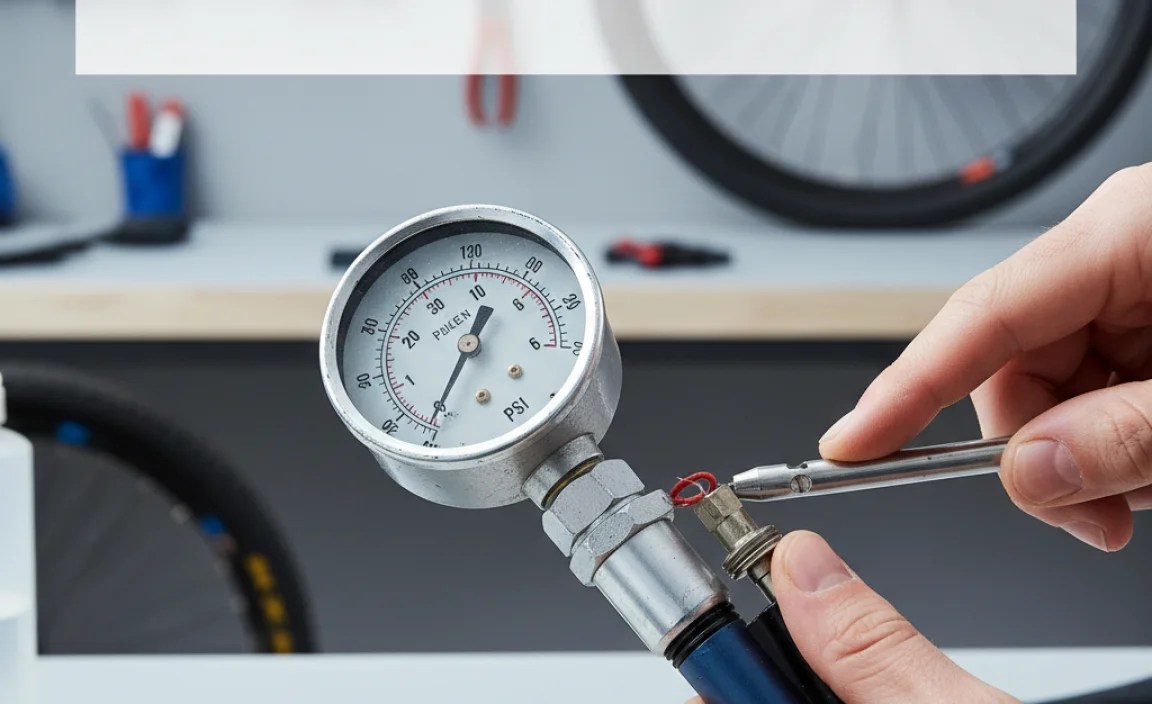
- Analog Gauges: These use a needle and dial to display the pressure. They’re generally reliable and easy to read, but can be less precise than digital gauges.
- Digital Gauges: These display the pressure on an LCD screen. They offer greater accuracy and often include features like pressure memory and the ability to switch between PSI and bar units.
Here’s a quick comparison:
| Feature | Analog Gauge | Digital Gauge |
|---|---|---|
| Accuracy | Good | Excellent |
| Readability | Good | Excellent |
| Durability | High | Moderate |
| Cost | Lower | Higher |
Preparing to Use Your Shock Pump
Before you start pumping, it’s important to gather the right tools and information. This will ensure a smooth and accurate inflation process.
Gather Your Tools
You’ll need the following:
- Shock Pump: Make sure it’s compatible with your suspension’s valve type (usually Schrader).
- Bike Manual: This will provide recommended pressure settings for your weight and riding style.
- Rag or Cloth: To clean the valve and pump head.
Find the Recommended Pressure
Your bike or suspension manufacturer should provide a chart or guide that recommends pressure settings based on your weight. This is a crucial starting point. Look for a sticker on your fork or shock, or consult the owner’s manual. For example, Rockshox offers a useful online resource for setting up their forks.
If you can’t find a specific recommendation, a general rule of thumb is to start with about half your body weight in PSI for the rear shock and slightly less for the fork. Remember, this is just a starting point – you’ll need to fine-tune it based on your riding experience.
Prepare the Valve
Before attaching the pump, clean the valve on your shock or fork with a clean rag. This will remove any dirt or debris that could interfere with the seal. Inspect the valve for damage and replace it if necessary.
Step-by-Step Guide to Using a Shock Pump Gauge

Now, let’s get to the heart of the matter. Follow these steps to accurately inflate your bike’s suspension using a shock pump gauge.
Step 1: Attach the Pump
Carefully screw the pump head onto the valve. Make sure it’s snug but not overtightened. Most shock pumps have a two-stage connector: screw it on, then tighten the lever or collar to create an airtight seal. Listen for any hissing sounds, which indicate a leak. If you hear a leak, try tightening the connection or repositioning the pump head.
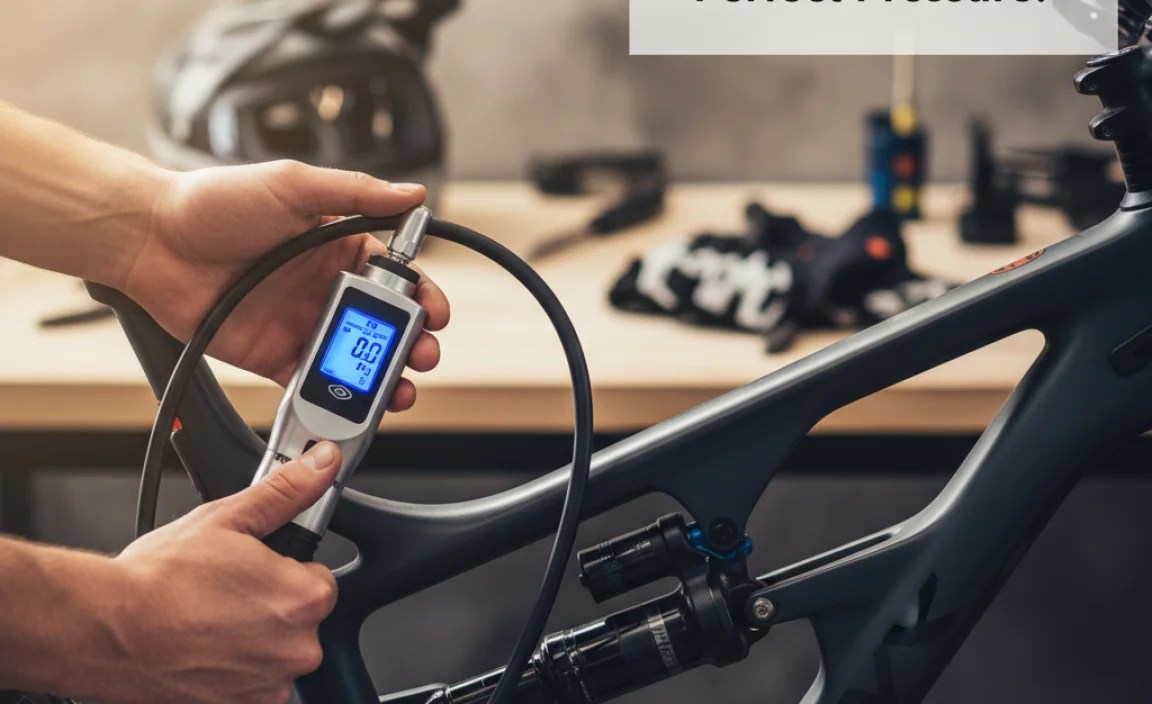
Step 2: Read the Initial Pressure
Once the pump is securely attached, the gauge will display the current pressure in your shock or fork. Take note of this reading. It’s important to know where you’re starting from so you can accurately adjust the pressure.
Step 3: Inflate to the Desired Pressure
Begin pumping the handle of the shock pump. Watch the gauge as you pump, and stop when you reach your desired pressure. Remember to pump slowly and smoothly to avoid overheating the pump. It’s also a good idea to take breaks to let the pump cool down, especially when inflating to high pressures.
Step 4: Fine-Tune the Pressure
It’s easy to overshoot your target pressure. Most shock pumps have a bleed valve that allows you to release small amounts of air. Use this valve to fine-tune the pressure to your exact desired setting. Press the bleed valve gently to release air in small increments. Check the gauge after each adjustment to ensure you’re on target.
Step 5: Detach the Pump Carefully
This is a critical step. Quickly and carefully detach the pump head from the valve. Most shock pumps are designed to minimize air loss during detachment, but some air will inevitably escape. This is normal. The key is to be quick and decisive. After detaching, check the pressure again to see how much air was lost. If the loss was significant (more than 5 PSI), repeat the process and try detaching more quickly.
Step 6: Test and Adjust
After inflating your suspension, take your bike for a short ride to test the feel. Pay attention to how the suspension responds to bumps and drops. If it feels too harsh, reduce the pressure slightly. If it bottoms out too easily, increase the pressure. Make small adjustments and test again until you find the perfect setting for your riding style and terrain. Remember to always stay within the manufacturer’s recommended pressure range.
Troubleshooting Common Issues
Even with the best equipment and instructions, you might encounter some common issues. Here’s how to troubleshoot them:
Air Leaks
If you hear a hissing sound when attaching the pump, there’s likely an air leak. Try these solutions:
- Tighten the Connection: Make sure the pump head is securely screwed onto the valve.
- Check the O-Rings: Inspect the O-rings on the pump head for damage or wear. Replace them if necessary.
- Clean the Valve: Clean the valve with a clean rag to remove any dirt or debris.
Inaccurate Readings
If the gauge seems inaccurate, try these steps:
- Calibrate the Gauge: Some digital gauges have a calibration function. Refer to the pump’s manual for instructions.
- Check the Battery: If you’re using a digital gauge, make sure the battery is fully charged.
- Use a Different Pump: If possible, try using a different shock pump to verify the reading.
Pump Overheating
Pumping to high pressures can cause the pump to overheat. This can damage the pump and affect its accuracy. To prevent overheating:
- Pump Slowly: Avoid rapid pumping.
- Take Breaks: Let the pump cool down periodically.
- Use a High-Volume Pump: Consider using a pump with a larger volume chamber for faster inflation.
Maintaining Your Shock Pump
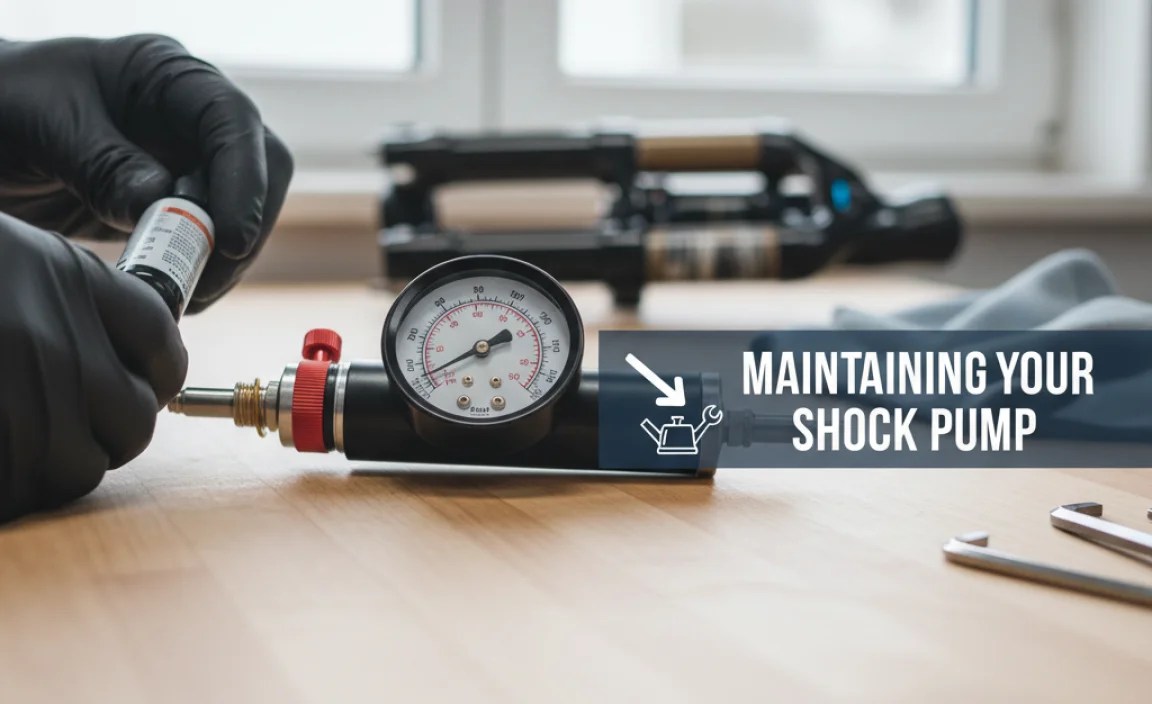
Proper maintenance will extend the life of your shock pump and ensure accurate readings. Here are some tips:
- Clean the Pump: Wipe down the pump with a clean rag after each use.
- Lubricate the O-Rings: Periodically lubricate the O-rings with a silicone-based lubricant.
- Store Properly: Store the pump in a clean, dry place.
- Replace Worn Parts: Replace any worn or damaged parts, such as O-rings or the pump head.
Choosing the Right Shock Pump
With so many options on the market, choosing the right shock pump can be overwhelming. Here are some factors to consider:
- Pressure Range: Make sure the pump’s pressure range is suitable for your suspension.
- Gauge Type: Choose between analog and digital gauges based on your preference for accuracy and readability.
- Pump Volume: Consider a high-volume pump for faster inflation.
- Build Quality: Look for a pump with a durable construction and high-quality materials.
- Features: Some pumps include features like a rotating hose, bleed valve, and pressure memory.
Here’s a comparison of some popular shock pumps:
| Model | Gauge Type | Max Pressure | Key Features | Price Range |
|---|---|---|---|---|
| Topeak PocketShock DXG | Analog | 360 PSI | Rotating hose, bleed valve | $40-$50 |
| RockShox High Pressure Fork/Shock Pump | Analog | 300 PSI | Durable construction, ergonomic handle | $35-$45 |
| Lezyne Digital Shock Drive | Digital | 350 PSI | Digital gauge, bleed button, compact design | $60-$70 |
Advanced Suspension Tuning Tips
Once you’re comfortable using a shock pump, you can start experimenting with advanced suspension tuning techniques. Here are a few ideas:
- Sag: Sag is the amount your suspension compresses when you’re sitting on the bike. Setting the correct sag is crucial for optimal performance. Consult your bike or suspension manufacturer for recommended sag settings.
- Rebound Damping: Rebound damping controls how quickly your suspension returns to its original position after being compressed. Adjusting rebound damping can improve traction and control.
- Compression Damping: Compression damping controls how easily your suspension compresses when encountering bumps. Adjusting compression damping can improve pedaling efficiency and prevent bottoming out.
- Volume Spacers: Volume spacers are small plastic or rubber inserts that change the progressiveness of your suspension. Adding volume spacers can make your suspension feel more supportive and prevent bottoming out.
Remember to make small adjustments and test after each change. Keep a record of your settings so you can easily revert to a previous configuration if needed.
FAQ About Shock Pump Gauges
What is the ideal PSI for my bike shock?
The ideal PSI varies depending on your weight, bike type, and riding style. Consult your bike’s manual or the manufacturer’s website for recommended pressure settings. Start with their recommendations and fine-tune based on your experience.
How often should I check my bike shock pressure?
Check your shock pressure before each ride, especially if you notice a change in suspension performance. Air can slowly leak out over time, so regular checks are essential for maintaining optimal performance.
Can I use a regular tire pump for my bike shock?
No, you should not use a regular tire pump for your bike shock. Tire pumps don’t provide the high pressures and precise control needed for air suspension systems. Using a tire pump can damage your shock or result in inaccurate pressure settings.
What does the bleed valve on a shock pump do?
The bleed valve allows you to release small amounts of air from the shock, enabling you to fine-tune the pressure to your desired setting. It’s useful for making small adjustments without having to detach the pump.
How do I know if my shock pump gauge is accurate?
You can check the accuracy of your gauge by comparing it to another known accurate gauge. If there’s a significant difference, the gauge may need calibration or replacement. Some digital gauges have a built-in calibration function.
What is sag, and why is it important?
Sag is the amount your suspension compresses when you’re sitting on the bike. Setting the correct sag ensures that your suspension is working within its optimal range of travel, providing a comfortable and controlled ride. It’s important because it allows the suspension to absorb bumps effectively.
What if my shock pump won’t attach to the valve properly?
Ensure the pump head is compatible with your valve type (usually Schrader). Check for any damage to the valve or pump head. Clean the valve and try again, making sure the connection is snug but not overtightened. If problems persist, inspect the pump’s O-rings and replace if necessary.
Conclusion
Using a shock pump gauge might seem intimidating at first, but with a little practice, it becomes second nature. By understanding the basics of shock pumps, following the step-by-step instructions, and troubleshooting common issues, you can confidently adjust your bike’s suspension for optimal performance. Remember to consult your bike’s manual, experiment with different settings, and always prioritize safety. With a properly inflated suspension, you’ll enjoy a smoother, more controlled, and more enjoyable ride. So get out there, pump it up, and experience the difference!


