
Pump Gauge Detachable: The Easy Inflation Secret
Quick Summary: Yes, many bike pump gauges are detachable for easy replacement or upgrade. To detach one, you’ll typically need to unscrew it from the pump head or hose, sometimes requiring a small wrench or pliers. Always check for specific instructions from the pump manufacturer to avoid damage.
Ever wrestled with a bike pump gauge that’s hard to read or just plain broken? You’re not alone! A faulty gauge can make inflating your tires a guessing game, which is frustrating and potentially dangerous. The good news is that many bike pump gauges are designed to be detachable, making it simple to swap out a bad one or upgrade to a better model. This guide will walk you through the process, step by step, so you can get back to riding with confidence. We’ll cover the tools you might need, how to identify the type of connection, and what to watch out for along the way. Let’s get started!
Is Your Bike Pump Gauge Detachable?

Before you start yanking on your bike pump gauge, it’s essential to figure out if it’s actually designed to be detached. Most modern, high-quality bike pumps have gauges that are either threaded or connected via a quick-release mechanism. Cheaper pumps sometimes have gauges that are permanently attached, but these are less common these days. Here’s how to check:
- Look for a Threaded Connection: Examine where the gauge connects to the pump body or hose. If you see threads, it’s likely a screw-on type.
- Check for a Quick-Release: Some gauges have a small lever or button that, when pressed, allows you to detach the gauge.
- Consult the Manual: The easiest way to know for sure is to check your pump’s manual. If you don’t have the physical manual, search online for your pump model; most manufacturers have digital versions available.
If you’ve determined that your gauge is detachable, congratulations! You’re one step closer to fixing or upgrading your pump. If not, you might need to consider replacing the entire pump head or, in some cases, the whole pump.
Tools You’ll Need
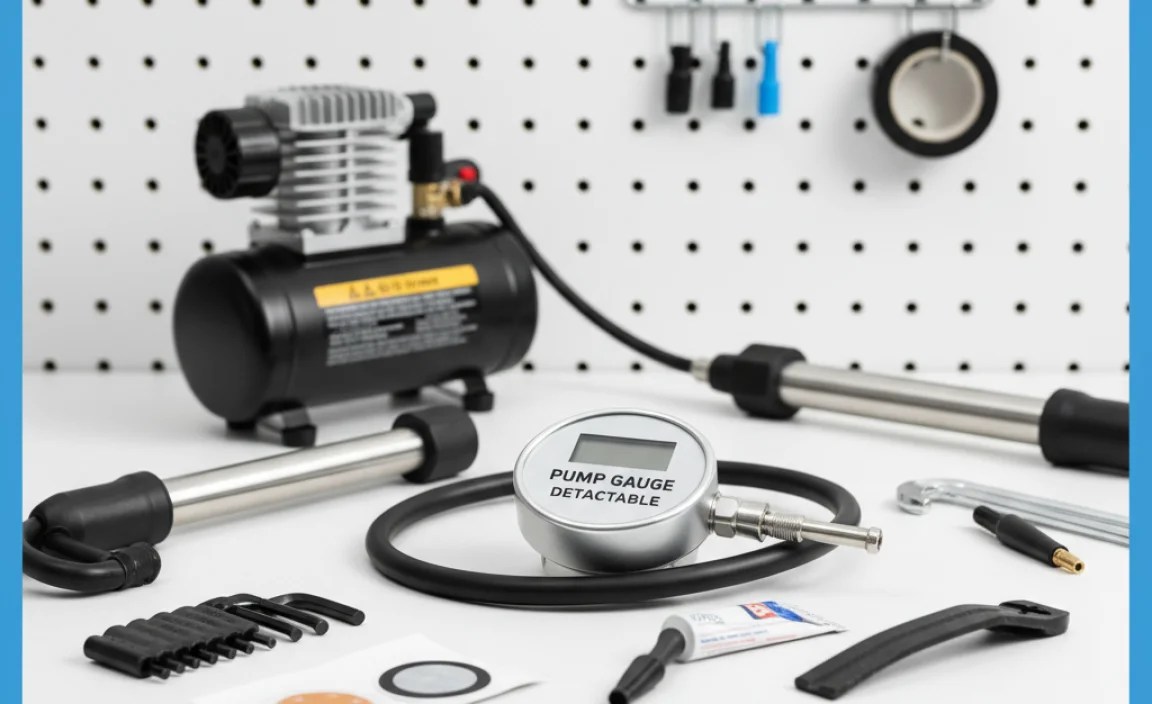
Having the right tools on hand makes the job much easier and reduces the risk of damaging your pump or gauge. Here’s a basic toolkit for detaching most bike pump gauges:
- Small Adjustable Wrench: For loosening threaded connections.
- Needle-Nose Pliers: To grip small parts or help loosen tight connections.
- Soft Cloth or Rag: To protect the finish of your pump and gauge.
- New Gauge (if replacing): Make sure it’s compatible with your pump type (Presta or Schrader) and pressure range.
- Thread Sealant Tape (Teflon Tape): For sealing threaded connections to prevent leaks. Available at most hardware stores or online retailers like Amazon.
Having these tools ready will streamline the process and ensure you can tackle any unexpected issues that might arise.
Step-by-Step Guide to Detaching a Bike Pump Gauge

Now, let’s get down to the actual process. Remember to take your time and be gentle; forcing anything can lead to damage. These steps cover the most common types of detachable gauges.
Step 1: Prepare Your Workspace
Find a clean, well-lit area to work. This will help you see what you’re doing and prevent losing any small parts. Lay down a cloth or towel to protect your pump and work surface.
Step 2: Identify the Connection Type
As mentioned earlier, most gauges are either threaded or use a quick-release mechanism. Look closely at how the gauge is attached. Is it screwed on, or is there a lever or button?
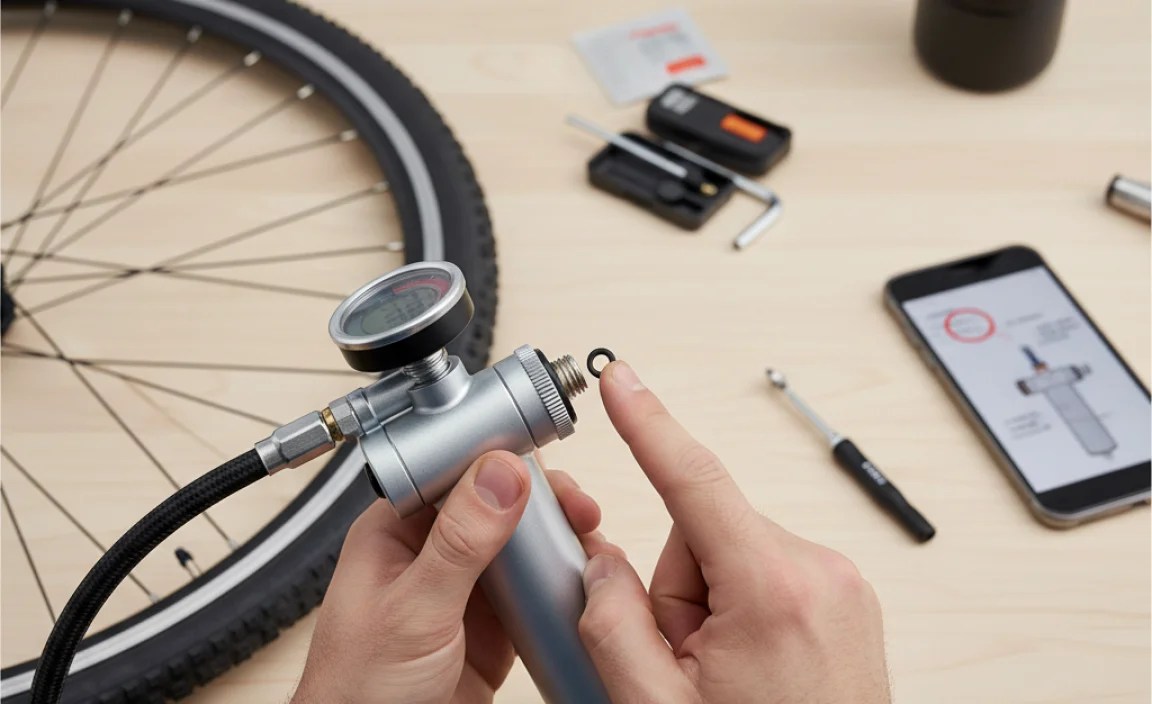
Step 3a: Detaching a Threaded Gauge
- Secure the Pump: Hold the pump body firmly or clamp it gently in a vise, using a soft cloth to protect the finish.
- Loosen the Connection: Use an adjustable wrench to gently loosen the nut or fitting where the gauge connects. Be careful not to overtighten or strip the threads.
- Unscrew the Gauge: Once the connection is loose, you should be able to unscrew the gauge by hand. If it’s still tight, use the wrench, but apply minimal force.
- Clean the Threads: Inspect the threads on both the pump and the gauge. Remove any old sealant or debris.
Step 3b: Detaching a Quick-Release Gauge
- Locate the Release Mechanism: Find the lever or button that releases the gauge.
- Activate the Release: Press the button or flip the lever. This should disengage the locking mechanism.
- Pull the Gauge: Gently pull the gauge away from the pump. It should detach easily. If it doesn’t, double-check that the release mechanism is fully disengaged.
Step 4: Inspect the Connection Point
Once the gauge is detached, inspect the connection point on the pump. Look for any signs of damage, such as cracks, stripped threads, or worn seals. If you find any damage, you may need to replace the entire pump head or hose.
Step 5: Installing a New Gauge (If Applicable)
- Apply Thread Sealant (for Threaded Gauges): If you’re installing a new threaded gauge, apply a few wraps of Teflon tape to the threads. This will help create a tight seal and prevent leaks.
- Attach the New Gauge: Screw the new gauge into place, either by hand or with a wrench. Tighten it snugly, but be careful not to overtighten. For quick-release gauges, simply push the new gauge into the connection point until it clicks into place.
- Test the Connection: Inflate a tire and check for leaks around the gauge connection. If you see or hear any leaks, tighten the connection or reapply thread sealant.
Troubleshooting Common Issues
Sometimes, things don’t go exactly as planned. Here are some common issues you might encounter and how to deal with them:
- Gauge Won’t Budge: If a threaded gauge is stuck, try applying a small amount of penetrating oil (like WD-40) to the connection and let it sit for a few minutes. Then, try loosening it again with a wrench.
- Stripped Threads: If you strip the threads, you may need to use a thread repair kit or replace the entire pump head or hose.
- Leaks After Reassembly: If you have leaks after reattaching the gauge, double-check the thread sealant and make sure the connection is tight. You may need to reapply the sealant or tighten the connection further.
- Incorrect Gauge Readings: Ensure the new gauge is compatible with your pump and that the pressure range is appropriate for your tires. Some gauges may need calibration.
Choosing the Right Replacement Gauge

If you’re replacing your gauge, it’s important to choose one that’s compatible with your pump and your needs. Here are some factors to consider:
- Compatibility: Make sure the gauge is compatible with your pump type (Presta or Schrader) and the connection type (threaded or quick-release).
- Pressure Range: Choose a gauge with a pressure range that’s appropriate for your tires. For road bikes, you’ll need a gauge that goes up to at least 120 psi. For mountain bikes, a lower range (e.g., 50 psi) may be sufficient.
- Accuracy: Look for a gauge that’s known for its accuracy. Digital gauges are generally more accurate than analog gauges, but they also require batteries.
- Readability: Choose a gauge with a clear, easy-to-read display. Larger numbers and a well-lit display can make a big difference.
Table: Comparing Gauge Types
| Gauge Type | Pros | Cons |
|---|---|---|
| Analog | Simple, durable, no batteries required | Less accurate, can be harder to read |
| Digital | More accurate, easy to read, often has additional features | Requires batteries, can be more expensive |
Maintaining Your Bike Pump Gauge
Proper maintenance can extend the life of your bike pump gauge and ensure accurate readings. Here are some tips:
- Store Your Pump Properly: Store your pump in a clean, dry place to protect it from the elements.
- Clean the Gauge Regularly: Wipe the gauge with a soft cloth to remove dust and dirt.
- Check for Leaks: Regularly check for leaks around the gauge connection. If you find any, tighten the connection or replace the seals.
- Calibrate Your Gauge: If you have a digital gauge, calibrate it periodically according to the manufacturer’s instructions.
When to Consider Professional Help
While detaching and replacing a bike pump gauge is usually a straightforward process, there are times when it’s best to seek professional help. Consider taking your pump to a bike shop if:
- You’re Not Comfortable Working on It: If you’re not confident in your mechanical skills, it’s better to let a professional handle it.
- You Encounter Significant Resistance: If you can’t loosen a threaded connection or detach a quick-release gauge without excessive force, you risk damaging the pump.
- You’ve Stripped the Threads: If you’ve stripped the threads on the pump or gauge, a professional may be able to repair or replace the damaged parts.
- You’re Not Sure What to Do: If you’re unsure about any step of the process, it’s always best to err on the side of caution and seek expert advice.
Table: Common Bike Pump Problems and Solutions
| Problem | Possible Cause | Solution |
|---|---|---|
| Gauge not reading correctly | Faulty gauge, damaged internals | Replace gauge, service pump |
| Air leaking from gauge connection | Loose connection, damaged threads | Tighten connection, apply thread sealant, replace damaged parts |
| Pump not inflating tire | Worn seals, blocked valve | Replace seals, clean valve |
| Handle difficult to push | Lack of lubrication, internal damage | Lubricate pump, service pump |
FAQ: Detaching Bike Pump Gauges
Here are some frequently asked questions about detaching bike pump gauges:
- Q: Can I replace my analog gauge with a digital one?
- A: Yes, as long as the connection type (threaded or quick-release) and size are compatible. Make sure the pressure range is appropriate for your tires.
- Q: What is Teflon tape, and why do I need it?
- A: Teflon tape (also called thread sealant tape) is a thin, white tape used to seal threaded connections. It helps prevent leaks by filling in any gaps between the threads.
- Q: How do I know if my gauge is accurate?
- A: You can compare your gauge’s readings to those of a known accurate gauge, such as one at a bike shop. If your gauge is consistently off, it may need to be replaced.
- Q: What do I do if I can’t find a replacement gauge for my pump?
- A: Contact the pump manufacturer or a bike shop. They may be able to source a replacement gauge or suggest a compatible alternative. You might also consider replacing the entire pump head.
- Q: Is it safe to use pliers to loosen a stuck gauge?
- A: Pliers can damage the finish of your pump and gauge. Use an adjustable wrench whenever possible, and protect the finish with a soft cloth. If you must use pliers, be very gentle.
- Q: How often should I replace my bike pump gauge?
- A: Replace your gauge when it becomes inaccurate, damaged, or difficult to read. With proper care, a good-quality gauge can last for many years.
- Q: What’s the difference between Presta and Schrader valves?
- A: Presta valves are narrow and typically found on road bikes, while Schrader valves are wider and similar to those on car tires. Make sure your gauge is compatible with the type of valve on your tires.
Conclusion
Detaching and replacing a bike pump gauge is a simple task that can save you money and keep your tires properly inflated. By following these steps and taking your time, you can easily fix or upgrade your pump and get back to enjoying your rides. Remember to choose the right replacement gauge, use the proper tools, and take care of your pump to ensure accurate readings and long-lasting performance. With a little patience and the right information, you’ll be able to tackle this maintenance task with confidence. Happy cycling!


