
How to Deflate Tyre Using Hand Pump? Easy Guide
Quick Summary: Deflating a tire with a hand pump is simple! First, locate the valve on your tire. Then, use the pump’s chuck (the part that attaches to the valve) to gently press the valve core. You’ll hear air escaping. Control the pressure by how much you press. Check the pressure with a gauge to avoid over-deflating. Easy peasy!
Ever needed to let a little air out of your tires but only had your trusty hand pump handy? It happens to the best of us! Maybe you’re trying to fine-tune your tire pressure for a smoother ride, or perhaps you accidentally over-inflated them. Whatever the reason, using a hand pump to deflate a tire is a skill every cyclist should know. Don’t worry; it’s easier than you think! This guide will walk you through each step, so you’ll be a pro in no time. Let’s get started and get those tires just right!
Understanding Tire Valves

Before we dive into the how-to, let’s quickly cover the two main types of valves you’ll find on bicycle tires:
- Presta Valves: These are the skinny valves with a little nut at the top. You’ll find them mostly on road bikes and higher-end mountain bikes.
- Schrader Valves: These are the wider, sturdier valves that you also see on car tires. They’re common on mountain bikes, hybrid bikes, and kids’ bikes.
Knowing which valve you have is crucial because the deflation process is slightly different for each.
Tools You’ll Need
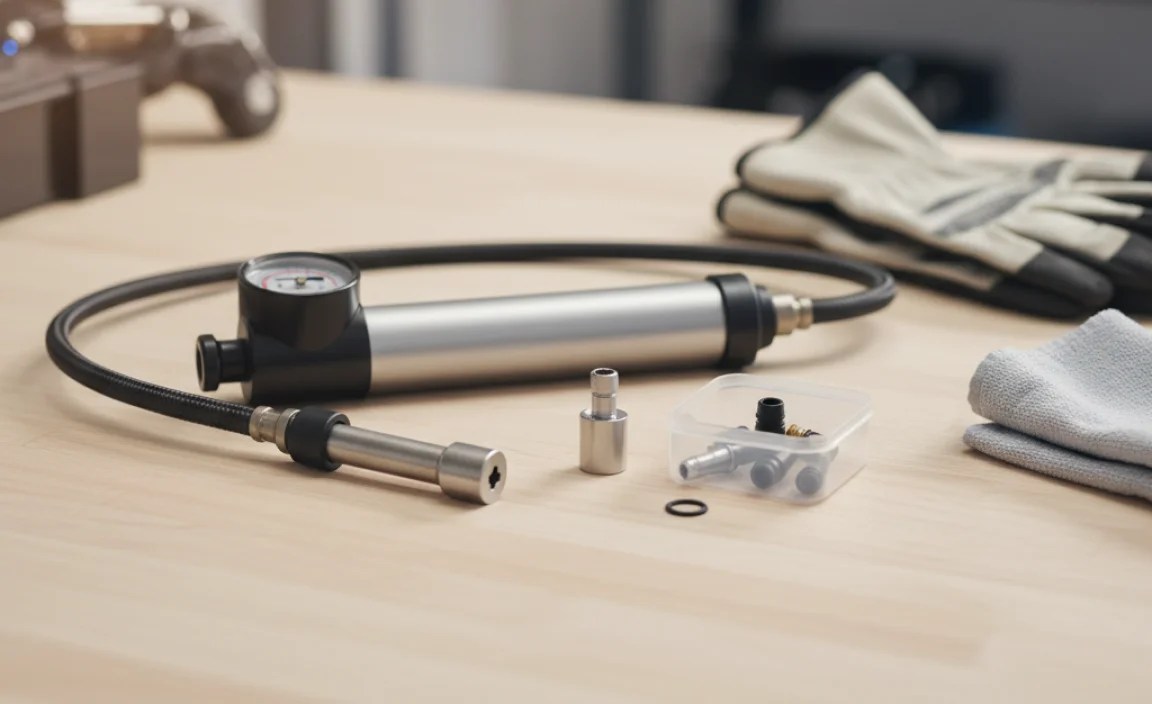
Luckily, you probably already have everything you need:
- Your Hand Pump: Any standard bicycle hand pump will do.
- A Tire Pressure Gauge (Optional but Recommended): This helps you accurately measure the tire pressure as you deflate.
- Valve Adaptor (If Needed): Some pumps require an adapter to switch between Presta and Schrader valves.
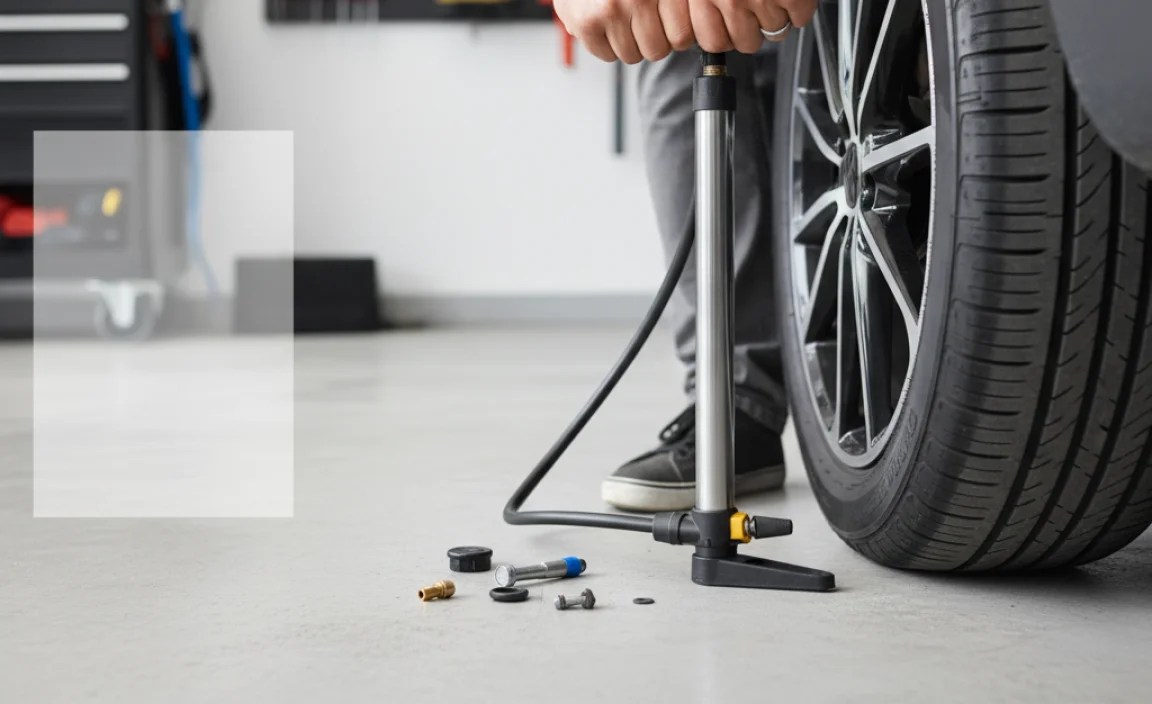
How to Deflate a Tire with a Hand Pump: Step-by-Step

Alright, let’s get down to business. Here’s how to deflate your tires using a hand pump, depending on the valve type.
Deflating a Presta Valve
- Locate the Valve: Find the Presta valve on your tire. It’s usually covered by a small dust cap.
- Unscrew the Valve Nut: Remove the dust cap and then unscrew the small nut at the very top of the valve. Don’t remove the nut completely; just loosen it.
- Press the Valve Core: Gently press down on the valve core (the little pin inside the valve). You should hear air escaping.
- Use the Pump Chuck (Carefully): If simply pressing the valve core with your finger isn’t working well, carefully use the end of the pump’s chuck to press the valve core. Be gentle to avoid damaging the valve.
- Control the Airflow: Control how much air escapes by how hard you press the valve core. A light touch lets out a little air; a firmer press lets out more.
- Check the Pressure: Use your tire pressure gauge to check the pressure periodically. Stop deflating when you reach your desired pressure.
- Tighten the Valve Nut: Once you’re happy with the pressure, tighten the valve nut and replace the dust cap.
Deflating a Schrader Valve
- Locate the Valve: Find the Schrader valve on your tire. It’s also usually covered by a dust cap.
- Remove the Dust Cap: Take off the dust cap.
- Press the Valve Core: The Schrader valve has a spring-loaded pin in the center. You’ll need to press this pin to release air.
- Use the Pump Chuck (Carefully): Carefully use the end of the pump’s chuck to press the valve core. Apply gentle, steady pressure. You should hear air hissing out.
- Control the Airflow: Control the airflow by adjusting how hard you press the pin.
- Check the Pressure: Use your tire pressure gauge to check the pressure regularly. Stop when you reach the desired pressure.
- Replace the Dust Cap: Put the dust cap back on the valve.
Tips for Success
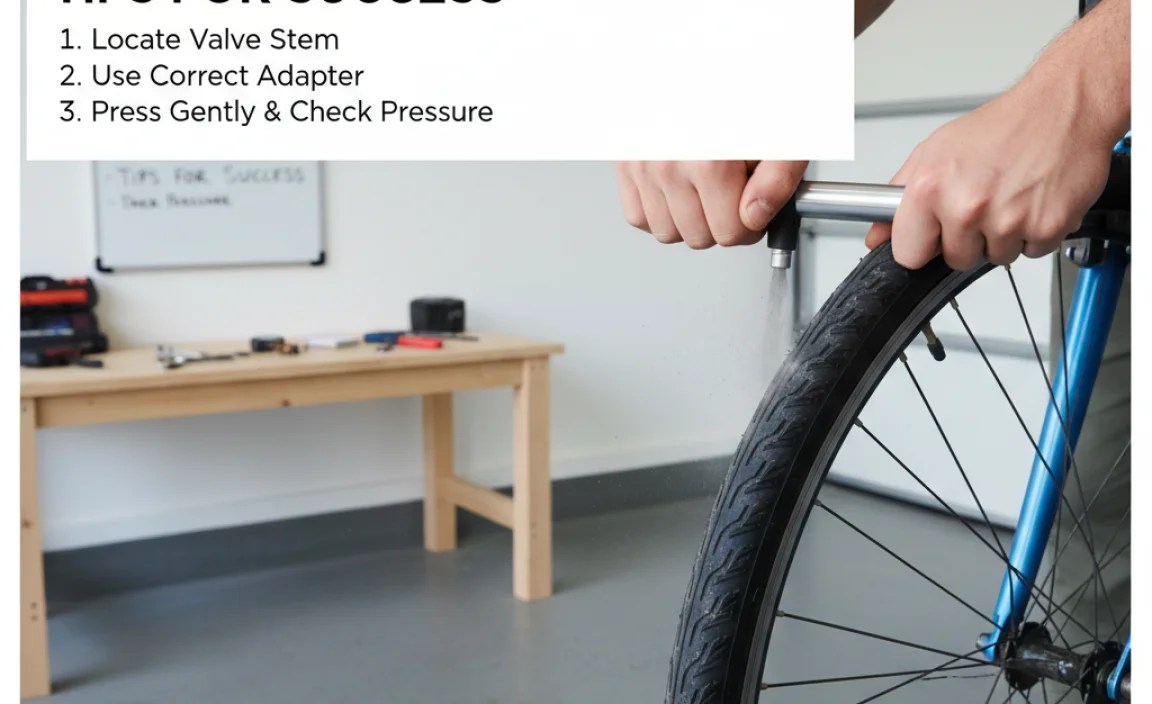
Here are a few extra tips to make the process even smoother:
- Be Gentle: Don’t use excessive force when pressing the valve core, especially on Presta valves. They’re delicate!
- Use a Gauge: A tire pressure gauge is your best friend. Eyeballing tire pressure is rarely accurate.
- Deflate in Small Bursts: It’s easier to let out a little air at a time than to over-deflate and have to pump air back in.
- Listen Carefully: Pay attention to the sound of the escaping air. This can help you gauge how quickly the tire is deflating.
- Clean Valves: Keep your valves clean from dirt and debris. A clean valve seals better and prevents leaks.
Troubleshooting Common Issues
Sometimes, things don’t go exactly as planned. Here are a few common problems and how to fix them:
- Air Not Escaping: Make sure you’ve fully loosened the valve nut on a Presta valve, or that you’re pressing the valve core firmly enough on either type of valve.
- Valve Leaking After Deflating: This could be due to a damaged valve core or dirt trapped in the valve. Try cleaning the valve or replacing the valve core.
- Pump Chuck Not Fitting: Ensure you’re using the correct adapter for your valve type (if needed). Some pumps have a reversible chuck for both Presta and Schrader valves.
Why You Might Want to Deflate Your Tires
You might be wondering, “Why would I even want to deflate my tires?” Here are a few common reasons:
- Adjusting for Terrain: Lower tire pressure can provide better traction on loose or uneven surfaces like dirt trails or gravel roads.
- Improving Ride Comfort: Slightly lower pressure can make your ride more comfortable by absorbing bumps and vibrations.
- Correcting Over-Inflation: If you accidentally put too much air in your tires, deflating them is the only way to get back to the correct pressure.
- Preparing for Storage: Some cyclists slightly deflate their tires before storing their bikes for extended periods to reduce stress on the tires.
Understanding Tire Pressure: PSI and Its Importance
Tire pressure is measured in PSI (pounds per square inch) or BAR (a metric unit). The correct tire pressure is crucial for performance, comfort, and safety. Here’s what you need to know:
- Finding the Recommended PSI: Look for the recommended PSI range printed on the sidewall of your tire. This is a guideline, not a strict rule.
- Factors Affecting Ideal PSI: Your ideal PSI depends on your weight, riding style, and the type of terrain you’ll be riding on.
- General Guidelines:
- Road Bikes: Typically require higher pressure (80-130 PSI) for speed and efficiency.
- Mountain Bikes: Usually run lower pressure (25-40 PSI) for traction and comfort.
- Hybrid Bikes: Fall somewhere in between (40-70 PSI), depending on the tire type and riding conditions.
Hand Pump vs. Other Methods
While a hand pump works perfectly well, you might be curious about other ways to deflate a tire. Here’s a quick comparison:
| Method | Pros | Cons |
|---|---|---|
| Hand Pump | Convenient, portable, readily available | Slower, requires more effort |
| Tire Lever | Can quickly release a large amount of air | Can be difficult to control the amount of air released, risk of damaging the valve |
| Valve Core Tool | Allows for complete removal of the valve core for rapid deflation | Requires a specialized tool, can be messy |
Choosing the Right Hand Pump
Not all hand pumps are created equal. Here’s what to look for when choosing a hand pump for your bike:
- Valve Compatibility: Make sure the pump works with both Presta and Schrader valves, either directly or with an adapter.
- Pressure Gauge: A built-in pressure gauge is incredibly helpful for accurate inflation and deflation.
- Size and Portability: Consider the size and weight of the pump, especially if you plan to carry it with you on rides.
- Pumping Efficiency: Look for a pump that delivers a good amount of air per stroke, so you don’t have to pump forever.
- Durability: Choose a pump made from high-quality materials that can withstand regular use.
Maintaining Your Hand Pump
A little maintenance goes a long way in keeping your hand pump working smoothly. Here are a few tips:
- Clean Regularly: Wipe down the pump with a damp cloth to remove dirt and grime.
- Lubricate Moving Parts: Apply a small amount of lubricant to the pump’s moving parts to keep them working smoothly.
- Check for Leaks: Inspect the pump for any leaks or damage, and repair or replace parts as needed.
- Store Properly: Store your pump in a dry place to prevent rust and corrosion.
Advanced Techniques
Once you’re comfortable with the basics, you can explore some more advanced techniques for fine-tuning your tire pressure:
- The “Bounce Test”: This involves bouncing the tire on the ground and feeling how it absorbs the impact. It’s not as accurate as a gauge, but it can give you a general sense of the pressure.
- The “Thumb Test”: Press your thumb into the tire and gauge how much it deflects. Again, this is not a precise method, but it can be helpful in a pinch.
- Experimenting with Different Pressures: Don’t be afraid to experiment with different tire pressures to find what works best for you and your riding style. Just be sure to stay within the recommended range printed on your tire.
Safety First
Before you start deflating your tires, keep these safety precautions in mind:
- Never Exceed the Recommended PSI: Over-inflating your tires can cause them to explode, which is dangerous.
- Check for Damage: Inspect your tires for any signs of damage, such as cuts, bulges, or worn spots. If you find any damage, replace the tire before riding.
- Be Aware of Your Surroundings: When deflating your tires, make sure you’re in a safe location away from traffic and other hazards.
Tire Pressure Chart
This chart provides a general guideline for tire pressure based on tire width and rider weight. Always refer to the manufacturer’s recommendations on your specific tire.
| Tire Width (mm) | Rider Weight (lbs) | Recommended Pressure (PSI) |
|---|---|---|
| 23 | 120-150 | 100-120 |
| 23 | 150-180 | 110-130 |
| 25 | 120-150 | 90-110 |
| 25 | 150-180 | 100-120 |
| 28 | 120-150 | 80-100 |
| 28 | 150-180 | 90-110 |
FAQ: Deflating Tires with a Hand Pump
Here are some frequently asked questions about deflating tires using a hand pump:
Can I use any hand pump to deflate a tire?
Yes, most standard bicycle hand pumps can be used to deflate tires. The key is to use the pump’s chuck to gently press the valve core.
Is it safe to deflate a tire completely?
While you can deflate a tire completely, it’s generally not recommended unless you’re removing the tire from the rim. Riding on a completely flat tire can damage the rim and tire.
How often should I check my tire pressure?
It’s a good idea to check your tire pressure before every ride, or at least once a week. Tires lose air over time, so regular checks will ensure optimal performance and safety.
What happens if I over-deflate my tires?
Over-deflating your tires can lead to a higher risk of pinch flats (where the tire gets pinched between the rim and the road), reduced rolling efficiency, and a less comfortable ride. If you over-deflate, simply use your hand pump to add air back in.
Can I use a car tire inflator to deflate my bike tires?
While technically possible, it’s not recommended. Car tire inflators are designed for higher volumes and pressures, making it difficult to control the deflation process for bicycle tires. A hand pump is much more suitable for precise adjustments.
How do I know if my valve core is damaged?
If your valve is constantly leaking air, even when tightened, it could indicate a damaged valve core. You can usually replace the valve core with a valve core tool, which is a relatively inexpensive repair.
Why is it harder to deflate a tire in cold weather?
Cold weather can cause the air inside the tire to contract, which may make it seem harder to deflate. However, the process is still the same. You may just need to press the valve core for a slightly longer period to achieve the desired pressure.
Conclusion
And there you have it! Deflating a tire with a hand pump is a simple yet essential skill for any cyclist. By understanding the different valve types, following the step-by-step instructions, and keeping the tips in mind, you can easily adjust your tire pressure for optimal performance and comfort. So, grab your pump, hit the road (or trail), and enjoy the ride with perfectly inflated (or slightly deflated) tires! Remember to always prioritize safety and check your tire pressure regularly. Happy cycling!


