
Easy Mountain Bike Tire Replacement Guide
Mountain Bike Tire Replacement Guide
Quick Summary: Replacing a mountain bike tire is simple! First, remove the wheel. Then, deflate the tire, unseat the bead, and remove the old tire. Install one side of the new tire, insert the tube, and seat the other side of the tire. Inflate to the correct pressure and reinstall the wheel. You’re ready to ride!
A flat tire on the trail can ruin your ride. Don’t let a punctured tube keep you off your mountain bike. Changing your tires might seem tricky, but it’s a skill every mountain biker should have. With a few simple tools and these step-by-step instructions, you’ll be back on the trail in no time. Let’s get started and show you how easy it is to replace your mountain bike tires!
This guide will cover everything from removing the old tire to properly seating the new one, plus tips on choosing the right tire pressure. Get ready to roll!
Tools and Materials You’ll Need

Before you start, gather everything you’ll need. Having the right tools makes the job much easier and faster.
- New mountain bike tire
- Tire levers (2-3)
- Bike pump or CO2 inflator
- Spare tube (if needed)
- Multi-tool or wrench (for removing the wheel)
- Rag or towel
Step-by-Step Guide to Replacing Your Mountain Bike Tire

Follow these steps to replace your mountain bike tire quickly and correctly.
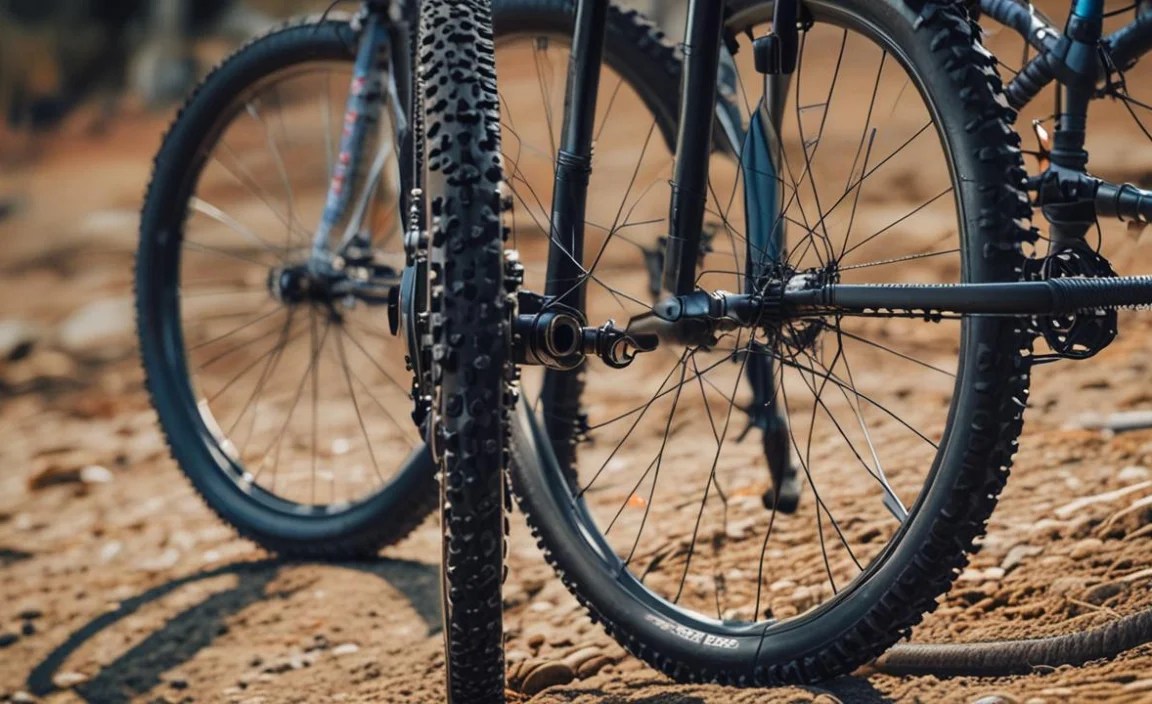
Step 1: Remove the Wheel
First, you need to take the wheel off your bike. This usually involves releasing the brakes and opening the quick-release lever or unscrewing the thru-axle.
- Release the brakes: Depending on your brake type (V-brakes or disc brakes), release the brake cable or pads to allow the wheel to pass through.
- Open the quick-release or unscrew the thru-axle: If you have a quick-release, open the lever. For a thru-axle, use a multi-tool or wrench to unscrew it.
- Remove the wheel: Carefully lift the bike and slide the wheel out of the dropouts.
Step 2: Deflate the Tire
Make sure the tire is completely deflated. This makes it easier to remove the tire from the rim.
- Locate the valve: Find the valve stem on your wheel.
- Remove the valve cap: Unscrew the valve cap and set it aside.
- Deflate the tire: Press the valve core to release any remaining air. If needed, use a valve core tool to fully deflate the tire.
Step 3: Unseat the Tire Bead
The tire bead is the edge of the tire that sits inside the rim. You need to unseat it to remove the tire.
- Squeeze the tire: Work your way around the tire, squeezing it towards the center of the rim. This helps loosen the bead.
- Use tire levers: Insert one tire lever under the bead and hook it onto a spoke. Insert a second lever a few inches away and pry that section of the bead off the rim. You may need a third lever for stubborn tires.
Step 4: Remove the Old Tire and Tube
Once one side of the bead is off the rim, you can remove the rest of the tire and the inner tube.
- Pull out the tube: Start at the valve and pull the tube out from under the tire.
- Remove the tire: With one side of the tire bead completely off the rim, you can now pull the entire tire off.
- Inspect the tire: Check the inside of the tire for any sharp objects that caused the puncture, like glass or thorns. Remove them carefully to prevent future flats.
Step 5: Inspect the Rim
Before installing the new tire, check the rim for any damage.
- Check for dents or cracks: Look for any signs of damage that could cause problems.
- Inspect the rim tape: Make sure the rim tape is properly covering the spoke holes to prevent the tube from getting punctured. Replace the rim tape if it’s damaged or worn.
Step 6: Install One Side of the New Tire
Now it’s time to put the new tire on the rim. Start by seating one side of the tire bead.
- Orient the tire correctly: Check the tire for a directional arrow and make sure it’s pointing in the direction of forward wheel rotation.
- Seat one bead: Starting opposite the valve hole, work the tire bead onto the rim. Use your thumbs to push the bead over the rim edge. Work your way around the entire rim until one side of the tire is fully seated.
Step 7: Insert the Tube
With one side of the tire on the rim, you can now insert the inner tube.
- Lightly inflate the tube: Add just enough air to give the tube some shape. This helps prevent it from getting pinched between the tire and rim.
- Insert the valve: Place the valve stem into the valve hole on the rim.
- Tuck in the tube: Carefully tuck the tube inside the tire, making sure it’s not twisted or pinched. Work your way around the tire, ensuring the tube sits evenly inside.
Step 8: Seat the Second Tire Bead
Now, seat the other side of the tire bead onto the rim.
- Start opposite the valve: Begin seating the bead opposite the valve.
- Use your thumbs: Use your thumbs to push the tire bead over the rim edge. Work your way around the tire.
- Be careful not to pinch the tube: As you get to the last section of the tire, it can be difficult to seat the bead without pinching the tube. Make sure the tube is pushed up into the tire and away from the rim edge.
- Use tire levers if necessary: If you’re having trouble seating the last section of the bead, use tire levers carefully. Insert the lever under the bead and gently pry it over the rim. Be extra careful not to pinch the tube.
Step 9: Check the Tire Seating
Before inflating the tire fully, make sure the tire is seated evenly around the rim.
- Inspect the tire: Look for a line on the tire sidewall that should be an even distance from the rim all the way around.
- Adjust if necessary: If you see any sections where the tire is not seated correctly, deflate the tire slightly and use your thumbs to push the bead into place.
Step 10: Inflate the Tire
Inflate the tire to the correct pressure. The recommended pressure is usually printed on the tire sidewall. A floor pump with a gauge is ideal for this.
- Connect the pump: Attach the pump head to the valve.
- Inflate to recommended pressure: Inflate the tire to the pressure recommended on the tire sidewall. Mountain bike tires typically range from 25 to 35 PSI, but check your tire for the exact range.
- Check the seating again: As you inflate the tire, watch the tire bead to make sure it’s seating evenly.
Step 11: Reinstall the Wheel
Now that the tire is inflated, you can put the wheel back on your bike.
- Position the wheel: Carefully slide the wheel back into the dropouts, making sure it’s centered.
- Secure the wheel: Close the quick-release lever or tighten the thru-axle to the correct torque.
- Reconnect the brakes: Reconnect the brake cable or adjust the brake pads.
Step 12: Test Ride
Before hitting the trails, take a short test ride to make sure everything is working properly.
- Check the brakes: Make sure the brakes are working effectively.
- Listen for any unusual noises: Pay attention to any rubbing or clicking sounds that could indicate a problem.
- Adjust if necessary: If you notice any issues, stop and make adjustments before continuing your ride.
Tips for Preventing Future Flats
Here are some tips to help you avoid flats in the future:
- Use tire sealant: Tire sealant can seal small punctures automatically.
- Check tire pressure regularly: Maintain the correct tire pressure to avoid pinch flats.
- Inspect your tires: Look for cuts, embedded objects, or wear and tear.
- Ride carefully: Avoid sharp rocks and debris on the trail.
Choosing the Right Mountain Bike Tire

Selecting the right tire can significantly improve your riding experience. Here’s what to consider:
- Tire Size: Ensure the tire size matches your bike and rims. Common mountain bike tire sizes include 26″, 27.5″, and 29″.
- Tire Width: Wider tires offer more grip and comfort but can be slower. Narrower tires are faster but provide less traction.
- Tread Pattern: Choose a tread pattern that suits your riding conditions. Aggressive treads are better for loose terrain, while smoother treads are faster on hardpack.
- Tire Compound: Softer compounds offer more grip but wear out faster. Harder compounds are more durable but provide less traction.
Here’s a quick guide to help you choose the right tire based on the terrain:
| Terrain | Tread Pattern | Compound |
|---|---|---|
| Hardpack | Smooth, low-profile | Hard |
| Loose | Aggressive, knobby | Soft |
| Muddy | Deep, widely spaced knobs | Soft |
| Mixed | Versatile, medium knobs | Medium |
Mountain Bike Tire Types

There are a few different types of mountain bike tires you should know about:
- Tubeless Tires: These tires don’t require an inner tube and use sealant to prevent leaks. They offer better traction, lower rolling resistance, and fewer pinch flats.
- Clincher Tires: These are the most common type of tire and use an inner tube. They are easy to install and maintain.
- Folding Tires: These tires have a Kevlar or carbon fiber bead that allows them to be folded for easy storage and transport. They are typically lighter and more expensive than wire bead tires.
- Wire Bead Tires: These tires have a wire bead that makes them more durable but less flexible. They are typically more affordable than folding tires.
Understanding Tire Pressure
Proper tire pressure is crucial for performance, comfort, and preventing flats. Here’s what you need to know:
- PSI Range: Check the tire sidewall for the recommended pressure range.
- Rider Weight: Heavier riders need higher pressure, while lighter riders can use lower pressure.
- Terrain: Ride with lower pressure on rough terrain for better grip and comfort. Increase pressure on smooth surfaces for faster rolling.
- Tire Width: Wider tires can be run at lower pressures than narrower tires.
Here’s a table to help you determine the right tire pressure based on rider weight and tire width:
| Rider Weight (lbs) | Tire Width (inches) | Recommended Pressure (PSI) |
|---|---|---|
| 120-150 | 2.2-2.3 | 22-25 |
| 150-180 | 2.2-2.3 | 25-28 |
| 180-210 | 2.2-2.3 | 28-31 |
| 210-240 | 2.2-2.3 | 31-34 |
| 120-150 | 2.4-2.6 | 20-23 |
| 150-180 | 2.4-2.6 | 23-26 |
| 180-210 | 2.4-2.6 | 26-29 |
| 210-240 | 2.4-2.6 | 29-32 |
FAQ: Mountain Bike Tire Replacement
Here are some frequently asked questions about mountain bike tire replacement.
Q: How often should I replace my mountain bike tires?
A: It depends on how often you ride and the type of terrain. Inspect your tires regularly for wear and tear. Replace them when the tread is worn down or if you notice any cuts or damage.
Q: Can I use the same tube for my new tire?
A: If the tube is in good condition and doesn’t have any patches, you can reuse it. However, it’s always a good idea to use a new tube to avoid potential problems.
Q: What is a tire lever, and how do I use it?
A: A tire lever is a tool used to pry the tire bead off the rim. Insert the lever under the bead and hook it onto a spoke. Use a second lever a few inches away to pry that section of the bead off the rim.
Q: What does PSI mean when referring to tire pressure?
A: PSI stands for pounds per square inch, which is the unit of measurement for tire pressure. Check your tire sidewall for the recommended PSI range.
Q: How do I know if my tire is seated correctly on the rim?
A: Look for a line on the tire sidewall that should be an even distance from the rim all the way around. If you see any sections where the tire is not seated correctly, deflate the tire slightly and use your thumbs to push the bead into place.
Q: What is tubeless-ready, and should I use it?
A: Tubeless-ready means that your rims and tires are designed to be used without inner tubes. Using tubeless setup can prevent flats and improve traction, making it a great choice for mountain biking.
Q: Can I change a mountain bike tire without tools?
A: While it’s possible in some cases, it’s not recommended. Using tire levers makes the job much easier and reduces the risk of damaging the tire or rim. Always carry tire levers with you on the trail.
Conclusion
Replacing your mountain bike tire is a straightforward process once you know the steps. By following this guide, you can confidently change your tires and keep your bike in top condition. Remember to use the right tools, choose the correct tire for your riding conditions, and maintain proper tire pressure. Now, get out there and enjoy the trails!


