
Mountain Bike Handlebar Types: Find YOUR Perfect Fit
Mountain Bike Handlebar Types: A Beginner’s Guide
Quick Summary: Mountain bike handlebars come in several types, each affecting your riding style and control. Flat bars offer direct steering, while riser bars provide more comfort and leverage. Downhill bars are wide for stability at high speeds. Understanding these differences helps you choose the right handlebar for your riding needs, improving both performance and comfort on the trail.
Choosing the right handlebar for your mountain bike can feel overwhelming. With so many shapes and sizes, it’s tough to know where to start. But don’t worry! Selecting the perfect handlebar can significantly improve your comfort and control. This guide breaks down the different types of mountain bike handlebars, explaining their pros and cons so you can make the best choice for your riding style. Let’s get rolling!
Understanding Mountain Bike Handlebars

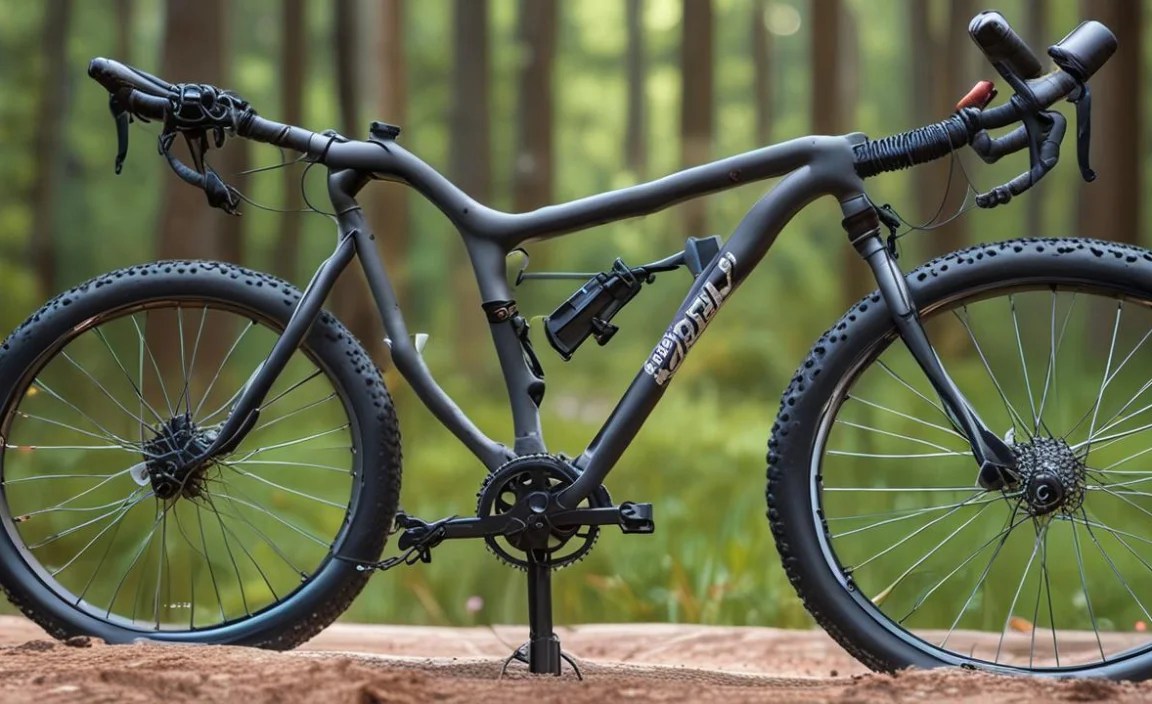
Mountain bike handlebars aren’t just about steering; they play a crucial role in your riding posture, control, and overall comfort. The right handlebar can enhance your ability to navigate challenging trails, absorb shocks, and maintain balance. Different handlebar types cater to different riding styles, from cross-country to downhill.
Key Handlebar Measurements
Before diving into the types, let’s cover the essential measurements:
- Width: The distance from one end of the bar to the other. Wider bars offer more control and leverage, while narrower bars are better for tight spaces.
- Rise: The vertical distance from the center of the clamping area to the highest point of the bar. Higher rise provides a more upright riding position.
- Sweep (Backsweep and Upsweep): Backsweep is how far the bar angles back toward the rider, affecting wrist comfort. Upsweep is the upward angle of the bar ends.
- Clamp Diameter: The diameter of the handlebar where it attaches to the stem (typically 31.8mm or 35mm).
Types of Mountain Bike Handlebars

Now, let’s explore the main types of mountain bike handlebars:
1. Flat Bars
Flat bars are straight and offer a direct connection to the front wheel. They’re lightweight and provide precise steering, making them popular for cross-country (XC) riding.
Pros:
- Lightweight
- Direct steering
- Good for climbing
Cons:
- Less comfortable on long rides
- Limited shock absorption
- May cause wrist strain
2. Riser Bars
Riser bars have an upward bend (rise) and backsweep, providing a more upright and comfortable riding position. They offer better control and shock absorption compared to flat bars.
Pros:
- More comfortable
- Better control
- Improved shock absorption
Cons:
- Slightly heavier than flat bars
- Can reduce climbing efficiency
3. Downhill Bars
Downhill bars are wide and have a significant rise, designed for maximum control and stability at high speeds. They’re built to withstand the demands of aggressive downhill riding.
Pros:
- Maximum control and stability
- Durable construction
- Ideal for aggressive riding
Cons:
- Heavy
- Not suitable for climbing
- Less agile in tight spaces
4. Enduro Bars
Enduro bars strike a balance between downhill and trail bars. They offer a comfortable rise and width that enhances control without sacrificing climbing ability, making them versatile for varied terrains.
Pros:
- Versatile for different terrains
- Good balance of control and climbing ability
- Comfortable for long rides
Cons:
- Not as specialized as downhill or XC bars
5. BMX-Style Bars
BMX-style bars have a high rise and significant backsweep, offering a very upright riding position. While not common on mountain bikes, they can be used for dirt jumping or park riding.
Pros:
- Very upright riding position
- Good for tricks and jumps
Cons:
- Not efficient for long rides
- Limited control on trails
Handlebar Comparison Table
Here’s a quick comparison table to help you see the differences at a glance:
| Handlebar Type | Rise | Width | Best For | Pros | Cons |
|---|---|---|---|---|---|
| Flat Bar | Low | Narrow to Medium | Cross-Country (XC) | Lightweight, Direct Steering | Less Comfortable, Limited Shock Absorption |
| Riser Bar | Medium | Medium to Wide | Trail Riding | Comfortable, Good Control | Slightly Heavier |
| Downhill Bar | High | Wide | Downhill | Maximum Control, Durable | Heavy, Poor for Climbing |
| Enduro Bar | Medium | Medium to Wide | Enduro/All Mountain | Versatile, Balanced Control and Climbing | Not Highly Specialized |
| BMX-Style Bar | High | Medium | Dirt Jumping, Park Riding | Upright Position, Good for Tricks | Inefficient, Limited Trail Control |
Choosing the Right Handlebar

Selecting the right handlebar involves considering your riding style, terrain, and personal preferences. Here’s a step-by-step guide:
- Identify Your Riding Style: Are you a cross-country racer, a trail rider, or a downhill enthusiast?
- Consider the Terrain: Do you ride mostly smooth trails, rocky terrain, or steep descents?
- Determine Your Preferred Riding Position: Do you prefer an upright, comfortable position or a more aggressive, forward-leaning stance?
- Experiment with Different Widths and Rises: Visit a local bike shop and try different handlebars to see what feels best.
- Read Reviews: Research different brands and models to get insights from other riders.
Width Considerations
Handlebar width significantly impacts your control and comfort. Here’s a general guideline:
- Narrower Bars (700-740mm): Best for cross-country, providing quick steering and navigating tight trails.
- Medium Bars (740-780mm): Suitable for trail riding, offering a balance of control and maneuverability.
- Wider Bars (780-820mm): Ideal for downhill and enduro, providing maximum stability and leverage.
To determine the ideal width, stand with your arms extended and measure the distance between your hands. This measurement can serve as a starting point for selecting your handlebar width. Remember, you can always cut down a wider bar if needed.
Rise and Sweep Adjustments
The rise and sweep of your handlebar affect your wrist and back comfort. Experiment with different rises to find a position that feels natural and reduces strain. Backsweep affects wrist angle, so choose a sweep that aligns with your natural hand position.
Installation and Adjustment
Installing and adjusting your handlebar is a straightforward process. Here’s a general guide:
- Remove the Old Handlebar: Loosen the stem bolts and remove the old handlebar.
- Install the New Handlebar: Place the new handlebar in the stem and tighten the bolts to the manufacturer’s specified torque. Use a torque wrench to avoid over-tightening.
- Adjust the Position: Rotate the handlebar until you find a comfortable and natural position.
- Secure the Controls: Reattach the brake levers, shifters, and grips, ensuring they are properly aligned and tightened.
- Test Ride: Take a short test ride to ensure the handlebar feels comfortable and secure. Make any necessary adjustments.
Safety Tip: Always use a torque wrench when tightening handlebar bolts. Over-tightening can damage the handlebar or stem, leading to a potential failure. If you’re unsure about any step, consult a professional bike mechanic.
For more in-depth guidance, Park Tool offers a comprehensive guide on handlebar installation and adjustment: Park Tool Handlebar Installation.
Material Matters: Aluminum vs. Carbon Fiber

Mountain bike handlebars are typically made from aluminum or carbon fiber. Each material offers distinct advantages and disadvantages.
Aluminum Handlebars
Aluminum handlebars are durable, affordable, and widely available. They provide good strength and stiffness for most riding conditions.
Pros:
- Affordable
- Durable
- Good strength and stiffness
Cons:
- Heavier than carbon fiber
- Less vibration damping
Carbon Fiber Handlebars
Carbon fiber handlebars are lightweight and offer excellent vibration damping, improving comfort on long rides. They are also very strong but can be more expensive.
Pros:
- Lightweight
- Excellent vibration damping
- High strength
Cons:
- More expensive
- Can be damaged by overtightening
Maintenance Tips for Handlebars
Proper maintenance can extend the life of your mountain bike handlebars. Here are some tips:
- Inspect Regularly: Check for cracks, dents, or signs of damage, especially after crashes.
- Clean Regularly: Wipe down your handlebars with a damp cloth to remove dirt and grime.
- Torque Check: Periodically check the torque of the stem bolts to ensure they are properly tightened.
- Replace When Necessary: If you notice any signs of damage or fatigue, replace your handlebars immediately.
FAQ: Mountain Bike Handlebar Types
Q1: What is handlebar rise?
Handlebar rise is the vertical distance from the center of the clamping area to the highest point of the bar. It affects your riding posture, with higher rises providing a more upright position.
Q2: What is handlebar sweep?
Handlebar sweep refers to the angle at which the handlebar bends back toward the rider (backsweep) and upward (upsweep). It affects wrist comfort and control.
Q3: How do I choose the right handlebar width?
Consider your riding style and terrain. Narrower bars (700-740mm) are best for cross-country, medium bars (740-780mm) for trail riding, and wider bars (780-820mm) for downhill and enduro.
Q4: What’s the difference between aluminum and carbon fiber handlebars?
Aluminum handlebars are durable and affordable, while carbon fiber handlebars are lightweight and offer better vibration damping, improving comfort.
Q5: How often should I replace my handlebars?
Inspect your handlebars regularly and replace them if you notice any cracks, dents, or signs of damage, especially after crashes.
Q6: Can I cut down a handlebar that is too wide?
Yes, you can cut down a wider handlebar to achieve the desired width. Use a pipe cutter and be sure to deburr the cut edges.
Q7: What is the ideal handlebar material for downhill riding?
Both aluminum and carbon fiber handlebars are used in downhill riding. Aluminum provides durability and affordability, while carbon fiber offers weight savings and vibration damping. The choice depends on personal preference and budget.
Conclusion
Choosing the right mountain bike handlebar is essential for comfort, control, and performance. By understanding the different types and considering your riding style, terrain, and personal preferences, you can select a handlebar that enhances your riding experience. Whether you prefer the lightweight precision of a flat bar or the stability of a wide downhill bar, the perfect handlebar is out there waiting for you. So, experiment, research, and find the one that feels just right!


