How to Fix a Pinched Inner Tube: Easy Pro Guide
Quick Summary: Fixing a pinched inner tube, also known as a “snakebite” or “pinch flat,” involves removing the wheel, taking out the tube, patching or replacing the tube, and carefully remounting the tire to avoid re-pinching. Always check your tire pressure and ensure the tire is properly seated on the rim before inflating.
Ever been cruising along, enjoying a smooth bike ride, when suddenly you hear that dreaded hissing sound? Chances are, you’ve got a pinched inner tube. Don’t worry, it happens to the best of us! A pinched inner tube, often called a snakebite flat, occurs when the tube gets squeezed between the tire and the rim, causing those tell-tale double punctures. The good news is, fixing it is totally doable with a few simple steps. I’m Raymond Ammons from BicyclePumper.com, and I’m here to guide you through the process. We’ll cover everything from identifying a pinch flat to getting you back on the road in no time. Let’s get started!
Understanding Pinched Inner Tubes
A pinched inner tube, or “snakebite,” is a common cycling woe. It’s essential to understand what causes it and how to prevent it. Let’s dive into the details.
What Causes a Pinched Inner Tube?
A pinch flat happens when your inner tube gets squeezed between the tire and the rim of your wheel. This usually occurs when you hit a bump, pothole, or other obstacle with insufficient tire pressure. The impact compresses the tire to the point where the rim edges pinch the tube, resulting in two small holes that resemble a snakebite. Several factors contribute to this:
- Low Tire Pressure: The most common culprit. When your tires aren’t inflated enough, they’re more susceptible to compression and pinching.
- Impact with Obstacles: Hitting potholes, rocks, or curbs can cause the tire to compress suddenly and pinch the tube.
- Improper Tire Installation: If the tire isn’t seated correctly on the rim, it can create weak spots where the tube is more likely to get pinched.
- Overloading the Bike: Carrying too much weight on your bike increases the pressure on the tires, making them more prone to pinch flats.
Preventing Pinched Inner Tubes
Prevention is always better than cure! Here are some strategies to avoid pinch flats:
- Maintain Proper Tire Pressure: Check your tire pressure before each ride. The recommended pressure is usually printed on the sidewall of your tire. Use a reliable bike pump with a pressure gauge to ensure accuracy.
- Choose the Right Tires: Consider using tires with puncture-resistant features. These tires often have an extra layer of material that protects the inner tube from punctures and pinches.
- Install Tire Liners or Sealant: Tire liners are placed between the tire and the tube to provide an additional barrier against punctures. Tire sealant can automatically seal small punctures as they occur.
- Ride Smoothly: Be mindful of road hazards and try to avoid hitting potholes and other obstacles. If you can’t avoid them, try to lighten your weight on the saddle as you pass over them.
- Use Wider Tires: Wider tires allow you to run lower pressures without increasing the risk of pinch flats. This can improve comfort and traction, especially on rough roads.
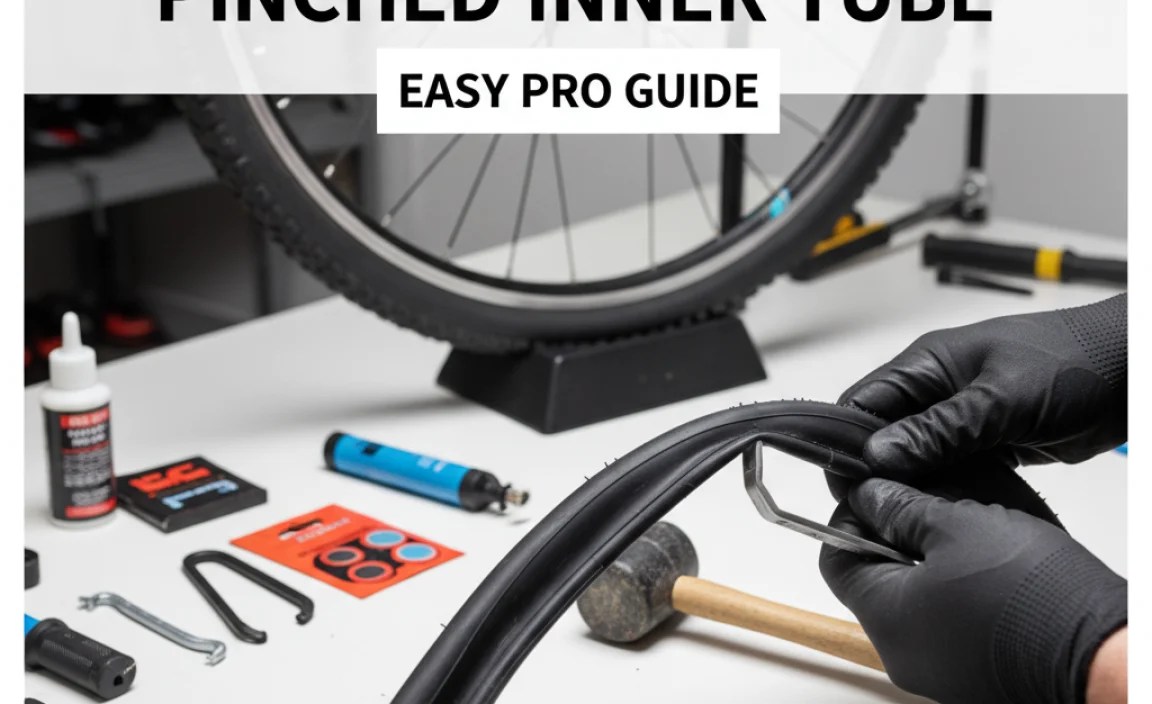
Tools and Materials You’ll Need

Before you start fixing that pinched inner tube, gather all the necessary tools and materials. Having everything on hand will make the process smoother and faster. Here’s a comprehensive list:
- Spare Inner Tube: Make sure it’s the correct size for your wheel.
- Tire Levers: These help you remove the tire from the rim.
- Bike Pump: To inflate the tube after installation. A mini-pump for on-the-go repairs and a floor pump for home use are both good to have.
- Multi-Tool or Wrenches: For removing the wheel from your bike.
- Patch Kit (Optional): If you prefer to patch the tube instead of replacing it.
- Rag or Paper Towels: For cleaning the rim and tire.
- Small Container of Water (Optional): To help locate the puncture in the tube.
- Tire Pressure Gauge: To ensure you inflate the tire to the correct pressure.
Here’s a quick table summarizing the essentials:
| Tool/Material | Purpose |
|---|---|
| Spare Inner Tube | Replacement for the punctured tube |
| Tire Levers | Removing the tire from the rim |
| Bike Pump | Inflating the new or patched tube |
| Multi-Tool/Wrenches | Removing the wheel from the bike |
| Patch Kit | Repairing the punctured tube (optional) |
| Rag/Paper Towels | Cleaning the rim and tire |
| Water Container | Locating the puncture (optional) |
| Tire Pressure Gauge | Ensuring correct inflation |
Step-by-Step Guide to Fixing a Pinched Inner Tube

Alright, let’s get to the main event! Follow these steps to fix your pinched inner tube and get back to riding. I’ll walk you through each stage with clear, simple instructions.
Step 1: Safety First and Preparation
Before you start, find a safe place away from traffic. Flip your bike upside down so it rests on the seat and handlebars. This makes it easier to work on the wheel. If you have quick-release wheels, you can skip the next part of this step. Otherwise, use a wrench to loosen the nuts holding the wheel in place.
Step 2: Remove the Wheel
For the front wheel, simply loosen the quick release or nuts and lift the fork to remove the wheel. For the rear wheel, shift the chain to the smallest cog to create slack. Then, loosen the quick release or nuts and carefully maneuver the wheel out of the frame, making sure to clear the chain and derailleur. If you’re struggling, don’t force it – gently wiggle the wheel until it comes free. Check out Park Tool’s guide on wheel removal for more detailed instructions and visuals.
Step 3: Remove the Tire
Deflate the tire completely by pressing the valve core with a small tool or the cap of your valve cap (if it has one). Insert one tire lever under the tire bead and hook it onto a spoke. Insert a second tire lever a few inches away and pry that section of the tire off the rim as well. Once you have a section of the tire off, you can usually slide one lever around the rim to completely remove one side of the tire. Be careful not to pinch the inner tube with the levers during this process!
Step 4: Remove the Inner Tube
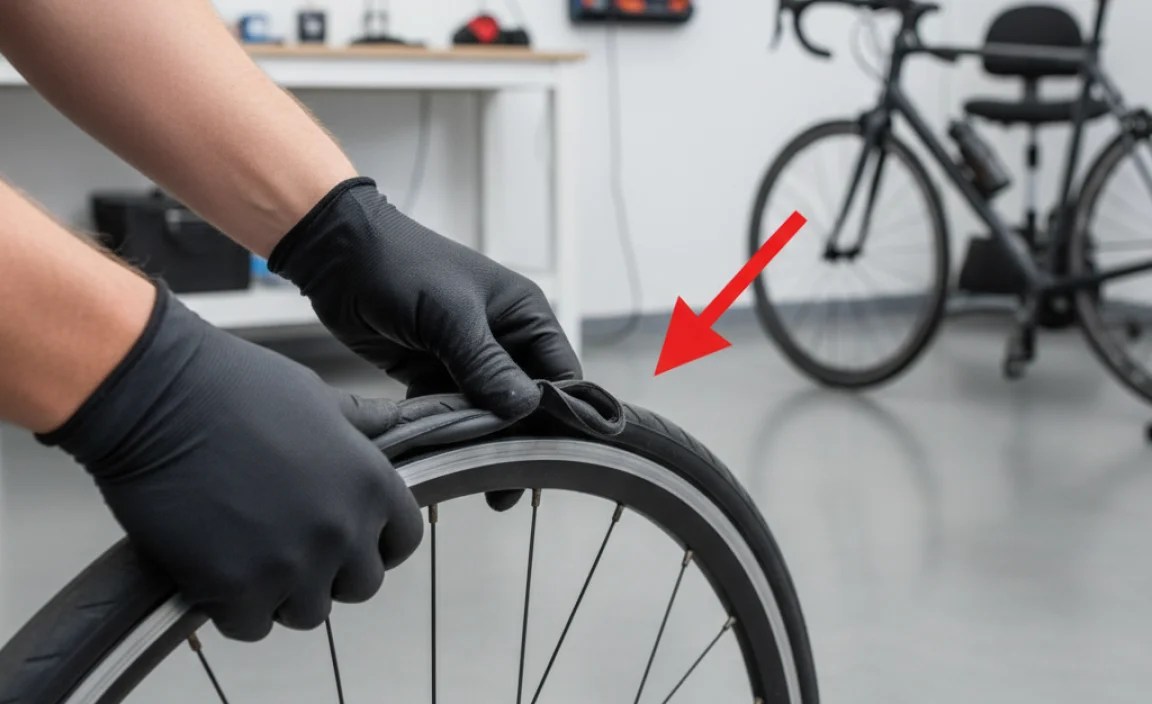
With one side of the tire removed, you can now pull out the inner tube. Start by removing the valve stem from the rim. Then, gently pull the tube out from under the tire, working your way around the wheel. Inspect the tire inside and out for any sharp objects (glass, thorns, metal shards) that may have caused the pinch flat. Carefully remove any debris to prevent future punctures.
Step 5: Inspect the Tire
Run your fingers along the inside of the tire to check for any sharp objects that might still be lodged in the rubber. If you find anything, carefully remove it. A small shard of glass or a tiny thorn can cause another flat if you don’t find it. Also, check the tire for any cuts or damage that might need attention.
Step 6: Replace or Patch the Inner Tube
Now you have two options: replace the inner tube with a new one or patch the existing tube. Replacing is faster and more reliable, especially if you’re on the road. If you choose to patch, follow the instructions on your patch kit. Typically, this involves roughing the area around the puncture with sandpaper, applying glue, waiting for it to become tacky, and then applying the patch. Hold the patch firmly in place for a few minutes to ensure a good seal.
Step 7: Partially Inflate the Tube
Before reinstalling the tube, inflate it slightly. This gives it some shape and helps prevent it from getting pinched during installation. Just a little bit of air is enough – you don’t want it fully inflated yet.
Step 8: Install the Tube
Start by inserting the valve stem into the hole in the rim. Then, carefully tuck the tube into the tire, working your way around the wheel. Make sure the tube isn’t twisted or pinched under the tire bead. This step requires a bit of finesse, so take your time.
Step 9: Seat the Tire
Now, carefully work the tire back onto the rim. Start opposite the valve stem and use your thumbs to push the tire bead over the rim. If you find it difficult, make sure the tube isn’t pinched and that the tire bead is sitting in the center of the rim channel. Sometimes, the last section of the tire can be tough to get on. Use tire levers if needed, but be extremely careful not to pinch the tube. A helpful technique is to push the tire towards the center of the rim, which gives you more slack to work with.
Step 10: Check the Tire Seating
Before inflating fully, inspect both sides of the tire to ensure the tire bead is evenly seated in the rim. Look for a small line on the tire sidewall that should be an equal distance from the rim all the way around. If you see any bulges or dips, deflate the tire slightly and use your thumbs to push the tire into place. This step is crucial to prevent future pinch flats and ensure a smooth ride.
Step 11: Inflate the Tire
Inflate the tire to the recommended pressure, which is usually printed on the tire sidewall. Use a bike pump with a pressure gauge to ensure you don’t over-inflate. Over-inflation can cause the tire to explode, while under-inflation increases the risk of pinch flats. Aim for the middle of the recommended pressure range for a good balance of comfort and performance.
Step 12: Reinstall the Wheel
Reinstall the wheel onto your bike. For the front wheel, simply insert the wheel between the fork blades and tighten the quick release or nuts. For the rear wheel, carefully position the wheel in the frame, making sure the chain is properly seated on the smallest cog. Then, tighten the quick release or nuts. Ensure the wheel is centered in the frame before fully tightening to avoid any rubbing against the brake pads or frame.
Step 13: Final Check
Give the wheel a spin to make sure it rotates freely and doesn’t rub against the brake pads or frame. Squeeze the brakes to ensure they’re working properly. If everything looks good, you’re ready to ride!
Advanced Tips and Tricks
Want to take your flat-fixing skills to the next level? Here are some advanced tips and tricks that can help you handle pinch flats like a pro:
- Use Talcum Powder: Before installing a new tube, lightly dust it with talcum powder. This reduces friction between the tube and the tire, which can help prevent pinch flats and extend the life of your tube.
- Carry a CO2 Inflator: For quick inflation on the road, a CO2 inflator can be a lifesaver. These devices use compressed carbon dioxide cartridges to inflate your tire in seconds. Just be sure to use them carefully and follow the instructions, as they can over-inflate your tire if you’re not careful.
- Tubeless Conversion: Consider converting to tubeless tires. Tubeless tires use sealant instead of an inner tube, which can seal small punctures as they occur. This reduces the risk of pinch flats and allows you to run lower tire pressures for improved comfort and traction.
- Rim Tape: Always check your rim tape to make sure it’s in good condition. The rim tape covers the spoke holes and prevents the tube from rubbing against them, which can cause punctures. If the rim tape is damaged or worn, replace it before installing a new tube.
FAQ About Fixing Pinched Inner Tubes
Got more questions? Here are some frequently asked questions about fixing pinched inner tubes:
- Why do my inner tubes keep getting pinched?
- Repeated pinch flats are usually caused by low tire pressure, riding over rough terrain, or improper tire installation. Make sure to inflate your tires to the recommended pressure, avoid hitting potholes and other obstacles, and ensure the tire is properly seated on the rim.
- Can I use any tire levers to remove the tire?
- While most tire levers will work, some are better than others. Look for levers that are strong, durable, and have a smooth, rounded edge to avoid damaging the rim or tire. Plastic levers are generally preferred over metal levers, as they are less likely to scratch the rim.
- How do I know if my tire is properly seated on the rim?
- Check the tire sidewall for a small line that should be an equal distance from the rim all the way around. If you see any bulges or dips, deflate the tire slightly and use your thumbs to push the tire into place. Inflate the tire to the recommended pressure and check again.
- Is it better to patch or replace an inner tube?
- Replacing an inner tube is faster and more reliable, especially when you’re on the road. However, patching can be a more economical option if you have the time and patience. A properly applied patch can last for the life of the tube.
- What is the correct tire pressure for my bike?
- The recommended tire pressure is usually printed on the sidewall of your tire. It’s important to stay within this range to avoid pinch flats and ensure optimal performance. Use a bike pump with a pressure gauge to accurately inflate your tires.
- Can I prevent pinch flats by using thicker inner tubes?
- While thicker inner tubes can provide some additional protection against punctures, they won’t completely eliminate the risk of pinch flats. Maintaining proper tire pressure and avoiding road hazards are still the most effective ways to prevent pinch flats.
- What should I do if I can’t remove the tire from the rim?
- If you’re having trouble removing the tire, make sure it’s fully deflated and that the tire bead is pushed into the center of the rim channel. Use tire levers carefully, and avoid pinching the inner tube. If the tire is still stuck, try using a different set of tire levers or asking for help from a more experienced cyclist.
Conclusion
And there you have it! Fixing a pinched inner tube is a skill every cyclist should have. By following these steps and tips, you’ll be able to handle most flats with confidence. Remember, prevention is key: keep your tires properly inflated, watch out for road hazards, and inspect your tires regularly. Now, get back out there and enjoy the ride! I’m Raymond Ammons from BicyclePumper.com, always here to help you keep your bike in top shape.