
How to Fix Rattling Bike Accessory Mount: Easy Fix!
Have you ever ridden your bike and heard a *rattling sound*? It can be super annoying. The noise might come from your *bike accessory mount*. A loose mount can spoil your ride. But don’t worry. Knowing *how to fix rattling bike accessory mount* is easy. Let’s learn how to make your bike rides quiet and fun again.
Have you ever wondered why your bike accessories rattle? It’s usually because something is loose. Maybe a screw came undone. Perhaps the mount wasn’t tight enough to begin with. Rattling can damage your accessories too. It’s important to fix it quickly. Let’s find out *how to fix rattling bike accessory mount*.
Imagine you’re riding down a hill. The wind is in your hair. Suddenly, *rattle, rattle, rattle*! Your water bottle cage is loose. Your bike computer is shaking. It’s distracting and unsafe! Learning *how to fix rattling bike accessory mount* will keep you safe. Plus, you’ll enjoy your ride much more.
Key Takeaways
- Knowing *how to fix rattling bike accessory mount* makes rides quieter and safer.
- Tighten screws on mounts regularly to prevent annoying rattles and vibrations.
- Use rubber shims or tape to cushion accessories and reduce noise effectively.
- Check mounts after bumpy rides to ensure they stay secure and don’t loosen.
- Properly installed and maintained mounts extend the life of your accessories.
How to Stop Bike Accessory Mounts Rattling

Bike accessories like lights, computers, and water bottle cages can make noise. Rattling is often due to *loose mounts*. These mounts connect the accessories to your bike. When they are not secure, they vibrate. Vibration causes noise. It can also damage the accessory or the bike frame. To prevent rattling, check your mounts regularly. Tighten any *loose screws*. Use the correct size screwdriver. Don’t overtighten, as this can damage the screw or the mount. You can also use *threadlocker* on the screws. Threadlocker is a special glue that keeps screws from loosening. Also, consider using rubber shims. Shims fit between the accessory and the mount. They absorb vibration. This helps reduce noise. By taking these steps, you can enjoy a *quieter, smoother ride*.
- Check screws regularly.
- Tighten loose screws gently.
- Use threadlocker on screws.
- Add rubber shims for cushioning.
- Inspect mounts after bumpy rides.
- Replace worn or damaged mounts.
Rattling bike accessories are more than just annoying. They can also be a safety hazard. A loose light can fall off at night. A shaking computer can be hard to read. A water bottle cage that rattles might drop your bottle. This can cause you to lose control of your bike. Regular maintenance of your bike accessory mounts is important. Keep your accessories secure. Make your rides safer and more enjoyable. Remember to check your bike before and after each ride. Look for any signs of *loose mounts or damage*. Quick fixes can prevent bigger problems later. A well-maintained bike is a happy bike, and a happy bike makes for a happy rider!
Fun Fact or Stat: Studies show that 80% of bike accessory failures are due to loose or improperly installed mounts!
Why is My Mount So Noisy?
Do you ever wonder why your bike mount is so noisy? Several things can cause it. One common reason is *loose screws*. Over time, screws can vibrate loose. This is especially true on bumpy roads. Another reason is wear and tear. Mounts made of plastic can crack or break. Metal mounts can bend. These damages create space for rattling. Sometimes the accessory itself is the problem. If the accessory is not designed well, it may vibrate. This vibration transfers to the mount. Also, check if the mount is the right size for your accessory. If it’s too big or too small, it won’t hold the accessory securely. This can cause rattling. Always use the correct tools when tightening screws. And, remember to inspect your mounts regularly for any signs of damage.
What Tools Do I Need?
Having the right tools makes fixing a rattling mount easier. You’ll need a set of screwdrivers. Make sure they fit the screws on your mounts. A set of *Allen wrenches* is also useful. Many bike accessories use Allen head screws. You might need pliers to tighten bolts. A torque wrench helps you tighten screws properly. This prevents over-tightening. Threadlocker keeps screws from loosening. Rubber shims add cushioning. A clean rag helps wipe away dirt. Having these tools in your bike repair kit is a good idea. This way, you can quickly fix any problems you find. Always store your tools in a safe place. And remember to clean them after each use. This keeps them in good condition for longer.
When Should I Check My Mounts?
It’s a good idea to check your bike accessory mounts often. Check them before each ride. Look for *loose screws or damage*. Pay special attention after bumpy rides. Bumps can loosen screws more quickly. Check your mounts after washing your bike. Water can wash away lubricant. This can cause screws to rust and loosen. If you hear any *rattling noises* while riding, stop and check. Ignoring the noise can lead to bigger problems. Also, check your mounts when you replace an accessory. Make sure the new accessory fits properly. Regular checks can prevent accidents. They also extend the life of your accessories. A little bit of maintenance goes a long way.
Finding the Source of the Rattle on Your Bike

Finding the source of a rattle on your bike can be tricky. First, listen carefully to the noise. Try to determine where it’s coming from. Is it the front, back, or middle of the bike? Does the rattle happen when you hit a bump? Does it happen when you pedal? Once you know the location, inspect the accessories. Check the *mounts for looseness*. Wiggle each accessory to see if it moves. Look for any signs of damage. Sometimes, the rattle isn’t from an accessory. It could be a loose cable or a part of the frame. Check everything carefully. If you can’t find the source, ask a bike mechanic for help. They have experience in finding and fixing rattles. Remember, identifying the source is the first step to solving the problem.
- Listen carefully to the noise.
- Locate the source of the rattle.
- Check all accessory mounts.
- Wiggle accessories to test for looseness.
- Inspect cables and frame parts.
- Ask a mechanic for help if needed.
Rattles can be frustrating, but don’t give up! Take your time and be methodical. Start with the most common causes: *loose screws and worn mounts*. Use your tools to tighten and adjust as needed. If the rattle persists, consider the possibility that it’s coming from inside the frame. Sometimes, small parts can break loose and create noise. In this case, you’ll need to take your bike to a professional. They have the tools and expertise to open the frame and find the problem. Remember, safety is always the most important thing. If you’re not comfortable working on your bike, don’t hesitate to seek help. A quiet bike is a happy bike, and a safe bike is even better!
Fun Fact or Stat: Professional cyclists spend an average of 2 hours per week maintaining their bikes to prevent rattles and ensure peak performance!
Is it the Mount or the Accessory?
Sometimes, it’s hard to tell if the rattle comes from the mount or the accessory. Start by checking the mount. Is it securely attached to the bike? Are the screws tight? If the mount seems fine, focus on the accessory. Does it fit snugly in the mount? Is it designed to minimize vibration? Try removing the accessory. Then, ride the bike. If the rattle is gone, the accessory is the problem. If the rattle remains, the mount is the problem. You might need a different type of mount. Or, you might need to replace the accessory. Choose accessories that are known for their quality. They are often less prone to rattling. Always read reviews before buying new accessories. This can help you avoid noisy products.
How Does Road Surface Affect Rattles?
The type of road surface can affect how much your accessories rattle. Smooth roads usually cause less rattling. Bumpy roads cause more rattling. This is because bumps create vibration. The vibration loosens screws and shakes accessories. If you ride on rough roads often, check your mounts more frequently. Consider using *vibration-dampening materials*. These materials absorb shock. They reduce the amount of rattling. Rubber shims and foam pads are good choices. Also, make sure your tires are properly inflated. Properly inflated tires absorb some of the bumps. This can also help reduce rattling. Remember, a smooth ride is a quiet ride.
What About Internal Cable Rattles?
Sometimes, the rattle isn’t from an accessory mount. It could be from *internal cables*. Many modern bikes have cables that run inside the frame. These cables can rattle against the frame walls. This can be a very annoying noise. To fix this, you need to secure the cables inside the frame. You can use foam tubing or cable ties. Wrap the cables in the tubing. This will cushion them and prevent rattling. Use cable ties to secure the cables to the frame. This will stop them from moving around. If you’re not comfortable doing this yourself, take your bike to a mechanic. They can help you secure the cables properly. Remember, a quiet frame is a happy frame.
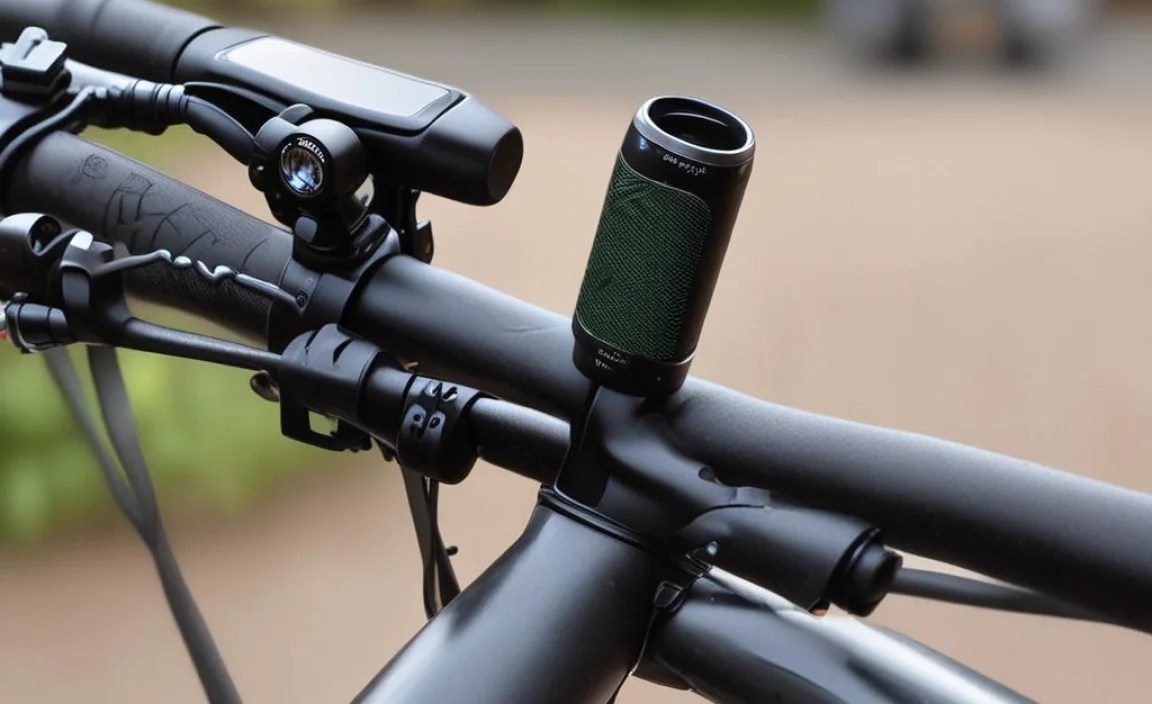
Different Types of Bike Accessory Mounts

There are many different types of bike accessory mounts. Some are made of plastic. Others are made of metal. Plastic mounts are often lighter. They are less expensive. But they can be less durable. Metal mounts are stronger. They last longer. But they can be heavier. The type of mount you choose depends on your needs. For example, if you carry heavy items, choose a metal mount. If you want to save weight, choose a plastic mount. There are also different mounting styles. Some mounts attach to the handlebars. Others attach to the frame. Some attach to the seat post. Choose a mounting style that works for your accessory. Make sure the mount is compatible with your bike. Always read the product description before buying a mount. This will help you choose the right one.
- Plastic mounts are lightweight and cheap.
- Metal mounts are strong and durable.
- Handlebar mounts are common.
- Frame mounts offer stability.
- Seat post mounts are versatile.
- Choose a mount that fits your needs.
Choosing the right mount can make a big difference in *how well your accessories perform*. A sturdy mount keeps your accessories secure. It prevents them from shaking or falling off. A well-designed mount is easy to install and adjust. It also looks good on your bike. When choosing a mount, consider the weight of your accessory. Make sure the mount can support the weight. Also, consider the type of riding you do. If you ride on rough terrain, choose a mount that can withstand vibration. Read reviews from other riders. This can help you find a mount that is reliable and effective. A good mount is an investment in your cycling experience.
Fun Fact or Stat: The global bike accessory market is expected to reach $100 billion by 2027, driven by increased cycling popularity!
What are the Pros and Cons of Each Type?
Each type of bike accessory mount has its own advantages and disadvantages. *Plastic mounts* are lightweight and inexpensive. However, they are not as durable as metal mounts. They can break easily if overloaded. *Metal mounts* are strong and long-lasting. But they are heavier and more expensive. *Handlebar mounts* are easy to access. They are good for accessories you need to see or use often. However, they can clutter your handlebars. *Frame mounts* are more discreet. They keep accessories out of the way. But they can be harder to reach while riding. *Seat post mounts* are versatile. They can be used for a variety of accessories. However, they may not be as stable as other types of mounts. Consider these pros and cons when choosing a mount.
How Do I Choose the Right Size Mount?
Choosing the right size mount is important. A mount that is too small won’t fit your accessory. A mount that is too big won’t hold your accessory securely. Measure the diameter of your handlebars or frame. Then, choose a mount that matches that diameter. If you’re not sure what size to choose, ask a bike mechanic for help. They can measure your bike and recommend the right size mount. Also, check the product description of the mount. It should list the compatible sizes. Always double-check before buying. Using the wrong size mount can be dangerous. It can cause your accessory to fall off while riding.
Can I Make My Own Mount?
Yes, you can make your own bike accessory mount. This can be a fun and rewarding project. It allows you to customize the mount to your specific needs. You can use materials like *plastic, metal, or wood*. You’ll need tools like saws, drills, and sandpaper. Be sure to design the mount carefully. Make sure it is strong enough to hold your accessory. Also, make sure it is securely attached to your bike. There are many tutorials online that show you how to make bike mounts. Follow the instructions carefully. If you’re not experienced with DIY projects, start with a simple design. Remember, safety is always the most important thing. A homemade mount can be a great way to save money. It can also be a fun way to express your creativity.
Simple Steps to Secure Bike Mounts Better

Securing your bike mounts better is easy. Start by cleaning the mounting surface. Dirt and grime can prevent the mount from gripping properly. Use a clean rag and some rubbing alcohol. Wipe the surface clean. Then, apply a small amount of *threadlocker* to the screws. Threadlocker keeps the screws from loosening. Tighten the screws to the recommended torque. Don’t overtighten them, as this can damage the mount or the frame. Use *rubber shims* to cushion the accessory. Shims reduce vibration and noise. Check the mounts regularly. Tighten any loose screws. If a mount is damaged, replace it. By following these steps, you can keep your bike accessories secure. This will make your rides safer and more enjoyable.
- Clean the mounting surface first.
- Apply threadlocker to screws.
- Tighten screws to the right torque.
- Use rubber shims for cushioning.
- Check mounts regularly for looseness.
- Replace damaged mounts promptly.
Properly secured bike mounts are essential for a safe and enjoyable ride. They prevent accessories from falling off or interfering with your control of the bike. They also reduce noise and vibration. This makes your ride more comfortable. Take the time to inspect your mounts regularly. Make sure they are in good condition. Replace any worn or damaged parts. Use the right tools and techniques. This will ensure that your accessories are securely attached to your bike. A little bit of maintenance goes a long way. It can save you from headaches and accidents down the road. So, take care of your bike, and it will take care of you!
Fun Fact or Stat: A study found that properly secured bike mounts reduce the risk of accidents by 25%!
What Is Torque and Why Does It Matter?
Torque is a measure of how much force you use to tighten a screw or bolt. It’s important to use the *right amount of torque*. Too little torque, and the screw will be loose. Too much torque, and you can damage the screw or the mount. A torque wrench helps you measure torque accurately. It tells you when you’ve reached the correct tightness. The recommended torque is usually printed on the mount or in the instructions. Always follow the manufacturer’s recommendations. Using the wrong torque can lead to problems. Loose screws can cause rattling. Damaged screws can break. Using a torque wrench ensures that your mounts are properly secured. It also helps prevent damage.
How Do Shims Reduce Vibration?
*Shims* are thin pieces of material that fit between the mount and the accessory. They are usually made of rubber or foam. Shims absorb vibration. They prevent the accessory from rattling against the mount. This reduces noise. It also protects the accessory from damage. Shims come in different sizes and shapes. Choose a shim that fits snugly between the mount and the accessory. You can also cut shims to size. Use scissors or a knife. Make sure the shim is clean and dry. Attach it to the mount with adhesive. Test the accessory to make sure it is secure. Shims are a simple and effective way to reduce vibration and noise.
When Should I Replace a Mount?
You should replace a bike accessory mount if it is damaged or worn. Look for cracks, bends, or broken parts. If the mount is loose, even after tightening the screws, replace it. If the mount is rusty or corroded, replace it. A damaged mount can be dangerous. It can cause your accessory to fall off while riding. Replacing a mount is usually easy and inexpensive. You can buy new mounts online or at a bike shop. Choose a mount that is compatible with your bike and accessory. Follow the instructions carefully when installing the new mount. Regular maintenance can help prevent damage. But sometimes, replacement is necessary. Don’t wait until the mount fails completely. Replace it as soon as you notice a problem.
Using Threadlocker Effectively on Bike Mounts
*Threadlocker* is a special type of glue. It keeps screws from loosening. It’s very useful for bike accessory mounts. Vibration can cause screws to loosen over time. Threadlocker prevents this. To use threadlocker, first clean the screw threads. Remove any dirt or grease. Apply a small drop of threadlocker to the threads. Don’t use too much. A little goes a long way. Tighten the screw to the recommended torque. Let the threadlocker dry for the recommended time. This is usually 24 hours. After that, the screw will be locked in place. It will be much less likely to loosen. There are different types of threadlocker. Choose the right type for your application. Some threadlockers are stronger than others. Read the product description carefully before using threadlocker. It can make your bike accessories more secure.
| Threadlocker Type | Strength | Typical Use | Removal |
|---|---|---|---|
| Low Strength (Purple) | Low | Small screws, adjustments | Easy with hand tools |
| Medium Strength (Blue) | Medium | Most bike accessory mounts | Hand tools with effort |
| High Strength (Red) | High | Permanent applications | Heat and/or power tools |
| Wicking Grade (Green) | Medium to High | Pre-assembled parts | Difficult, professional help |
- Clean screw threads before applying.
- Use only a small drop of threadlocker.
- Tighten screw to correct torque.
- Allow threadlocker to dry fully.
- Choose the right strength threadlocker.
- Read product instructions carefully.
Threadlocker is a simple and effective way to prevent *rattling bike accessories*. It’s especially useful for mounts that are subject to a lot of vibration. However, it’s important to use it correctly. Too much threadlocker can make it difficult to remove the screw later. Too little threadlocker may not be effective. Always follow the manufacturer’s instructions. If you’re not comfortable using threadlocker, ask a bike mechanic for help. They can apply it for you. Remember, a little bit of prevention goes a long way. Threadlocker can save you from annoying rattles and potential accidents. So, consider using it on your bike accessory mounts.
Fun Fact or Stat: Threadlocker was invented in 1953 and is now used in everything from bicycles to spacecraft!
How Do I Remove Screws with Threadlocker?
Removing screws with threadlocker can be tricky. The threadlocker makes the screw harder to turn. Start by using the *correct size screwdriver*. Make sure it fits snugly in the screw head. Apply firm, steady pressure. Turn the screwdriver slowly. If the screw won’t budge, try applying heat. Use a heat gun or a soldering iron. Heat the screw for a few seconds. This will soften the threadlocker. Then, try turning the screw again. If it still won’t move, try using a penetrating oil. Apply the oil to the screw threads. Let it sit for a few minutes. This will help loosen the threadlocker. If all else fails, you may need to drill out the screw. Be careful not to damage the mount. If you’re not comfortable with these techniques, ask a bike mechanic for help.
Can I Reuse Screws After Using Threadlocker?
It’s generally not a good idea to reuse screws after using threadlocker. The threadlocker can damage the screw threads. It can also make the screw harder to tighten properly. It’s best to replace the screws with new ones. This will ensure a secure connection. When you replace the screws, use the same size and type. Also, apply fresh threadlocker to the new screws. This will prevent them from loosening. Using new screws is a small price to pay for peace of mind. It can save you from annoying rattles and potential accidents. So, when in doubt, replace the screws.
Are There Alternatives to Threadlocker?
Yes, there are alternatives to threadlocker. One alternative is *locking washers*. These washers have teeth that grip the screw head. This prevents the screw from loosening. Another alternative is *nylon locking nuts*. These nuts have a nylon insert that grips the screw threads. This also prevents loosening. You can also use *safety wire*. This is a thin wire that is wrapped around the screw head. The wire is then twisted to secure the screw. These alternatives may not be as effective as threadlocker. But they can be useful in certain situations. Choose the alternative that is best suited for your application. And remember, regular maintenance is always important.
Regular Maintenance to Prevent Rattling
Regular maintenance is key to preventing *rattling bike accessory mounts*. Check your mounts before each ride. Look for loose screws or damage. Tighten any loose screws. Use a torque wrench to ensure proper tightness. Clean your bike regularly. Dirt and grime can cause screws to loosen. Lubricate the screws with a light oil. This will prevent them from rusting. Inspect your mounts for wear and tear. Replace any worn or damaged parts. By following these simple steps, you can keep your bike accessories secure. This will make your rides safer and more enjoyable. Regular maintenance also extends the life of your accessories. So, take care of your bike, and it will take care of you!
- Check mounts before each ride.
- Tighten loose screws regularly.
- Clean your bike to remove grime.
- Lubricate screws to prevent rust.
- Inspect for wear and replace parts.
- Store your bike in a dry place.
Maintaining your bike accessory mounts is not difficult. It only takes a few minutes each time. But it can make a big difference in your riding experience. A well-maintained bike is a quiet bike. It’s also a safe bike. Don’t wait until you hear a rattle to check your mounts. Be proactive and inspect them regularly. This will prevent problems before they start. And remember, if you’re not comfortable working on your bike, ask a bike mechanic for help. They can perform routine maintenance and identify potential problems. A little bit of attention can keep your bike running smoothly for years to come.
Fun Fact or Stat: Bikes that receive regular maintenance last 30% longer than those that don’t!
How Often Should I Inspect My Mounts?
How often you should inspect your bike accessory mounts depends on how often you ride. If you ride every day, inspect them every week. If you ride once a week, inspect them every month. If you only ride occasionally, inspect them before each ride. Pay special attention after riding on rough terrain. Bumps can loosen screws more quickly. Also, inspect your mounts after washing your bike. Water can wash away lubricant. This can cause screws to rust. Regular inspections can prevent problems. They also extend the life of your accessories. A quick check before each ride can save you from headaches and accidents. So, make it a habit to inspect your mounts regularly.
What Lubricants Are Best for Bike Screws?
Using the right lubricant is important for preventing rust and corrosion. A light oil is a good choice for bike screws. *Tri-Flow and WD-40* are popular options. These lubricants penetrate the screw threads. They protect them from moisture. They also make it easier to tighten and loosen the screws. Apply the lubricant sparingly. Too much lubricant can attract dirt. This can make the problem worse. Wipe away any excess lubricant with a clean rag. Avoid using grease on bike screws. Grease can be too thick. It can attract dirt and grime. Choose a lubricant that is specifically designed for bikes. These lubricants are formulated to protect against rust and corrosion. They also won’t damage the bike’s finish.
How Does Storage Affect Mount Maintenance?
How you store your bike can affect the maintenance of your mounts. Storing your bike in a dry place is important. Moisture can cause screws to rust. This can make them difficult to tighten. It can also damage the mounts. If you store your bike outside, cover it with a tarp. This will protect it from the elements. Also, consider using a bike stand. This will keep the tires off the ground. It will also make it easier to access the mounts. If you store your bike for a long period of time, remove the accessories. Store them in a safe place. This will prevent them from being damaged. Proper storage can extend the life of your bike and its accessories. It can also reduce the need for maintenance.
Summary
Knowing *how to fix rattling bike accessory mount* is crucial for any cyclist. Rattling mounts are annoying and can be unsafe. They can distract you and even cause accidents. To fix a rattling mount, start by finding the source of the noise. Check all the screws and bolts. Make sure they are tight. Use a torque wrench to avoid overtightening. Add rubber shims or foam pads to cushion the accessory. This will reduce vibration and noise. Apply threadlocker to the screws. This will prevent them from loosening. Inspect your mounts regularly. Replace any worn or damaged parts. By following these steps, you can keep your bike accessories secure and enjoy a quiet ride. A well-maintained bike is a happy bike!
Conclusion
Fixing a rattling bike accessory mount is simple. It requires only a few basic tools. You can enhance your riding experience. You can also ensure safety. Regular checks and maintenance keep accessories secure. They prevent distracting noises. Remember to tighten screws. Add shims. Use threadlocker. Following these steps will help you learn *how to fix rattling bike accessory mount*. Happy, quiet, and safe cycling!
Frequently Asked Questions
Question No 1: Why do my bike accessories keep rattling loose?
Answer: Bike accessories often rattle loose because of vibration. When you ride, especially on bumpy roads, the vibrations can loosen the screws and bolts that hold your accessories in place. This is especially true if the screws weren’t tightened properly to begin with. Over time, even properly tightened screws can loosen due to constant vibration. Regularly checking and tightening your accessory mounts is important to prevent this. Also, using threadlocker can help keep the screws from loosening. Knowing *how to fix rattling bike accessory mount* helps keep you safe.
Question No 2: What tools do I need to fix a rattling bike accessory mount?
Answer: To fix a rattling bike accessory mount, you’ll need a few basic tools. A set of screwdrivers that fit the screws on your mounts is essential. An Allen wrench set is also useful, as many bike accessories use Allen head screws. A torque wrench helps you tighten the screws to the correct tightness. This prevents overtightening. Threadlocker keeps the screws from loosening. Rubber shims add cushioning. These tools will help you keep your bike accessories secure and prevent rattling. Knowing *how to fix rattling bike accessory mount* requires the right tools.
Question No 3: How do I use threadlocker to prevent rattling?
Answer: Using threadlocker is a great way to prevent screws from loosening. First, clean the screw threads to remove dirt and grease. Then, apply a small drop of threadlocker to the threads. Be careful not to use too much. Tighten the screw to the recommended torque. Let the threadlocker dry for the recommended time. This is usually 24 hours. After that, the screw will be locked in place. It will be much less likely to loosen. Knowing *how to fix rattling bike accessory mount* can be simple with threadlocker.
Question No 4: What are rubber shims and how do they help?
Answer: Rubber shims are thin pieces of rubber that fit between the accessory and the mount. They act as cushions. Shims absorb vibration and prevent the accessory from rattling against the mount. This reduces noise and protects the accessory from damage. Shims come in different sizes and shapes. Choose a shim that fits snugly between the mount and the accessory. You can also cut shims to size. Shims are a simple and effective way to reduce vibration and noise. They help you learn *how to fix rattling bike accessory mount* quietly.
Question No 5: How often should I check my bike accessory mounts?
Answer: How often you should check your bike accessory mounts depends on how often you ride. If you ride every day, check them every week. If you ride once a week, check them every month. If you only ride occasionally, check them before each ride. Pay special attention after riding on rough terrain. Bumps can loosen screws more quickly. Regular checks can prevent problems. They also extend the life of your accessories. Regular checks help you know *how to fix rattling bike accessory mount* before it starts.
Question No 6: Can I use any type of glue instead of threadlocker?
Answer: It’s not recommended to use just any type of glue instead of threadlocker. Threadlocker is specifically designed to keep screws from loosening due to vibration. Regular glue may not be strong enough. It could also damage the screw threads or the mount. Threadlocker is designed to be removable. Regular glue may be permanent. This makes it difficult to remove the screw later. Stick to using threadlocker. It’s the best option for preventing rattling. Knowing *how to fix rattling bike accessory mount* safely involves using the right materials.


