
How to Remove Dust from Hose Ends: Easy Guide
Quick Summary: Dust in your hose ends can mess with connections and performance. To remove it, start by tapping the hose to dislodge loose particles. Use a soft brush or cloth to wipe the ends. For stubborn dust, try compressed air or a specialized hose cleaning tool. Always inspect for damage afterward to ensure a secure, leak-free connection.
Hey there, Raymond Ammons from BicyclePumper.com here. Ever notice how dust and grime love to collect inside your hose ends? Whether it’s on your bike pump, garden hose, or even your vacuum, that buildup can lead to poor connections, leaks, and just plain frustrating performance. It’s a common problem, but don’t worry, it’s totally fixable.
In this guide, I’ll walk you through simple, step-by-step methods to get those hose ends clean and working like new again. We’ll cover everything from basic tapping and wiping to using compressed air and specialized tools. Plus, I’ll share some tips to keep them clean longer. Let’s get started and get your hoses back in top shape!
Why Clean Your Hose Ends?
Before we dive into the how-to, let’s quickly cover why keeping your hose ends clean is so important. It’s not just about aesthetics; it’s about performance and longevity.
- Better Connections: Dust and debris prevent a tight seal.
- Prevents Leaks: Clean threads grip better, stopping leaks.
- Extends Hose Life: Cleanliness reduces wear and tear.
- Maintains Pressure: Essential for bike pumps and sprayers.
- Avoid Contamination: Important for water hoses and fluid transfer.
Tools and Materials You’ll Need

Gathering the right tools makes the job easier and more effective. Here’s what I recommend having on hand:
- Soft Brush: An old toothbrush or small parts brush works great.
- Clean Cloth or Rag: Microfiber cloths are ideal.
- Compressed Air: Canned air or an air compressor with a nozzle.
- Hose Cleaning Tool: If you have one, even better (more on this later).
- Mild Soap and Water: For stubborn grime.
- Safety Glasses: Protect your eyes from flying debris.
- Gloves: Keep your hands clean and protected.
Step-by-Step Guide to Removing Dust
Alright, let’s get those hose ends clean! Follow these steps for a thorough cleaning.
Step 1: Initial Tapping and Shaking
Start with the basics. Often, a good tap and shake can dislodge a lot of loose dust and debris.
- Hold the hose with the end pointing downward.
- Gently tap the hose end against a solid surface (like a workbench or the ground).
- Shake the hose vigorously to help loosen any stubborn particles.
- Inspect the end to see how much dust has been removed.
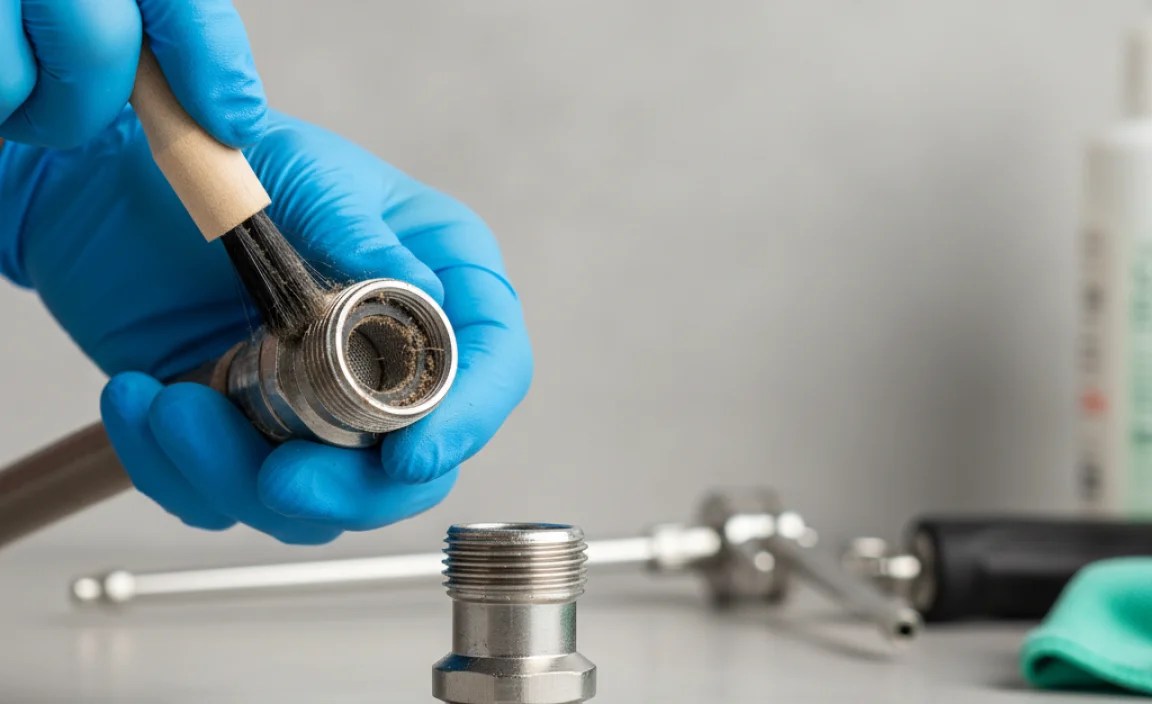
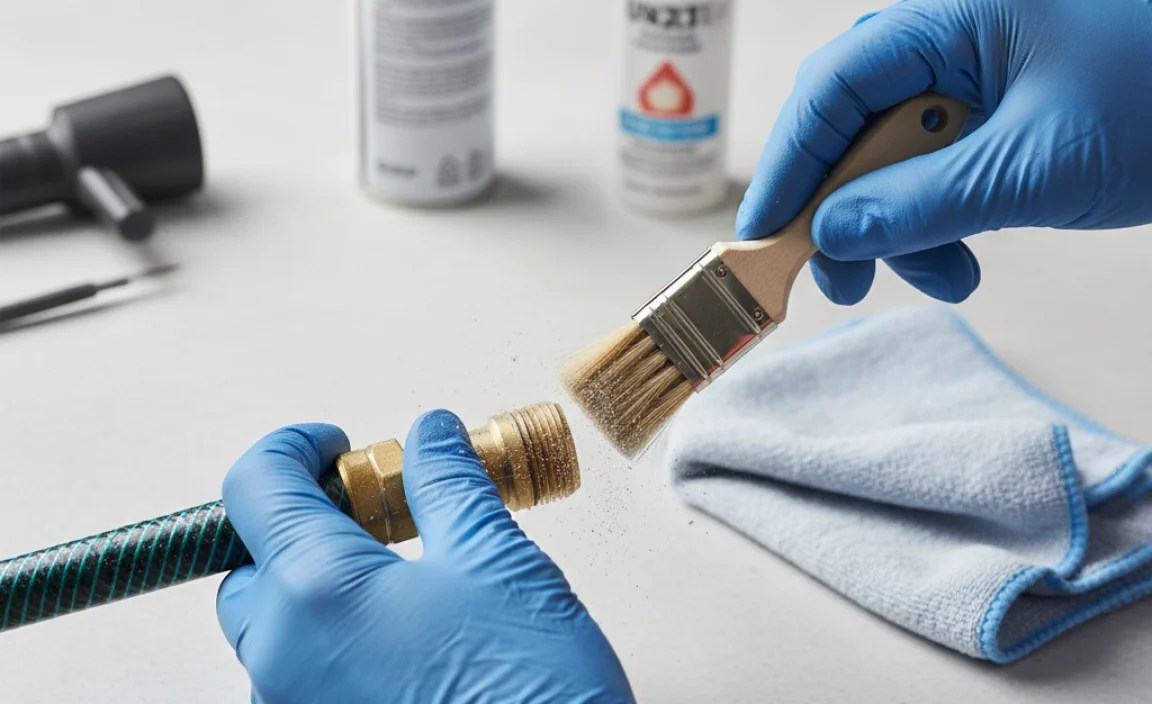
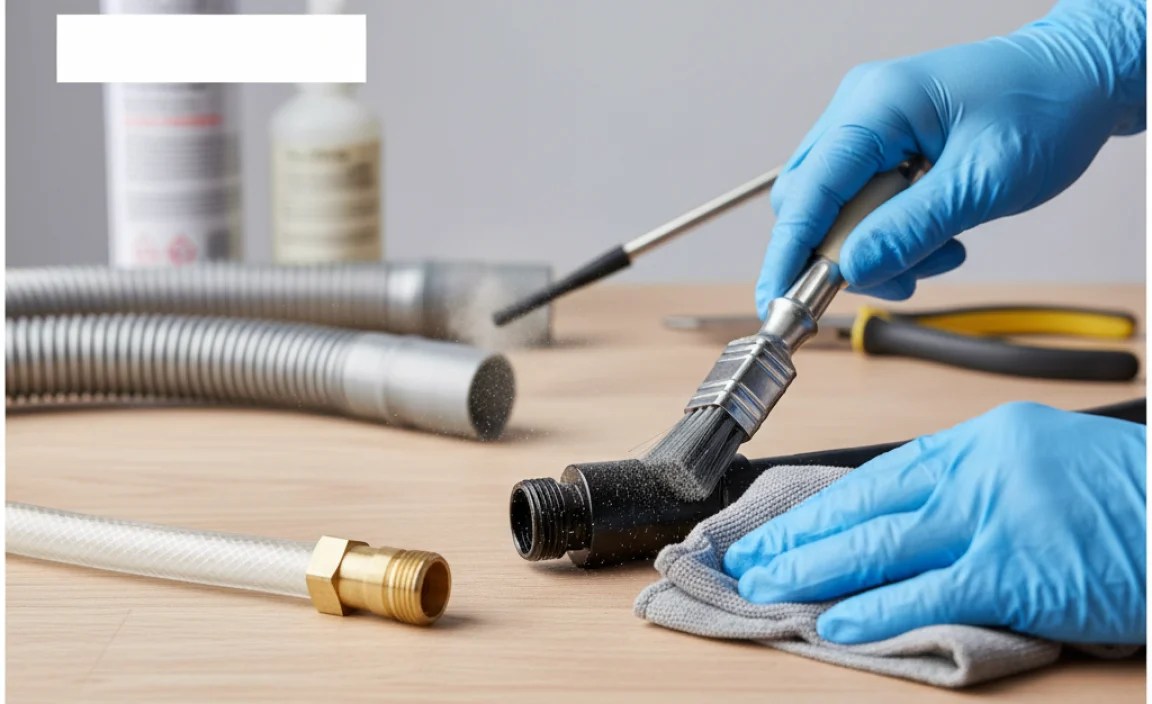
Step 2: Brush and Wipe
Next, use a brush and cloth to remove any remaining surface dust.
- Use a soft brush (like an old toothbrush) to scrub the inside and outside of the hose end.
- Pay close attention to threads and crevices where dust tends to accumulate.
- Wipe the area with a clean cloth to remove loosened dust.
- Repeat until the cloth comes away clean.
Step 3: Compressed Air Blast
Compressed air is excellent for blasting out stubborn dust from hard-to-reach areas.
- Put on your safety glasses!
- Attach a nozzle to your compressed air source (canned air or air compressor).
- Point the nozzle into the hose end and give short bursts of air.
- Watch as dust particles are blown out.
- Repeat until no more dust comes out.
Pro Tip: If using an air compressor, start with a low pressure setting to avoid damaging the hose.
Step 4: Soap and Water (If Needed)
For hose ends with greasy or sticky grime, soap and water can be very effective.
- Mix a small amount of mild soap with water.
- Dip your brush or cloth into the soapy water.
- Scrub the inside and outside of the hose end.
- Rinse thoroughly with clean water.
- Dry the hose end completely with a clean cloth.
Step 5: Specialized Hose Cleaning Tools
For certain types of hoses, specialized cleaning tools can make the job even easier. For example, some bike pump hoses have very small connectors that are hard to reach. Here are a few options:
- Hose Cleaning Brushes: These come in various sizes and shapes to fit different hose diameters.
- Pipe Cleaners: Great for small, narrow openings.
- Thread Cleaning Tools: Specifically designed to clean threads on fittings.
To use these tools, simply insert them into the hose end and twist or scrub to remove dust and debris. Follow up with compressed air or a clean cloth to remove any residue.
Step 6: Final Inspection
Before reattaching the hose, give it a final inspection to ensure it’s clean and in good condition.
- Check for any remaining dust or debris.
- Inspect the hose end for cracks, splits, or other damage.
- Make sure the threads (if any) are clean and undamaged.
- If you find any damage, replace the hose or fitting as needed.
Specific Hose Types and Cleaning Tips
Different types of hoses may require slightly different cleaning approaches. Here are some tips for common types:
Bike Pump Hoses
- Challenge: Small size and delicate valves.
- Tip: Use pipe cleaners or small brushes. Be gentle to avoid damaging the valve.
- Frequency: Clean every few months, or more often if you notice reduced performance.
Garden Hoses
- Challenge: Larger size and potential for algae or mold growth.
- Tip: Use a garden hose cleaning brush and a solution of water and bleach (10:1 ratio) for mold. Rinse thoroughly!
- Frequency: Clean at the beginning and end of the gardening season.
Vacuum Hoses
- Challenge: Accumulation of dust, hair, and larger debris.
- Tip: Disconnect the hose from the vacuum and use a long, flexible brush to dislodge debris. A shop vac can help suck out stubborn blockages.
- Frequency: Clean every few months, or more often if you notice reduced suction.
Air Compressor Hoses
- Challenge: Potential for oil and moisture buildup.
- Tip: Use an air compressor blow gun to blast out debris. Consider installing an air filter/water separator to reduce moisture and oil.
- Frequency: Clean every few months, or more often if you use it frequently.
Preventing Dust Buildup
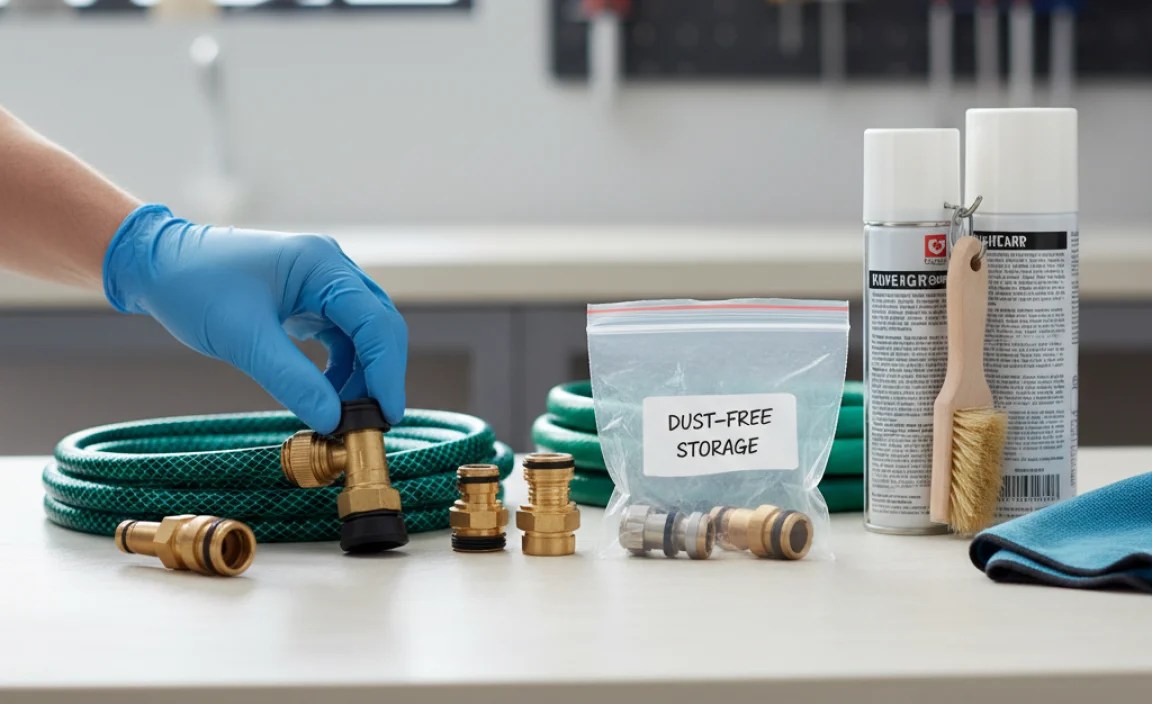
Once you’ve got your hose ends clean, here are some tips to keep them that way:
- Store Hoses Properly: Coil them neatly and store them in a clean, dry place.
- Use Protective Caps: Cover the ends of hoses when not in use to prevent dust from entering.
- Regular Cleaning: Make cleaning hose ends part of your regular maintenance routine.
- Avoid Dragging: Don’t drag hoses across dirty surfaces, as this can force dirt into the ends.
- Inspect Regularly: Check your hose ends periodically for dust and debris.
Troubleshooting Common Issues
Sometimes, you might encounter issues during the cleaning process. Here are some common problems and how to solve them:
| Issue | Solution |
|---|---|
| Stubborn Dust | Soak the hose end in warm, soapy water for a few minutes before cleaning. |
| Damaged Threads | Use a thread repair tool or replace the hose end. |
| Clogged Nozzle | Use a needle or pin to clear the blockage. |
| Hose Won’t Connect | Ensure the hose end is completely clean and undamaged. Check for proper alignment. |
Choosing the Right Cleaning Products
While mild soap and water are often sufficient, sometimes you might need a specialized cleaning product. Here’s a quick guide:
- For General Cleaning: Mild dish soap or all-purpose cleaner.
- For Grease and Oil: Degreaser or citrus cleaner.
- For Mold and Mildew: Bleach solution (10:1 water to bleach).
- For Mineral Deposits: White vinegar or a commercial descaler.
Important: Always test cleaning products in an inconspicuous area first to ensure they don’t damage the hose material. Rinse thoroughly after cleaning.
Safety First
Before you start cleaning, keep these safety tips in mind:
- Wear Safety Glasses: Protect your eyes from flying debris.
- Wear Gloves: Protect your hands from dirt and chemicals.
- Work in a Well-Ventilated Area: Especially when using cleaning products or compressed air.
- Disconnect Power: If cleaning electrical appliance hoses, disconnect the power source first.
- Read Instructions: Follow the manufacturer’s instructions for cleaning products and tools.
When to Replace vs. Clean
Sometimes, cleaning isn’t enough. Here’s when you should consider replacing a hose or hose end:
- Cracks or Splits: If the hose material is cracked or split, it’s time to replace it.
- Bulges or Weak Spots: These indicate internal damage.
- Severe Corrosion: If metal fittings are heavily corroded, they may be beyond repair.
- Irreparable Damage: If the hose end is severely damaged or cannot be properly cleaned, replace it.
- Age: Hoses degrade over time, so replace them periodically even if they look okay.
The Environmental Impact of Hose Cleaning
Cleaning your hoses can also have a positive impact on the environment. Here’s how:
- Extending Hose Life: By cleaning and maintaining your hoses, you can extend their lifespan, reducing the need to replace them frequently.
- Reducing Waste: Replacing hoses less often means less waste going to landfills.
- Conserving Resources: Manufacturing new hoses requires resources like plastic and rubber. By extending the life of your existing hoses, you can help conserve these resources.
- Using Eco-Friendly Cleaners: When cleaning your hoses, opt for eco-friendly cleaning products that are biodegradable and non-toxic.
Best Practices for Long-Term Hose Maintenance
To keep your hoses in top condition for years to come, follow these best practices:
- Regular Inspections: Inspect your hoses regularly for signs of wear and tear.
- Proper Storage: Store your hoses in a cool, dry place away from direct sunlight.
- Avoid Kinking: Kinking can damage the hose material and reduce its lifespan.
- Protect from Extreme Temperatures: Avoid exposing your hoses to extreme temperatures, as this can cause them to crack or become brittle.
- Use the Right Hose for the Job: Use the appropriate type of hose for the task at hand. Don’t use a garden hose for high-pressure applications, for example.
FAQ: Cleaning Hose Ends
1. How often should I clean my hose ends?
It depends on how often you use the hose and the environment it’s exposed to. A good rule of thumb is to clean them every few months or whenever you notice a buildup of dust or debris.
2. Can I use WD-40 to clean hose ends?
WD-40 can be used to loosen stubborn grime, but be sure to clean it off thoroughly afterward with soap and water. WD-40 can leave a residue that attracts more dust.
3. What’s the best way to store a hose to prevent dust buildup?
Coil the hose neatly and store it in a clean, dry place away from direct sunlight. Use protective caps to cover the ends and prevent dust from entering.
4. Can I use a pressure washer to clean hose ends?
It’s generally not recommended, as the high pressure can damage the hose or fittings. Stick to gentler methods like brushing and compressed air.
5. What if I can’t remove all the dust from the hose end?
If you’ve tried all the cleaning methods and there’s still dust remaining, it might be time to replace the hose or fitting. Stubborn dust can indicate damage or wear.
6. Are there any special considerations for cleaning drinking water hoses?
Yes! Use only potable water-safe hoses and cleaning solutions. Rinse thoroughly after cleaning to ensure no residue remains. Avoid using soap unless it’s specifically designed for potable water systems.
7. What type of brush is best for cleaning hose threads?
A small, stiff-bristled brush like a toothbrush or a specialized thread cleaning brush is ideal. These brushes can reach into the threads and remove dust and debris without damaging the threads themselves.
Conclusion
So there you have it! Cleaning dust from your hose ends is a simple but essential part of maintaining your equipment and keeping everything running smoothly. By following these steps and tips, you can extend the life of your hoses, prevent leaks, and ensure optimal performance. Remember to inspect your hoses regularly, clean them as needed, and replace them when necessary. With a little bit of care and attention, your hoses will serve you well for years to come. Happy cleaning!


