
How to Use Analog Bike Gauge: Easy Pressure Guide
Do you like riding your bike? Do you know how to use an analog bike gauge? It is important to check your tire pressure. This keeps you safe. It also makes riding easier. Let’s learn about bike gauges!
Your tires need the right amount of air. Too little air makes it hard to pedal. Too much air can make your tires pop! An analog bike gauge helps you get it just right. Ready to become a tire pressure pro?
Key Takeaways
- Using an analog bike gauge ensures your tires have the correct pressure.
- Check your bike tire pressure before each ride for safety and ease.
- Find the recommended PSI on your tire’s sidewall to guide your inflation.
- Press the gauge firmly on the valve stem to get an accurate reading.
- Adjust tire pressure to match your weight and riding conditions.
Understanding Your Analog Bike Gauge

An analog bike gauge is a simple tool. It measures the air pressure in your tires. It has a dial with numbers on it. These numbers show PSI, or pounds per square inch. PSI tells you how much air is inside. The gauge has a small part that presses onto your tire valve. When you press it, the needle on the dial moves. The needle points to the pressure reading. Knowing this helps you keep your tires in good shape. Good tire pressure makes biking safer and more fun. It also helps your tires last longer. Make sure to check your tires often with your gauge. This will make you a smart and safe biker.
- The gauge measures air pressure in PSI.
- It has a dial with a needle.
- You press the gauge on the tire valve.
- The needle shows the pressure.
- Check your tires often.
Why is it important to have the right tire pressure? Imagine riding a bike with flat tires. It would be very hard! Now, imagine your tires are too full. They could explode! The right pressure makes riding smooth and easy. It also helps you steer better. Your bike will be more comfortable. Plus, your tires will last longer. Using an analog bike gauge is easy. It is a great way to keep your bike in top shape. Always check your tires before you ride. This helps you stay safe and have fun.
Fun Fact or Stat: Did you know that properly inflated tires can improve your bike’s speed by up to 10%?
Why Use an Analog Gauge?
Have you ever wondered why people still use analog gauges? With all the fancy digital tools around, it might seem old-fashioned. But analog gauges have some great qualities. They don’t need batteries. This means they will always work. They are also very simple to use. You just press it on the valve and read the dial. Many people find them to be very reliable. They are often less expensive than digital gauges. So, if you want a tool that is simple, reliable, and doesn’t need batteries, an analog gauge is a good choice. It’s a classic tool that gets the job done!
Reading the PSI Scale
The PSI scale on your analog bike gauge might look a little confusing at first. But it is easy to understand. PSI stands for pounds per square inch. The numbers on the dial show how much air is in your tire. Look for the recommended PSI on the side of your tire. It will say something like “40-65 PSI”. This means your tire should have between 40 and 65 pounds of air pressure. When you use the gauge, the needle will point to a number. If that number is within the recommended range, your tire pressure is good. If it is too low, you need to add air. If it is too high, let some air out.
Maintaining Gauge Accuracy
To make sure your analog bike gauge gives you the right reading, you need to take care of it. Keep it clean and dry. Dirt and water can mess up the gauge. Don’t drop it or throw it around. This can damage the parts inside. Store it in a safe place where it won’t get bumped or crushed. If you think your gauge is not working right, compare it to another gauge. If the readings are very different, your gauge might need to be replaced. Taking good care of your gauge will help it last longer. It will also help you keep your tires properly inflated.
Finding the Right PSI for Your Tires

Finding the right PSI for your tires is very important. PSI means pounds per square inch. This tells you how much air should be in your tire. Look on the side of your tire. You will see a range of numbers. For example, it might say “35-60 PSI”. This means your tire should have between 35 and 60 PSI. The right PSI makes your bike ride better. It also helps you stay safe. Too little air can make it hard to pedal. Too much air can make the tire explode. Using an analog bike gauge helps you find the right PSI. Always check your tires before you ride. This will keep you safe and make biking more fun.
- Look for the PSI range on your tire.
- Use an analog bike gauge to check the pressure.
- Add air if the pressure is too low.
- Let air out if the pressure is too high.
- Check your tires before each ride.
- Correct PSI improves ride quality.
How do you know if your tire pressure is just right? It should feel firm but not too hard. When you sit on the bike, the tire should not flatten too much. If it does, you need more air. If the tire feels rock hard, you might have too much air. The best way to be sure is to use an analog bike gauge. Practice using the gauge until you feel comfortable. Ask a grown-up to help you if you are not sure. Keeping your tires at the right pressure is one of the best things you can do for your bike. It will make your rides safer and more enjoyable.
Fun Fact or Stat: Mountain bike tires usually have lower PSI than road bike tires for better grip on trails.
Understanding Tire Markings
Have you ever looked closely at the side of your bike tire? There are lots of numbers and words there. These markings tell you important things about your tire. One of the most important things is the PSI range. This tells you the minimum and maximum air pressure for your tire. You might also see the tire size. This tells you how wide and how tall the tire is. Knowing how to use an analog bike gauge and understanding these markings helps you take good care of your bike. It also helps you choose the right tires when you need to replace them. So, take a look at your tires and see what you can learn!
Factors Affecting Tire Pressure
Many things can affect your bike tire pressure. The weather can make a difference. When it is hot, the air in your tires expands, which increases the pressure. When it is cold, the air contracts, which decreases the pressure. Your weight also matters. If you are heavier, you might need more air in your tires. The type of riding you do makes a difference too. If you are riding on smooth roads, you can use higher pressure. If you are riding on bumpy trails, you might want lower pressure. Using an analog bike gauge and paying attention to these factors will help you keep your tires at the right pressure.
Adjusting for Rider Weight
Your weight plays a big part in how to use an analog bike gauge correctly. A heavier rider will need more air in their tires. This is because the tires have to support more weight. If you don’t add enough air, the tires will flatten too much. This can make it harder to pedal. It can also damage the tires. A lighter rider can use less air. This can make the ride more comfortable. Check your tire’s PSI range. Then, add or release air based on your weight. Ask a grown-up for help if you are not sure how much to adjust. Getting the right tire pressure for your weight will make biking much more enjoyable.
Step-by-Step: Using Your Analog Gauge
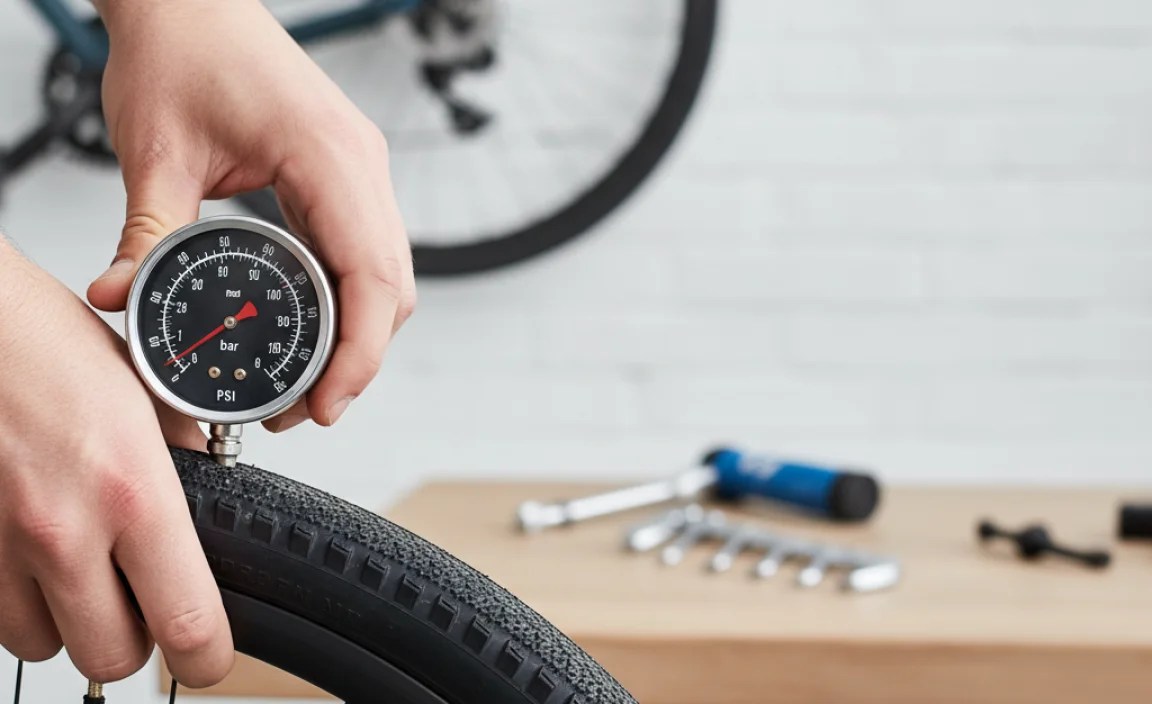
Using your analog gauge is easy. First, find the valve on your tire. It is usually covered by a small cap. Take the cap off. Next, hold the gauge firmly against the valve. Make sure it is straight. Press down until you hear a slight hissing sound. This means the gauge is connected. Look at the dial on the gauge. The needle will point to a number. This is the PSI, or the air pressure in your tire. Compare this number to the PSI range on your tire. If the pressure is too low, add air. If it is too high, let some air out. After checking, put the cap back on the valve. Now you know how to use analog bike gauge!
- Remove the valve cap.
- Press the gauge firmly on the valve.
- Read the PSI on the dial.
- Compare to the tire’s recommended range.
- Adjust air pressure as needed.
- Replace the valve cap.
What if you don’t have a pump? You can use a pump at a gas station. But be careful! Gas station pumps can put air in very quickly. It is easy to overfill your tires. Ask a grown-up to help you. It is better to use a bike pump. Bike pumps are made for bike tires. They let you add air slowly and carefully. Always check the pressure with your analog bike gauge after adding air. This will help you get the pressure just right. Remember, safe tires make for a safe and fun ride!
Fun Fact or Stat: Road bikes often require higher tire pressure than mountain bikes for better speed and efficiency on smooth surfaces.
Preparing the Tire Valve
Before you use your analog bike gauge, you need to prepare the tire valve. First, find the valve on your tire. It is usually covered by a small cap. Take the cap off. This keeps dirt out of the valve. Make sure the valve is clean. If it is dirty, wipe it with a clean cloth. This will help the gauge get a good seal. Some valves have a small pin inside. Make sure the pin is not stuck. You can gently push it in and out to make sure it moves freely. Now your valve is ready for the gauge. Getting the valve ready helps you get an accurate reading.
Attaching the Gauge Correctly
Attaching the gauge correctly is key to getting an accurate reading. Hold the analog bike gauge firmly. Line it up straight with the valve. Press the gauge onto the valve. You should hear a slight hissing sound. This means the gauge is sealed. If you don’t hear a hiss, the gauge is not on tight enough. Try again. Make sure the gauge is not tilted to one side. This can let air escape. Hold the gauge steady until the needle stops moving. Then you can read the pressure. A good seal is important for an accurate reading. Practice makes perfect!
Reading the Pressure Accurately
Reading the pressure accurately is the last step. Look at the dial on the analog bike gauge. The needle will point to a number. This is the PSI, or the air pressure in your tire. Look straight at the dial. Don’t look at it from an angle. This can make you read the wrong number. Some gauges have small lines between the numbers. These lines show smaller amounts of pressure. If the needle is between two numbers, guess the closest number. Write down the pressure. Then you can compare it to the recommended range on your tire. Now you know how to read the pressure correctly.
Common Mistakes When Using Gauges
Lots of people make mistakes when they use analog gauges. One common mistake is not pressing the gauge firmly enough. If you don’t press hard enough, air will leak out. This will give you a wrong reading. Another mistake is not lining up the gauge straight. If the gauge is tilted, it won’t seal properly. This can also cause air to leak. Some people forget to take off the valve cap. The cap blocks the gauge from reaching the valve. Always take the cap off first. Make sure to read the gauge at eye level. Looking at it from an angle can cause errors. Avoid these mistakes to get the right tire pressure.
- Not pressing the gauge firmly.
- Not lining up the gauge straight.
- Forgetting to remove the valve cap.
- Reading the gauge at an angle.
- Not checking the PSI range on the tire.
Why is it important to avoid these mistakes? Wrong tire pressure can be dangerous. Too little air can make it hard to control your bike. It can also damage your tires. Too much air can make your tires explode. This can cause a crash. Using an analog bike gauge correctly helps you stay safe. It also helps your tires last longer. Take your time and be careful. Ask a grown-up for help if you are not sure. Safe biking is fun biking!
Fun Fact or Stat: Under-inflated tires can increase rolling resistance, making you work harder to pedal.
Air Leaks and How to Prevent Them
Air leaks can be a big problem when using an analog bike gauge. A leak happens when air escapes while you are checking the pressure. This can give you a wrong reading. To prevent leaks, make sure the gauge is lined up straight. Press it firmly onto the valve. Hold it steady while you read the pressure. Check the valve for damage. If the valve is bent or broken, it might leak. You might need to replace the valve. Keep the valve clean. Dirt can prevent a good seal. Preventing air leaks will help you get an accurate reading.
Over-Inflation and Its Risks
Over-inflation is when you put too much air in your tires. This can be dangerous. Over-inflated tires are more likely to explode. This can cause a crash. It can also damage your tires and rims. Always check the PSI range on your tire. Do not put more air in than the maximum number. Use an analog bike gauge to check the pressure. Add air slowly. Check the pressure often. If you accidentally put in too much air, let some out. Over-inflation is a serious risk. Be careful and stay safe.
Gauge Damage and Misreading
Gauge damage can cause misreading. If your analog bike gauge is dropped or bumped, it can get damaged. The needle might not move correctly. The dial might be cracked. A damaged gauge will not give you an accurate reading. Handle your gauge with care. Store it in a safe place. If you think your gauge is damaged, compare it to another gauge. If the readings are different, replace the damaged gauge. Using a damaged gauge is like guessing. You need a working gauge to be safe.
Maintaining Your Bike Tires Properly

Maintaining your bike tires properly is important for safety and fun. Check your tires before every ride. Look for cuts, bumps, or wear. Use an analog bike gauge to check the air pressure. Keep your tires inflated to the right PSI. This will make your bike easier to ride. It will also help your tires last longer. Clean your tires regularly. Dirt and grime can damage the rubber. Store your bike in a cool, dry place. This will protect your tires from the sun and weather. Taking care of your tires will make your bike rides safer and more enjoyable.
| Tire Type | Recommended PSI Range | Benefits of Correct PSI |
|---|---|---|
| Road Bike | 80-130 PSI | Faster speed, lower rolling resistance |
| Mountain Bike | 25-35 PSI | Better grip, more comfortable ride |
| Hybrid Bike | 40-70 PSI | Good balance of speed and comfort |
| Kids’ Bike | 30-50 PSI | Easy pedaling, safe handling |
- Check tires before each ride.
- Use an analog bike gauge for PSI.
- Clean tires regularly.
- Store bike in a cool, dry place.
- Replace worn tires.
Why is tire maintenance so important? Your tires are the only part of your bike that touches the ground. They provide grip and control. If your tires are in bad shape, you could have an accident. Worn tires can slip easily. Under-inflated tires can make it hard to steer. Over-inflated tires can explode. Taking care of your tires is like taking care of your brakes. It helps you stay safe. Plus, it saves you money. Well-maintained tires last longer. So, make tire maintenance a part of your biking routine.
Fun Fact or Stat: Regularly checking and maintaining your bike tires can extend their lifespan by up to 50%.
Regular Tire Inspections
Regular tire inspections are a must. Before each ride, take a quick look at your tires. Check for cuts, scrapes, or bulges. These can weaken the tire. Remove any small stones or glass stuck in the tire. These can cause a flat. Feel the tire for soft spots. This could mean the tire is wearing thin. Use an analog bike gauge to check the pressure. Make sure it is within the recommended range. Regular inspections help you catch problems early. This can prevent accidents and save you money.
Cleaning and Protecting Your Tires
Cleaning and protecting your tires is easy. Use a brush and soapy water to clean your tires. Rinse them well. This removes dirt and grime. Avoid using harsh chemicals. These can damage the rubber. After cleaning, let the tires dry completely. You can use a tire protectant spray. This helps protect the rubber from the sun. It also makes the tires look shiny. Clean tires perform better and last longer. Protecting them keeps them looking good too.
Knowing When to Replace Your Tires
Knowing when to replace your tires is key. Tires wear out over time. The tread gets thin. The rubber gets hard. You might see cracks in the sidewall. These are signs that it is time for new tires. If you get a lot of flats, it might be time to replace your tires. New tires provide better grip and handling. They also reduce the risk of accidents. Ask a grown-up to help you choose the right tires for your bike. Replacing your tires is an important part of bike maintenance.
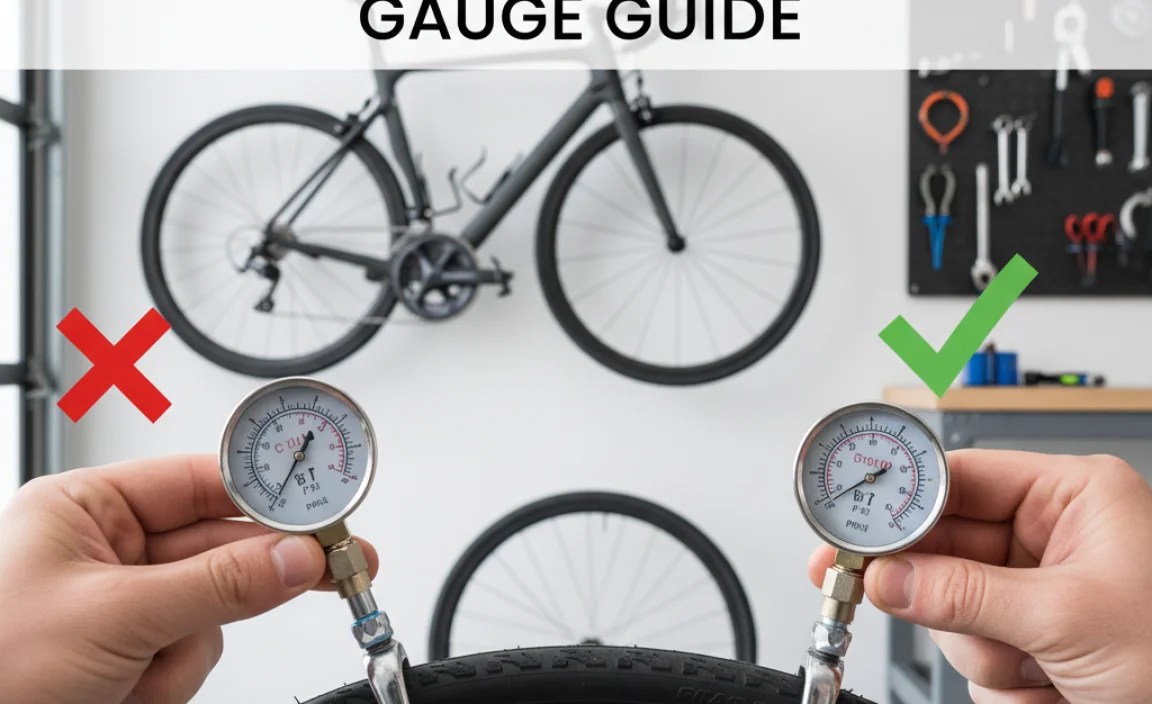
Choosing the Right Analog Gauge Type
Choosing the right analog gauge type can make a big difference. There are different types of gauges. Some are small and simple. Others are larger and more accurate. Some have a long hose. This makes it easier to reach the valve. Some have a rotating head. This lets you read the pressure from any angle. Think about what is important to you. Do you want a small, portable gauge? Or do you want a more accurate gauge for home use? Read reviews and compare prices. Choose a gauge that fits your needs and your budget. The right gauge will make it easier to check your tire pressure.
- Consider size and portability.
- Think about accuracy needs.
- Look for a gauge with a hose.
- Check for a rotating head.
- Read reviews and compare prices.
- Choose a gauge that fits your budget.
Why is it worth spending a little extra on a good gauge? A good gauge will give you accurate readings. This helps you keep your tires at the right pressure. It will also last longer. A cheap gauge might break easily. It might not be very accurate. This could lead to over- or under-inflated tires. A good gauge is an investment in your safety and your bike’s performance. It is a tool you will use for many years. So, choose wisely and take care of your gauge.
Fun Fact or Stat: High-quality analog gauges can maintain their accuracy for years with proper care and storage.
Compact vs. High-Pressure Gauges
When choosing an analog gauge, think about size. Compact gauges are small and easy to carry. You can take them with you on rides. High-pressure gauges are larger. They are often more accurate. Compact gauges are good for quick checks. High-pressure gauges are good for precise inflation. Consider what you need most. Do you want portability or accuracy? Choose the gauge that fits your riding style.
Gauge Features to Look For
Look for certain features when buying an analog gauge. A rotating head makes it easier to read the pressure. A long hose makes it easier to reach the valve. A clear dial makes it easier to see the numbers. A durable case protects the gauge from damage. A pressure release button lets you release air easily. These features can make checking your tires easier and more accurate. Choose a gauge with the features that matter to you.
Budget vs. Professional-Grade Gauges
Think about your budget when choosing a gauge. Budget gauges are less expensive. They are good for basic use. Professional-grade gauges are more expensive. They are more accurate and durable. If you ride a lot, a professional-grade gauge might be worth the investment. If you only ride occasionally, a budget gauge might be fine. Consider how often you will use the gauge. Choose the one that fits your needs and your budget.
Summary
Knowing how to use an analog bike gauge is a key skill for any cyclist. It helps you maintain the correct tire pressure. Correct tire pressure improves your bike’s performance. It also enhances your safety. Always check the recommended PSI on your tire’s sidewall. Make sure to press the gauge firmly onto the valve stem. Read the gauge carefully. Avoid common mistakes like under- or over-inflation. Regular tire maintenance keeps your bike in top condition. It also makes your rides more enjoyable.
Different types of analog gauges are available. Choose one that fits your needs and budget. Features like a rotating head and a long hose can make it easier to use. Remember to inspect your tires regularly for wear and damage. Replace them when needed. With the right knowledge and tools, you can keep your tires properly inflated and enjoy safe, smooth rides.
Conclusion
Learning how to use an analog bike gauge is easy. It is also very important. The right tire pressure makes your bike safer. It also makes it easier to ride. Check your tires before every ride. Use your gauge to make sure they are properly inflated. Take care of your tires and your gauge. This will help you enjoy biking for many years to come. Happy riding!
Frequently Asked Questions
Question No 1: Why is it important to check my bike tire pressure?
Answer: Checking your bike tire pressure is very important for a few reasons. First, it helps you stay safe. Tires with the right amount of air are easier to control. Second, it makes riding easier. Properly inflated tires roll faster and require less effort to pedal. Third, it helps your tires last longer. Riding on under-inflated tires can damage them. Using an analog bike gauge to check your tire pressure regularly helps you avoid these problems and enjoy a safer, more comfortable ride.
Question No 2: How often should I check my bike tire pressure?
Answer: You should check your bike tire pressure before every ride. This is especially important if you haven’t ridden your bike in a while. Tires can slowly lose air over time. Checking before each ride ensures your tires are always at the right pressure. It only takes a few minutes to use an analog bike gauge. Making it a habit will help you stay safe and enjoy your rides more. If you notice your tires are losing air quickly, there might be a leak. Get it checked by a bike mechanic.
Question No 3: What does PSI mean on my bike tire?
Answer: PSI stands for pounds per square inch. It is a measure of air pressure. The PSI number on your bike tire tells you how much air should be inside. Different tires need different amounts of pressure. Road bike tires usually need higher PSI than mountain bike tires. The recommended PSI range is printed on the side of your tire. Use an analog bike gauge to check the PSI. Add or release air until the pressure is within the recommended range. This ensures your tires are properly inflated for a safe and comfortable ride.
Question No 4: Can I use a car tire gauge on my bike?
Answer: Yes, you can use a car tire gauge on your bike. However, it might not be the best choice. Car tire gauges are often designed for higher pressure ranges than bike tires. This means they might not be as accurate at lower pressures. Bike-specific gauges, including analog bike gauges, are designed for the lower pressure ranges of bike tires. They provide more accurate readings. If you only have a car tire gauge, it will work in a pinch. But a bike-specific gauge is a better tool for the job. Always double-check the reading to be sure.
Question No 5: What if I don’t have a bike pump?
Answer: If you don’t have a bike pump, you have a few options. You can use a pump at a gas station. But be very careful! Gas station pumps can fill tires quickly. It is easy to overfill your tires. Ask a grown-up to help you. Another option is to go to a local bike shop. They usually have pumps you can use for free. A bike pump is a good investment if you ride often. They are easy to use and let you control the air pressure. Remember to always use an analog bike gauge after pumping to ensure proper inflation.
Question No 6: How do I know if my analog gauge is accurate?
Answer: You can check the accuracy of your analog gauge by comparing it to another gauge. If you have a friend with a gauge, compare readings. If the readings are very different, one of the gauges might not be accurate. You can also take your gauge to a bike shop. They can test it for you. If your gauge is not accurate, it is best to replace it. An inaccurate gauge can lead to over- or under-inflated tires. This can be dangerous. A reliable gauge is important for safe biking.


