
Serfas Smart Valve Chuck Replacement: Easy Fix!
Quick Summary:
Replacing a Serfas smart valve chuck is easy! First, unscrew the old chuck from the hose. Next, wrap Teflon tape around the threads of the new chuck. Finally, screw the new chuck onto the hose until it’s snug. Make sure it’s tight enough to seal, but don’t overtighten it. Now you’re ready to pump!
Is your Serfas bike pump not working like it used to? Are you struggling to get a good seal on your tire valve? The problem might be your pump’s chuck. Over time, the valve chuck on your Serfas pump can wear out or get damaged. Luckily, replacing it is a simple fix you can do at home with just a few tools.
This guide will walk you through each step of replacing your Serfas smart valve chuck. We’ll cover everything from identifying the right replacement part to getting it installed and ready to go. Let’s get that pump working like new again!
What You’ll Need
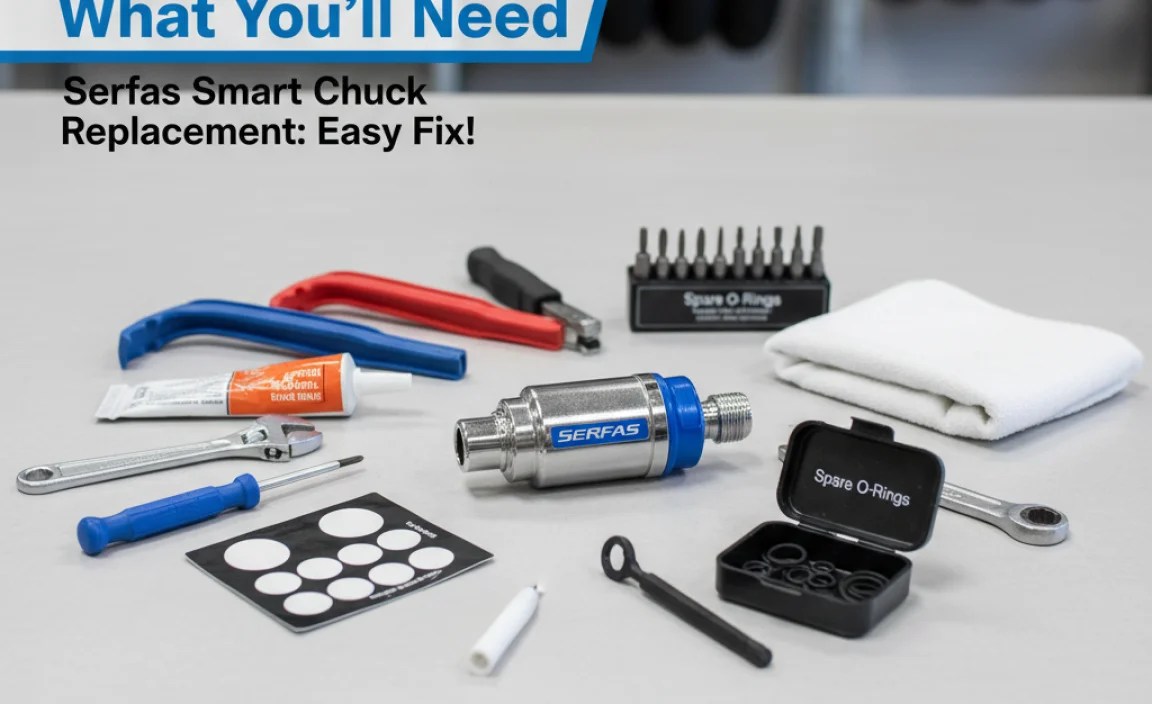
Before you start, make sure you have these items ready:
- New Serfas Smart Valve Chuck: Make sure it’s the correct type for your pump.
- Adjustable Wrench or Pliers: To grip and turn the chuck.
- Teflon Tape (Plumber’s Tape): To seal the threads and prevent leaks.
- Clean Rag: To wipe away any dirt or grease.
Step-by-Step Guide to Serfas Smart Valve Chuck Replacement

Follow these steps to replace your Serfas smart valve chuck:
Step 1: Remove the Old Chuck
First, you need to remove the old, worn-out chuck from the pump hose.
- Secure the Hose: Hold the pump hose firmly near the chuck. You can use a wrench or pliers to gently grip the hose fitting, but be careful not to damage it.
- Unscrew the Chuck: Use an adjustable wrench or pliers to grip the base of the old chuck. Turn it counterclockwise to unscrew it from the hose. It might be a little tight, so apply steady pressure.
- Clean the Threads: Once the chuck is removed, use a clean rag to wipe the threads on the end of the hose. Remove any old Teflon tape or debris.
Step 2: Prepare the New Chuck
Now, get your new Serfas smart valve chuck ready for installation.
- Wrap Teflon Tape: Take your Teflon tape and wrap it around the threads of the new chuck. Wrap it in a clockwise direction (when looking at the end of the chuck) to ensure it seals properly when screwed into the hose.
- Apply Enough Tape: Use about 2-3 layers of Teflon tape. This will create a good seal and prevent air leaks.
- Smooth the Tape: Press the Teflon tape firmly onto the threads to smooth it out. This helps it grip and seal effectively.
Step 3: Install the New Chuck
It’s time to attach the new chuck to the pump hose.
- Align the Chuck: Carefully align the threads of the new chuck with the threads on the end of the pump hose.
- Screw it On: Turn the chuck clockwise to screw it onto the hose. Tighten it by hand until it’s snug.
- Use a Wrench (If Needed): If you can’t get it tight enough by hand, use an adjustable wrench or pliers to gently tighten it a bit more. Be careful not to overtighten, as this could damage the threads or the chuck itself.
- Check the Seal: Once the chuck is installed, check the seal by attaching it to a tire valve and pumping a few strokes. Listen for any air leaks around the chuck. If you hear a leak, tighten the chuck a little more.
Troubleshooting
Sometimes, things don’t go exactly as planned. Here are a few common issues and how to fix them:
Air Leaks
If you hear air leaking around the chuck, it usually means the seal isn’t tight enough.
- Tighten the Chuck: Try tightening the chuck a bit more with a wrench or pliers. Be careful not to overtighten.
- Add More Teflon Tape: If tightening doesn’t work, remove the chuck, add another layer of Teflon tape, and reinstall it.
- Check for Damage: Inspect the chuck and hose for any visible damage. If either is damaged, you may need to replace them.
Difficulty Screwing On the Chuck
If you’re having trouble screwing the new chuck onto the hose, the threads might be misaligned or damaged.
- Check the Threads: Inspect the threads on both the chuck and the hose for any damage or debris. Clean them thoroughly.
- Align Carefully: Make sure the threads are perfectly aligned before you start screwing the chuck on.
- Use Lubricant: A tiny drop of lubricant (like silicone grease) on the threads can help them mesh more smoothly.
Chuck Won’t Engage with Valve
If the chuck seems like it’s not properly engaging with the tire valve, here’s what to check:
- Check Chuck Type: Confirm that the chuck is compatible with the type of valve you are trying to inflate (Presta or Schrader).
- Inspect Valve Core: Ensure the valve core on the tire is not loose or damaged. A loose valve core can prevent a good seal. Use a valve core tool to tighten or replace if necessary.
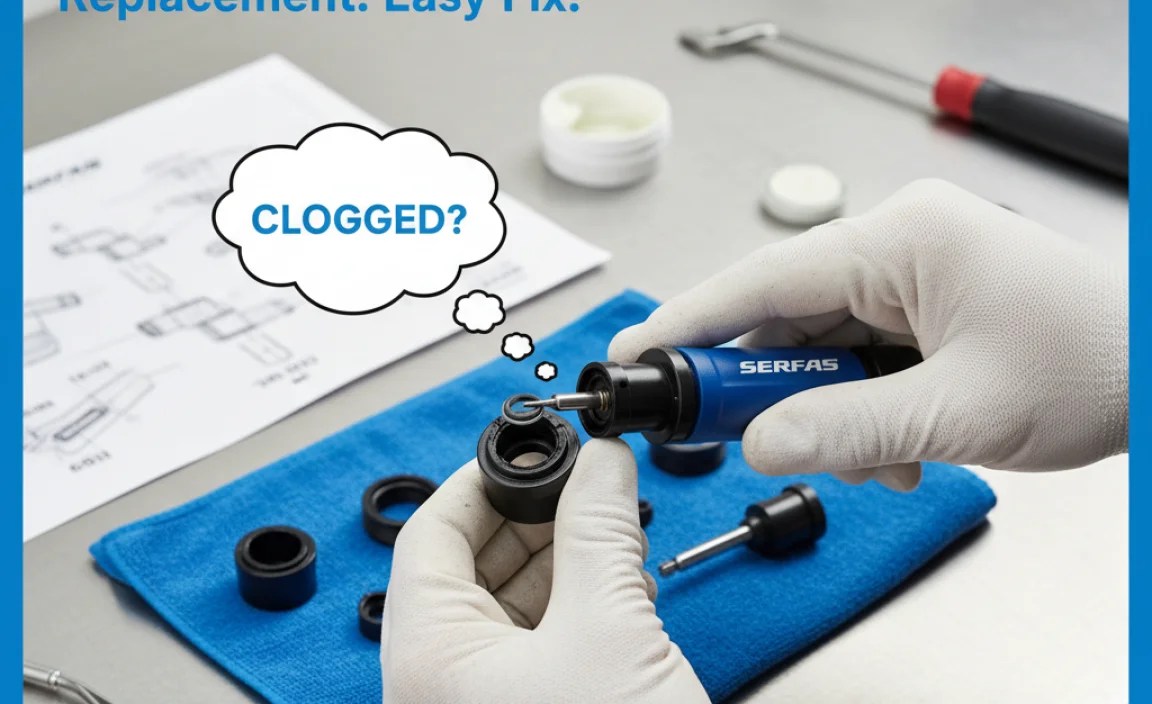
- Clean the Chuck: Sometimes dirt or debris inside the chuck can interfere with the valve engagement. Try cleaning the chuck with a small brush or compressed air.
Choosing the Right Serfas Smart Valve Chuck

Serfas offers different types of smart valve chucks. It’s important to choose the right one for your pump and your needs.
Types of Chucks
- Standard Smart Valve: This is the most common type, designed to work with both Presta and Schrader valves.
- Thread-On Chuck: Some pumps use a thread-on chuck, which screws directly onto the valve.
- Dual-Head Chuck: Some chucks have two separate heads, one for Presta and one for Schrader valves.
Compatibility
Make sure the replacement chuck is compatible with your specific Serfas pump model. Check your pump’s manual or the Serfas website to find the correct part number. Using the wrong chuck can lead to poor performance or even damage to your pump.
Maintaining Your Serfas Pump
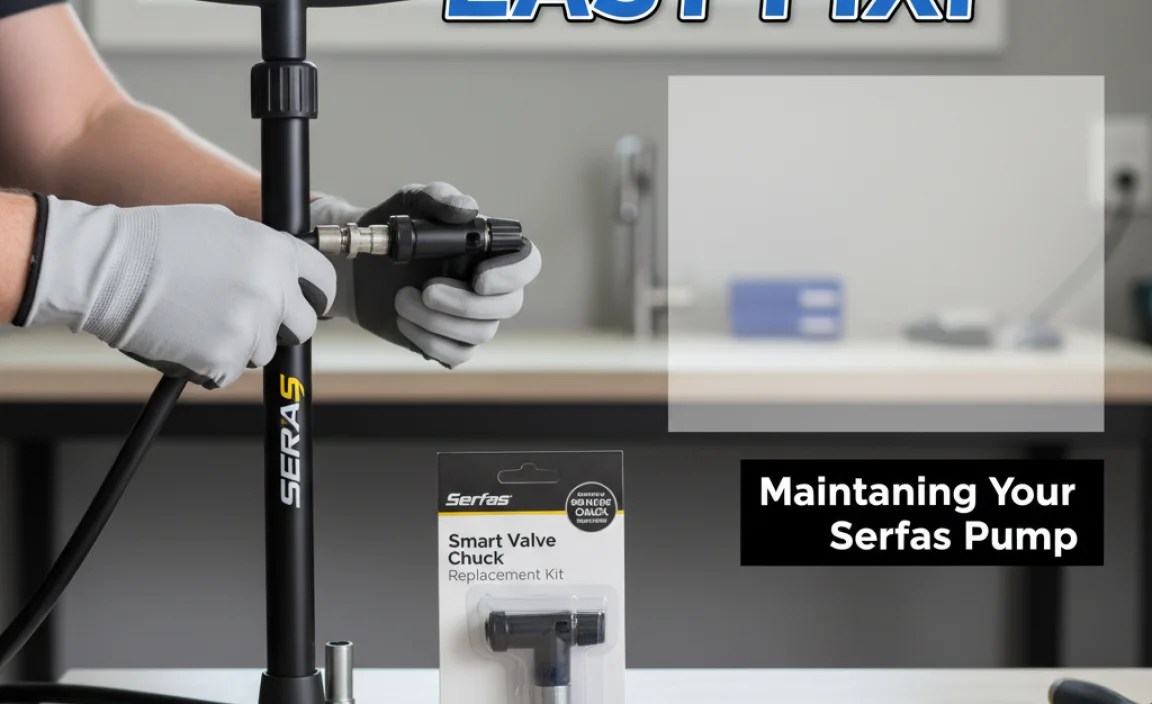
To keep your Serfas pump working smoothly for years, follow these maintenance tips:
- Regular Cleaning: Wipe down your pump regularly with a clean rag to remove dirt and grime.
- Check for Leaks: Periodically check for air leaks around the hose and chuck. Tighten any loose connections.
- Lubricate Moving Parts: Apply a small amount of silicone grease to the pump’s moving parts (like the piston) to keep them working smoothly.
- Store Properly: Store your pump in a dry place to prevent rust and corrosion.
Tools and Accessories for Bike Pump Maintenance
Having the right tools and accessories can make bike pump maintenance much easier.
Essential Tools
- Adjustable Wrench or Pliers: For tightening and loosening connections.
- Teflon Tape: For sealing threads and preventing leaks.
- Silicone Grease: For lubricating moving parts.
- Valve Core Tool: For tightening or replacing valve cores.
Helpful Accessories
- Hose Clamps: To secure the hose to the pump.
- Replacement Hoses: In case your hose gets damaged.
- Pressure Gauge: To accurately measure tire pressure.
Table: Common Serfas Pump Problems and Solutions
| Problem | Possible Cause | Solution |
|---|---|---|
| Pump not inflating tire | Leaky chuck, damaged hose, or faulty valve | Replace chuck or hose, tighten valve core |
| Air leaking from pump | Loose connections, worn seals | Tighten connections, replace seals |
| Hard to pump | Dry piston, clogged filter | Lubricate piston, clean filter |
| Incorrect pressure reading | Faulty gauge | Replace gauge |
| Chuck won’t engage | Incorrect chuck type, damaged valve core | Use correct chuck, replace valve core |
Table: Comparing Serfas Smart Valve Chuck Models
| Model | Compatibility | Features | Price Range |
|---|---|---|---|
| Standard Smart Valve | Presta and Schrader | Easy to use, durable | $10 – $15 |
| Thread-On Chuck | Specific pump models | Secure connection | $12 – $18 |
| Dual-Head Chuck | Presta and Schrader | Separate heads for each valve type | $15 – $20 |
Why Choose Serfas?
Serfas is a well-known brand in the cycling world, known for its quality and reliability. Their pumps and accessories are designed to last, and they offer a wide range of products to suit different needs and budgets. When you choose Serfas, you’re investing in a product that will help you keep your tires properly inflated and your bike running smoothly.
External Resources
For more information on bike maintenance and repair, check out these resources:
- Park Tool Repair Help – Comprehensive guides and videos on bike repair.
- REI Expert Advice on Bicycle Maintenance – Tips and advice from the experts at REI.
- BikeRadar Bike Maintenance Tips – A variety of maintenance tips for all levels of cyclists.
FAQ: Serfas Smart Valve Chuck Replacement
Q: How often should I replace my Serfas smart valve chuck?
A: It depends on how often you use your pump. If you notice air leaks or difficulty getting a good seal, it’s time to replace the chuck.
Q: Can I use a different brand of chuck with my Serfas pump?
A: It’s best to use a Serfas chuck designed for your pump to ensure proper fit and performance.
Q: Where can I buy a replacement Serfas smart valve chuck?
A: You can find them at most bike shops or online retailers that sell Serfas products.
Q: Do I need any special tools to replace the chuck?
A: An adjustable wrench or pliers and Teflon tape are the only tools you’ll need.
Q: How do I know if my chuck is compatible with Presta or Schrader valves?
A: Most Serfas smart valve chucks are designed to work with both types of valves. Check the product description to be sure.
Q: What is Teflon tape and why do I need it?
A: Teflon tape (also called plumber’s tape) is a thin, white tape used to seal threaded connections. It prevents air leaks and ensures a tight seal.
Q: Can I overtighten the new chuck?
A: Yes, overtightening can damage the threads on the chuck or the hose. Tighten it until it’s snug, but don’t force it.
Conclusion
Replacing your Serfas smart valve chuck is a simple and cost-effective way to keep your bike pump working like new. By following these steps, you can easily replace the chuck yourself and avoid the expense of buying a new pump. Regular maintenance and timely repairs will extend the life of your pump and ensure that you always have properly inflated tires for a smooth and enjoyable ride. Now get back out there and enjoy the road!


