
How to Train Workshop Staff on Chuck Replacement: Easy!
Quick Summary: Training your workshop staff on chuck replacement involves understanding safety protocols, selecting the right chuck, mastering removal and installation techniques, and performing quality checks. This ensures tools are always ready for precise and safe operation, minimizing downtime and maximizing efficiency.
Chuck replacement is a common task in any workshop, but doing it correctly is crucial for safety and efficiency. A poorly installed chuck can lead to inaccurate work, tool damage, or even injuries. Training your staff to handle chuck replacement properly ensures that your tools are always in top condition, reducing downtime and improving the quality of your work. This guide will walk you through the essential steps to train your team effectively, making sure they’re confident and competent in this vital skill.
We’ll cover everything from the necessary safety precautions to the step-by-step procedures for removing and installing chucks. We’ll also discuss how to select the right chuck for different tools and applications, and how to perform quality checks to guarantee a job well done. Let’s get started!
Understanding Chucks and Their Importance

Before diving into the training process, it’s essential to understand what a chuck is and why its proper maintenance is crucial.
What is a Chuck?
A chuck is a specialized type of clamp used to hold an object with radial symmetry, especially a rotating tool like a drill or lathe. It provides a secure grip, allowing the tool to perform its function accurately and safely. Chucks come in various designs, each suited to different applications and tool types.
- Drill Chucks: Used in drills to hold drill bits.
- Lathe Chucks: Used in lathes to hold workpieces.
- Collet Chucks: Offer high precision and are used for smaller tools.
- Keyed Chucks: Require a key to tighten and loosen the grip.
- Keyless Chucks: Can be tightened and loosened by hand.
Why Proper Chuck Maintenance Matters
Proper chuck maintenance, including timely replacement when necessary, is vital for several reasons:
- Safety: A worn or damaged chuck can cause the tool to slip, leading to potential injuries.
- Accuracy: A well-maintained chuck ensures the tool holds the workpiece or bit securely, resulting in precise and accurate work.
- Efficiency: A faulty chuck can slow down operations, increasing downtime and reducing productivity.
- Tool Longevity: Replacing a chuck when needed can prevent further damage to the tool itself.
Safety First: Essential Precautions
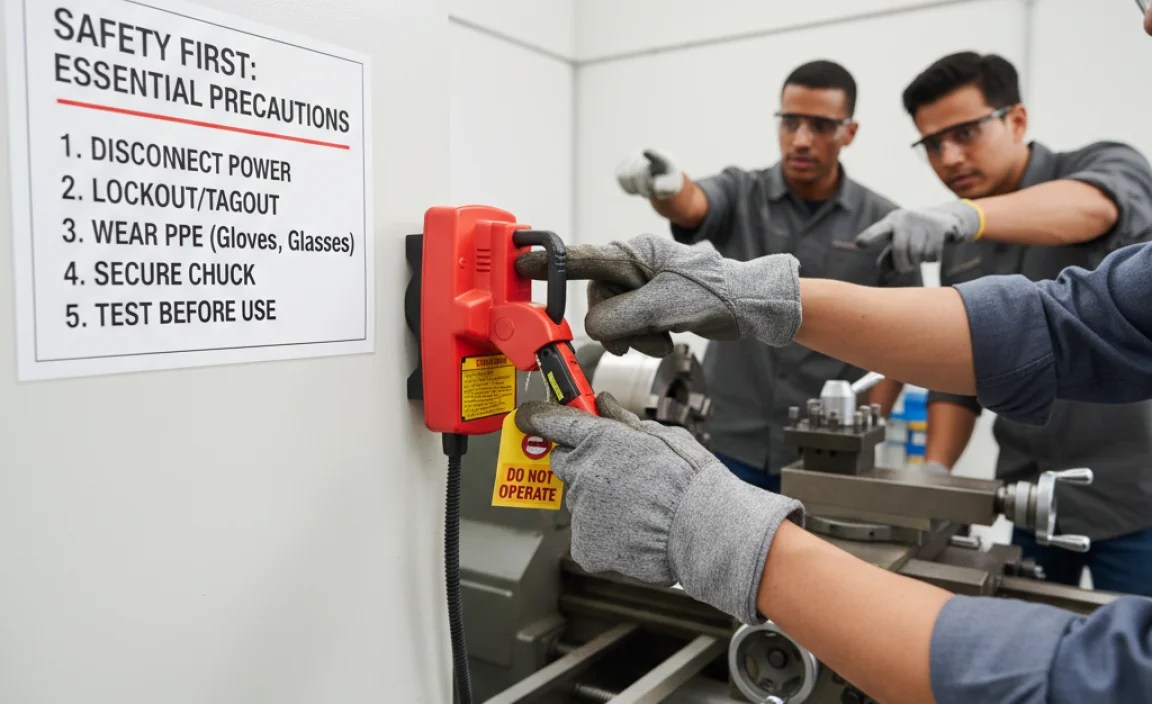
Safety should always be the top priority when training staff on chuck replacement. Here are the essential precautions to cover:
Personal Protective Equipment (PPE)
Ensure all staff members wear the appropriate PPE at all times:
- Safety Glasses: To protect eyes from flying debris.
- Gloves: To provide a better grip and protect hands from sharp edges.
- Hearing Protection: Especially when working with noisy machinery.
- Closed-Toe Shoes: To protect feet from falling objects.
Machine Safety
Before starting any work, make sure the machine is safely shut down:
- Disconnect Power: Always unplug the machine or switch off the circuit breaker to prevent accidental start-up.
- Lockout/Tagout Procedures: Implement lockout/tagout procedures to ensure the machine remains off during maintenance. Learn more about OSHA’s guidelines on controlling hazardous energy.
- Clear the Area: Ensure the workspace is clean and free from obstructions.
Tool Handling
Teach your staff how to handle tools safely:
- Use the Right Tool: Always use the correct tool for the job.
- Inspect Tools: Check tools for damage before use.
- Proper Storage: Store tools properly to prevent damage and accidents.
Step-by-Step Guide to Chuck Replacement Training
Here’s a detailed guide to help you train your staff on the chuck replacement process.
1. Assessing the Need for Replacement
The first step is to teach your staff how to identify when a chuck needs replacement. Common signs include:
- Slippage: The tool bit slips during operation.
- Difficulty Tightening: The chuck is hard to tighten or loosen.
- Visible Damage: Cracks, rust, or broken parts are visible.
- Inaccurate Grip: The chuck doesn’t hold the bit straight.
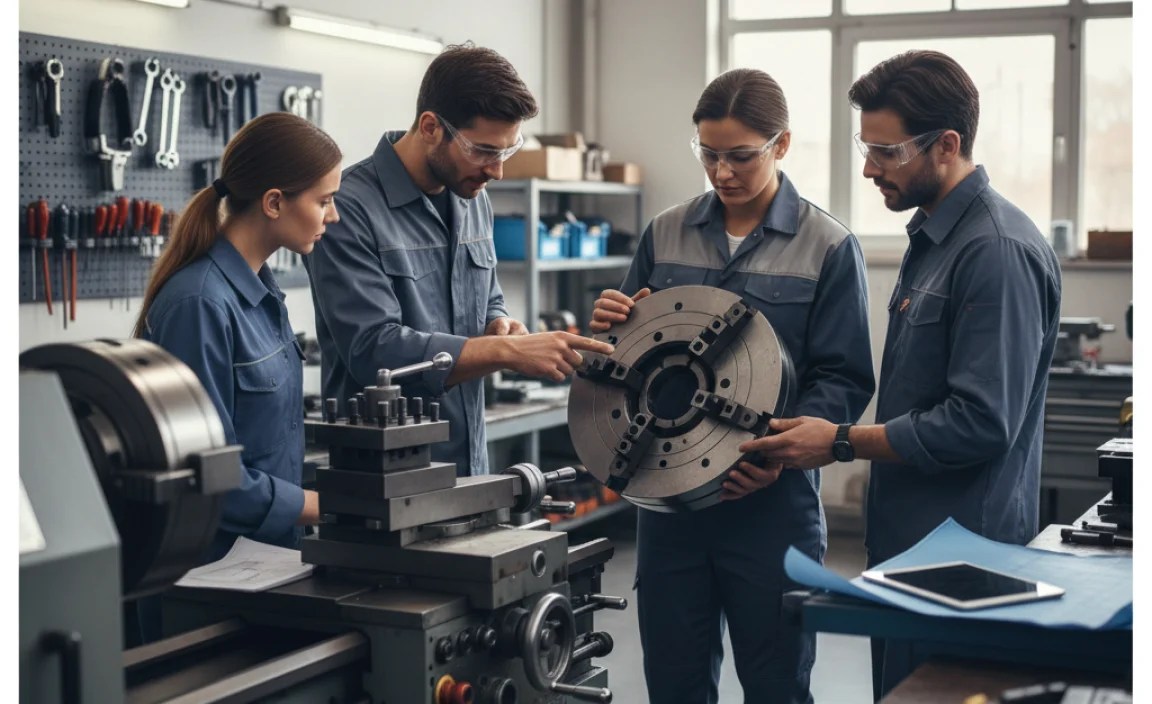
2. Selecting the Right Chuck
Choosing the correct replacement chuck is crucial. Consider the following factors:
- Tool Type: Match the chuck to the specific tool (e.g., drill, lathe).
- Size: Ensure the chuck size matches the tool’s spindle and the range of bits it needs to hold.
- Mount Type: Common mount types include threaded, taper, and integrated.
- Quality: Invest in high-quality chucks from reputable brands for durability and performance.
3. Removing the Old Chuck
The removal process varies depending on the chuck type. Here are the general steps:
Removing a Threaded Chuck
- Secure the Spindle: Use a wrench to hold the spindle in place.
- Loosen the Chuck: Use a chuck key or wrench to loosen the chuck from the spindle.
- Unscrew the Chuck: Rotate the chuck counterclockwise to unscrew it completely.
Removing a Tapered Chuck
- Insert a Knockout Bar: Insert a knockout bar through the spindle bore.
- Tap the Bar: Gently tap the knockout bar with a hammer to dislodge the chuck.
- Catch the Chuck: Be ready to catch the chuck as it comes loose.
4. Installing the New Chuck
The installation process also varies by chuck type. Here are the general steps:
Installing a Threaded Chuck
- Clean the Spindle Threads: Ensure the spindle threads are clean and free from debris.
- Apply Lubricant: Apply a small amount of lubricant to the threads.
- Screw on the Chuck: Rotate the chuck clockwise to screw it onto the spindle.
- Tighten the Chuck: Use a wrench to tighten the chuck securely.
Installing a Tapered Chuck
- Clean the Taper: Ensure both the chuck taper and the spindle taper are clean.
- Align the Chuck: Align the chuck with the spindle.
- Press the Chuck: Use a press or gentle hammer taps to seat the chuck firmly onto the spindle.
5. Quality Checks and Testing
After installation, perform quality checks to ensure the chuck is properly installed:
- Runout Test: Use a dial indicator to measure the runout (deviation from true rotation). Acceptable runout depends on the tool and application but should generally be minimal.
- Grip Test: Insert a bit or workpiece and check that the chuck holds it securely without slippage.
- Visual Inspection: Check for any gaps or misalignment between the chuck and the spindle.
6. Documentation and Record-Keeping
Maintain records of all chuck replacements, including:
- Date of Replacement: When the chuck was replaced.
- Tool Identification: Which tool the chuck was installed on.
- Chuck Model: The model number of the replacement chuck.
- Technician: Who performed the replacement.
This documentation helps track maintenance schedules and identify potential issues.
Tools and Equipment Needed
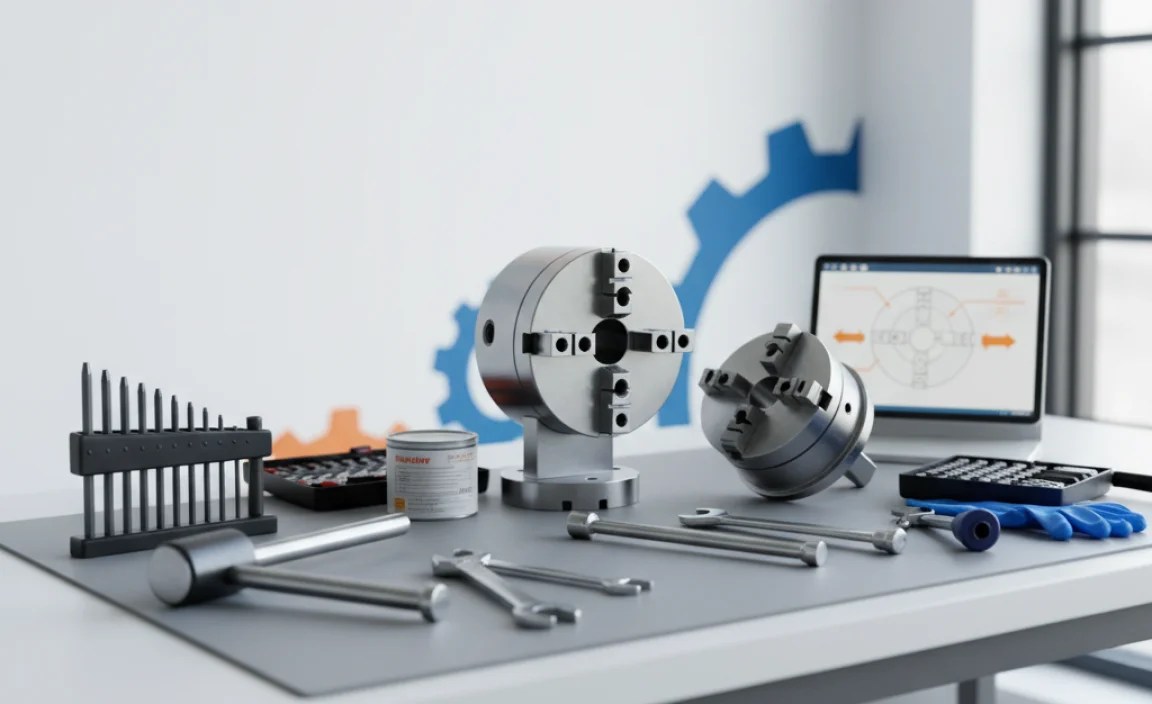
Make sure your staff has access to the necessary tools and equipment for chuck replacement:
- Chuck Key: For tightening and loosening keyed chucks.
- Wrenches: For securing the spindle and tightening threaded chucks.
- Knockout Bar: For removing tapered chucks.
- Hammer: For gently tapping the knockout bar.
- Dial Indicator: For measuring runout.
- Cleaning Supplies: For cleaning the spindle and chuck.
- Lubricant: For lubricating threads.
- Press: For installing tapered chucks (optional but recommended).
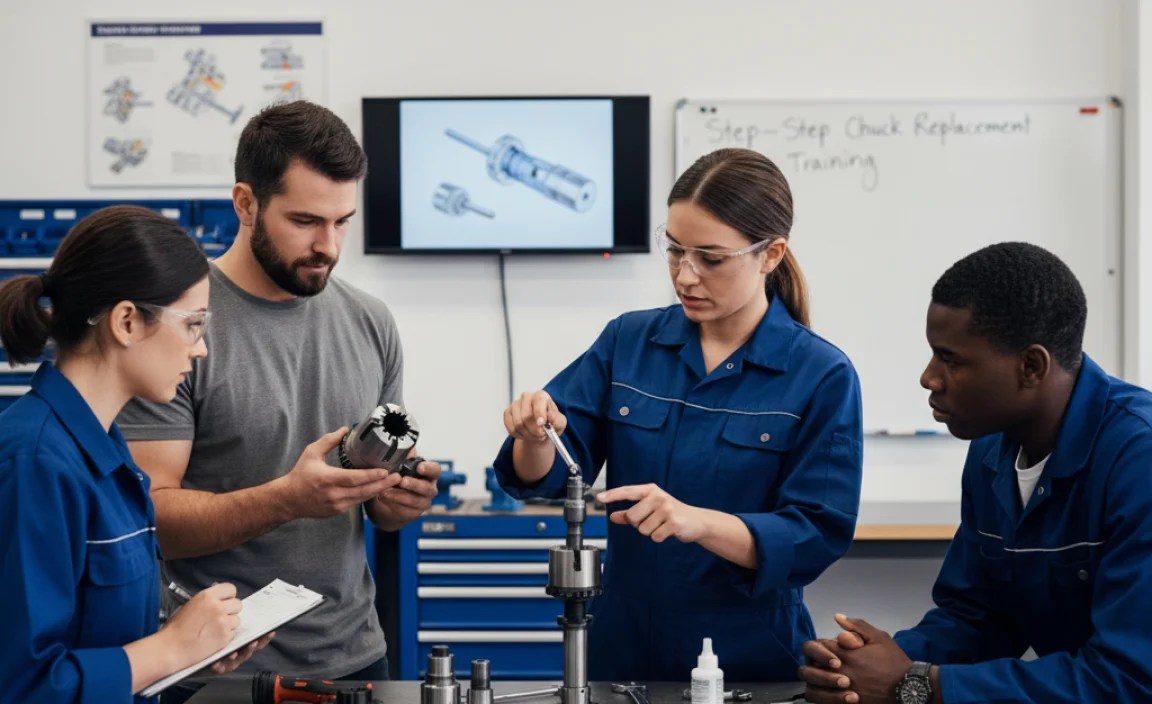
Creating a Training Program
A well-structured training program is essential for ensuring your staff masters chuck replacement. Here’s how to create one:
1. Start with Theory
Begin with classroom-style training to cover the basics:
- Chuck Types and Applications: Explain the different types of chucks and their uses.
- Safety Procedures: Emphasize the importance of safety and proper PPE.
- Step-by-Step Instructions: Walk through the removal and installation processes in detail.
2. Hands-On Practice
Provide hands-on practice sessions where staff can work on actual tools:
- Supervised Practice: Supervise staff as they perform chuck replacements on various tools.
- Troubleshooting: Teach them how to troubleshoot common issues.
- Quality Checks: Train them to perform runout and grip tests.
3. Ongoing Training and Updates
Chuck replacement techniques and tool designs can evolve, so provide ongoing training:
- Regular Refreshers: Conduct regular refresher courses to reinforce best practices.
- Updates on New Tools: Provide training on new tools and chuck types as they are introduced.
- Feedback and Improvement: Encourage feedback from staff and use it to improve the training program.
4. Certification
Consider implementing a certification program to ensure competency:
- Written Exam: Test knowledge of safety procedures and chuck types.
- Practical Exam: Evaluate ability to perform chuck replacements correctly.
- Certification Renewal: Require periodic recertification to ensure skills remain current.
Troubleshooting Common Issues
Even with proper training, issues can arise during chuck replacement. Here’s how to troubleshoot some common problems:
| Issue | Possible Cause | Solution |
|---|---|---|
| Chuck won’t come off | Corrosion or tight fit | Use penetrating oil, apply heat, or use a more powerful knockout bar. |
| New chuck won’t seat properly | Dirty or damaged taper | Clean the taper thoroughly, repair any damage, or replace the spindle. |
| Excessive runout | Misalignment or damaged chuck | Reinstall the chuck, check for damage, or replace the chuck. |
| Chuck slips during operation | Worn chuck jaws or incorrect tightening | Replace the chuck or ensure proper tightening technique. |
Advanced Techniques and Tips
Once your staff is comfortable with basic chuck replacement, you can introduce some advanced techniques and tips:
- Using a Chuck Press: A chuck press provides more controlled force for installing tapered chucks, reducing the risk of damage.
- Custom Chuck Jaws: For specialized applications, custom chuck jaws can be machined to hold specific workpieces.
- Quick-Change Chucks: Quick-change chucks allow for rapid tool changes, increasing efficiency in high-production environments.
- Balancing Chucks: Balancing chucks is crucial for high-speed applications to minimize vibration and ensure accurate performance.
Benefits of Proper Training
Investing in proper chuck replacement training offers numerous benefits:
- Improved Safety: Reduces the risk of accidents and injuries.
- Increased Efficiency: Minimizes downtime and speeds up operations.
- Higher Quality Work: Ensures accurate and precise results.
- Reduced Tool Costs: Prevents damage to tools and extends their lifespan.
- Enhanced Employee Morale: Increases confidence and job satisfaction.
Resources for Further Learning
To enhance your training program, consider these additional resources:
- Manufacturer Manuals: Provide detailed information on specific chuck models.
- Online Tutorials: Offer visual demonstrations of chuck replacement techniques.
- Industry Publications: Keep up-to-date with the latest trends and best practices.
- Professional Organizations: Join organizations like the National Tooling and Machining Association (NTMA) for access to training and resources.
FAQ: Chuck Replacement Training
Here are some frequently asked questions about chuck replacement training:
What are the most common mistakes made during chuck replacement?
Common mistakes include not disconnecting power, using the wrong tools, failing to clean the spindle, and neglecting to perform runout tests.
How often should chuck replacement training be conducted?
Initial training should be followed by refresher courses at least annually, or more frequently if new tools or techniques are introduced.
What is the best way to ensure staff members retain the training information?
Hands-on practice, regular quizzes, and readily available reference materials can help reinforce learning.
How can I measure the effectiveness of my chuck replacement training program?
Track metrics such as the number of chuck-related incidents, tool downtime, and the accuracy of completed projects.
What should I do if a staff member is consistently struggling with chuck replacement?
Provide additional one-on-one training, simplify the process, or re-evaluate their suitability for the task.
Are there any specific certifications for chuck replacement?
While there aren’t specific certifications solely for chuck replacement, certifications in machine maintenance or tool operation often cover these skills.
How important is it to use genuine replacement parts?
Using genuine replacement parts is crucial for ensuring proper fit, performance, and safety. Aftermarket parts may not meet the same standards.
Conclusion
Training your workshop staff on chuck replacement is an investment that pays off in safety, efficiency, and quality. By following the steps outlined in this guide, you can create a comprehensive training program that equips your team with the skills and knowledge they need to handle chuck replacement with confidence. Remember to prioritize safety, provide hands-on practice, and stay up-to-date with the latest techniques. With a well-trained team, your workshop will run smoother, safer, and more efficiently.


