
How to Stop a Shallow Well Pump from Short Cycling
Quick Summary: Short cycling in a shallow well pump means it’s turning on and off too frequently, which can damage the pump and waste energy. To fix it, check the pressure tank’s air charge, inspect for leaks in the pipes, ensure the well isn’t running dry, and consider installing a larger pressure tank or a Cycle Stop Valve. Each of these steps will help stabilize the water pressure and extend the life of your pump.
Is your shallow well pump driving you crazy by turning on and off every few seconds? You’re not alone! This annoying issue, called “short cycling,” is a common headache for well owners. Not only is it noisy and inefficient, but it can also seriously shorten the lifespan of your pump. The good news is that you can often fix it yourself with a few simple checks and adjustments. In this guide, we’ll walk you through the most common causes of short cycling and provide step-by-step instructions to get your pump running smoothly again. Let’s dive in!
Understanding Short Cycling in Shallow Well Pumps

Short cycling refers to the rapid on-off cycling of a well pump, typically occurring when the pump struggles to maintain consistent water pressure. Instead of running for a reasonable period to fill the pressure tank and then shutting off, the pump starts and stops frequently, sometimes within seconds. This puts undue stress on the pump’s motor and components, leading to premature wear and potential failure.
Why Short Cycling is Bad
Here’s why you should address short cycling as soon as you notice it:
- Reduced Pump Lifespan: Frequent starts and stops generate heat and mechanical stress, wearing out the motor, impeller, and other pump parts faster.
- Increased Energy Consumption: Each pump start requires a surge of electricity. Short cycling wastes energy and increases your electricity bill.
- Water Pressure Fluctuations: Short cycling causes inconsistent water pressure in your home, leading to annoying spurts and dips in flow.
- Potential for Water Hammer: The rapid on-off action can create pressure waves in the pipes, known as water hammer, which can damage plumbing fixtures and joints.
Identifying the Causes of Short Cycling

Before you start troubleshooting, it’s essential to understand the potential causes of short cycling. Here are the most common culprits:
- Low Air Charge in the Pressure Tank: The pressure tank stores water under pressure, providing a buffer between the pump and your household plumbing. If the air charge in the tank is too low, the pump will cycle on and off more frequently.
- Waterlogged Pressure Tank: Over time, pressure tanks can become waterlogged, meaning they lose their air cushion. This reduces the tank’s ability to store water under pressure, leading to short cycling.
- Leaks in the Plumbing System: Leaks in the pipes, fittings, or fixtures can cause a drop in water pressure, triggering the pump to turn on more frequently.
- Well Running Dry: If the well’s water level drops below the pump intake, the pump will suck air, causing it to cycle on and off rapidly.
- Faulty Pressure Switch: The pressure switch controls the pump’s on-off cycle based on water pressure. A malfunctioning switch can cause erratic pump behavior.
- Incorrect Pump Size: If the pump is too powerful for your well and plumbing system, it may cycle on and off too quickly.
Step-by-Step Guide to Stopping Short Cycling

Now that you understand the potential causes, let’s get to the solutions. Here’s a step-by-step guide to troubleshoot and fix short cycling in your shallow well pump:
Step 1: Check the Pressure Tank’s Air Charge
The air charge in the pressure tank is crucial for proper pump operation. Here’s how to check and adjust it:
- Turn off the pump: Locate the circuit breaker for the well pump and switch it off.
- Drain the pressure tank: Open a faucet in your house and let the water run until the pressure tank is completely empty. This ensures an accurate air pressure reading.
- Check the air pressure: Locate the Schrader valve (like a tire valve) on top of the pressure tank. Use a tire pressure gauge to check the air pressure.
- Adjust the air pressure: The air pressure should be 2 PSI below the pump’s cut-in pressure (the pressure at which the pump turns on). For example, if the pump’s cut-in pressure is 30 PSI, the air pressure should be 28 PSI. Use a bicycle pump or air compressor to add or release air as needed.
- Turn the pump back on: Close the faucet and turn the circuit breaker back on. Observe the pump’s behavior. If it still short cycles, move on to the next step.
Step 2: Inspect for Leaks
Even small leaks can cause a significant drop in water pressure, leading to short cycling. Carefully inspect the entire plumbing system for leaks:
- Check all visible pipes and fittings: Look for drips, wet spots, or signs of corrosion. Pay close attention to joints and connections.
- Inspect the well casing and pump housing: Check for cracks or leaks around the well casing and where the pump connects to the plumbing.
- Examine faucets and toilets: A running toilet or a leaky faucet can contribute to short cycling. Repair any leaks you find.
- Check underground pipes: If you suspect a leak in an underground pipe, you may need to hire a professional plumber to locate and repair it.
Step 3: Check the Well Water Level
If the well is running dry, the pump will suck air and cycle on and off rapidly. Here’s how to check the water level:
- Listen to the pump: If the pump is making unusual noises, such as gurgling or sputtering, it may be sucking air.
- Check the water level with a well sounder: A well sounder is a device used to measure the water level in a well. Lower the sounder into the well until it reaches the water, then read the depth.
- Compare the water level to the pump intake: The water level should be well above the pump intake. If it’s close to or below the intake, the well may be running dry.
If the well is running dry, you may need to:
- Conserve water usage.
- Lower the pump deeper into the well (if possible).
- Consider drilling a deeper well or finding an alternative water source.
Step 4: Inspect the Pressure Switch
The pressure switch is a critical component that controls the pump’s on-off cycle. A faulty switch can cause short cycling. Here’s how to inspect it:
- Turn off the pump: Disconnect the power to the pump at the circuit breaker.
- Locate the pressure switch: The pressure switch is usually located near the pressure tank and has wires connected to it.
- Inspect the switch for damage: Look for signs of corrosion, cracks, or loose wires.
- Clean the switch contacts: If the contacts are dirty or corroded, clean them with a wire brush or sandpaper.
- Test the switch: Use a multimeter to test the switch’s continuity. The switch should close (show continuity) when the pressure drops below the cut-in pressure and open (no continuity) when the pressure reaches the cut-out pressure.
- Replace the switch if necessary: If the switch is damaged or not working properly, replace it with a new one of the same type and pressure settings.
Step 5: Consider a Larger Pressure Tank
A larger pressure tank can provide a greater buffer between the pump and your household plumbing, reducing the frequency of pump cycles. If you have a small pressure tank, consider upgrading to a larger one.
Here’s how to determine the appropriate size for your pressure tank:
- Calculate your water usage: Estimate your average daily water usage based on the number of people in your household and your typical water consumption habits.
- Determine your pump’s flow rate: Find the flow rate (gallons per minute) of your well pump. This information is usually printed on the pump’s nameplate.
- Use a pressure tank sizing chart: Consult a pressure tank sizing chart or use an online calculator to determine the appropriate tank size based on your water usage and pump flow rate.
Consulting with a plumbing professional is also a good option to ensure you select the right size tank for your needs.
Step 6: Install a Cycle Stop Valve (CSV)
A Cycle Stop Valve is a pressure-regulating valve that maintains a constant pressure in the plumbing system, regardless of water demand. It reduces the pump’s cycling frequency and extends its lifespan.
Here’s how a CSV works:
- The CSV senses the water flow and adjusts the valve opening to maintain a constant pressure.
- When water demand is low, the CSV restricts the flow, allowing the pump to run continuously at a lower flow rate.
- This eliminates the frequent on-off cycling associated with traditional pressure tank systems.
Installing a CSV can be a more complex project and may require professional assistance.
Troubleshooting Table

Here is a quick reference table to help you troubleshoot:
| Problem | Possible Cause | Solution |
|---|---|---|
| Pump short cycles | Low air charge in pressure tank | Check and adjust air pressure |
| Pump short cycles | Waterlogged pressure tank | Drain and recharge or replace tank |
| Pump short cycles | Leaks in plumbing | Inspect and repair leaks |
| Pump short cycles | Well running dry | Conserve water, lower pump, or drill deeper well |
| Pump short cycles | Faulty pressure switch | Inspect, clean, or replace switch |
| Pump short cycles | Incorrect pump size | Consult with a professional to determine correct pump size |
Tools You’ll Need
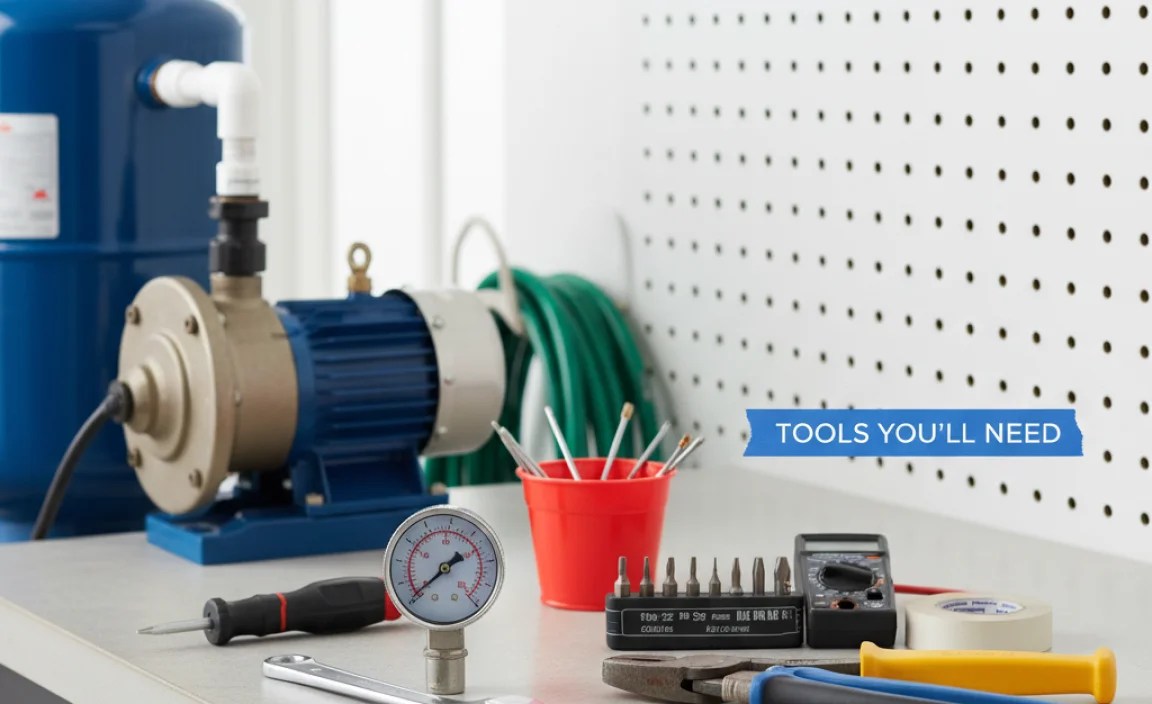
Before you start troubleshooting, gather the following tools:
- Tire pressure gauge
- Bicycle pump or air compressor
- Wrenches
- Screwdrivers
- Multimeter
- Wire brush or sandpaper
- Well sounder (optional)
- Plumber’s tape
- Pipe sealant
Safety Precautions
When working with well pumps and plumbing, always follow these safety precautions:
- Turn off the power to the pump before working on any electrical components.
- Wear safety glasses to protect your eyes.
- Be careful when working with water and electricity.
- If you’re not comfortable working with plumbing or electrical systems, hire a qualified professional.
Preventive Maintenance Tips
To prevent short cycling and extend the life of your well pump, follow these preventive maintenance tips:
- Check the pressure tank’s air charge regularly (every 6 months).
- Inspect the plumbing system for leaks periodically.
- Monitor your water usage and conserve water when possible.
- Have your well and pump inspected by a professional every few years.
FAQ Section
Here are some frequently asked questions about short cycling in shallow well pumps:
- Q: Why is my well pump turning on and off so frequently?
- A: Frequent on-off cycling, or short cycling, is often due to a low air charge in the pressure tank, leaks in the plumbing system, or a well running dry. A faulty pressure switch can also be the culprit.
- Q: How do I check the air pressure in my pressure tank?
- A: First, turn off the pump and drain the pressure tank. Then, use a tire pressure gauge to check the air pressure at the Schrader valve on top of the tank. The pressure should be 2 PSI below the pump’s cut-in pressure.
- Q: What is a waterlogged pressure tank?
- A: A waterlogged pressure tank is one that has lost its air cushion, meaning it’s mostly filled with water. This reduces the tank’s ability to store water under pressure, leading to short cycling.
- Q: Can a leaky toilet cause my well pump to short cycle?
- A: Yes, a running toilet or any other leak in the plumbing system can cause a drop in water pressure, triggering the pump to turn on more frequently.
- Q: Is it safe to drink water from a well that is short cycling?
- A: While short cycling itself doesn’t directly contaminate the water, it can indicate underlying issues with the well or plumbing system that could affect water quality. It’s always a good idea to have your water tested regularly, especially if you’re experiencing well pump problems. You can find certified labs through the EPA website: EPA Private Wells Information.
- Q: How much does it cost to fix a short cycling well pump?
- A: The cost to fix short cycling varies depending on the cause. Simple fixes like adjusting the air pressure in the pressure tank are free. Replacing a pressure switch might cost $50-$100. Replacing a pressure tank could range from $200 to $500, while drilling a deeper well could cost thousands. Hiring a professional plumber will also add to the expense.
- Q: When should I call a professional?
- A: If you’re not comfortable working with plumbing or electrical systems, or if you’ve tried the troubleshooting steps and the pump is still short cycling, it’s best to call a qualified plumber or well contractor. They can diagnose the problem accurately and recommend the appropriate solution. Additionally, if you suspect a leak in an underground pipe, it’s best to call a professional.
Conclusion
Dealing with a short cycling well pump can be frustrating, but with a little knowledge and some basic troubleshooting, you can often resolve the issue yourself. By checking the pressure tank’s air charge, inspecting for leaks, ensuring the well isn’t running dry, and considering a larger pressure tank or a Cycle Stop Valve, you can stop the short cycling and extend the life of your pump. Remember to prioritize safety and consult with a professional if you’re unsure about any of the steps. With a little effort, you can enjoy consistent water pressure and a more reliable well system for years to come.
“`


