
How to Fix Sump Pump Short Cycling: A Step-by-Step Guide
Quick Summary: Sump pump short cycling (turning on and off too frequently) can damage your pump and flood your basement. To fix it, first, clean the pump pit. Then, adjust the float switch, check the discharge pipe for obstructions, ensure the check valve is working, and confirm the pump is correctly sized. Regular maintenance will prevent future issues and keep your basement dry.
Is your sump pump turning on and off more often than it should? This is called short cycling, and it’s a common problem for homeowners. It not only wastes energy but can also significantly shorten the lifespan of your sump pump. The good news is that many causes of short cycling are easy to fix yourself. By understanding the reasons behind this issue and following a few simple steps, you can get your sump pump back to working efficiently and reliably.
In this guide, we’ll walk you through the most common causes of short cycling and provide clear, step-by-step instructions on how to address each one. From adjusting the float switch to clearing obstructions in the discharge pipe, you’ll learn how to diagnose and fix the problem. Let’s get started and keep your basement dry!
Understanding Sump Pump Short Cycling

Before we dive into the fixes, it’s important to understand what short cycling is and why it happens. A sump pump is designed to remove water from a sump pit, preventing your basement from flooding. When it turns on and off too frequently in a short period, it’s short cycling. This puts unnecessary strain on the motor, leading to premature failure. Here’s a closer look at why this happens:
- Float Switch Issues: The float switch tells the pump when to turn on and off. If it’s stuck, tangled, or improperly adjusted, it can cause the pump to cycle rapidly.
- Clogged Impeller: Debris can clog the impeller, reducing the pump’s efficiency and causing it to work harder and cycle more often.
- Incorrect Pump Size: If the pump is too powerful for the amount of water it needs to handle, it will quickly pump out the water and then shut off, only to start again shortly after.
- Check Valve Problems: The check valve prevents water from flowing back into the sump pit after the pump shuts off. If it’s faulty, the pump will have to remove the same water repeatedly.
- Discharge Pipe Obstructions: Blockages in the discharge pipe can cause backpressure, making the pump work harder and cycle more frequently.
Tools and Materials You’ll Need

Before you start, gather the necessary tools and materials. Having everything on hand will make the job go smoothly. Here’s a list of what you’ll likely need:
- Gloves
- Safety glasses
- Screwdrivers (Phillips and flathead)
- Pliers
- Adjustable wrench
- Shop vacuum or wet/dry vacuum
- Garden hose
- Bucket
- Check valve (if replacement is needed)
- New float switch (if needed)
Step-by-Step Guide to Fixing Sump Pump Short Cycling

Now, let’s get into the step-by-step instructions for fixing sump pump short cycling. Follow these steps carefully to diagnose and resolve the issue.
Step 1: Disconnect the Power
Safety first! Before you do anything, disconnect the sump pump from its power source. This will prevent any electrical accidents while you’re working on it. Simply unplug the pump from the outlet.
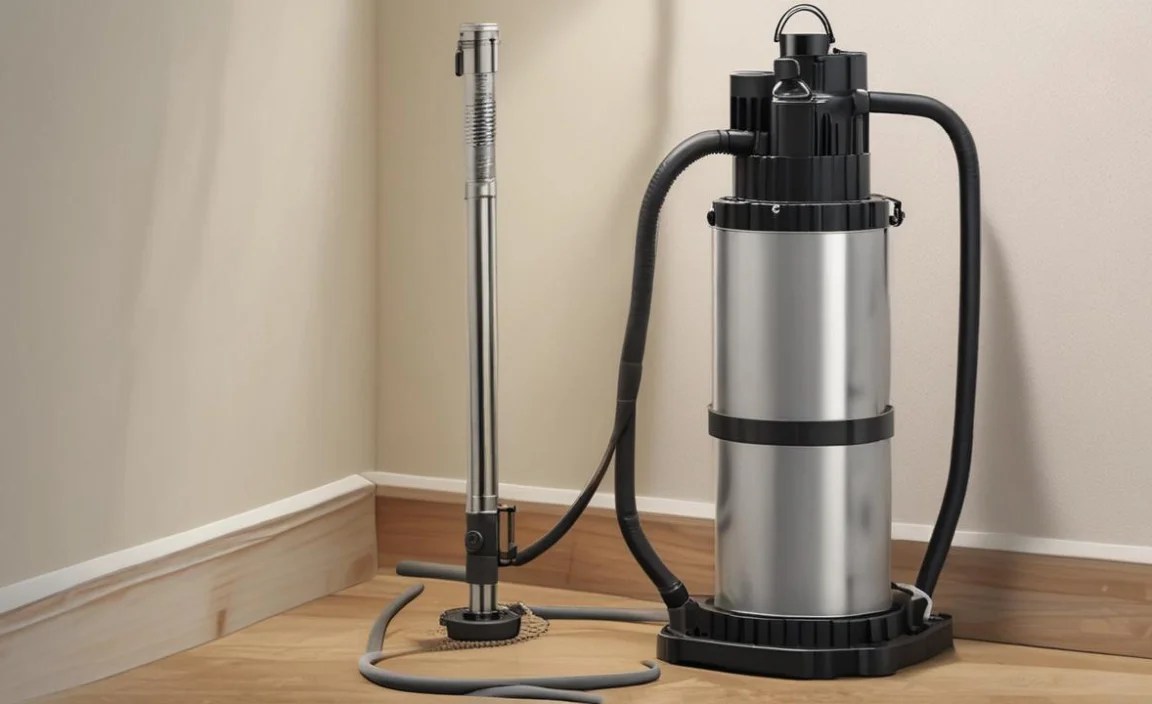
Step 2: Inspect and Clean the Sump Pit
A dirty sump pit can cause all sorts of problems. Debris can interfere with the float switch and clog the pump. Here’s how to clean it:
- Remove the Pump: Carefully lift the pump out of the pit. Be mindful of any attached pipes or cords.
- Inspect the Pit: Look for any sediment, rocks, or debris at the bottom of the pit.
- Remove Debris: Use a shop vacuum or a bucket to remove any accumulated debris from the pit.
- Clean the Pump Intake: Check the pump’s intake screen for clogs and clean it thoroughly. A garden hose can be helpful for rinsing away stubborn dirt.
Step 3: Check and Adjust the Float Switch
The float switch is crucial for proper pump operation. If it’s not working correctly, it can cause short cycling. Here’s how to check and adjust it:
- Inspect the Float: Make sure the float moves freely and isn’t obstructed by anything in the pit. Sometimes, the float can get stuck against the side of the pit or tangled with the pump’s cord.
- Adjust the Tether: Many float switches have an adjustable tether. Shortening the tether will cause the pump to turn on and off more frequently, while lengthening it will reduce the frequency. Adjust the tether so that the pump turns on when the water level reaches a reasonable height and turns off when the water level has dropped sufficiently.
- Test the Switch: Manually lift the float to see if the pump turns on. Lower the float to see if the pump turns off. If the switch doesn’t respond, it may need to be replaced.
Step 4: Inspect the Check Valve
The check valve prevents water from flowing back into the sump pit after the pump shuts off. If it’s not working correctly, the pump will have to pump the same water repeatedly, leading to short cycling. Here’s what to do:
- Locate the Check Valve: The check valve is usually located on the discharge pipe, near the pump.
- Inspect for Leaks: Check the valve for any signs of leaks or damage.
- Test the Valve: Manually open and close the valve to ensure it moves freely. If it’s stuck or doesn’t seal properly, it needs to be replaced.
- Replace if Necessary: If the check valve is faulty, replace it with a new one. Make sure to choose a check valve that’s compatible with your pump and discharge pipe.
Step 5: Check the Discharge Pipe for Obstructions
A blocked discharge pipe can cause backpressure, making the pump work harder and cycle more frequently. Here’s how to check for and clear any obstructions:
- Inspect the Pipe: Check the entire length of the discharge pipe for any visible blockages or kinks. Pay particular attention to areas where the pipe bends or connects to other pipes.
- Disconnect the Pipe: Disconnect the discharge pipe from the pump and the outlet point.
- Flush the Pipe: Use a garden hose to flush the pipe with water, dislodging any debris. If the blockage is stubborn, you may need to use a plumbing snake to break it up.
- Reassemble the Pipe: Once the pipe is clear, reassemble it, making sure all connections are secure.
Step 6: Verify the Pump Size
Using the wrong size sump pump can lead to short cycling. If the pump is too powerful, it will quickly remove the water and then shut off, only to start again shortly after. Here’s how to verify that you have the right size pump:
- Assess Your Needs: Consider the size of your basement, the typical water level in the sump pit, and the frequency of flooding. This will help you determine the appropriate pump capacity.
- Check the Pump’s Specifications: Look for the pump’s flow rate (gallons per minute or GPM) on the pump itself or in the manufacturer’s documentation.
- Compare to Recommendations: Compare the pump’s flow rate to the recommendations for your specific situation. A pump that’s too powerful will cycle too frequently, while a pump that’s not powerful enough won’t be able to keep up with the water inflow.
- Consider a Variable Speed Pump: If you’re unsure about the right size, consider a variable speed pump. These pumps adjust their speed based on the water level, reducing the risk of short cycling.
Step 7: Reinstall the Pump and Test It
After addressing all the potential issues, it’s time to reinstall the pump and test it to make sure it’s working correctly:
- Place the Pump in the Pit: Carefully lower the pump back into the sump pit, making sure it’s sitting securely on the bottom.
- Connect the Discharge Pipe: Reconnect the discharge pipe to the pump.
- Plug in the Pump: Plug the pump back into the outlet.
- Test the Pump: Pour water into the sump pit to activate the float switch and observe the pump’s operation. Make sure it turns on and off at the appropriate water levels and that it’s not cycling too frequently.
Preventative Maintenance for Sump Pumps
Preventing short cycling is better than fixing it. Regular maintenance can keep your sump pump running smoothly and extend its lifespan. Here are some tips for preventative maintenance:
- Clean the Sump Pit Regularly: At least twice a year, remove the pump and clean out any debris from the sump pit.
- Inspect the Float Switch: Check the float switch regularly to make sure it moves freely and isn’t obstructed. Adjust the tether as needed.
- Test the Pump Periodically: Every few months, pour water into the sump pit to test the pump and make sure it’s working correctly.
- Check the Check Valve: Inspect the check valve for leaks or damage and replace it if necessary.
- Clear the Discharge Pipe: Periodically check the discharge pipe for obstructions and flush it with water to keep it clear.
- Consider a Backup System: Install a battery backup system or a secondary sump pump to protect your basement during power outages or pump failures.
Troubleshooting Common Issues
Even with regular maintenance, you might encounter some issues with your sump pump. Here are some common problems and how to troubleshoot them:
| Issue | Possible Cause | Solution |
|---|---|---|
| Pump won’t turn on | No power, tripped circuit breaker, faulty switch | Check power supply, reset breaker, replace switch |
| Pump runs constantly | Stuck float switch, continuous water inflow | Adjust or replace float switch, address water source |
| Pump is noisy | Worn bearings, loose components, debris in impeller | Lubricate bearings, tighten components, clean impeller |
| Water backing up | Clogged discharge pipe, faulty check valve, pump failure | Clear pipe, replace valve, replace pump |
Advanced Solutions for Persistent Short Cycling
If you’ve tried the basic fixes and your sump pump is still short cycling, you might need to consider more advanced solutions:
- Install a Sump Basin: A larger sump basin can help regulate the water level and reduce the frequency of pump cycles. Ensure that the basin is properly installed and sealed to prevent water leakage.
- Use a Cycle Counter: Install a cycle counter to monitor how often your sump pump is turning on and off. This can help you identify patterns and potential issues before they become major problems.
- Optimize Drainage: Improve the drainage around your home’s foundation to reduce the amount of water that enters the sump pit. This can involve grading the landscape, cleaning gutters, and extending downspouts.
- Professional Inspection: If you’re unable to resolve the issue yourself, consider hiring a professional plumber or sump pump technician to inspect your system and recommend solutions. They can identify underlying problems that you might have missed.
Cost Considerations for Sump Pump Maintenance and Repair
Maintaining or repairing a sump pump involves various costs. Understanding these can help you budget effectively. Here’s a breakdown:
| Item/Service | Average Cost | Description |
|---|---|---|
| New Check Valve | $10 – $30 | Replacement valve to prevent backflow. |
| New Float Switch | $20 – $50 | Replacement switch to control pump activation. |
| Sump Pump Replacement | $100 – $400 | Cost for a new sump pump unit. |
| Professional Inspection | $75 – $200 | Fee for a plumber or technician to assess the system. |
| Installation Costs | $150 – $500 | Professional installation of a new pump or components. |
FAQ: Addressing Your Sump Pump Questions
Here are some frequently asked questions about sump pumps and short cycling:
Why is my sump pump turning on every few minutes?
Your sump pump might be turning on frequently due to a high water table, a faulty float switch, a clogged discharge pipe, or an incorrectly sized pump. Check these components to identify and resolve the issue.
Is it bad if my sump pump runs too often?
Yes, frequent cycling can cause the motor to overheat and wear out quickly. It also wastes energy and increases the risk of pump failure, potentially leading to a flooded basement.
How do I adjust the float switch on my sump pump?
Adjust the tether length on the float switch. Shortening the tether increases the frequency of cycles, while lengthening it reduces the frequency. Ensure the float moves freely and isn’t obstructed.
Can a bad check valve cause short cycling?
Yes, a faulty check valve can allow water to flow back into the sump pit after the pump shuts off, causing the pump to turn on again shortly after. Replace the check valve if it’s not sealing properly.
How often should I replace my sump pump?
Sump pumps typically last for 7-10 years. However, it’s a good idea to inspect your pump regularly and replace it if you notice any signs of wear or decreased performance.
What size sump pump do I need?
The size of the sump pump depends on the size of your basement, the typical water level in the sump pit, and the frequency of flooding. Consult a professional or refer to sizing guides to determine the appropriate pump capacity for your needs. Generally, 1/3 HP is suitable for a small basement, while 1/2 HP or greater is needed for larger basements or frequent flooding.
Is it worth getting a sump pump with a battery backup?
Yes, a sump pump with a battery backup is a worthwhile investment, especially if you live in an area prone to power outages. The battery backup will keep the pump running during a power outage, protecting your basement from flooding.
Conclusion
Fixing sump pump short cycling might seem daunting at first, but by following these step-by-step instructions, you can diagnose and resolve the issue effectively. Regular maintenance and prompt attention to potential problems will keep your sump pump running smoothly and protect your basement from water damage. Remember to prioritize safety by disconnecting the power before working on the pump, and don’t hesitate to seek professional help if you’re unsure about any step. With a little effort, you can ensure your sump pump is always ready to keep your home dry and secure.


