
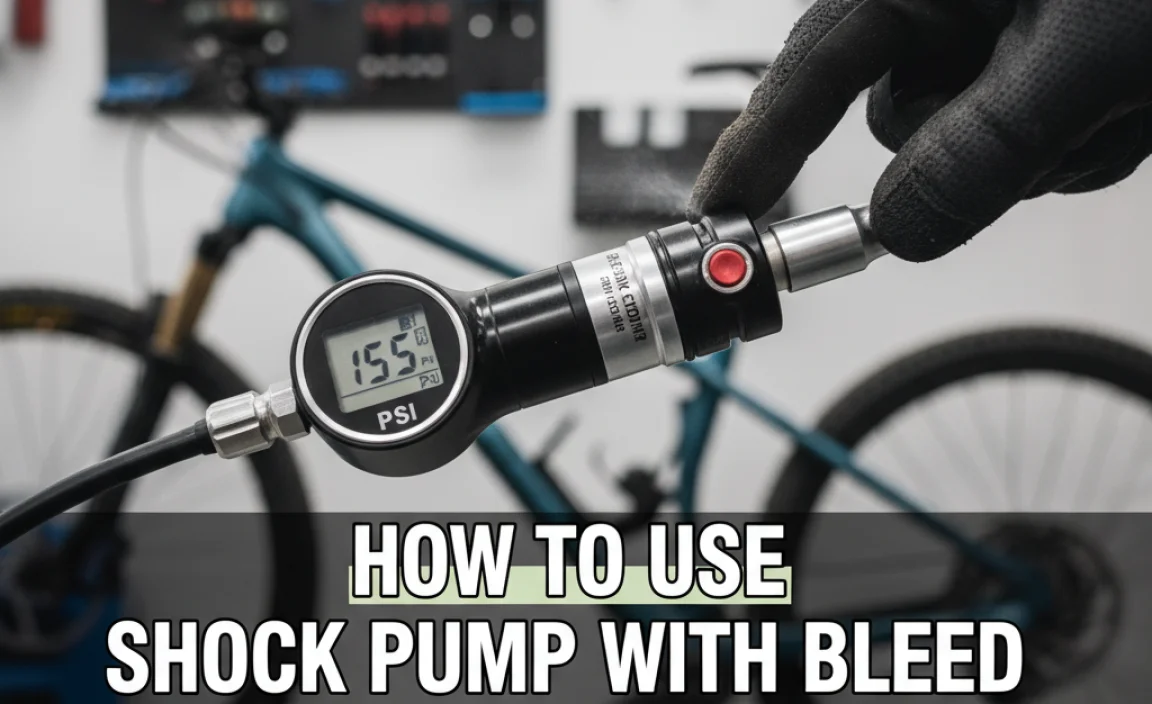
How to Use Shock Pump with Bleed Button for Fine Tuning
Have you ever ridden a bike that felt too bumpy? Or maybe one that felt too soft? Getting the right air pressure in your bike’s suspension is key. This is where a shock pump comes in handy. Some even have a special bleed button. Do you know how to use shock pump with bleed button for fine tuning? Let’s find out how to make your ride super smooth!
A shock pump helps you add or remove air. This changes how your bike feels when you ride it. The bleed button lets you make tiny adjustments. It gives you perfect control. It is like having a volume knob for your bike’s comfort!
Key Takeaways
- A shock pump with bleed button helps adjust bike suspension for comfort.
- Always check your bike’s manual for the right air pressure.
- The bleed button releases small amounts of air for fine tuning.
- Too much or too little air can make riding uncomfortable or unsafe.
- Learning how to use shock pump with bleed button for fine tuning improves your ride.
Understanding Your Bike’s Suspension
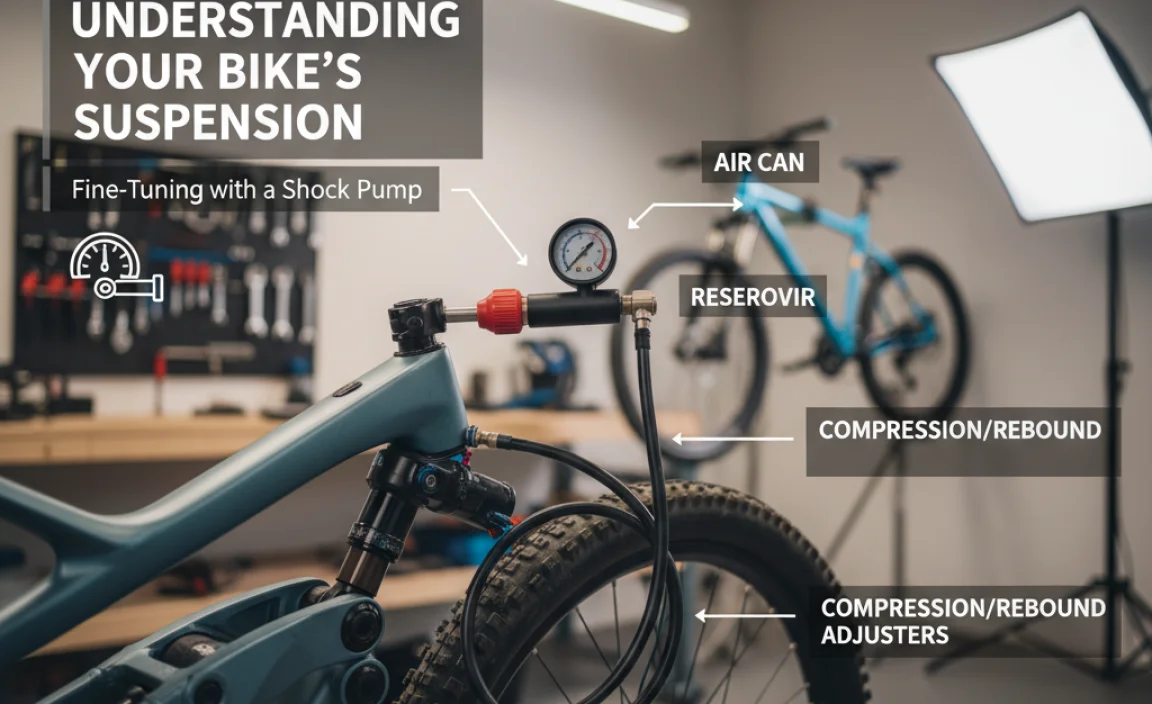
Your bike’s suspension is like a spring. It soaks up bumps. It keeps your tires on the ground. This gives you more control. There are different types of suspension. Some bikes only have front suspension. These are called hardtails. Other bikes have both front and rear suspension. These are full-suspension bikes. Knowing what kind you have is the first step. Next, you need to understand how it works. Air pressure is a big part. Too much air makes the ride harsh. Too little air makes it feel soft and squishy. Finding the right balance is key. This is where a shock pump becomes your best friend. It allows you to dial in the perfect feel. Using a pump with a bleed button makes it even easier to get it just right. It will make your ride safe and fun.
- Suspension helps absorb bumps on the trail.
- Hardtails only have front suspension forks.
- Full-suspension bikes have front and rear shocks.
- Air pressure affects how suspension performs.
- A shock pump helps adjust air pressure precisely.
Imagine your bike as a bouncy ball. If it’s too hard, every little bump stings. If it’s too soft, it barely bounces at all. You want it just right. Your bike’s suspension works the same way. Too much air pressure turns your ride into a teeth-rattling experience. Too little pressure makes you wallow. It is important to find the sweet spot. The right air pressure will depend on your weight. It also depends on your riding style. Most suspension forks and shocks have a recommended pressure range. Start there and make small adjustments. The bleed button helps you fine-tune. It will make sure that you get the perfect ride feel. Remember, a little bit of adjustment can make a big difference.
Why Suspension Matters
Have you ever tried riding a bike with flat tires? It’s not fun! Every little bump feels huge. Your arms and legs get tired quickly. Suspension helps prevent this. It absorbs those bumps before they reach you. This makes your ride smoother and more comfortable. Suspension also helps you stay in control. Your tires stay on the ground better. This gives you more grip. More grip means you can turn and brake more easily. Good suspension can make you a faster rider. It can also make you a safer rider. It really helps you enjoy your time out on the trails. So next time you see a mountain biker flying down a hill, remember, it’s not just skill. Their suspension is helping them out too!
Types of Bike Suspension
Bike suspension comes in many forms. The simplest is a spring. Some bikes use coil springs. Others use air springs. Air springs are lighter and more adjustable. This makes them popular on mountain bikes. There are also different kinds of dampers. Dampers control how quickly the suspension moves. Some dampers use oil. Others use fancy electronic controls. The goal is always the same. To keep your tires on the ground and your ride smooth. Each type has its own advantages and disadvantages. Coil springs are reliable and feel plush. Air springs are lighter and more adjustable. Advanced dampers can adapt to changing terrain. Choosing the right suspension depends on your needs and budget.
Setting Sag for Optimal Performance
Sag is how much your suspension compresses when you sit on the bike. Setting the right sag is important. It lets the suspension work properly. Most manufacturers recommend setting sag to around 20-30%. You can measure sag with a ruler or a sag meter. To set sag, first add air to the shock. Then, sit on the bike in your normal riding position. Have a friend measure how much the suspension compresses. If it’s too much, add more air. If it’s not enough, let some air out. Keep adjusting until you get the right sag. This will give you a good starting point for your suspension setup. From there, you can fine-tune the air pressure and damping to suit your riding style.
Fun Fact or Stat: The first commercially successful suspension fork was introduced in 1990 by Manitou, revolutionizing mountain biking!
Finding the Right Shock Pump
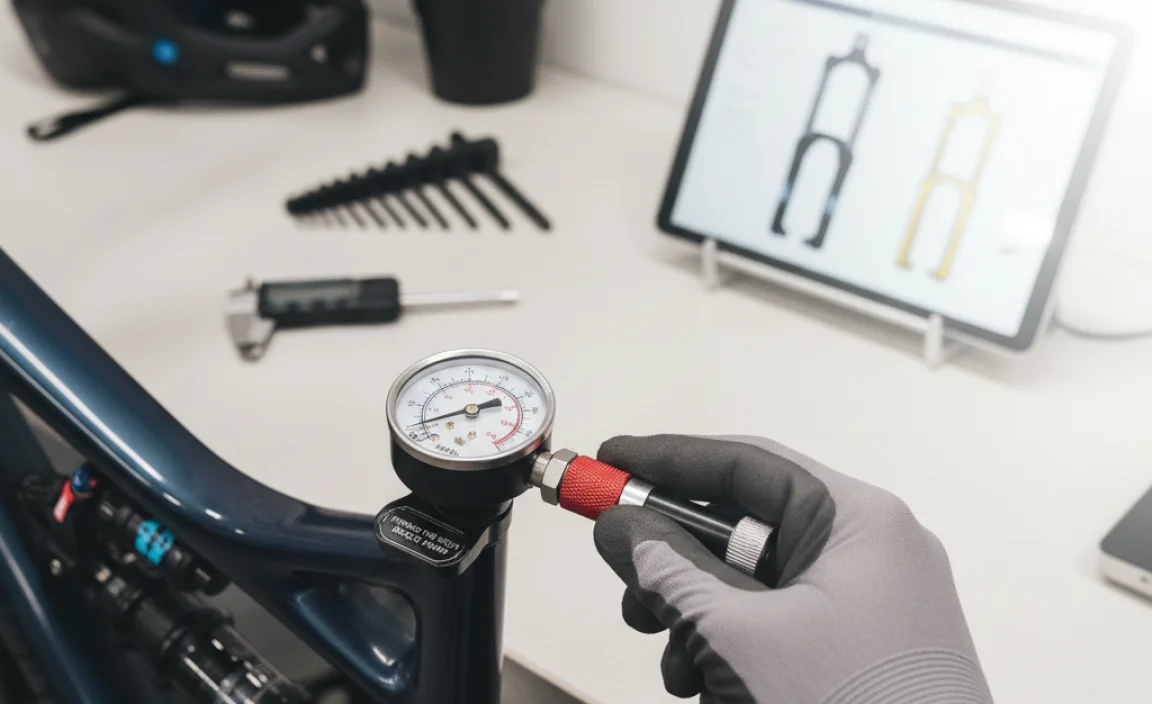
A shock pump is a special pump. It is made for bike suspension. Regular tire pumps don’t work. They don’t deliver air precisely. They also can’t handle high pressures. Shock pumps have a special valve. This valve prevents air from leaking out when you disconnect it. They also have a gauge. The gauge shows the air pressure. Some pumps have digital gauges. These are easier to read. Look for a pump with a bleed button. This lets you release small amounts of air. It helps you fine-tune the pressure. A good shock pump is an investment. It will help you keep your suspension working great. This makes your rides more enjoyable. It is key to how to use shock pump with bleed button for fine tuning.
- Shock pumps are designed for high-pressure suspension systems.
- Regular tire pumps cannot accurately adjust suspension pressure.
- Digital gauges provide precise pressure readings.
- A bleed button allows for small air pressure adjustments.
- A reliable shock pump is essential for suspension maintenance.
Choosing the right shock pump is important. Consider the gauge. Is it easy to read? Is it accurate? A digital gauge is often better than an analog one. It shows the pressure more clearly. Think about the pump’s handle. Is it comfortable to hold? Does it feel sturdy? A good handle makes pumping easier. Check the hose. Is it long enough? Is it flexible? A long, flexible hose makes it easier to reach the valve. Look for a pump with a bleed button. The bleed button should be easy to use. It should release air slowly and predictably. Some pumps have a swivel head. This makes it easier to attach the pump to the valve. Read reviews before you buy a pump. See what other riders think. A little research can help you find the perfect pump.
Features to Look For
When buying a shock pump, there are some key features to look for. A clear and accurate gauge is a must. You need to know exactly how much air you’re adding. A comfortable handle is also important. Pumping can take some effort. You don’t want your hands to get tired. A long and flexible hose makes it easier to reach the valve. A swivel head can also help. It lets you position the pump at the right angle. A bleed button is essential for fine-tuning. It lets you release small amounts of air. Some pumps have a two-stage system. This lets you add air quickly at low pressures. Then, you can switch to a slower mode for high pressures. Look for a pump that is durable and well-made. It should last for many years of use.
Digital vs. Analog Gauges
Shock pumps come with either digital or analog gauges. Digital gauges are more precise. They show the pressure in clear numbers. They are easy to read, even in bright sunlight. Analog gauges have a needle that points to a number. They can be harder to read. Especially if the gauge is small. Digital gauges often have extra features. Some can display the pressure in different units. Others can store previous readings. Analog gauges are usually less expensive. They don’t require batteries. Both types of gauges can be accurate. But digital gauges are generally easier to use and more reliable.
Maintaining Your Shock Pump
Like any tool, your shock pump needs maintenance. Keep it clean. Wipe it down after each use. This prevents dirt and grime from building up. Check the hose for cracks or leaks. Replace the hose if necessary. Lubricate the pump’s moving parts regularly. This will keep it working smoothly. Store the pump in a dry place. This prevents rust and corrosion. If your pump has a digital gauge, replace the batteries when needed. A well-maintained shock pump will last longer. It will also give you more accurate readings. Regular maintenance is key to keeping your suspension in top condition.
Fun Fact or Stat: High-end shock pumps can cost over $100, offering features like adjustable air volume and ultra-precise pressure readings.
Preparing Your Bike for Adjustment

Before you start pumping, get your bike ready. First, find the air valve on your suspension. It is usually covered with a small cap. Remove the cap. Now, check your bike’s manual. It will tell you the recommended air pressure. This is a good starting point. Make sure your suspension is clean. Dirt can damage the seals. Use a soft cloth to wipe it down. Now, you’re ready to connect the shock pump. Screw the pump’s hose onto the valve. Make sure it’s tight. You don’t want any air to leak out. Check the pressure on the pump’s gauge. It should match the current pressure in your suspension. Now you can start adding air. It is key to how to use shock pump with bleed button for fine tuning.
- Locate the air valve on your bike’s suspension fork or shock.
- Consult your bike’s manual for recommended air pressure settings.
- Clean the suspension around the valve to prevent contamination.
- Securely attach the shock pump to the air valve.
- Ensure the pump is properly connected to avoid air leaks.
Before you even think about grabbing your shock pump, take a moment. Inspect your suspension components. Look for any signs of damage. Cracks, leaks, or worn seals can affect performance. If you spot any problems, address them before making adjustments. A damaged shock can give you inaccurate readings. This can lead to improper setup. Make sure the area around the air valve is clean. Dirt and debris can get into the valve. This can cause leaks or damage. Use a clean cloth to wipe down the area. This will ensure a clean connection with the shock pump. Taking these steps will help you get the most out of your suspension setup. It will keep your bike running smoothly.
Checking for Leaks
Air leaks can ruin your suspension setup. Before you start pumping, check for leaks. Listen for a hissing sound around the air valve. This is a sign of a leak. You can also use soapy water. Apply a small amount to the valve. If bubbles form, there’s a leak. A loose connection between the pump and the valve can cause leaks. Make sure the pump is screwed on tightly. Damaged seals can also cause leaks. If you suspect a seal is bad, replace it. Ignoring leaks can lead to inconsistent performance. It can also damage your suspension components. Regular checks will help you catch leaks early.
Understanding Pressure Units
Air pressure is measured in different units. The most common are PSI and BAR. PSI stands for pounds per square inch. BAR is a metric unit. Most shock pumps display pressure in both units. Knowing the difference is important. This will help you set the correct pressure. Your bike’s manual may use one unit or the other. Make sure you’re using the right unit. Converting between PSI and BAR is easy. You can use an online calculator. Or, you can remember a simple rule of thumb. 1 BAR is about 14.5 PSI. Understanding pressure units will help you avoid mistakes.
Safety First: Pressure Limits
Every suspension component has a maximum pressure limit. Exceeding this limit can be dangerous. It can damage the suspension. It can even cause it to fail. Always check your bike’s manual for the maximum pressure. Never exceed this limit. Start with a lower pressure. Then, gradually increase it until you reach the desired feel. Pumping too much air can be dangerous. It’s better to be safe than sorry. If you’re not sure about the pressure limit, consult a bike mechanic. They can help you set your suspension safely.
Fun Fact or Stat: Some professional mountain bikers adjust their suspension pressure multiple times during a single race to adapt to changing course conditions!
Adding Air with the Shock Pump
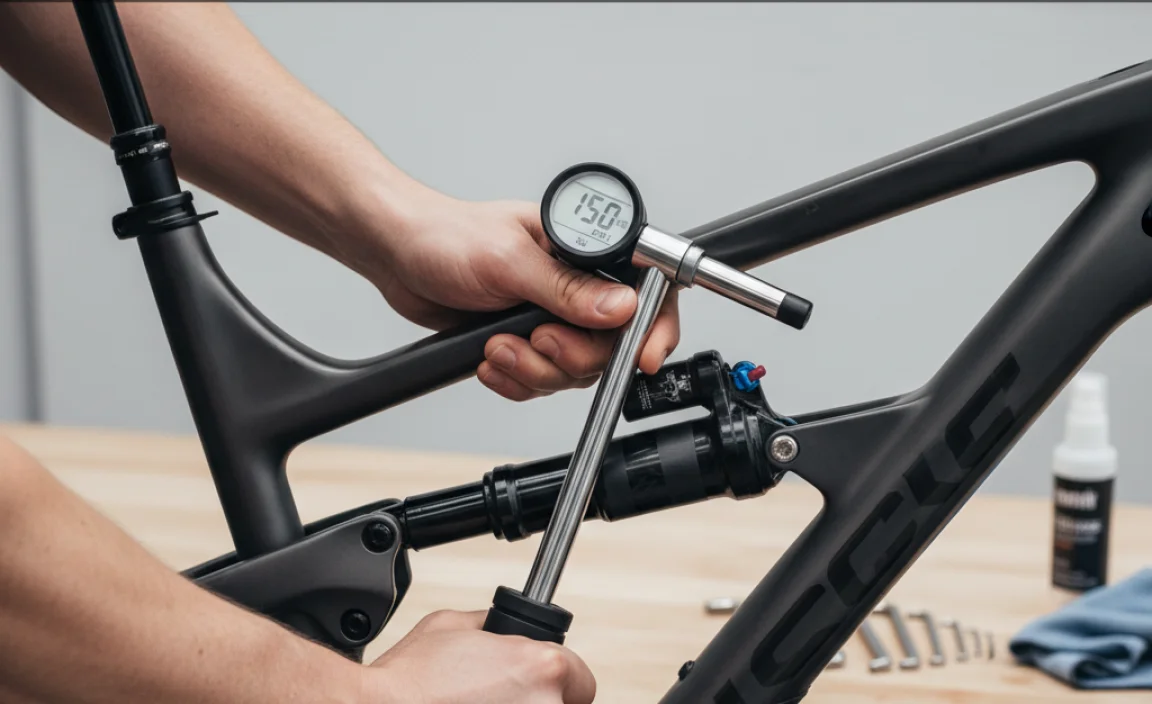
Now you’re ready to add air. Pump the shock pump slowly and steadily. Watch the gauge. Stop when you reach the desired pressure. Remember, it’s better to start with less air. You can always add more. It’s harder to remove air without a bleed button. After you reach the desired pressure, disconnect the pump. Do this quickly. Some air will escape when you disconnect the pump. This is normal. Check the pressure again. If it’s too high, use the bleed button. If it’s too low, add a little more air. Keep adjusting until you get it just right. This part is key to how to use shock pump with bleed button for fine tuning.
- Pump the shock pump slowly and steadily to add air.
- Monitor the pressure gauge to avoid over-inflating.
- Disconnect the pump quickly to minimize air loss.
- Recheck the pressure after disconnecting the pump.
- Use the bleed button to release small amounts of air if needed.
Adding air to your suspension is like inflating a balloon. You want to do it gradually. Avoid pumping too quickly. Rapid pumping can heat up the air inside the shock. This can give you an inaccurate reading. Pump smoothly and consistently. Keep an eye on the gauge. Stop when you reach your target pressure. Don’t be afraid to overshoot slightly. You can always use the bleed button to release air. It’s better to have a little too much than not enough. Remember, small adjustments can make a big difference. After you’ve added air, double-check the pressure. Make sure it’s where you want it to be. A little patience and attention to detail will pay off.
Pumping Techniques
There are different techniques for pumping a shock pump. Some people prefer short, quick strokes. Others prefer long, smooth strokes. Experiment to find what works best for you. The key is to be consistent. Avoid jerky movements. This can make it harder to control the pressure. Use your whole body to pump. This will help you avoid fatigue. Keep your back straight. Use your legs and core muscles. This will make pumping easier and more efficient. Remember to take breaks if you need them. Pumping can be tiring, especially at high pressures.
Dealing with Air Loss
A small amount of air loss is normal when you disconnect the shock pump. But excessive air loss is a problem. It can be caused by a leaky valve or a faulty pump. Make sure the pump is properly attached to the valve. Tighten the connection if necessary. If the valve is leaking, try cleaning it. Use a small brush or a cotton swab. If the problem persists, the valve may need to be replaced. A faulty pump can also cause air loss. Check the pump’s seals and O-rings. Replace them if they are damaged. If you’re still experiencing air loss, consult a bike mechanic.
Overcoming Resistance
As you pump, you may encounter resistance. This is normal, especially at higher pressures. Don’t force the pump. This can damage it. Instead, use a steady, consistent pressure. Make sure the pump is properly aligned with the valve. A misaligned pump can be harder to pump. If you’re still struggling, try using a different pump. Some pumps are easier to use than others. If you’re new to using a shock pump, ask a bike mechanic for help. They can show you the proper technique.
Fun Fact or Stat: Some shock pumps have a pressure release valve that automatically prevents over-inflation, protecting your suspension.
Using the Bleed Button for Fine Tuning
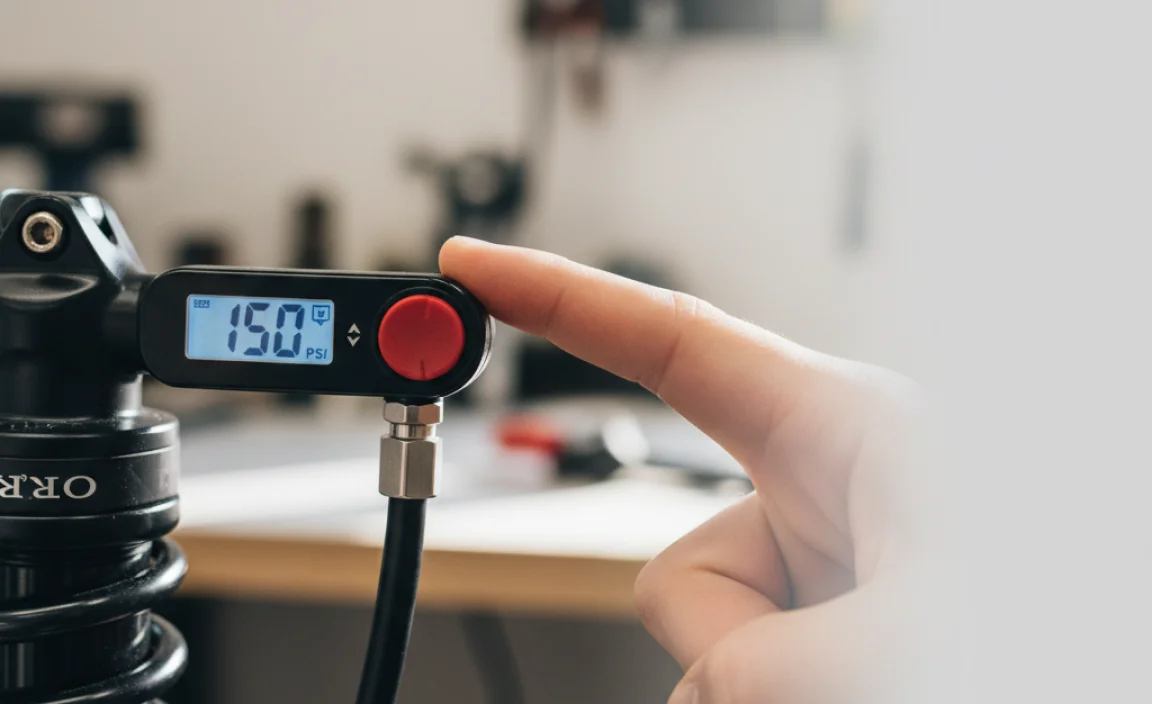
The bleed button is your secret weapon. It lets you make tiny adjustments to the air pressure. This is key for fine-tuning your suspension. Press the bleed button gently. A small amount of air will escape. Check the pressure gauge. See how much the pressure dropped. Repeat this process until you reach the perfect pressure. The bleed button gives you precise control. It allows you to dial in your suspension. It will make it feel just right. Knowing how to use shock pump with bleed button for fine tuning is great.
- The bleed button allows for precise air pressure adjustments.
- Press the bleed button gently to release small amounts of air.
- Monitor the pressure gauge to see the pressure change.
- Repeat the process until the desired pressure is reached.
- The bleed button provides fine control over suspension feel.
Think of the bleed button as a tiny volume knob for your suspension. It allows you to make subtle adjustments. This can transform your ride. Start by adding a little too much air. Then, use the bleed button to release air in small increments. Check the pressure after each adjustment. Keep going until you get the perfect feel. The bleed button is especially useful for dialing in your suspension. This will help when you are on the trail. It can help you compensate for changing conditions. It can make your ride more comfortable and controlled. Don’t be afraid to experiment. The bleed button makes it easy to fine-tune your suspension.
When to Use the Bleed Button
The bleed button is useful in many situations. Use it when you’re close to your target pressure. But you need to make small adjustments. Use it when you’re on the trail. And you want to fine-tune your suspension. Use it when the temperature changes. Temperature affects air pressure. Use it when you change your riding style. Different styles require different suspension settings. The bleed button gives you the flexibility to adapt. It will help you adapt to any situation. It is a great tool for any rider.
Bleed Button Techniques
There are different techniques for using the bleed button. Some people prefer to press it quickly and release it. Others prefer to hold it down for a longer period. Experiment to find what works best for you. The key is to be gentle. Avoid pressing the button too hard. This can release too much air. Use short, controlled bursts. Check the pressure after each burst. This will give you more control over the adjustment. Remember, small adjustments can make a big difference.
Avoiding Over-Bleeding
It’s possible to release too much air with the bleed button. This is called over-bleeding. If you over-bleed, you’ll need to add more air. This can be frustrating. To avoid over-bleeding, use short bursts. Check the pressure after each burst. Pay close attention to the gauge. Stop when you reach your target pressure. If you do over-bleed, don’t worry. Just add more air and start again. The bleed button is a valuable tool. But it requires practice and patience.
Fun Fact or Stat: Some bleed buttons are micro-adjustable, allowing riders to release as little as 1 PSI of air at a time!
Testing and Adjusting on the Trail
The best way to fine-tune your suspension is on the trail. Find a section of trail you know well. Ride it with your current suspension settings. Pay attention to how the bike feels. Does it feel too harsh? Does it feel too soft? Make small adjustments to the air pressure. Use the bleed button to release air. Use the shock pump to add air. Ride the same section of trail again. See if the adjustments made a difference. Keep adjusting until you find the perfect feel. This is how to use shock pump with bleed button for fine tuning. It will make your rides better.
- Test your suspension settings on a familiar trail.
- Pay attention to how the bike feels on different terrain.
- Make small adjustments to air pressure based on feedback.
- Re-ride the trail to evaluate the effectiveness of adjustments.
- Continue adjusting until you find the optimal suspension feel.
Testing on the trail is crucial. It’s where you can really feel the difference. Start with a baseline setting. This is the pressure recommended by your bike’s manufacturer. Ride a variety of terrain. Pay attention to how the suspension performs. Does it soak up small bumps? Does it handle big hits? Does it feel stable in corners? If the ride feels harsh, release some air. Use the bleed button for small adjustments. If the ride feels soft and squishy, add some air. Remember to make small changes. Test the changes on the same section of trail. Keep adjusting until you find the sweet spot. This is how you dial in your suspension for maximum performance.
Recognizing Suspension Issues
Knowing how to recognize suspension issues is key. A harsh ride can mean too much air pressure. A soft ride can mean too little air pressure. A bouncy ride can mean damping issues. A sticky ride can mean lubrication issues. Pay attention to how the bike feels. This will help you diagnose problems. If you’re not sure what’s wrong, consult a bike mechanic. They can help you identify and fix suspension problems.
Adjusting for Different Terrain
Different terrain requires different suspension settings. Smooth trails require less air pressure. Rough trails require more air pressure. Uphill sections require firmer suspension. Downhill sections require softer suspension. Adjust your suspension to match the terrain. This will improve your ride quality. It will also help you maintain control. Use the bleed button and shock pump to make quick adjustments. This will let you adapt to changing conditions.
Documenting Your Settings
Keeping track of your suspension settings is a good idea. Write down the air pressure for different conditions. Note any adjustments you make on the trail. This will help you remember what works best. You can use a notebook or a spreadsheet. Or, you can use a suspension setup app. These apps help you track your settings. They also provide recommendations. Documenting your settings will save you time. It will also help you fine-tune your suspension more effectively.
Fun Fact or Stat: Some riders use smartphone apps to record their suspension settings and trail conditions, creating a personalized suspension tuning database.
Common Mistakes to Avoid
Setting up your suspension can be tricky. It’s easy to make mistakes. One common mistake is ignoring the bike’s manual. The manual provides important information. It includes recommended air pressures. Another mistake is using the wrong pump. A regular tire pump won’t work. You need a special shock pump. Over-inflating your suspension is also a mistake. This can damage the components. It can also make the ride harsh. Not using the bleed button is another mistake. The bleed button is essential for fine-tuning. Avoid these mistakes. You will get the most out of your suspension. Knowing how to use shock pump with bleed button for fine tuning avoids issues.
- Ignoring the bike’s manual for recommended air pressure.
- Using a regular tire pump instead of a shock pump.
- Over-inflating the suspension beyond its maximum limit.
- Forgetting to use the bleed button for fine-tuning adjustments.
- Not testing and adjusting suspension on the trail.
One of the biggest mistakes is rushing the process. Setting up your suspension takes time and patience. Don’t expect to get it right on the first try. Experiment with different settings. Test them on the trail. Make small adjustments. Keep trying until you find what works best for you. Another common mistake is neglecting maintenance. Your suspension needs regular cleaning and lubrication. This will keep it working smoothly. Ignoring these tasks can lead to problems. Damaged seals, worn bushings, and sticky dampers can affect performance. Regular maintenance will extend the life of your suspension. It will also ensure that it performs at its best.
Ignoring Recommended Pressure
Ignoring the recommended pressure is a big mistake. Bike manufacturers provide these recommendations. They are a good starting point. They are based on the bike’s design. They are also based on the rider’s weight. Ignoring these recommendations can lead to problems. Too much air pressure can make the ride harsh. Too little air pressure can make the ride soft. Always start with the recommended pressure. Then, adjust from there. This will help you find the optimal setting for your bike.
Over-Inflating Suspension
Over-inflating your suspension can be dangerous. It can damage the components. It can also make the ride harsh. Always check the maximum pressure limit. This limit is printed on the suspension. Never exceed this limit. Use a shock pump with an accurate gauge. This will help you avoid over-inflating. If you accidentally over-inflate, use the bleed button. Release air until you reach the desired pressure. Remember, safety first!
Neglecting Maintenance
Neglecting maintenance is a common mistake. Suspension components need regular cleaning. They also need lubrication. This will keep them working smoothly. Clean your suspension after each ride. Use a soft cloth and mild soap. Lubricate the moving parts regularly. Use a suspension-specific lubricant. This will prevent wear and tear. Inspect your suspension for damage. Look for cracks, leaks, or worn seals. Replace any damaged parts. Regular maintenance will extend the life of your suspension.
Fun Fact or Stat: A properly maintained suspension system can improve your bike’s handling and control by up to 30%!
Summary
Summary
Using a shock pump with a bleed button is essential for fine-tuning your bike’s suspension. It allows you to adjust the air pressure. This will help you match the pressure to your weight, riding style, and terrain. Start by understanding your bike’s suspension. Find the right shock pump. Prepare your bike for adjustment. Add air with the shock pump. Use the bleed button for fine tuning. Test and adjust on the trail. Avoid common mistakes. By following these steps, you can dial in your suspension. This will make your rides more comfortable and controlled. It’s key to how to use shock pump with bleed button for fine tuning.
Conclusion
Learning how to use shock pump with bleed button for fine tuning is a game-changer. It lets you dial in your suspension for maximum comfort and control. It will take time and practice to get it right. But the results are worth it. A well-tuned suspension can improve your riding experience. You’ll be able to tackle any trail with confidence. So grab your shock pump, hit the trails, and start experimenting. You’ll be amazed at the difference it makes.
Frequently Asked Questions
Question No 1: What is a shock pump and why do I need one?
Answer: A shock pump is a special pump for bike suspension. It delivers air precisely. It handles high pressures. Regular tire pumps don’t work for this. You need a shock pump to adjust your suspension. Adjusting your suspension improves your ride. It also makes it safer. It is important to know how to use shock pump with bleed button for fine tuning. This will allow you to have a better ride.
Question No 2: What is a bleed button on a shock pump for?
Answer: The bleed button is for fine-tuning. It lets you release small amounts of air. This gives you precise control. It helps you get the perfect air pressure. It’s like a volume knob for your suspension. Do you want to know how to use shock pump with bleed button for fine tuning? The bleed button helps make it easy and precise. It will allow you to fine tune your ride.
Question No 3: How do I know what air pressure to put in my suspension?
Answer: Check your bike’s manual. It will tell you the recommended air pressure. This is a good starting point. You can also find pressure charts online. These charts are based on your weight. Start with the recommended pressure. Then, adjust to your liking. Remember, small adjustments can make a big difference. You can use the bleed button to fine tune it.
Question No 4: Can I use a regular tire pump to inflate my suspension?
Answer: No, you cannot use a regular tire pump. Regular tire pumps don’t deliver air precisely. They also can’t handle high pressures. You need a special shock pump. Shock pumps have a special valve. This valve prevents air from leaking out. They also have a gauge. The gauge shows the air pressure. The gauge will help you know how to use shock pump with bleed button for fine tuning.
Question No 5: How often should I check and adjust my suspension?
Answer: Check your suspension before each ride. This will ensure that it is working properly. Adjust it as needed. You may need to adjust it for different terrain. You may also need to adjust it for different weather conditions. It is important to know how to use shock pump with bleed button for fine tuning. This will help you make the proper adjustments.
Question No 6: What are some common signs that my suspension needs adjustment?
Answer: A harsh ride means too much air. A soft ride means too little air. A bouncy ride means damping issues. A sticky ride means lubrication issues. Pay attention to how the bike feels. This will help you diagnose problems. With the right air pressure, you will enjoy your ride. You can use a shock pump with bleed button to get the exact pressure you want.