
How to Attach a Shock Pump to a Fork: Easy Guide
Do you love riding your bike on bumpy trails? Does your bike’s front suspension feel too soft or too hard? You might need a shock pump! A shock pump helps you adjust the air pressure in your bike’s fork. But *how to attach a shock pump to a fork* can seem tricky. Don’t worry, it’s easier than you think!
These steps will guide you. You can make your ride smoother and more fun. Let’s learn how to get started.
Key Takeaways
- Knowing *how to attach a shock pump to a fork* improves your ride.
- Always check the recommended air pressure for your bike’s fork.
- Attaching the pump carefully prevents damage to the valve.
- Use short bursts of air to fine-tune the fork’s pressure.
- Regularly check and adjust the air pressure for best performance.
Understanding Your Bike’s Fork

Before you learn *how to attach a shock pump to a fork*, you need to know about your bike’s fork. The fork is the part that holds your front wheel. Many bikes have a suspension fork. This means it has springs or air inside to absorb bumps. An air fork uses air pressure to control how much it moves. The right air pressure makes your ride smoother and more comfortable. Too little air and the fork bottoms out. Too much air and the ride feels harsh. Finding the sweet spot is key. Check your bike’s manual or the manufacturer’s website. They will tell you the recommended air pressure for your weight and riding style. Understanding your fork helps you adjust it properly for the best riding experience.
- The fork holds your front wheel.
- Suspension forks absorb bumps.
- Air forks use air pressure.
- Correct pressure improves your ride.
- Check your bike’s manual.
Knowing your fork type will help you get the best performance. A well-maintained fork makes a big difference. It improves handling and control. This will keep you safe and comfortable on the trails. Remember to check the air pressure regularly. Small adjustments can make a big impact. A little bit of knowledge goes a long way in enjoying your ride. Learning about your fork is the first step toward a better biking experience.
Fun Fact or Stat: The first suspension forks appeared on mountain bikes in the late 1980s, revolutionizing off-road riding!
Why is Fork Pressure Important?
Have you ever ridden a bike with flat tires? It feels slow and bumpy, right? The same thing happens if your fork pressure is wrong. If the pressure is too low, the fork will sink too much when you hit a bump. This is called “bottoming out.” It can damage your fork and make riding uncomfortable. If the pressure is too high, the fork won’t move enough. You’ll feel every little bump, and it can hurt your hands and arms. The right pressure lets the fork absorb bumps smoothly. This gives you more control and makes riding more fun. Think of it like inflating a basketball. Too little air and it won’t bounce. Too much air and it’s too hard. Just the right amount makes it perfect for playing.
Different Types of Forks
Did you know there are different kinds of forks? Some forks use springs inside, like in a car’s suspension. These are called coil forks. Other forks use air pressure. These are called air forks. Air forks are lighter and easier to adjust. You can change the air pressure to match your weight and riding style. Some high-end forks even use a combination of air and oil. These offer the best performance. They are more complex and require more maintenance. Knowing the type of fork you have is important. It helps you understand how to adjust it. It also helps you know what kind of pump you need. Most air forks use a special shock pump. These pumps have a gauge to show the air pressure.
Finding the Right Pressure
Imagine you are tuning a guitar. You want the strings to be just right. Not too tight, not too loose. Finding the right fork pressure is similar. Start by checking your bike’s manual or the fork manufacturer’s website. They will have a chart that shows the recommended pressure for your weight. If you weigh 100 pounds, it might say to use 50 PSI (pounds per square inch). If you weigh 200 pounds, it might say to use 100 PSI. This is just a starting point. You might need to adjust it based on your riding style and the type of trails you ride. Experimenting is key to finding what works best for you. Start with the recommended pressure and then add or remove a little air until it feels right.
Gathering Your Tools
Now that you know about your fork, let’s get ready to pump it up! You’ll need a few things before you learn *how to attach a shock pump to a fork*. First, you need a shock pump. This isn’t like a regular bike pump. A shock pump has a special valve and a gauge. The gauge shows you the exact air pressure. This is important for getting the right setting. Second, you might need a rag or cloth. This is to wipe off any dirt or grime around the valve. Keeping the valve clean helps the pump attach properly. Third, have your bike’s manual handy. It might have specific instructions for your fork. Having everything ready makes the process smoother and easier. It also prevents you from running around looking for things later.
- You need a shock pump.
- Get a rag or cloth.
- Keep your bike’s manual nearby.
- Find a well-lit area.
- Make sure the pump is clean.
Having the right tools is half the battle. Trying to use a regular bike pump on an air fork won’t work. You could damage the valve. A shock pump is designed to deliver small amounts of air at high pressure. This lets you fine-tune the fork. Think of it like using the right tool for any job. A screwdriver won’t work as a hammer. A shock pump is the right tool for adjusting your fork’s air pressure. It’s an investment that will pay off in better performance and a more comfortable ride.
Fun Fact or Stat: Shock pumps can deliver air pressure up to 300 PSI (pounds per square inch)!
Choosing the Right Shock Pump
Have you ever tried to open a door with the wrong key? It doesn’t work, right? The same is true for shock pumps. Not all shock pumps are the same. Some are better than others. Look for a shock pump with a clear and easy-to-read gauge. This will help you see the exact air pressure. Some pumps have a swivel head. This makes it easier to attach to the valve. Some pumps also have a bleed valve. This lets you release small amounts of air. This is useful for fine-tuning the pressure. Read reviews and ask other riders for recommendations. A good shock pump will last for years and make adjusting your fork much easier. Choose wisely and you’ll be happy with your purchase.
Cleaning the Fork Valve
Imagine you are about to eat an apple. You would wash it first, right? Cleaning the fork valve is like washing the apple. Dirt and grime can get into the valve. This can prevent the pump from attaching properly. It can also damage the valve over time. Use a clean rag or cloth to wipe around the valve. Be gentle and don’t use any harsh chemicals. Just a quick wipe will do the trick. This simple step can help prevent problems and keep your fork working smoothly. A clean valve ensures a good connection with the pump. This gives you an accurate pressure reading.
Reading Your Bike’s Manual
Have you ever built a Lego set without the instructions? It can be tough! Your bike’s manual is like the instructions for your bike. It tells you important information about your fork. It will tell you the recommended air pressure for your weight. It might also have specific instructions for adjusting the fork. Some forks have different settings for different riding styles. The manual will explain how to adjust these settings. Take a few minutes to read the manual before you start. It can save you time and prevent you from making mistakes. The manual is a valuable resource that can help you get the most out of your bike.
Locating the Fork’s Valve

Okay, you have your tools. Now, where do you attach the pump? You need to find the valve on your bike’s fork. The valve is usually on top of one of the fork legs. It looks like a small cap. Sometimes it’s covered by a dust cap. This protects the valve from dirt and water. Remove the dust cap if there is one. Underneath, you’ll see a valve similar to the one on your car’s tires. This is where you attach the shock pump. Take a close look and make sure it’s clean. Knowing where the valve is makes *how to attach a shock pump to a fork* much easier.
- Find the valve on the fork leg.
- It might be covered by a dust cap.
- Remove the dust cap.
- The valve looks like a tire valve.
- Make sure the valve is clean.
Finding the valve is like finding the right keyhole. You need to know where to look. Once you find it, make sure it’s clean. This will help the pump attach properly. Some forks have two valves, one on each leg. These forks might have different air chambers. Your bike’s manual will tell you how to adjust them. Most forks only have one valve. This is the one you’ll use most often. Take your time and make sure you find the right spot. This will make the next steps much easier.
Fun Fact or Stat: Some high-end forks have multiple air chambers, allowing for even more precise tuning!
Identifying the Valve Type
Have you ever seen different kinds of plugs for electronics? Some are big, some are small. The same is true for fork valves. Most forks use a Schrader valve. This is the same type of valve you find on car tires. Some forks use a Presta valve. This type is narrower and has a small nut on the end. Knowing the type of valve you have is important. It tells you what kind of adapter you might need. Most shock pumps are designed to work with Schrader valves. If you have a Presta valve, you’ll need an adapter. Check your bike’s manual or the fork manufacturer’s website to find out what type of valve you have.
Removing the Dust Cap
Imagine you are opening a present. You carefully remove the wrapping paper. Removing the dust cap is similar. It protects the valve from dirt and debris. The dust cap is usually a small plastic or metal cap. It screws or pops off the valve. Be careful not to lose it. You’ll need to put it back on after you’re done. Some dust caps are very small and easy to drop. Keep it in a safe place while you’re working. Removing the dust cap is a small but important step. It ensures that the pump can attach properly to the valve.
Cleaning Around the Valve
Have you ever tried to stick a sticker on a dirty surface? It doesn’t stick very well, right? Cleaning around the valve is like cleaning the surface for the sticker. Dirt and grime can prevent the pump from making a good seal. This can cause air to leak out. Use a clean rag or cloth to wipe around the valve. Be gentle and don’t use any harsh chemicals. Just a quick wipe will do the trick. This simple step can help prevent problems and ensure an accurate pressure reading.
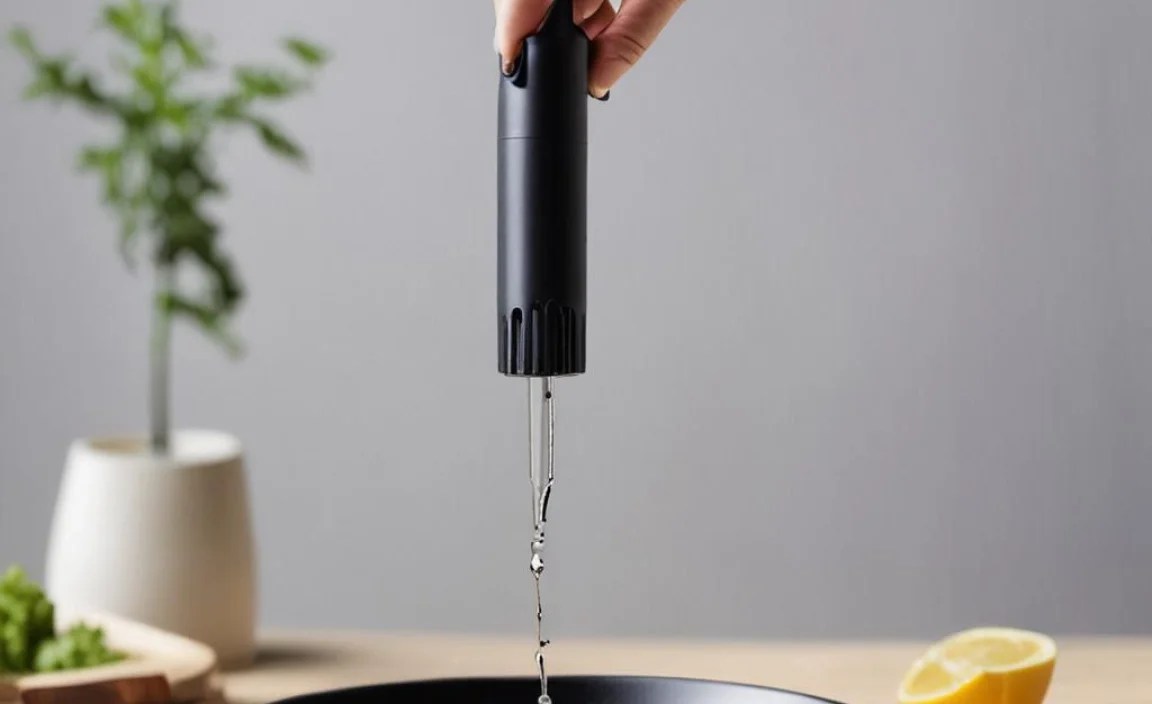
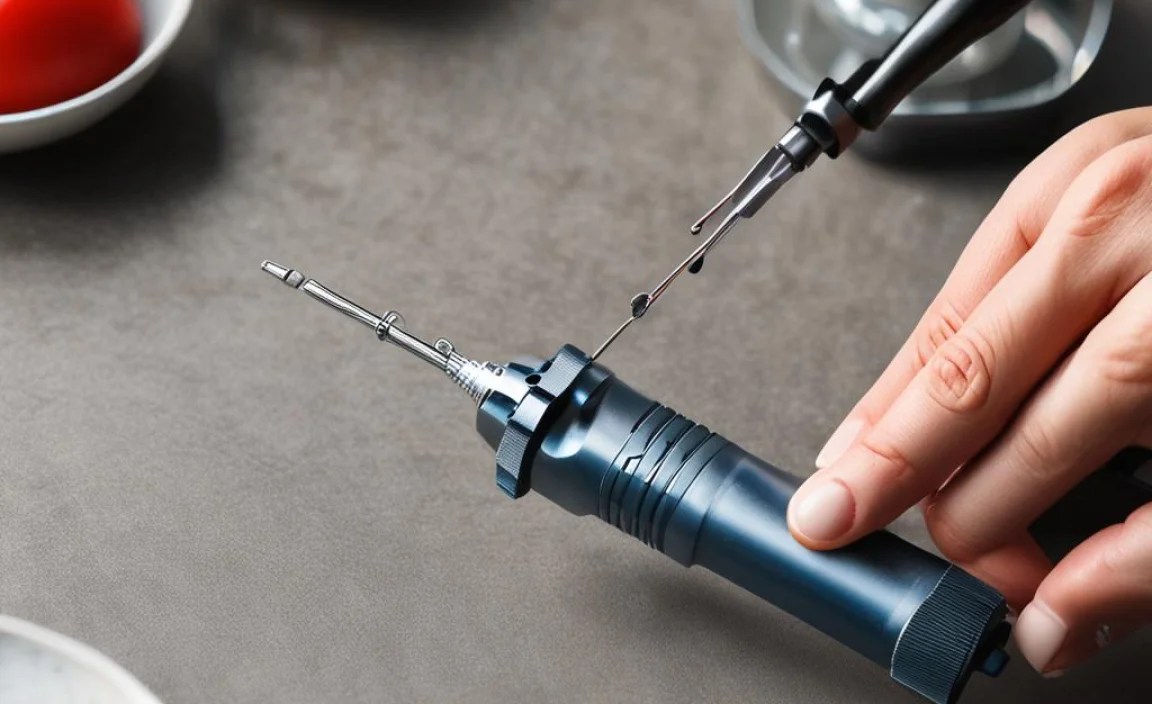
Attaching the Shock Pump
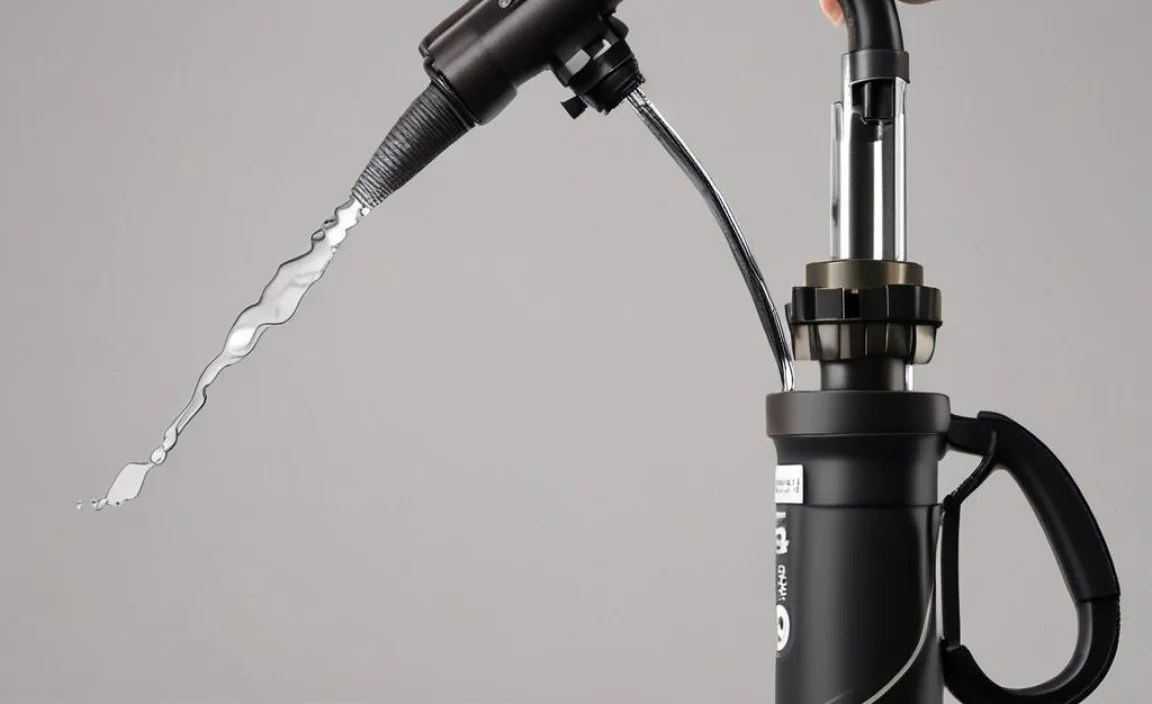
Now for the main event! It’s time to learn *how to attach a shock pump to a fork*. First, make sure the pump’s valve is open. This allows air to flow into the fork. Line up the pump’s nozzle with the fork’s valve. Push the nozzle onto the valve firmly. You should feel it click or snap into place. Some pumps have a lever or clamp to secure the connection. If yours does, engage it now. Make sure the connection is tight and secure. A loose connection will cause air to leak out. Double-check everything before you start pumping. A good connection is key to getting an accurate pressure reading.
- Open the pump’s valve.
- Line up the nozzle with the fork’s valve.
- Push the nozzle on firmly.
- Secure the connection with a lever or clamp.
- Double-check the connection.
Attaching the pump correctly is like plugging in an electrical cord. You need to make sure it’s securely plugged in. Otherwise, it won’t work. A loose connection can cause air to leak out, giving you a false pressure reading. This can lead to over- or under-inflating the fork. Take your time and make sure the connection is solid. This will ensure you get an accurate reading and can adjust the fork properly. A little patience here will pay off in a smoother and more comfortable ride.
| Step | Action | Why |
|---|---|---|
| 1 | Open pump valve | Allows air flow |
| 2 | Line up nozzle | Ensures correct fit |
| 3 | Push firmly | Creates a seal |
| 4 | Secure connection | Prevents leaks |
Fun Fact or Stat: Some shock pumps have a “no-loss” valve, which prevents air from escaping when you detach the pump!
Opening the Pump’s Valve
Have you ever tried to drink from a straw that’s blocked? It’s impossible! Opening the pump’s valve is like unblocking the straw. It allows air to flow from the pump into the fork. Most shock pumps have a valve that you need to open before you start pumping. This valve is usually a small knob or lever. Make sure it’s in the open position before you attach the pump to the fork. If the valve is closed, no air will flow and you won’t be able to adjust the pressure. Double-check this step before you move on to the next one.
Pushing the Nozzle Firmly
Imagine you are snapping together two Lego bricks. You need to push them together firmly so they stay connected. Pushing the nozzle onto the fork’s valve is similar. You need to push it on firmly to create a good seal. This prevents air from leaking out. You should feel it click or snap into place. If it doesn’t feel secure, try pushing it on a little harder. Be careful not to damage the valve. A good seal is essential for getting an accurate pressure reading.
Securing the Connection
Have you ever used a clamp to hold two pieces of wood together? It keeps them from moving. Securing the connection between the pump and the fork’s valve is similar. Some shock pumps have a lever or clamp that you can use to secure the connection. This prevents the pump from coming loose while you’re pumping. Engage the lever or clamp after you’ve pushed the nozzle onto the valve. Make sure it’s tight and secure. This will ensure a good seal and prevent air from leaking out.
Pumping and Checking Pressure
You’re almost there! Now you know *how to attach a shock pump to a fork*, so it’s time to pump. Start pumping the handle of the shock pump. Watch the gauge as you pump. The needle will move, showing the air pressure. Pump slowly and steadily. Don’t pump too fast, or you might overheat the pump. Keep pumping until you reach the desired pressure. Check your bike’s manual or the fork manufacturer’s website for the recommended pressure. Once you reach the correct pressure, stop pumping. Check the gauge again to make sure it’s accurate. Small adjustments might be needed.
- Pump the handle slowly and steadily.
- Watch the gauge as you pump.
- Pump to the desired pressure.
- Check the gauge for accuracy.
- Make small adjustments if needed.
Pumping up your fork is like inflating a balloon. You want to fill it with just the right amount of air. Too little air and it won’t float. Too much air and it might pop. The same is true for your fork. The right air pressure will give you the best performance. Use the gauge on the shock pump to monitor the pressure. Small adjustments can make a big difference. Take your time and be patient. It might take a few tries to get it just right. But once you do, you’ll notice a big improvement in your ride.
Fun Fact or Stat: Air pressure in a fork can affect the rebound, compression, and bottom-out resistance!
Reading the Gauge Accurately
Have you ever tried to read a clock that’s too small? It can be hard to see the numbers. Reading the gauge on a shock pump is similar. You need to be able to see the numbers clearly. Make sure the gauge is clean and well-lit. Look at the gauge from directly in front. Looking at it from an angle can give you a false reading. Pay attention to the units of measurement. Most gauges show pressure in PSI (pounds per square inch). Some gauges also show pressure in bar. Make sure you’re reading the correct units. An accurate reading is essential for setting the correct air pressure.
Pumping Slowly and Steadily
Imagine you are pouring water into a glass. You want to pour it slowly and steadily so you don’t spill any. Pumping air into your fork is similar. You want to pump it slowly and steadily so you don’t overheat the pump or damage the valve. Pumping too fast can also cause the pressure to rise too quickly. This can make it difficult to get an accurate reading. Take your time and pump smoothly. This will give you the best results.
Adjusting Pressure in Small Increments
Have you ever tried to tune a radio? You make small adjustments until you get a clear signal. Adjusting the air pressure in your fork is similar. You want to make small adjustments until you get the right feel. Adding or removing too much air at once can make it difficult to find the sweet spot. Use the bleed valve on the shock pump to release small amounts of air. Pump the handle in short bursts to add small amounts of air. Check the gauge after each adjustment. This will help you fine-tune the pressure and get the best performance.
Detaching the Pump
You’ve pumped up your fork and checked the pressure. Now it’s time to detach the pump. This is a simple but important step. Some shock pumps have a “no-loss” valve. This prevents air from escaping when you detach the pump. If your pump doesn’t have this feature, a small amount of air will escape. This is normal. Don’t worry, it won’t affect the pressure too much. Carefully disconnect the pump’s nozzle from the fork’s valve. If there’s a lever or clamp, release it first. Pull the nozzle straight off the valve. Replace the dust cap on the valve to protect it from dirt and water. Now you know *how to attach a shock pump to a fork* and detach it!
- Release the lever or clamp if there is one.
- Carefully disconnect the nozzle.
- Replace the dust cap.
- Store the shock pump in a safe place.
- Check the pressure again after a ride.
Detaching the pump is like unplugging an appliance. You want to do it carefully so you don’t damage anything. A quick and smooth motion is best. This minimizes the amount of air that escapes. Replacing the dust cap is like putting a lid on a container. It keeps dirt and water out. This will protect the valve and keep it working properly. Store the shock pump in a safe place so you can find it when you need it. Checking the pressure again after a ride is a good idea. This will ensure that the fork is still properly inflated.
Fun Fact or Stat: Some professional riders check their fork pressure before every ride!
Disconnecting the Nozzle Carefully
Have you ever tried to remove a bandage quickly? It can hurt! Disconnecting the nozzle from the fork’s valve carefully is like removing a bandage slowly. You want to do it gently so you don’t damage the valve or lose too much air. If there’s a lever or clamp, release it first. Then, pull the nozzle straight off the valve. Avoid twisting or bending the nozzle. This can damage the valve and cause it to leak.
Replacing the Dust Cap
Imagine you are putting a lid on a jar of peanut butter. You want to make sure it’s on tight so the peanut butter stays fresh. Replacing the dust cap on the fork’s valve is similar. It protects the valve from dirt and water. This helps to keep it working properly. Make sure the dust cap is clean before you put it back on. Screw it on tightly or push it on firmly. This will ensure a good seal and prevent dirt from getting into the valve.
Storing the Shock Pump Properly
Have you ever left your toys out in the rain? They can get ruined! Storing the shock pump properly is like putting your toys away. It protects it from damage and keeps it working properly. Store the shock pump in a clean, dry place. Avoid leaving it in direct sunlight or extreme temperatures. This can damage the pump and shorten its lifespan. A good place to store the shock pump is in your garage or toolbox.
Regular Maintenance and Checks
You now know *how to attach a shock pump to a fork*. But the job isn’t done! Regular maintenance is important. Check the air pressure in your fork before each ride. This will ensure that it’s properly inflated. Small changes in temperature can affect the air pressure. Riding on rough trails can also cause the pressure to change. If you notice that the fork feels too soft or too hard, adjust the pressure accordingly. A little bit of maintenance can go a long way in keeping your fork working properly. It will also help you get the most out of your bike.
- Check the air pressure before each ride.
- Adjust the pressure as needed.
- Inspect the fork for leaks or damage.
- Clean the fork regularly.
- Service the fork according to the manufacturer’s recommendations.
Think of your bike’s fork like a car engine. It needs regular maintenance to keep it running smoothly. Checking the air pressure is like checking the oil level. It’s a quick and easy task that can prevent bigger problems. Inspecting the fork for leaks or damage is like checking the tires for wear and tear. It can help you catch problems early before they become serious. A well-maintained fork will last longer and perform better. This will give you a more comfortable and enjoyable ride.
Fun Fact or Stat: Professional mountain bikers often service their forks every 20–40 hours of riding!
Checking Air Pressure Regularly
Have you ever checked the air in your car tires? It’s important to do this regularly to ensure they are properly inflated. Checking the air pressure in your bike’s fork is similar. It’s a quick and easy task that can make a big difference in your ride quality. Check the air pressure before each ride. This will ensure that the fork is properly inflated. Small changes in temperature can affect the air pressure. Riding on rough trails can also cause the pressure to change. Make it a habit to check the air pressure regularly.
Inspecting for Leaks and Damage
Imagine you are looking for a hole in a balloon. You want to find it before all the air leaks out. Inspecting your fork for leaks and damage is similar. You want to find any problems before they become serious. Look for signs of oil leaking from the seals. Check for cracks or dents in the fork legs. If you see any damage, take your bike to a qualified mechanic for repair. Early detection can prevent bigger problems and save you money in the long run.
Cleaning the Fork Regularly
Have you ever washed your bike after a muddy ride? It’s important to clean off all the dirt and grime. Cleaning your fork regularly is similar. Dirt and grime can damage the seals and reduce the performance of the fork. Use a clean cloth and some mild soap and water to clean the fork legs. Avoid using harsh chemicals or solvents. Rinse the fork thoroughly and dry it with a clean cloth. A clean fork will last longer and perform better.
Summary
Learning *how to attach a shock pump to a fork* is an important skill for any cyclist. It allows you to fine-tune your bike’s suspension for optimal performance. This guide covers everything from understanding your fork to regular maintenance. Remember to gather your tools, locate the valve, and attach the pump carefully. Pump slowly and steadily, and check the pressure frequently. Detach the pump carefully and replace the dust cap. Regular maintenance will keep your fork working smoothly for years to come. By following these steps, you can enjoy a smoother, more comfortable, and more controlled ride.
Conclusion
Adjusting your bike’s fork might seem daunting. But with the right knowledge, it’s easy. You learned *how to attach a shock pump to a fork*. Now you can fine-tune your suspension. A properly adjusted fork improves handling. It also makes rides more comfortable. Remember to check pressure often. Regular maintenance ensures peak performance. So grab your shock pump. Get ready to enjoy a smoother ride.
Frequently Asked Questions
Question No 1: What is a shock pump and why do I need one?
Answer: A shock pump is a special type of pump. It is designed to inflate air forks and shocks on bikes. Regular bike pumps cannot deliver the high pressure needed for these components. Shock pumps have a gauge that shows the precise air pressure. This is important for setting the fork correctly. You need a shock pump to adjust the air pressure in your fork. This will optimize your bike’s suspension for your weight and riding style. Learning *how to attach a shock pump to a fork* is the first step to improving your ride quality. The right air pressure will make your ride smoother and more comfortable.
Question No 2: How often should I check the air pressure in my fork?
Answer: You should check the air pressure in your fork before each ride. This will ensure that it is properly inflated. Small changes in temperature can affect the air pressure. Riding on rough trails can also cause the pressure to change. If you notice that the fork feels too soft or too hard, adjust the pressure accordingly. Regular checks will help you maintain optimal suspension performance. This will give you a more comfortable and controlled ride. Knowing *how to attach a shock pump to a fork* makes this task quick and easy. Consistency is key to maintaining your bike’s performance.
Question No 3: What happens if I over-inflate my fork?
Answer: Over-inflating your fork can make the ride harsh and uncomfortable. The fork won’t compress enough when you hit bumps. This can lead to a jarring ride and hand fatigue. It can also damage the fork. Too much pressure can stress the seals and other components. This can lead to premature wear and tear. If you accidentally over-inflate your fork, use the bleed valve on the shock pump to release some air. Check the pressure gauge frequently. This ensures you don’t exceed the recommended pressure. Understanding *how to attach a shock pump to a fork* and use its features is crucial for safe operation.
Question No 4: Can I use a regular bike pump to inflate my fork?
Answer: No, you cannot use a regular bike pump to inflate your fork. Regular bike pumps don’t deliver enough pressure. They also lack the precise gauge needed for accurate adjustments. Using a regular pump can also damage the fork’s valve. Shock pumps are designed specifically for inflating air forks and shocks. They deliver high pressure in small increments. This allows you to fine-tune the suspension. *How to attach a shock pump to a fork* is different than attaching a regular pump to a tire. Using the correct tool is essential for safety and performance.
Question No 5: What should I do if air leaks out when I detach the pump?
Answer: It is normal for a small amount of air to leak out when you detach the shock pump. Most shock pumps don’t have a “no-loss” valve. This small amount of air loss won’t significantly affect the pressure. However, if a lot of air leaks out, there might be a problem. Check the pump’s nozzle and the fork’s valve for damage. Make sure the connection is secure when you attach the pump. Practicing *how to attach a shock pump to a fork* correctly can minimize air loss. If the problem persists, consult a bike mechanic.
Question No 6: Where can I find the recommended air pressure for my fork?
Answer: You can find the recommended air pressure for your fork in your bike’s manual. You can also find it on the fork manufacturer’s website. Look for a chart that shows the recommended pressure for your weight. This is usually a starting point. You might need to adjust it based on your riding style and the type of trails you ride. Experimenting is key to finding what works best for you. Remember, knowing *how to attach a shock pump to a fork* is only part of the equation. Knowing the correct pressure is equally important for optimal performance.


