
Pump Gauge Lockable: Ultimate Security!
A pump gauge lockable feature secures the pressure reading on your bike pump. This is helpful for getting precise tire pressure without losing air while checking. If your pump doesn’t have this feature, you can buy an adapter or a new pump with a lockable gauge. This ensures consistent and accurate tire inflation every time.
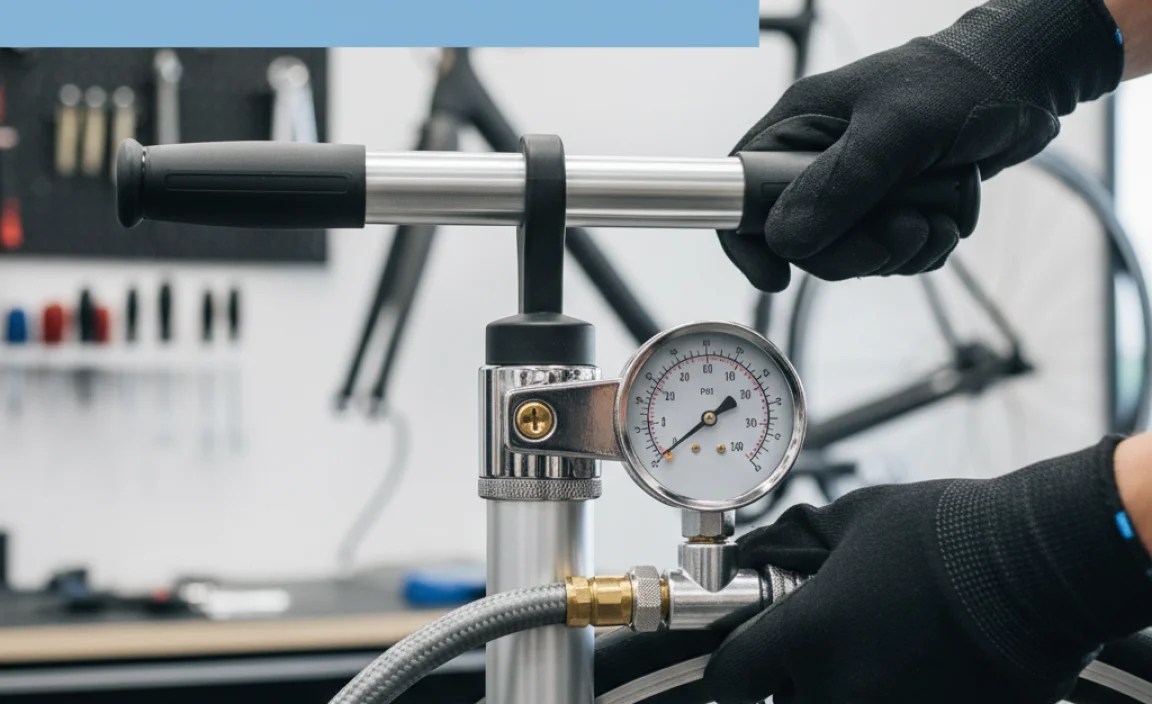
Ever struggled to get the perfect tire pressure on your bike? You pump, check the gauge, and by the time you’ve taken the pump head off, you’ve lost a bit of air. It’s a common frustration for cyclists, whether you’re a daily commuter or a weekend trail rider. The good news is, there’s a simple solution: a pump with a lockable gauge! This handy feature lets you lock the pressure reading, so you can get an accurate measurement without any air loss. We’ll guide you through why it matters, how it works, and what to look for. Get ready to say goodbye to guesswork and hello to perfectly inflated tires!
Why Use a Pump with a Lockable Gauge?

A pump with a lockable gauge offers several benefits that improve your cycling experience. Let’s break down why this feature is so valuable:
- Accuracy: Lockable gauges provide precise pressure readings. This is crucial for optimal performance and safety.
- Consistency: Achieve the same tire pressure every time. This leads to predictable handling and a more comfortable ride.
- Convenience: No more second-guessing or re-pumping. Lock the reading, remove the pump head, and you’re done.
- Reduced Air Loss: Prevent air from escaping while checking the pressure. This saves effort and extends tire life.
- Improved Performance: Correct tire pressure reduces rolling resistance, making your rides faster and more efficient.
Understanding Tire Pressure and Its Impact

Tire pressure significantly impacts your bike’s performance, comfort, and safety. Here’s why getting it right matters:
- Rolling Resistance: Properly inflated tires roll faster. Underinflated tires increase friction, making you work harder.
- Grip: Correct pressure optimizes contact with the road or trail. Overinflated tires have less grip, while underinflated tires can feel sluggish.
- Comfort: The right pressure absorbs bumps and vibrations. This results in a smoother, more enjoyable ride.
- Puncture Resistance: Proper inflation reduces the risk of pinch flats. Underinflated tires are more susceptible to punctures from impacts.
- Tire Wear: Maintaining correct pressure extends the life of your tires. Over or underinflation can cause uneven wear.
Types of Bike Pumps with Lockable Gauges

Bike pumps with lockable gauges come in various types, each suited for different needs. Here’s an overview:
- Floor Pumps: Ideal for home use, offering high volume and stable platforms.
- Hand Pumps: Portable and lightweight, perfect for on-the-go adjustments.
- Mini Pumps: Compact enough to fit in a saddlebag or jersey pocket.
- CO2 Inflators: Quick and convenient for emergency inflation (but don’t have lockable gauges).
Floor Pumps with Lockable Gauges
Floor pumps are a staple for any cyclist’s home workshop. Here’s what makes them great:
- Stability: Wide base for easy pumping.
- High Volume: Inflates tires quickly.
- Accurate Gauges: Many models include lockable gauges for precise readings.
Hand and Mini Pumps with Lockable Gauges
Hand and mini pumps are essential for roadside repairs. Look for these features:
- Portability: Small and lightweight for easy carrying.
- Versatility: Compatible with both Presta and Schrader valves.
- Lockable Gauges: Some models offer this feature for on-the-go accuracy.
Key Features to Look for in a Lockable Gauge Pump

When choosing a pump with a lockable gauge, consider these key features:
- Gauge Accuracy: Look for a gauge with a clear, easy-to-read display and accurate pressure readings (ideally within +/- 1 PSI).
- Locking Mechanism: Ensure the locking mechanism is reliable and easy to use.
- Valve Compatibility: Check if the pump head works with both Presta and Schrader valves, or if it’s easily convertible.
- Build Quality: Opt for durable materials like aluminum or steel for long-lasting performance.
- Ergonomics: Choose a pump with a comfortable handle and stable base for easy pumping.
Step-by-Step Guide: Using a Pump with a Lockable Gauge
Using a pump with a lockable gauge is straightforward. Follow these steps for accurate inflation:
Step 1: Prepare Your Bike and Pump
Make sure your bike is stable and the tire valve is accessible.
- Position the Bike: Place your bike on a flat, stable surface.
- Locate the Valve: Find the Presta or Schrader valve on your tire.
- Remove the Valve Cap: Unscrew the valve cap and set it aside.
Step 2: Attach the Pump Head to the Valve
Connect the pump head securely to the valve.
- Presta Valve: Loosen the valve nut before attaching the pump head.
- Schrader Valve: Simply press the pump head onto the valve.
- Secure the Connection: Ensure the pump head is firmly attached to prevent air leaks.
Step 3: Inflate the Tire to the Desired Pressure
Pump until the gauge reaches your target pressure.
- Pump Steadily: Use smooth, consistent strokes.
- Monitor the Gauge: Watch the gauge as you pump to avoid overinflation.
- Refer to Tire Markings: Check the recommended pressure range on your tire sidewall.
Step 4: Lock the Gauge Reading
Engage the locking mechanism to hold the pressure reading.
- Activate the Lock: Flip the switch or press the button to lock the gauge.
- Verify the Reading: Confirm that the gauge is holding the pressure.
Step 5: Remove the Pump Head
Carefully detach the pump head from the valve.
- Detach Quickly: Remove the pump head with a swift, straight motion to minimize air loss.
- Tighten the Valve Nut (Presta): Secure the valve nut to prevent leaks.
- Replace the Valve Cap: Screw the valve cap back on to protect the valve.
Step 6: Verify the Tire Pressure
Double-check the pressure to ensure accuracy.
- Read the Locked Gauge: Verify the pressure reading on the locked gauge.
- Compare to Target Pressure: Ensure the pressure matches your desired level.
- Make Adjustments: If necessary, add or release air to reach the exact pressure.
Troubleshooting Common Issues
Even with the best equipment, issues can arise. Here’s how to handle common problems:
Problem: Air Leaks When Pumping
Solution: Ensure the pump head is securely attached to the valve. Check for worn-out seals and replace if necessary.
- Check Pump Head Connection: Make sure the pump head is fully engaged with the valve.
- Inspect Seals: Look for cracks or damage in the pump head seals.
- Replace Worn Parts: Purchase replacement seals or a new pump head if needed.
Problem: Gauge Shows Incorrect Pressure
Solution: Calibrate the gauge or replace it if it’s consistently inaccurate.
- Calibrate the Gauge: Use a known accurate gauge to compare readings and adjust accordingly.
- Check Battery (Digital Gauges): Replace the battery if the gauge is dim or displaying incorrect readings.
- Replace the Gauge: If calibration doesn’t work, consider replacing the gauge or the entire pump.
Problem: Locking Mechanism Fails
Solution: Clean the locking mechanism or replace the pump if the lock is irreparable.
- Clean the Mechanism: Remove any dirt or debris that may be obstructing the lock.
- Lubricate Moving Parts: Apply a small amount of lubricant to ensure smooth operation.
- Replace the Pump: If the locking mechanism is broken, replacing the pump may be the best option.
Maintaining Your Pump with a Lockable Gauge
Proper maintenance extends the life of your pump and ensures accurate readings. Follow these tips:
- Clean Regularly: Wipe down the pump with a damp cloth to remove dirt and grime.
- Lubricate Moving Parts: Apply a small amount of lubricant to the handle and other moving parts.
- Store Properly: Keep the pump in a dry, protected area to prevent rust and damage.
- Check Seals: Inspect the seals regularly and replace them if they show signs of wear.
- Calibrate the Gauge: Periodically check the gauge against a known accurate source to ensure it remains accurate.
Recommended Products and Accessories
Enhance your pumping experience with these recommended products and accessories:
- Digital Pressure Gauges: For highly accurate readings.
- Valve Adapters: To convert between Presta and Schrader valves.
- Pump Repair Kits: To replace worn-out parts like seals and hoses.
- Floor Pump Mats: To protect your floor and provide a stable base for pumping.
| Product | Description | Benefits |
|---|---|---|
| Digital Pressure Gauge | Provides highly accurate tire pressure readings. | Ensures precise inflation, improving performance and safety. |
| Valve Adapter | Converts between Presta and Schrader valves. | Allows you to use the same pump for different types of bikes. |
| Pump Repair Kit | Includes replacement seals, hoses, and other parts. | Extends the life of your pump by allowing you to repair worn components. |
DIY vs. Professional Service
Deciding whether to maintain your pump yourself or seek professional help depends on your comfort level and the complexity of the issue.
DIY Maintenance
Pros:
- Cost-Effective: Save money on service fees.
- Convenient: Perform maintenance on your own schedule.
- Educational: Learn more about your equipment.
Cons:
- Time-Consuming: Requires time and effort to perform maintenance tasks.
- Potential for Errors: Mistakes can lead to further damage.
- Limited Expertise: May not be able to address complex issues.
Professional Service
Pros:
- Expertise: Experienced technicians can diagnose and fix issues quickly.
- Quality Service: Ensures the job is done correctly.
- Warranty: Some services offer warranties on their work.
Cons:
- Costly: Service fees can be expensive.
- Inconvenient: Requires scheduling an appointment and transporting the pump.
- Less Control: You rely on the technician’s judgment.
The Science Behind Accurate Tire Pressure
Understanding the science behind tire pressure can help you make informed decisions about inflation. Key factors include:
- Temperature: Air pressure increases with temperature. Adjust pressure accordingly.
- Altitude: Lower air pressure at higher altitudes can affect tire inflation.
- Rider Weight: Heavier riders require higher tire pressures.
- Tire Volume: Wider tires generally require lower pressures.
Here’s a table showing recommended tire pressures based on rider weight and tire width:
| Rider Weight (lbs) | Tire Width (mm) | Recommended Pressure (PSI) |
|---|---|---|
| 120-150 | 23 | 100-110 |
| 150-180 | 25 | 90-100 |
| 180-220 | 28 | 80-90 |
Choosing the Right Tire Pressure for Different Riding Conditions
The ideal tire pressure varies depending on the type of riding you’re doing. Here are some guidelines:
- Road Cycling: Higher pressures (100-120 PSI) for low rolling resistance.
- Mountain Biking: Lower pressures (25-35 PSI) for better grip and shock absorption.
- Gravel Riding: Moderate pressures (40-60 PSI) for a balance of speed and comfort.
- Commuting: Adjust pressure based on road conditions and load.
For more information, check out resources like BikeRadar’s guide to tire pressure.
Frequently Asked Questions (FAQ)
What is a lockable gauge on a bike pump?
A lockable gauge is a feature on some bike pumps that allows you to freeze the pressure reading. This helps you get an accurate measurement without losing air when you remove the pump head.
Why is a lockable gauge important?
It ensures you get the correct tire pressure. Accurate tire pressure improves your bike’s performance, comfort, and safety by optimizing rolling resistance and grip.
Can I add a lockable gauge to my existing pump?
You might be able to! Look for aftermarket gauge adapters that offer a locking feature. However, it may be easier to simply invest in a new pump with a built-in lockable gauge.
Are digital gauges more accurate than analog gauges?
Generally, yes. Digital gauges tend to be more precise and easier to read. But a high-quality analog gauge can also provide accurate readings if properly maintained.
How often should I check my tire pressure?
Ideally, check your tire pressure before every ride. At a minimum, check it once a week. Tires lose pressure over time, so regular checks are crucial for optimal performance and safety.
What happens if I overinflate my tires?
Overinflating your tires can lead to a harsher ride, reduced grip, and an increased risk of blowouts. Always stay within the recommended pressure range printed on your tire sidewall.
What should I do if my pump gauge isn’t working?
First, check the battery if it’s a digital gauge. If that’s not the problem, try cleaning the gauge or replacing it. If the issue persists, it might be time for a new pump.
Conclusion
Investing in a pump with a lockable gauge is a game-changer for any cyclist. It provides accuracy, consistency, and convenience, ensuring your tires are always inflated to the perfect pressure. Whether you’re a seasoned pro or a weekend warrior, the ability to lock your pressure reading simplifies bike maintenance and enhances your riding experience. So, take the plunge, upgrade your pump, and enjoy the benefits of perfectly inflated tires on every ride. Happy cycling!


