
How to Repair Air Leak at Pump Connection: Easy Fix
Quick Summary: Got an air leak where your pump connects to the tire? Don’t worry! Usually, it’s a simple fix. First, check if the pump head is properly seated on the valve. If not, adjust it. Next, inspect the rubber gasket inside the pump head for wear or damage. Replacing this small part often solves the problem. Lastly, make sure your valve stem is in good condition. With these steps, you’ll be back to perfectly inflated tires in no time!
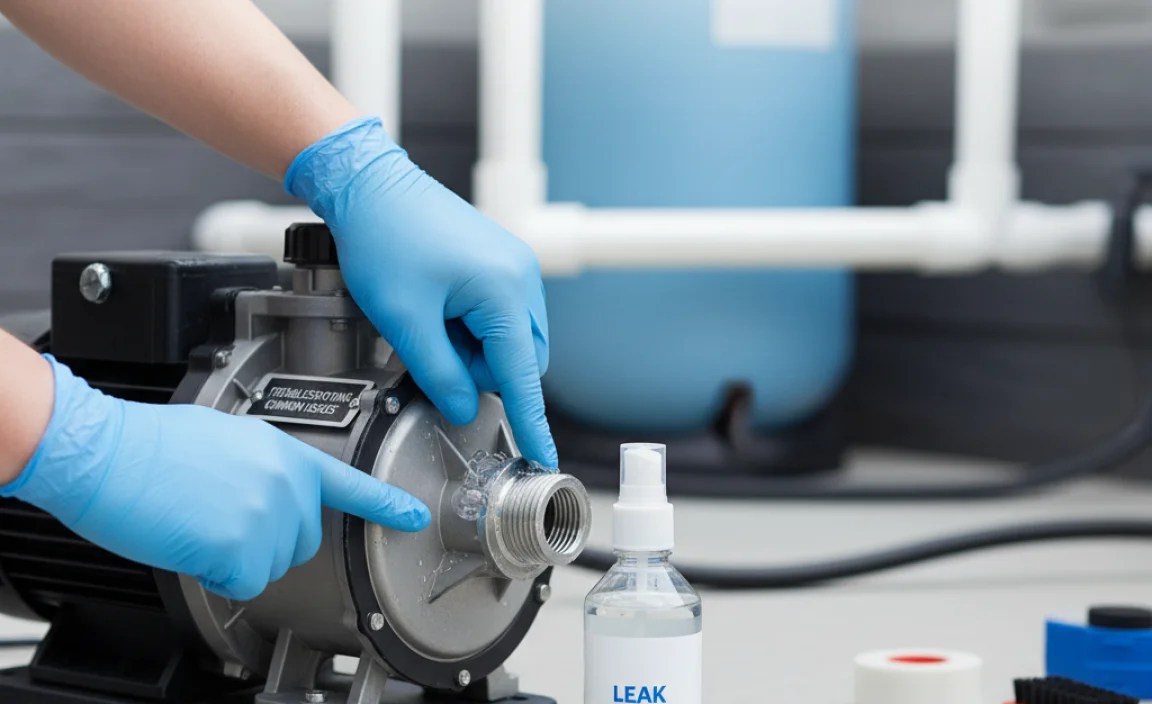
Is your bike pump hissing and losing air instead of filling your tires? It’s a common problem, and often, the culprit is a leak at the pump connection. This can be super frustrating, especially when you’re trying to get ready for a ride. But don’t worry, you don’t need to buy a new pump! Most of the time, you can fix this yourself with a few simple steps. This guide will walk you through diagnosing and repairing air leaks at your pump connection, so you can get back on the road or trail quickly and easily.
Understanding Air Leaks at the Pump Connection

Air leaks at the pump connection can be annoying, but understanding why they happen can help you fix them faster and prevent them in the future. Let’s break down the common causes:
- Worn-out Gasket: The rubber gasket inside the pump head is the most common cause. Over time, it can dry out, crack, or become misshapen, leading to a poor seal.
- Incorrect Pump Head Placement: If the pump head isn’t properly seated on the valve stem, air can escape. This often happens when you’re in a hurry.
- Damaged Valve Stem: The valve stem on your inner tube can also be the problem. If it’s bent, cracked, or the valve core is loose, it won’t seal properly with the pump head.
- Debris or Dirt: Sometimes, dirt or small debris can get stuck between the pump head and the valve stem, preventing a tight seal.
- Loose Pump Head Components: Some pump heads have adjustable parts that can loosen over time, leading to leaks.
Tools and Materials You’ll Need

Before you start, gather these essential tools and materials. Having everything ready will make the repair process smoother and faster.
- Bike Pump: Obviously, you’ll need the pump you’re trying to fix.
- Replacement Gaskets: Keep a set of replacement gaskets on hand. They’re inexpensive and readily available at most bike shops or online retailers.
- Valve Core Tool: This small tool is used to tighten or remove the valve core on Schrader and Presta valves.
- Clean Rags: Use these to clean the pump head and valve stem.
- Small Brush: A small brush, like an old toothbrush, can help remove dirt and debris.
- Needle-Nose Pliers: These can be useful for removing small parts or debris.
- Silicone Grease (Optional): Applying a small amount of silicone grease to the gasket can help improve the seal and extend its life.
Step-by-Step Guide to Repairing Air Leaks

Follow these steps to diagnose and repair air leaks at your pump connection. We’ll start with the simplest solutions and move on to more involved repairs if necessary.
Step 1: Check Pump Head Placement
The first thing to check is whether the pump head is correctly positioned on the valve stem. A misaligned or loosely attached pump head is a common cause of air leaks.
- Position the Pump Head: Make sure the pump head is pushed fully onto the valve stem.
- Engage the Lever: If your pump has a lever, ensure it’s fully engaged to create a tight seal.
- Listen for Leaks: Pay attention to where the hissing sound is coming from. If it’s from the connection point, reposition the pump head and try again.
Step 2: Inspect the Gasket
The rubber gasket inside the pump head is a critical component for creating an airtight seal. Over time, it can wear out and cause leaks. Here’s how to inspect and replace it:
- Open the Pump Head: Most pump heads can be opened by unscrewing or unclipping them. Refer to your pump’s manual if you’re unsure how to do this.
- Remove the Gasket: Carefully remove the rubber gasket. It might be held in place by a small retaining ring or simply sit in a groove.
- Inspect the Gasket: Look for cracks, tears, or deformation. If the gasket looks worn, it’s time to replace it.
- Install a New Gasket: Place the new gasket in the pump head, making sure it’s seated correctly.
- Reassemble the Pump Head: Close the pump head and ensure all parts are securely fastened.
Step 3: Clean the Valve Stem
Dirt and debris can interfere with the seal between the pump head and the valve stem. Cleaning the valve stem is a quick and easy way to address this issue.
- Wipe the Valve Stem: Use a clean rag to wipe down the valve stem, removing any visible dirt or grime.
- Use a Small Brush: For stubborn dirt, use a small brush to gently scrub the valve stem.
- Check for Damage: While cleaning, inspect the valve stem for any signs of damage, such as bends or cracks.
Step 4: Check and Tighten the Valve Core (If Applicable)
If you have Schrader or Presta valves with removable valve cores, make sure they are properly tightened. A loose valve core can cause air to leak out.
- Use a Valve Core Tool: Insert the valve core tool into the valve stem and gently tighten the valve core.
- Avoid Overtightening: Be careful not to overtighten, as this can damage the valve core or the valve stem threads.
- Test for Leaks: After tightening, check for leaks by listening for hissing sounds or applying a small amount of soapy water to the valve stem.
Step 5: Lubricate the Gasket (Optional)
Applying a small amount of silicone grease to the gasket can help improve the seal and extend its lifespan. This is an optional step, but it can be beneficial, especially if you live in a dry climate.
- Apply Silicone Grease: Use a small amount of silicone grease on your finger and lightly coat the gasket.
- Reinstall the Gasket: Place the lubricated gasket back into the pump head.
- Reassemble the Pump Head: Close the pump head and ensure all parts are securely fastened.
Step 6: Inspect the Pump Head for Damage
Sometimes, the pump head itself can be damaged, leading to air leaks. Inspect the pump head for cracks, loose parts, or other signs of wear and tear.
- Check for Cracks: Look closely at the pump head body for any cracks or breaks.
- Tighten Loose Parts: If you find any loose screws or bolts, tighten them carefully.
- Replace Damaged Parts: If the pump head is severely damaged, you may need to replace the entire pump head or the entire pump.
Step 7: Test the Pump
After performing any of the above repairs, it’s essential to test the pump to ensure the air leak is resolved. Here’s how:
- Attach the Pump Head: Connect the pump head to a tire valve.
- Engage the Lever: If your pump has a lever, engage it to create a seal.
- Pump Air: Start pumping air into the tire.
- Listen for Leaks: Pay close attention to the connection point between the pump head and the valve stem. If you hear any hissing sounds, there may still be a leak.
- Check Tire Pressure: Monitor the tire pressure to ensure it’s increasing steadily. If the pressure isn’t increasing or is dropping quickly, there’s likely still a leak.
Troubleshooting Common Issues
Even after following the steps above, you might still encounter some issues. Here are some common problems and their solutions:
- Leak Persists After Replacing Gasket: Make sure you’ve installed the correct size and type of gasket. Also, check for damage to the pump head or valve stem.
- Pump Head Won’t Stay on Valve: This could be due to a worn-out lever mechanism or a damaged valve stem. Try adjusting the lever or replacing the valve stem.
- Air Leaks from Valve Core: Ensure the valve core is tightened properly. If the leak persists, the valve core may be damaged and need replacement.
- Pump Feels Stiff or Difficult to Use: This could be due to a dry or damaged pump cylinder. Lubricate the cylinder with silicone grease or replace the pump.
Preventative Maintenance Tips
Preventing air leaks is always better than fixing them. Here are some tips to keep your bike pump in good working condition:
- Regularly Inspect the Gasket: Check the gasket for wear and tear every few months and replace it as needed.
- Clean the Valve Stem: Keep the valve stem clean to prevent dirt and debris from interfering with the seal.
- Store the Pump Properly: Store your pump in a dry, clean place to protect it from the elements.
- Lubricate Moving Parts: Periodically lubricate the moving parts of the pump with silicone grease to keep them working smoothly.
- Avoid Over-Pumping: Over-pumping can put stress on the pump and its components, leading to premature wear.
Choosing the Right Replacement Parts
When replacing parts on your bike pump, it’s essential to choose the right ones. Here’s what to consider:
- Gasket Size and Type: Make sure you get the correct size and type of gasket for your pump head. Refer to your pump’s manual or contact the manufacturer for assistance.
- Valve Core Compatibility: If replacing a valve core, ensure it’s compatible with your valve stem (Schrader or Presta).
- Pump Head Quality: If replacing the entire pump head, choose a high-quality one that’s compatible with your pump.
Here’s a table summarizing common replacement parts and their compatibility:
| Part | Compatibility | Notes |
|---|---|---|
| Gasket | Specific to pump head model | Check pump manual or manufacturer website |
| Valve Core | Schrader or Presta | Ensure correct type for your inner tube |
| Pump Head | Varies by pump type | Consider universal adapters for versatility |
Advanced Troubleshooting
If you’ve tried all the basic troubleshooting steps and are still experiencing air leaks, here are some more advanced techniques to consider:
- Check for Microscopic Cracks: Use a magnifying glass to inspect the pump head and valve stem for tiny cracks that may be causing leaks.
- Test with Soapy Water: Apply a small amount of soapy water to the connection point and look for bubbles, which indicate a leak.
- Disassemble and Clean the Pump: Disassemble the entire pump and clean all parts thoroughly. This can help remove hidden dirt and debris.
Here’s a table summarizing the troubleshooting steps discussed:
| Problem | Possible Solution | Difficulty |
|---|---|---|
| Air leak at pump head | Replace gasket | Easy |
| Loose valve core | Tighten valve core with tool | Easy |
| Damaged valve stem | Replace inner tube | Medium |
| Cracked pump head | Replace pump head or entire pump | Medium |
When to Seek Professional Help
While many air leak issues can be resolved with DIY repairs, there are times when it’s best to seek professional help. Consider taking your pump to a bike shop if:
- You’re not comfortable disassembling the pump.
- You’ve tried all the troubleshooting steps and the leak persists.
- The pump is severely damaged.
- You’re unsure how to identify or replace the correct parts.
FAQ: Repairing Air Leaks at Pump Connection
Here are some frequently asked questions about repairing air leaks at the pump connection:
1. Why is my bike pump leaking air at the valve?
The most common reason is a worn-out or damaged rubber gasket inside the pump head. Dirt, debris, or a loose valve core can also cause leaks.
2. How often should I replace the gasket on my bike pump?
It depends on how often you use your pump, but it’s a good idea to inspect the gasket every few months and replace it if you see any signs of wear or damage.
3. Can I use any type of grease on my bike pump?
No, you should only use silicone grease on your bike pump. Other types of grease can damage the rubber components.
4. What is a valve core tool, and why do I need one?
A valve core tool is a small tool used to tighten or remove the valve core on Schrader and Presta valves. It’s essential for maintaining proper air pressure in your tires.
5. How do I know if my valve stem is damaged?
Look for bends, cracks, or leaks around the base of the valve stem. If you suspect damage, replace the inner tube.
6. Is it worth repairing a bike pump, or should I just buy a new one?
Most bike pump problems are easy and inexpensive to fix. Replacing the gasket or tightening the valve core can often resolve the issue. However, if the pump is severely damaged or very old, it may be more cost-effective to buy a new one.
7. Can I prevent air leaks in my bike pump?
Yes, regular maintenance can help prevent air leaks. Keep the pump and valve stem clean, inspect the gasket regularly, and store the pump in a dry, clean place.
Conclusion
Repairing air leaks at the pump connection is a common task for cyclists, but with the right knowledge and tools, it’s a problem you can easily solve yourself. By following the steps outlined in this guide, you can diagnose and fix most air leaks, saving you time and money. Remember to regularly inspect and maintain your pump to prevent future issues. With a little bit of care, your bike pump will continue to serve you well for many rides to come. Now get out there and enjoy the ride, knowing you’re prepared for anything!


