
How to Easily Fix Punctures Caused by Thorns
Quick Summary: Fixing a thorn puncture is simple! First, remove the wheel and tire. Find the thorn, pull it out, and inspect the tire inside and out. Use a patch kit or tire plug to seal the hole in the tube. Reinstall the tire and wheel, then inflate. Regularly check your tires for embedded thorns to prevent future flats.
Dealing with a flat tire caused by a pesky thorn is a common frustration for cyclists. It always seems to happen at the worst time, right? But don’t worry! Fixing it yourself is easier than you might think. This guide will walk you through each step, showing you how to quickly identify the problem, repair the puncture, and get back on the road. Soon, you’ll be fixing flats like a pro, feeling confident and ready to tackle any trail. Let’s get started!
What You’ll Need

Before you start, gather these essential tools and materials:
- Bike pump or CO2 inflator
- Tire levers
- Patch kit or tire plugs
- Multi-tool or wrench (to remove the wheel)
- Small container of water
- Rag or paper towel
Step-by-Step Guide to Fixing a Thorn Puncture

Step 1: Identify the Puncture
The first step is to confirm that a thorn caused the flat tire. Look closely at the tire for any visible thorns or small objects sticking out. If you find one, mark the area on the tire with chalk or a pen before removing it.
If you don’t see anything obvious, slowly rotate the tire, carefully inspecting the surface. Sometimes, the thorn might be tiny or embedded deep within the tire.
Step 2: Remove the Wheel
Depending on whether you have a front or rear puncture, the removal process differs slightly:
- Front Wheel: Most front wheels have a quick-release lever. Open the lever, and if necessary, loosen the adjustment nut slightly. Lift the front of the bike and remove the wheel.
- Rear Wheel: Shift the chain to the smallest cog. If you have a quick-release, open it. For bolt-on wheels, use a wrench to loosen the nuts. Carefully pull the wheel back and down, guiding the chain off the cassette.
Step 3: Remove the Tire and Tube
Now, it’s time to get to the inner tube:
- Deflate the Tire: If there’s still some air in the tire, fully deflate it by pressing the valve core.
- Use Tire Levers: Insert one tire lever under the tire bead, hooking it onto a spoke. Insert a second lever a few inches away, and pry that section of the tire off the rim.
- Remove the Tire: Once a section of the tire is off the rim, you can usually slide one tire lever around the rest of the tire to completely remove one side.
- Extract the Tube: Carefully pull the inner tube out from inside the tire, starting at the valve stem.
Step 4: Find the Puncture in the Tube
Locating the exact puncture can be tricky, but here’s how to do it:
- Inflate the Tube Slightly: Add just enough air to give the tube some shape without overinflating it.
- Listen and Feel: Slowly rotate the tube, listening for a hissing sound or feeling for air escaping.
- Use Water: If you can’t hear or feel the leak, submerge sections of the tube in a small container of water. Look for bubbles, which will indicate the location of the puncture.
- Mark the Spot: Once you find the puncture, mark it with a pen or marker.
Step 5: Inspect the Tire
This is a crucial step to prevent repeat punctures:
- Check the Outside: Carefully examine the outside of the tire at the location corresponding to the puncture in the tube. Look for any remaining thorns, glass, or other debris.
- Check the Inside: Run your fingers along the inside of the tire to feel for any sharp objects that may have penetrated the tire. Be very careful, as these objects can be sharp!
- Remove Debris: If you find anything, carefully remove it with pliers or tweezers.
Step 6: Repair the Tube
You have two main options for repairing the tube: patching or using a tire plug.
Patching the Tube
- Roughen the Surface: Use the sandpaper or metal scuffer from your patch kit to roughen the area around the puncture. This helps the adhesive stick.
- Apply Glue: Apply a thin, even layer of vulcanizing glue to the roughened area.
- Wait for the Glue to Dry: Let the glue dry completely. It should be tacky but not wet. This usually takes a few minutes.
- Apply the Patch: Remove the backing from the patch and carefully apply it over the glued area. Press firmly for several seconds to ensure good adhesion.
- Wait and Test: Wait a few minutes before inflating the tube slightly to check the patch.
Using Tire Plugs
Tire plugs are a quick and effective solution, especially for larger punctures. Note that plugs are typically used for tire repair, not tube repair. However, some cyclists use them on tubes in emergencies:
- Insert the Plug: Insert the tire plug into the insertion tool.
- Widen the Hole: Push the insertion tool with the plug into the puncture.
- Remove the Tool: Twist and remove the insertion tool, leaving the plug in place.
- Trim the Excess: Trim the excess plug material, leaving about ¼ inch sticking out.
Step 7: Reinstall the Tube and Tire
Now, it’s time to put everything back together:
- Slightly Inflate the Tube: Add just a bit of air to the tube to give it some shape. This helps prevent pinching.
- Insert the Tube: Carefully insert the valve stem into the hole in the rim. Then, tuck the rest of the tube into the tire cavity.
- Seat the Tire: Starting opposite the valve stem, use your thumbs to push the tire bead back onto the rim. Work your way around the tire.
- Check the Tire: Make sure the tube isn’t pinched between the tire and the rim. Inspect both sides of the tire.
Step 8: Inflate the Tire
Inflate the tire to the recommended pressure, which is usually printed on the sidewall of the tire. Use a bike pump or CO2 inflator.
Step 9: Reinstall the Wheel
Reattach the wheel to your bike:
- Front Wheel: Insert the wheel into the fork dropouts, making sure it’s seated properly. Close the quick-release lever.
- Rear Wheel: Align the cassette with the chain. Pull the rear derailleur back and carefully slide the wheel into the dropouts. Make sure it’s seated properly. Close the quick-release lever or tighten the axle nuts with a wrench.
Step 10: Final Check
Before riding, double-check that the wheel is securely attached and the tire is properly inflated. Spin the wheel to make sure it rotates freely and doesn’t wobble.
Tips for Preventing Future Thorn Punctures
- Use Tire Liners: These provide an extra layer of protection between the tire and the tube.
- Use Thorn-Resistant Tubes: These tubes are thicker and more resistant to punctures.
- Choose the Right Tires: Some tires are designed with puncture-resistant materials.
- Regularly Inspect Your Tires: Check your tires for embedded thorns or debris after each ride.
- Ride Smart: Avoid riding through areas with a lot of thorns or debris.
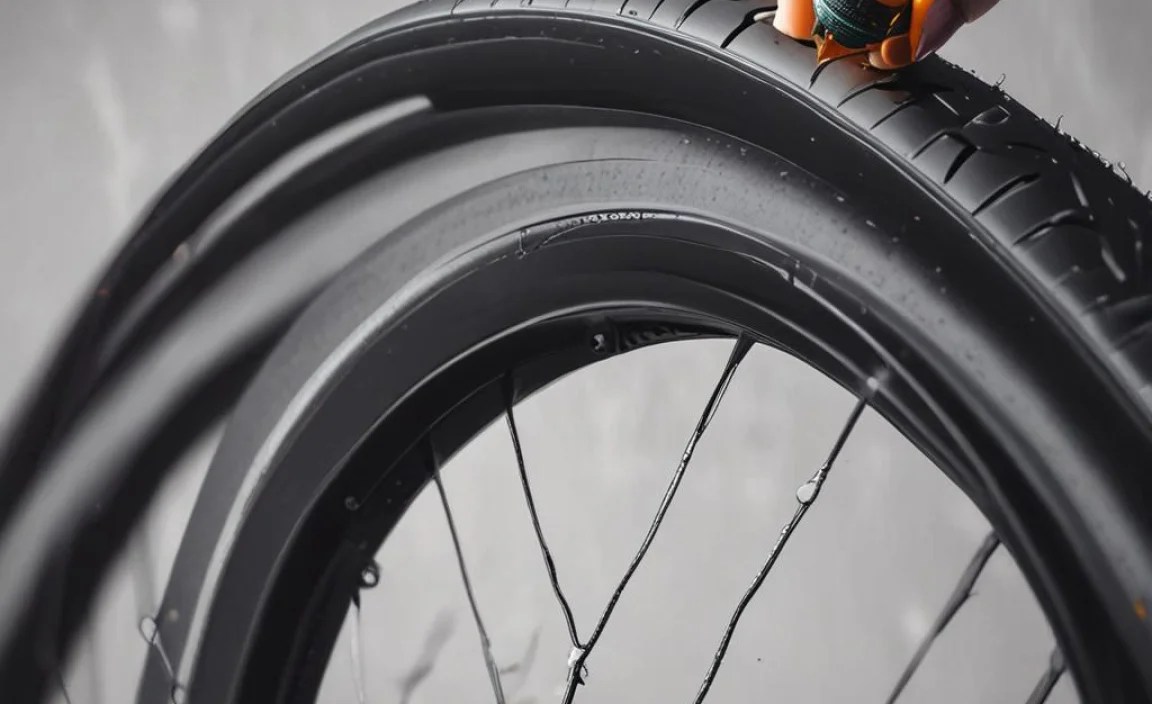
- Sealant: Use a tire sealant, such as those offered by Stan’s NoTubes, to automatically seal small punctures as they occur.
Troubleshooting

| Problem | Possible Cause | Solution |
|---|---|---|
| Puncture keeps happening in the same spot | There’s still a thorn or sharp object embedded in the tire | Carefully inspect the tire again, inside and out |
| Patch won’t stick | The surface wasn’t roughened enough, or the glue wasn’t dry | Roughen the surface more thoroughly and let the glue dry completely |
| Tire is difficult to get back on the rim | The tire bead isn’t properly seated in the rim channel | Make sure the tube is fully inside the tire and use tire levers carefully to seat the bead |
| Valve stem keeps tearing | The tire is slipping on the rim or the valve hole is rough | Make sure the tire pressure is correct and file down any rough edges on the valve hole |
Types of Bike Tire Sealants
| Sealant Type | Pros | Cons | Best For |
|---|---|---|---|
| Latex-Based | Seals quickly, works well with tubeless setups | Can dry out over time, may require occasional refreshing | Tubeless tires, preventing small punctures |
| Ammonia-Free | Doesn’t corrode rims, longer lifespan | May not seal as quickly as latex-based sealants | Aluminum rims, riders who prefer less maintenance |
| Fiber-Reinforced | Seals larger punctures effectively | Can be messier to install, may clog valves | Riding in areas with frequent large punctures |
| Water-Based | Environmentally friendly, easy cleanup | May not be as effective in extreme conditions | Everyday riding, environmentally conscious cyclists |
Essential Tools for Cyclists
- Bike Pump: A reliable pump is essential for maintaining proper tire pressure. Consider a floor pump for home use and a mini-pump for on-the-go adjustments.
- Multi-Tool: A compact multi-tool with various Allen wrenches, screwdrivers, and a chain tool can handle many roadside repairs.
- Tire Levers: These help remove tires from the rim without damaging them.
- Patch Kit: A must-have for fixing punctures on the road.
- Chain Lube: Keep your chain lubricated for smooth shifting and to prevent wear.
- Allen Wrench Set: A set of Allen wrenches is essential for adjusting various components on your bike.
- Torque Wrench: For carbon fiber bikes or components, a torque wrench ensures you tighten bolts to the correct specification.
FAQ: Fixing Thorn Punctures
What causes punctures from thorns?
Thorns, being sharp and rigid, can easily pierce through the tire and inner tube of a bicycle, leading to air leakage and a flat tire.
Can I prevent thorn punctures?
Yes, you can reduce the risk by using tire liners, thorn-resistant tubes, puncture-resistant tires, regularly inspecting your tires, and avoiding areas with a lot of thorns.
How long does it take to fix a thorn puncture?
With practice, you can fix a thorn puncture in about 20-30 minutes. The first time might take a bit longer, so don’t rush!
Do I need to replace the tube every time I get a puncture?
No, you can usually patch the tube multiple times. However, if the tube has several punctures or a large tear, it’s best to replace it.
Can I use regular glue instead of vulcanizing glue for patches?
No, regular glue won’t work as effectively. Vulcanizing glue creates a chemical bond between the patch and the tube, ensuring a secure repair.
What is the best tire pressure to avoid punctures?
Check the recommended pressure on your tire’s sidewall. Maintaining the correct pressure helps prevent pinch flats and reduces the risk of punctures.
Are tubeless tires more resistant to thorn punctures?
Yes, tubeless tires, when used with sealant, can often seal small punctures automatically, providing better protection against thorns and other debris. Learn more about tubeless tire systems on reputable cycling sites like BikeRadar.
Conclusion
Fixing a flat tire caused by a thorn might seem daunting at first, but with a little practice, it becomes a manageable part of cycling. By following these steps and taking preventative measures, you’ll be well-equipped to handle punctures and enjoy your rides without worry. Remember to always carry the necessary tools and stay vigilant about inspecting your tires. Happy cycling!


