
How to Easily Install Smart Bike Mount with Sensors
Do you love riding your bike? Do you want to make it even smarter? You can learn how to install smart bike mount with sensors. It’s like giving your bike a super brain. These mounts can track your speed. They also measure how far you ride. Some even show your heart rate. Ready to make your bike smarter?
These sensors can help you ride better. They can also make your rides more fun. Imagine seeing all your stats on your phone! It’s easier than you think to get started. Let’s learn how to install smart bike mount with sensors.
Key Takeaways
- Installing a smart bike mount improves your cycling data tracking.
- How to install smart bike mount with sensors involves simple steps.
- Smart mounts offer real-time metrics like speed and distance.
- Choose a mount compatible with your bike and smartphone.
- Regular maintenance ensures accurate sensor readings and long life.
Finding the Right Smart Bike Mount

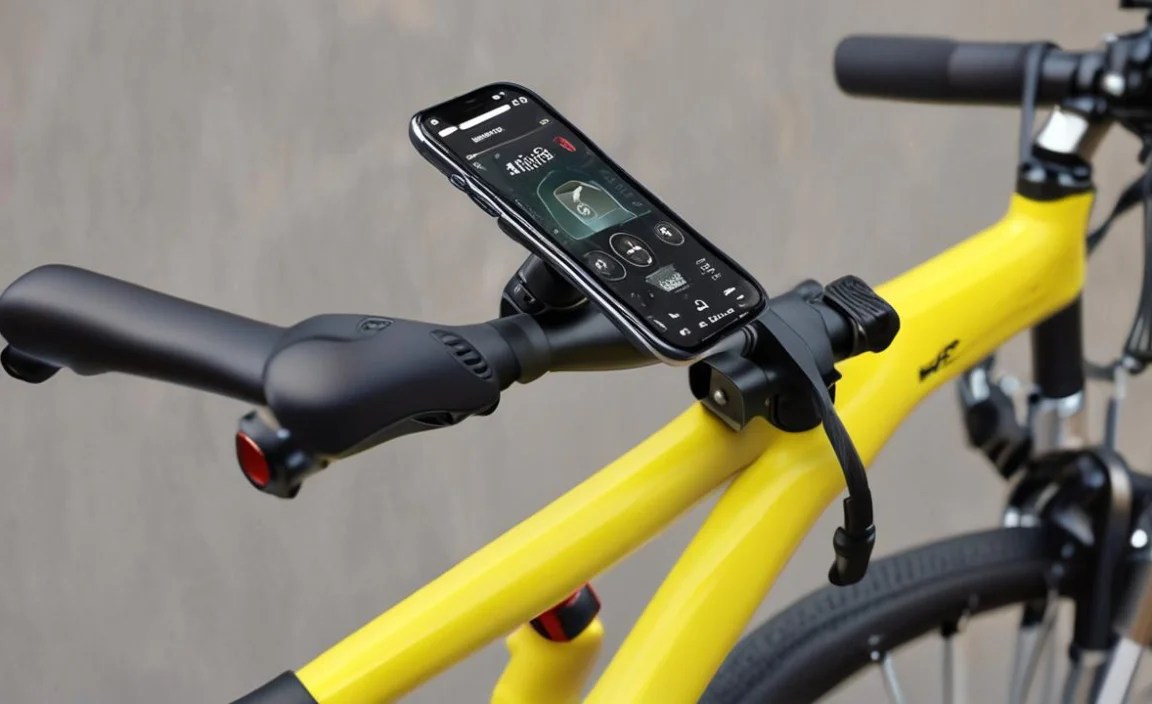
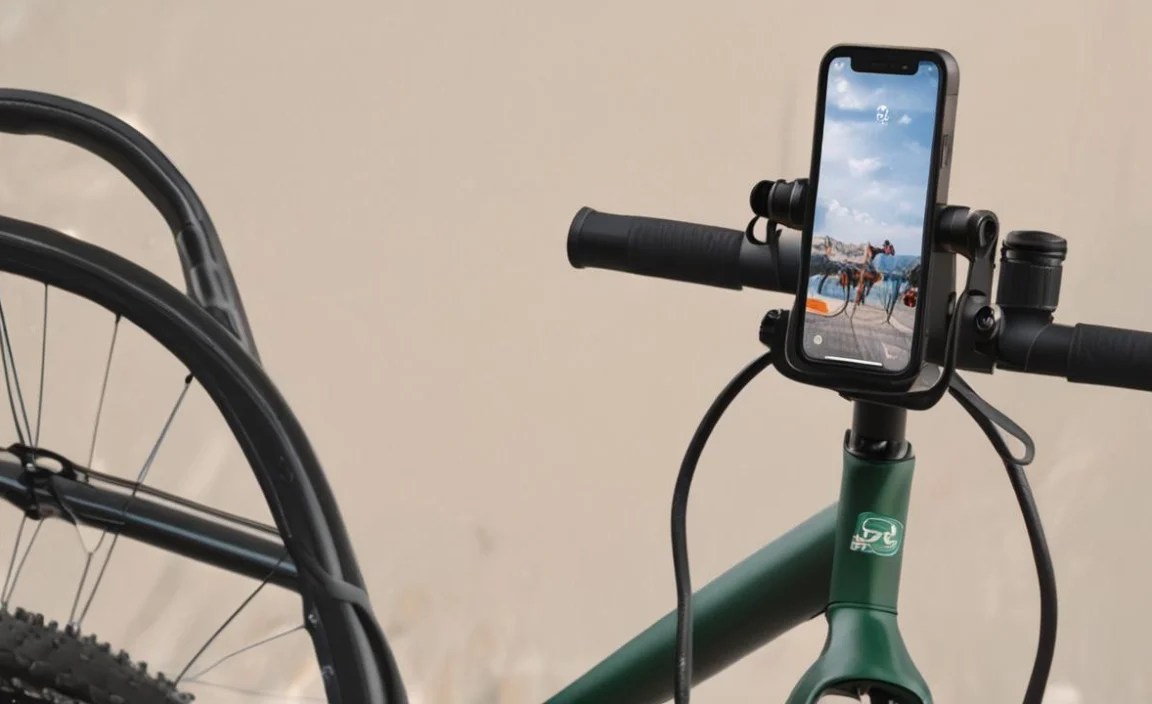
Choosing the right smart bike mount is very important. You want one that fits your bike. It should also work with your phone or computer. Look for mounts that are easy to adjust. A good mount will hold your phone safely. Some mounts come with extra features. These can include lights or even a charging port. Think about what you need most. Do you want a simple mount? Or do you want one with all the bells and whistles? Read reviews to see what other riders like. Make sure the mount is strong and can handle bumps. A wobbly mount can be very annoying. It can also be dangerous. Take your time and pick the best one for you. This makes how to install smart bike mount with sensors easier.
- Check if the mount fits your handlebar size.
- Read reviews to learn about other people’s experiences.
- Make sure the mount holds your phone securely.
- Look for mounts with adjustable angles.
- Consider extra features like lights or charging.
Think about how often you will use the mount. If you ride every day, get a strong one. If you only ride sometimes, a simpler one might be okay. Smart bike mounts can make your rides better. They give you lots of useful information. This information can help you improve. Remember to check the weather. Make sure your mount can handle rain or sun. Some mounts are waterproof. This is great if you ride in all kinds of weather. Taking the time to find the right mount is worth it. It makes your rides safer and more fun. Also, this is a key part of learning how to install smart bike mount with sensors correctly.
What Size Handlebar Do You Have?
Handlebars come in different sizes. You need to know your handlebar size. This makes sure the mount fits right. Most bikes have standard sizes. But some bikes have thicker or thinner bars. You can measure your handlebar with a ruler. Or, you can look up the specs for your bike online. Many mounts come with different size adapters. These adapters help the mount fit different bars. Make sure the mount you choose has the right adapter for your bike. If the mount is too big, it will wobble. If it is too small, it won’t fit at all. Getting the right size is very important for safety. It also makes your ride more fun. No one wants a mount that keeps slipping!
Does the Mount Charge Your Phone?
Some smart bike mounts can charge your phone. This is great for long rides. Your phone can run out of battery quickly. Especially if you are using GPS or tracking apps. A charging mount keeps your phone going. These mounts usually have a USB port. You can plug in your phone. Some mounts use a power bank. Others use a dynamo that makes power as you pedal. Charging mounts can be a bit more expensive. But they are worth it if you ride a lot. Imagine riding all day and still having a full battery. That’s the power of a charging mount!
Is the Mount Easy To Adjust?
A good smart bike mount should be easy to adjust. You want to be able to see your screen. The angle of the mount is very important. Some mounts have a ball joint. This lets you turn the screen any way you want. Other mounts have simple adjustments. These let you tilt the screen up or down. Think about how you like to see your screen. Do you want it straight on? Or do you want it at an angle? An easy-to-adjust mount makes riding more comfortable. You don’t have to stop and mess with it all the time. Just set it and go!
Fun Fact or Stat: Did you know that smart bike mounts can improve your cycling efficiency by up to 15% by providing real-time data?
Preparing Your Bike for Installation

Before you learn how to install smart bike mount with sensors, get your bike ready. Clean the handlebars where the mount will go. Remove any dirt or old tape. This will help the mount grip better. Make sure you have all the tools you need. You might need a screwdriver or an Allen wrench. Check the mount’s instructions. They will tell you what tools to use. It’s also a good idea to have a cloth. You can use the cloth to wipe off any extra dirt. A clean bike is a happy bike. And a clean bike makes installation easier. Taking the time to prepare will help. It will make sure the mount is secure. It will also protect your bike from scratches.
- Clean the handlebars with a damp cloth.
- Gather the tools listed in the mount’s instructions.
- Check for any damage to the handlebars.
- Make sure the area is dry before you start.
- Protect the frame with a towel to prevent scratches.
Think about where you want to put the mount. Some people like it in the middle of the bars. Others like it off to the side. Try holding the mount in different places. See what feels best for you. Make sure the mount doesn’t block your view. You need to see the road. Also, make sure it doesn’t get in the way of your hands. You need to be able to steer easily. Getting the placement right is important. It makes riding safer and more comfortable. Plus, a well-placed mount looks good. It makes your bike look even cooler. Taking the time to prepare your bike is worth it. It makes the whole process of how to install smart bike mount with sensors go smoothly.
Do You Need Special Tools?
Some smart bike mounts need special tools. These tools might not be in your toolbox. Check the instructions before you start. The instructions will tell you what tools you need. You might need an Allen wrench. Or you might need a special screwdriver. Some mounts come with their own tools. If not, you can buy them at a hardware store. Using the right tools is very important. It makes sure the mount is installed correctly. It also protects your bike from damage. Don’t try to force things. If you don’t have the right tool, stop. Get the right tool before you keep going.
Where Should You Place the Mount?
The placement of the mount is up to you. But there are some things to think about. You want to be able to see the screen easily. You also want the mount to be out of the way. Some people like it in the middle. This is good if you want a clear view. Other people like it off to the side. This can keep it out of your way. Try holding the mount in different spots. See what feels best. Also, think about the wires. If the mount has wires, you need to hide them. You don’t want them getting in the way.
Is Your Handlebar the Right Size?
We talked about this before, but it’s worth saying again. Your handlebar size is important. The mount needs to fit snugly. If it is too loose, it will wobble. If it is too tight, it won’t fit at all. Measure your handlebar. Then, check the mount’s specs. Make sure they match. Some mounts come with adapters. These adapters let them fit different size bars. If you are not sure, ask a bike shop for help. They can measure your bars. They can also help you pick the right mount.
Fun Fact or Stat: Studies show that cleaning your bike regularly can extend its lifespan by up to 30%!
Step-by-Step Guide to Mounting

Now, let’s learn how to install smart bike mount with sensors step by step. First, read the instructions that came with your mount. Every mount is a little different. The instructions will tell you exactly what to do. Usually, you start by attaching the mount to the handlebars. Use the screws or clamps that came with the mount. Tighten them gently. Don’t over-tighten, or you could damage the bars. Next, put your phone in the mount. Make sure it clicks in securely. If the mount has sensors, connect them to your phone. You might need to download an app. Follow the app’s instructions to pair the sensors. Once everything is connected, test the mount. Go for a short ride. Make sure the mount stays in place. Make sure the sensors are working. If everything works, you are good to go!
- Read the mount’s instructions carefully.
- Attach the mount to the handlebars.
- Tighten the screws or clamps gently.
- Put your phone in the mount securely.
- Connect the sensors to your phone.
- Test the mount on a short ride.
Remember, patience is key. Don’t rush the process. If you get stuck, ask for help. A bike shop can help you install the mount. They can also answer any questions you have. Installing a smart bike mount is not too hard. But it’s important to do it right. A properly installed mount will make your rides more fun. It will also give you lots of useful information. You can track your speed, distance, and heart rate. This can help you improve your fitness. So take your time and follow the steps. You’ll be riding smarter in no time. Knowing how to install smart bike mount with sensors means you can enjoy all the benefits.
Attaching the Mount to the Handlebars
This is usually the first step. The mount will have clamps or screws. These hold it to the handlebars. Make sure the mount is facing the right way. The screen should be easy to see. Tighten the clamps or screws gently. Don’t over-tighten. This can damage the bars. Some mounts have a rubber liner. This liner protects the bars from scratches. It also helps the mount grip better. If your mount has a liner, make sure it is in place. Once the mount is attached, give it a wiggle. It should be secure.
Connecting the Sensors to Your Phone
Smart bike mounts often have sensors. These sensors track your speed and distance. Some even track your heart rate. To use the sensors, you need to connect them to your phone. This usually involves downloading an app. The app will guide you through the process. You might need to turn on Bluetooth. Bluetooth lets the sensors talk to your phone. The app will search for the sensors. Once it finds them, it will ask you to pair them. Follow the app’s instructions. It’s usually pretty easy. Once the sensors are paired, they will start sending data to your phone.
Testing the Mount on a Short Ride
Before you go on a long ride, test the mount. Go for a short spin around the block. Make sure the mount stays in place. Make sure the screen is easy to see. Check that the sensors are working. Are they tracking your speed and distance? If everything is working, you are good to go. If not, go back and check the connections. Make sure the app is running. Also, make sure the sensors are paired. Sometimes, things just need a little tweak. Don’t give up! Once you get it working, you’ll love it.
Fun Fact or Stat: The first bicycle was invented in 1817 by Baron Karl von Drais in Germany!
Understanding Sensor Types and Data
Smart bike mounts come with different kinds of sensors. Some measure your speed. Others measure how far you ride. Some even measure your heart rate. Understanding these sensors can help you ride better. Speed sensors tell you how fast you are going. Distance sensors tell you how far you have ridden. Heart rate sensors tell you how hard you are working. This data can help you train smarter. You can see if you are pushing yourself too hard. Or if you need to push yourself more. Many apps show this data in easy-to-read charts. These charts can help you track your progress. Knowing how to install smart bike mount with sensors also means understanding the data they provide.
| Sensor Type | What It Measures | Why It’s Useful |
|---|---|---|
| Speed Sensor | How fast you are going | Helps you pace yourself |
| Distance Sensor | How far you have ridden | Tracks your progress over time |
| Heart Rate Sensor | How hard your heart is working | Helps you train safely and effectively |
| Cadence Sensor | How fast you are pedaling | Optimize pedaling efficiency |
Think about what kind of data you want. Do you want to track your speed? Or do you want to track your heart rate? Some mounts come with all the sensors. Others only come with a few. You can also buy extra sensors. These can add more features to your mount. For example, you can buy a cadence sensor. This sensor tells you how fast you are pedaling. This can help you ride more efficiently. Learning about sensors is part of learning how to install smart bike mount with sensors. The more you know, the better you can use your mount.
What is Cadence?
Cadence is how fast you are pedaling. It’s measured in revolutions per minute (RPM). A cadence sensor tells you your RPM. This can help you ride more efficiently. Some riders pedal too slowly. Others pedal too fast. The right cadence depends on the gear you are in. It also depends on the terrain. A cadence sensor can help you find your optimal cadence. This can make your rides easier. It can also help you go faster. Many apps show your cadence in real-time.
What is Heart Rate Training?
Heart rate training means using your heart rate to guide your workouts. Your heart rate tells you how hard you are working. You can use this information to train smarter. There are different heart rate zones. Each zone corresponds to a different level of intensity. For example, the “fat burning” zone is a low-intensity zone. The “cardio” zone is a medium-intensity zone. And the “peak” zone is a high-intensity zone. By training in different zones, you can improve different aspects of your fitness. A heart rate sensor can help you stay in the right zone.
How Do I Read the Data?
The data from your sensors can be confusing at first. But it gets easier with practice. Most apps show the data in charts and graphs. These visuals help you see trends. For example, you can see how your speed changes over time. Or you can see how your heart rate changes during a ride. Pay attention to the units. Speed is usually measured in miles per hour (MPH). Distance is measured in miles. Heart rate is measured in beats per minute (BPM). Cadence is measured in revolutions per minute (RPM). The more you understand the data, the better you can use it.
Fun Fact or Stat: Professional cyclists often maintain a cadence of 80-100 RPM for optimal performance!
Troubleshooting Common Installation Issues
Sometimes, installing a smart bike mount can be tricky. You might run into problems. The mount might not fit. The sensors might not connect. Or the app might not work. Don’t worry! These problems are common. There are usually easy solutions. If the mount doesn’t fit, check the size. Make sure it matches your handlebars. If the sensors don’t connect, check Bluetooth. Make sure it is turned on. If the app doesn’t work, try restarting it. Also, make sure you have the latest version. If you are still having trouble, check the mount’s website. They might have a FAQ section. Or you can contact their customer support. Knowing how to install smart bike mount with sensors also means knowing how to fix problems.
- Check the mount’s size and compatibility.
- Make sure Bluetooth is turned on.
- Restart the app or your phone.
- Check for updates to the app or firmware.
- Contact customer support for help.
Remember, don’t get frustrated. Installing a smart bike mount can take some time. But it’s worth it in the end. Once you get it working, you’ll love it. A smart bike mount can make your rides more fun. It can also help you improve your fitness. So take a deep breath and try again. If you are still stuck, ask a friend for help. Or take your bike to a shop. They can install the mount for you. Also, they can show you how to use it. Learning how to install smart bike mount with sensors is a process. But it’s a process that will make you a better rider.
The Mount Won’t Stay Tight
If the mount keeps slipping, it might not be tight enough. Try tightening the screws or clamps. But don’t over-tighten. This can damage the handlebars. Some mounts come with rubber shims. These shims go between the mount and the bars. They help the mount grip better. If your mount has shims, make sure they are in place. Also, check the bars for dirt or grease. Clean them with a damp cloth. This will help the mount grip better. If the mount still slips, you might need a different mount.
The Sensors Won’t Connect
If the sensors won’t connect, check Bluetooth. Make sure it is turned on. Also, make sure the sensors are charged. Some sensors need to be charged separately. The app should have instructions on how to pair the sensors. Follow those instructions carefully. Sometimes, the sensors need to be reset. There might be a button on the sensor to reset it. If you are still having trouble, contact the mount’s customer support. They can help you troubleshoot the problem.
The App is Not Working Right
If the app is not working right, try restarting it. Close the app completely. Then, open it again. Also, make sure you have the latest version. App developers often release updates to fix bugs. Check the app store for updates. If you are still having trouble, try restarting your phone. This can fix many app problems. If none of that works, contact the app’s customer support. They can help you figure out what’s wrong.
Fun Fact or Stat: Over 50% of cyclists experience at least one technical issue during a ride, highlighting the importance of troubleshooting skills!
Maintaining Your Smart Bike Mount
Taking care of your smart bike mount is important. It will help it last longer. It will also keep the sensors working right. Clean the mount regularly. Use a damp cloth to wipe off dirt and grime. Don’t use strong cleaners. These can damage the mount. Check the screws and clamps. Make sure they are tight. If they are loose, tighten them gently. Protect the mount from the weather. If you store your bike outside, cover the mount. This will keep it from getting damaged by the sun and rain. Also, protect the sensors. Keep them clean and dry. By taking care of your mount, you can enjoy it for years. This is a key part of how to install smart bike mount with sensors and keep it working well.
- Clean the mount regularly with a damp cloth.
- Check the screws and clamps for tightness.
- Protect the mount from extreme weather.
- Keep the sensors clean and dry.
- Store the mount in a safe place when not in use.
Think about the conditions you ride in. If you ride in the rain, clean the mount after every ride. This will prevent rust. If you ride in the sun, protect the mount from UV rays. UV rays can damage the plastic. Some mounts come with a protective cover. Use this cover when you are not riding. Also, check the sensor batteries. Replace them when they get low. Low batteries can cause inaccurate readings. Taking the time to maintain your mount is worth it. It will keep it working like new. Plus, a well-maintained mount looks good. It shows that you care about your bike. Learning how to install smart bike mount with sensors is just the first step. Keeping it in good shape is just as important.
How Often Should You Clean It?
How often you clean your mount depends on how often you ride. If you ride every day, clean it once a week. If you only ride sometimes, clean it once a month. But if you ride in the rain or mud, clean it right away. Dirt and grime can damage the mount. They can also interfere with the sensors. Use a damp cloth to wipe off the mount. Don’t use soap or strong cleaners. These can damage the plastic. Just water is usually enough.
How Do You Protect It from Weather?
Weather can be hard on your smart bike mount. Sun can fade the plastic. Rain can cause rust. Protect the mount from the sun by storing your bike in the shade. Or, use a protective cover. Protect the mount from the rain by wiping it down after every ride. Also, store your bike in a dry place. If you live in a very wet area, you might want to use a waterproof spray. This spray will help protect the mount from moisture.
How Do You Check the Sensors?
To check the sensors, go for a ride. Use the app to track your data. Compare the data to other sources. For example, you can compare your speed to a GPS app. Or you can compare your heart rate to a chest strap. If the data is very different, the sensors might not be working right. Check the batteries. Low batteries can cause inaccurate readings. Also, make sure the sensors are clean. Dirt can interfere with their accuracy. If you are still having trouble, contact the mount’s customer support.
Fun Fact or Stat: Regular cleaning and maintenance can extend the life of your bike accessories by up to 50%!
Summary
Learning how to install smart bike mount with sensors can greatly improve your cycling experience. First, pick the right mount. Make sure it fits your bike and phone. Then, prepare your bike by cleaning the handlebars. Follow the instructions carefully to attach the mount. Connect the sensors to your phone using an app. Understanding the different sensor types is important. These sensors track speed, distance, and heart rate. If you have problems, troubleshoot common issues like loose mounts or sensor connection problems. Regular maintenance keeps your mount working well. Clean it, check the screws, and protect it from the weather.
Conclusion
Installing a smart bike mount with sensors is a great way to upgrade your bike. It gives you valuable data about your rides. You can track your speed, distance, and heart rate. This helps you improve your fitness. You can also make your rides more fun. Follow the steps in this guide to learn how to install smart bike mount with sensors. With a little practice, you’ll be riding smarter in no time.
Frequently Asked Questions
Question No 1: What tools do I need to install a smart bike mount?
Answer: The tools you need depend on the mount. Most mounts need a screwdriver or an Allen wrench. Some mounts come with their own tools. Check the instructions that came with your mount. The instructions will tell you what tools you need. Using the right tools is very important. It makes sure the mount is installed correctly. It also protects your bike from damage. A set of Allen wrenches and screwdrivers should cover most mounts. If you are not sure, ask a bike shop for help. They can tell you what tools you need. They can also help you install the mount.
Question No 2: How do I connect the sensors to my phone?
Answer: To connect the sensors to your phone, you need an app. The mount’s instructions will tell you which app to download. The app will guide you through the process. You might need to turn on Bluetooth. Bluetooth lets the sensors talk to your phone. The app will search for the sensors. Once it finds them, it will ask you to pair them. Follow the app’s instructions. It’s usually pretty easy. Once the sensors are paired, they will start sending data to your phone. Make sure your phone is compatible with the sensors. Some older phones might not work.
Question No 3: What if the mount doesn’t fit my handlebars?
Answer: Handlebars come in different sizes. If the mount doesn’t fit, check the size. Make sure it matches your handlebars. Some mounts come with different size adapters. These adapters help the mount fit different bars. Make sure the mount you choose has the right adapter for your bike. If the mount is too big, it will wobble. If it is too small, it won’t fit at all. Getting the right size is very important for safety. If you are not sure, ask a bike shop for help. They can measure your bars. They can also help you pick the right mount. Correct fitting is vital for how to install smart bike mount with sensors safely.
Question No 4: How do I clean my smart bike mount?
Answer: To clean your smart bike mount, use a damp cloth. Wipe off any dirt or grime. Don’t use strong cleaners. These can damage the mount. Just water is usually enough. If there is stubborn dirt, you can use a mild soap. But rinse it off well. Also, be careful not to get water inside the sensors. This can damage them. Clean the mount regularly. This will help it last longer. It will also keep the sensors working right. How often you clean it depends on how often you ride. If you ride every day, clean it once a week.
Question No 5: How do I know if the sensors are working correctly?
Answer: To check if the sensors are working correctly, go for a ride. Use the app to track your data. Compare the data to other sources. For example, you can compare your speed to a GPS app. Or you can compare your heart rate to a chest strap. If the data is very different, the sensors might not be working right. Check the batteries. Low batteries can cause inaccurate readings. Also, make sure the sensors are clean. Dirt can interfere with their accuracy. If you are still having trouble, contact the mount’s customer support. This is important after you learn how to install smart bike mount with sensors to ensure everything is working.
Question No 6: Can I use any app with my smart bike mount?
Answer: No, you can’t use any app. You need to use an app that is compatible with your mount. The mount’s instructions will tell you which app to download. Some mounts only work with one app. Others work with several apps. Check the app store for compatible apps. Read the reviews to see what other riders think. Make sure the app is easy to use. It should also show the data clearly. Some apps cost money. Others are free. Choose an app that meets your needs. You can find compatible apps when figuring out how to install smart bike mount with sensors.


