
How to Choose Mount for Hybrid Commuter Bike: Smart Guide
Have you ever seen a bike zooming past? Did it have bags attached? Maybe you want to carry things on your bike, too. But how to choose mount for hybrid commuter bike? It can seem tricky. Don’t worry! This article will help you pick the right one.
Think of your bike like a car. Cars have trunks for stuff. Bikes need mounts to hold bags and baskets. Let’s learn how to pick the best mount for your bike. This way, you can carry your lunch, books, or even groceries!
Key Takeaways
- Knowing how to choose mount for hybrid commuter bike makes carrying items easier.
- Rear racks attach over the back wheel and are strong for heavy loads.
- Front racks go over the front wheel, great for lighter, quick-access items.
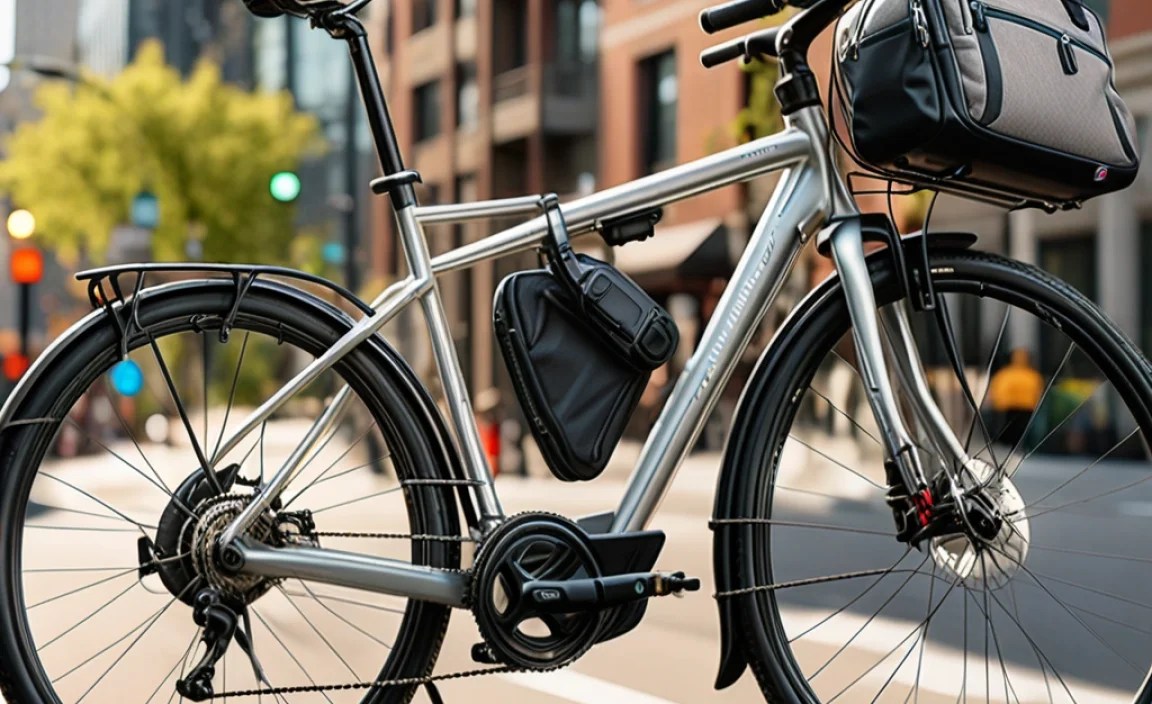
- Handlebar bags clip to your handlebars for valuables like phones and wallets.
- Consider the weight you’ll carry and how often you’ll use the mount.
How to Choose Mount for Hybrid Commuter Bike

Picking the right mount for your hybrid commuter bike is super important. It’s like choosing the right shoes for a race. You need something that fits well and helps you go the distance. Think about what you want to carry. Do you need to carry heavy books to school? Or just a light jacket for a ride in the park? The weight and size of your items matter. Also, think about how often you’ll use the mount. Will you use it every day for commuting? Or just on weekends for fun rides? The more you use it, the sturdier it should be. Consider the weather, too. Will you be riding in the rain? If so, you might want a waterproof bag or basket. This will keep your stuff dry and safe. A good mount makes biking easier and more fun!
- Consider the weight you need to carry.
- Think about how often you will use the mount.
- Check if the mount fits your bike frame.
- Look for durable materials that last long.
- Make sure the mount is easy to install and remove.
Choosing the right mount isn’t just about carrying things. It’s about making your bike work for you. A good mount can turn your bike into a mini-truck. You can carry groceries, school books, or even camping gear! But a bad mount can be a pain. It might wobble, break, or even damage your bike. So, take your time and do your research. Read reviews, ask friends, and try out different options. A little effort now can save you a lot of trouble later. Remember, the goal is to make biking easier and more enjoyable. A well-chosen mount can do just that. It’s all about finding the perfect fit for your needs.
Fun Fact or Stat: Did you know that bike commuting can save you money on gas and parking? Plus, it’s a great way to exercise!
What is the Best Material for a Bike Mount?
Imagine your bike mount is like a superhero. It needs to be strong and reliable. The material it’s made from is super important. Some mounts are made of aluminum. Aluminum is light but strong. It’s like a superhero who can fly and lift heavy things. Other mounts are made of steel. Steel is very strong and can handle a lot of weight. It’s like a superhero who is super tough and can’t be easily broken. Some mounts even use carbon fiber. Carbon fiber is super light and super strong, but it can be more expensive. It’s like a superhero with high-tech armor. The best material depends on what you need. If you want something light, go for aluminum or carbon fiber. If you need something super strong, go for steel.
How Does Mount Affect Balance on a Bike?
Have you ever tried carrying a heavy bag on one shoulder? It can make you feel off-balance. The same thing can happen with a bike mount. If you put too much weight on one side of your bike, it can be hard to steer. Imagine trying to ride a bike with a big bag of rocks on one side. You might wobble and fall! That’s why it’s important to balance the weight on your bike. Try to put heavy items in the center of the mount. This will keep your bike stable. Also, don’t overload your mount. If you carry too much weight, it can make your bike hard to control. Always check the weight limit of your mount. Stay safe and have fun!
How to Choose Mount for Commuting in the Rain?
Riding your bike in the rain can be fun, but it can also be tricky. You need to protect your stuff from getting wet. Imagine riding to school with your homework in your bag. If it rains, your homework could get ruined! That’s why you need a waterproof mount or bag. Look for mounts made of waterproof materials. Some bags have special covers that keep the rain out. You can also use a plastic bag to protect your stuff. Just make sure the bag is sealed tight. Remember to dry your mount and bag after riding in the rain. This will help them last longer. Riding in the rain can be an adventure, but be prepared!
Understanding Rear Bike Racks

Rear bike racks are like the trunk of your bike. They sit over your back wheel. These are super strong. They can hold a lot of weight. Think of carrying heavy textbooks or groceries. Rear racks are great for that! They usually have a flat platform. You can attach bags or baskets to this platform. Some racks have side supports. These keep your bags from hitting the wheel. Make sure the rack fits your bike. Not all bikes are the same size. Check the rack’s weight limit, too. Don’t overload it! A good rear rack makes commuting much easier. It lets you carry what you need without straining your back. Plus, it keeps your hands free for steering.
- Rear racks are strong and can carry heavy loads.
- They attach over the back wheel of your bike.
- Look for racks with side supports for bags.
- Ensure the rack fits your specific bike model.
- Check the weight limit before loading items.
- Consider racks with adjustable features for different bag sizes.
Rear racks aren’t just for commuters. They’re also great for touring. Imagine riding your bike across the country. You’ll need to carry a lot of gear. A rear rack can handle tents, sleeping bags, and cooking supplies. Some racks are even designed for specific types of bags. Panniers are bags that hang on the sides of the rack. They’re perfect for organizing your stuff. Top boxes sit on top of the rack. These are great for quick-access items. Think about how you want to use your rack. This will help you choose the right one. A sturdy rear rack can open up a whole new world of biking adventures.
Fun Fact or Stat: The first bike racks were simple wooden platforms attached with leather straps!
What are the Benefits of Using a Rear Rack?
Have you ever tried carrying a backpack while riding a bike? It can make your back sweat. It can also throw off your balance. A rear rack solves these problems. It lets you carry your stuff without putting weight on your body. This makes riding more comfortable. It also improves your balance. You can steer easier and feel more stable. Rear racks are great for carrying heavy items. They distribute the weight evenly. This prevents strain on your bike frame. Plus, they keep your hands free for signaling and braking. A rear rack can make your commute safer and more enjoyable. It’s like having a personal assistant for your bike!
How to Install a Rear Rack on Your Bike?
Installing a rear rack might seem tricky. But it’s actually quite simple. First, you’ll need a few tools. A wrench and a screwdriver are usually enough. Most racks come with instructions. Read them carefully! Look for mounting points on your bike frame. These are usually near the rear wheel. Attach the rack to these points using bolts and nuts. Make sure everything is tight. A loose rack can be dangerous. Double-check your work before riding. If you’re not sure, ask a bike shop for help. They can install the rack for you. With a little patience, you’ll be carrying cargo in no time!
What are Common Problems with Rear Racks?
Even the best rear racks can have problems. Sometimes the bolts come loose. This can make the rack wobble. Check the bolts regularly and tighten them as needed. Another common problem is overloading. If you carry too much weight, the rack can break. Always check the weight limit and stay within it. Sometimes the rack can interfere with your brakes. Make sure the rack doesn’t rub against your brake cables. If it does, adjust the rack or cables. With a little care, you can avoid these problems. A well-maintained rear rack will last for years.
Exploring Front Bike Racks
Front bike racks are like the glove compartment of your bike. They sit over your front wheel. These are great for lighter loads. Think of carrying a jacket or a small bag. Front racks are often smaller than rear racks. They don’t hold as much weight. But they can be very convenient. Some front racks have a platform. You can attach a basket or bag to this platform. Others are designed for specific bags. These bags clip onto the rack. This makes it easy to take them on and off. A front rack can make it easier to grab things on the go. It’s perfect for quick errands or leisurely rides.
- Front racks are ideal for lighter loads.
- They attach over the front wheel of your bike.
- Look for racks with quick-release mechanisms.
- Ensure the rack doesn’t interfere with steering.
- Consider racks with adjustable platforms.
Front racks aren’t just for city bikes. They can also be used for touring. Imagine riding your bike through the mountains. You might want to carry a camera or a map. A front rack is perfect for these items. It keeps them within easy reach. Some front racks are designed for panniers. These panniers hang on the sides of the rack. This lets you carry more gear. Just make sure the rack is strong enough. Don’t overload it! A well-chosen front rack can add a lot of versatility to your bike. It’s all about finding the right balance between weight and convenience.
Fun Fact or Stat: Early front racks were often made of wicker and used for delivering bread!
What are the Advantages of a Front Rack?
Have you ever needed to grab something quickly while riding? A front rack makes this easy. It keeps your belongings within reach. You don’t have to stop and dig through a backpack. This can save you time and hassle. Front racks also improve your visibility. They can hold a light or reflector. This makes you more visible to cars and pedestrians. Plus, they can add a stylish touch to your bike. Many front racks come in different colors and designs. A front rack can make your bike more practical and attractive. It’s a great way to personalize your ride.
How Does a Front Rack Affect Steering?
Adding a front rack can change how your bike handles. The extra weight can make steering feel different. It might feel heavier or less responsive. This is especially true with a heavy load. To compensate, try to distribute the weight evenly. Put heavier items closer to the center of the rack. This will help maintain your balance. Also, practice riding with the rack. Get used to the new feel of your bike. With a little practice, you’ll be steering like a pro in no time. Remember, safety always comes first!
What Types of Bags Work Best with Front Racks?
Choosing the right bag for your front rack is important. Some bags are designed specifically for front racks. These bags often have clips or straps that attach to the rack. This keeps the bag secure. Other bags can be adapted to fit a front rack. You can use bungee cords or straps to hold them in place. Just make sure the bag doesn’t interfere with your steering or brakes. Baskets are also a popular choice for front racks. They’re great for carrying groceries or other bulky items. Whatever bag you choose, make sure it’s durable and waterproof. This will protect your belongings from the elements.
Choosing Handlebar Bags and Mounts

Handlebar bags are like the purse or wallet for your bike. They attach to your handlebars. These are perfect for small, valuable items. Think of your phone, wallet, or keys. Handlebar bags keep these items within easy reach. They usually have a quick-release mechanism. This lets you take the bag on and off easily. Some handlebar bags are waterproof. This protects your belongings from rain. Others have reflective strips. This makes you more visible at night. A good handlebar bag can make your ride safer and more convenient. It’s like having a mini-storage unit right in front of you.
- Handlebar bags are ideal for small, valuable items.
- They attach to the handlebars for easy access.
- Look for bags with quick-release features.
- Ensure the bag doesn’t block your view or controls.
- Consider waterproof options for rainy weather.
- Check for reflective elements for added safety.
Handlebar bags aren’t just for city riding. They can also be used for touring. Imagine riding your bike across the country. You might want to carry a map or a snack. A handlebar bag is perfect for these items. It keeps them within easy reach. Some handlebar bags have a clear plastic window. This lets you see your phone or GPS device. Others have multiple compartments. This helps you organize your belongings. A well-chosen handlebar bag can make your ride more enjoyable. It’s all about keeping your essentials close at hand.
Fun Fact or Stat: The first handlebar bags were often made of leather and used by messengers!
What Size Handlebar Bag is Best?
Choosing the right size handlebar bag is important. A bag that’s too big can get in the way. It might block your view or interfere with your brakes. A bag that’s too small might not hold everything you need. Think about what you want to carry. If you only need to carry a few small items, a small bag is fine. If you need to carry more, choose a larger bag. Also, consider the size of your handlebars. Some handlebars are wider than others. Make sure the bag fits comfortably on your handlebars. A well-sized handlebar bag will make your ride more comfortable and convenient.
How to Attach a Handlebar Bag Securely?
Attaching a handlebar bag securely is crucial. A loose bag can be dangerous. It might fall off while you’re riding. Most handlebar bags come with straps or clips. Use these to attach the bag to your handlebars. Make sure the straps are tight. The bag should not wobble or move around. Some bags have a quick-release mechanism. This lets you take the bag on and off easily. Just make sure the mechanism is secure. Double-check your work before riding. A securely attached handlebar bag will keep your belongings safe and sound.
What Features to Look for in a Handlebar Bag?
When choosing a handlebar bag, consider the features that are important to you. Waterproofing is a key feature. A waterproof bag will protect your belongings from rain. Reflective strips are also important. They make you more visible at night. Multiple compartments can help you organize your belongings. A clear plastic window can let you see your phone or GPS device. A quick-release mechanism makes it easy to take the bag on and off. Choose a bag with the features that best suit your needs. A well-featured handlebar bag will make your ride more enjoyable and convenient.
Understanding Bike Mount Weight Limits
Every bike mount has a weight limit. This is the maximum amount of weight it can safely carry. It’s super important to know this limit. Overloading your mount can be dangerous. It can damage the mount or even your bike. Check the manufacturer’s instructions to find the weight limit. Don’t exceed this limit! Think about what you want to carry. If you need to carry heavy items, choose a mount with a high weight limit. If you only need to carry light items, a mount with a lower weight limit is fine. Always err on the side of caution. It’s better to be safe than sorry. A responsible cyclist knows their limits.
- Every bike mount has a maximum weight limit.
- Exceeding the weight limit can damage the mount.
- Check the manufacturer’s instructions for the limit.
- Consider the weight of the mount itself.
- Distribute the weight evenly to prevent imbalance.
Weight limits aren’t just about the mount itself. They’re also about your bike. Your bike frame has a weight limit, too. This is the maximum weight it can safely support. This includes the weight of the bike, the rider, and any cargo. Check your bike’s manual to find the weight limit. Don’t exceed this limit! Overloading your bike frame can damage it. It can even cause it to break. This can be very dangerous. Be aware of your bike’s weight limit. It’s a crucial part of safe cycling. Always prioritize safety when carrying cargo.
Fun Fact or Stat: Some cargo bikes can carry up to 400 pounds of cargo!
How to Determine the Right Weight Limit for Your Needs?
Determining the right weight limit starts with knowing what you’ll carry. Make a list of the items you plan to transport. Weigh each item. Add up the weights. This will give you an estimate of the total weight. Then, add a little extra weight for good measure. It’s always better to overestimate than underestimate. Choose a mount with a weight limit that exceeds your total weight. This will give you a margin of safety. Also, consider the type of riding you’ll be doing. If you’ll be riding on rough roads, choose a mount with a higher weight limit. This will help it withstand the extra stress.
What Happens If You Exceed the Weight Limit?
Exceeding the weight limit can have serious consequences. The mount could break. This could cause your cargo to fall off. It could also cause you to lose control of your bike. The bike frame could also be damaged. It could bend or crack. This could make the bike unsafe to ride. In extreme cases, the frame could even break. This could cause a serious accident. Always stay within the weight limit. It’s not worth the risk. Safety should always be your top priority.
How to Distribute Weight Properly on a Bike Mount?
Distributing weight properly is key to safe cycling. Try to distribute the weight evenly on the mount. Put heavier items closer to the center. This will help maintain your balance. Avoid putting too much weight on one side. This can make the bike unstable. If you’re using panniers, distribute the weight evenly between them. This will prevent the bike from leaning to one side. Also, avoid putting heavy items too high up. This can raise the center of gravity. This can make the bike more likely to tip over. Keep the weight low and centered for maximum stability.
Installing Your Bike Mount Correctly
Installing your bike mount correctly is essential. A poorly installed mount can be dangerous. It might come loose while you’re riding. This could cause your cargo to fall off. It could also cause you to lose control of your bike. Follow the manufacturer’s instructions carefully. Use the correct tools. Make sure all bolts are tightened securely. Double-check your work before riding. If you’re not sure how to install the mount, ask a bike shop for help. They can install it for you. A properly installed mount will give you peace of mind. You’ll know your cargo is safe and secure.
- Follow the manufacturer’s instructions carefully.
- Use the correct tools for installation.
- Ensure all bolts are tightened securely.
- Double-check your work before riding.
- Consider professional installation if unsure.
Installation isn’t just about following the instructions. It’s also about common sense. Look for any potential problems. Make sure the mount doesn’t interfere with your brakes or gears. Make sure it doesn’t rub against your tires. If you see any problems, fix them before riding. It’s better to take a little extra time now than to have an accident later. Also, check the mount regularly. Make sure the bolts haven’t come loose. A little maintenance can go a long way. It can keep your mount in good working order for years to come.
Fun Fact or Stat: Some bike mounts are designed to be installed in less than 10 minutes!
What Tools Do You Need for Bike Mount Installation?
Having the right tools is essential for bike mount installation. You’ll typically need a wrench, a screwdriver, and an Allen wrench set. The size of the wrench and screwdriver will depend on the size of the bolts on your mount. An Allen wrench set is useful for tightening recessed bolts. A torque wrench is also a good idea. This will help you tighten the bolts to the correct specification. This prevents them from being too loose or too tight. A set of pliers can be helpful for holding nuts in place. With the right tools, installation will be much easier.
How to Adjust a Bike Mount for a Perfect Fit?
Adjusting your bike mount is important for a perfect fit. Most mounts have adjustable features. These allow you to customize the fit to your bike. You can adjust the height of the mount, the angle of the platform, and the position of the straps. Experiment with different settings to find the best fit. Make sure the mount is level and stable. It shouldn’t wobble or move around. The straps should be tight but not too tight. They shouldn’t pinch or rub against your bike frame. A well-adjusted mount will provide a secure and comfortable ride.
What to Do If You Encounter Problems During Installation?
Encountering problems during installation is not uncommon. Don’t panic! Take a deep breath and assess the situation. Read the instructions again carefully. Make sure you’re following them correctly. If you’re still stuck, try searching online for help. There are many videos and tutorials that can guide you through the process. If you’re still unable to resolve the problem, ask a bike shop for help. They have experienced mechanics who can troubleshoot the issue. Don’t force anything. Forcing a bolt or a part can damage it. Be patient and persistent. With a little effort, you’ll get the mount installed correctly.
Maintaining Your Bike Mount for Longevity
Taking care of your bike mount is important. It will help it last longer. Clean your mount regularly. Use a damp cloth to wipe away dirt and grime. Lubricate moving parts. This will keep them working smoothly. Check the bolts regularly. Make sure they haven’t come loose. Tighten them as needed. Store your bike in a dry place. This will prevent rust and corrosion. Inspect your mount for damage. Look for cracks, bends, or breaks. If you find any damage, repair or replace the mount. A little maintenance can go a long way. It will keep your mount in good working order for years to come.
- Clean your bike mount regularly.
- Lubricate moving parts to prevent rust.
- Check bolts regularly and tighten if needed.
- Store your bike in a dry place.
- Inspect for damage and repair or replace.
Maintenance isn’t just about cleaning and lubricating. It’s also about being observant. Pay attention to how your mount is performing. Listen for any unusual noises. Feel for any vibrations. Look for any signs of wear and tear. The sooner you catch a problem, the easier it will be to fix. Don’t ignore small issues. They can quickly turn into big problems. A little attention to detail can save you a lot of trouble down the road. A well-maintained mount will provide years of reliable service.
Fun Fact or Stat: Regular bike maintenance can extend the life of your bike by up to 50%!
How Often Should You Clean Your Bike Mount?
Cleaning your bike mount depends on how often you ride. If you ride every day, you should clean it at least once a week. If you only ride occasionally, you can clean it less often. However, you should always clean it after riding in wet or muddy conditions. This will prevent dirt and grime from building up. Use a mild soap and water to clean the mount. Avoid using harsh chemicals. They can damage the finish. Rinse the mount thoroughly and dry it with a clean cloth. A clean mount will look better and perform better.
What Lubricants Are Best for Bike Mounts?
Choosing the right lubricant is important for keeping your bike mount working smoothly. Use a light oil or grease to lubricate moving parts. Avoid using WD-40. It can attract dirt and grime. A Teflon-based lubricant is a good choice. It will provide long-lasting protection. Apply the lubricant sparingly. Too much lubricant can attract dirt and grime. Wipe away any excess lubricant with a clean cloth. A well-lubricated mount will operate smoothly and quietly.
How to Identify and Repair Damage to a Bike Mount?
Identifying damage to your bike mount is important for safety. Inspect the mount regularly for cracks, bends, or breaks. Look for signs of rust or corrosion. If you find any damage, repair or replace the mount. Small cracks can sometimes be repaired with epoxy. However, it’s usually best to replace a damaged mount. A damaged mount is a safety hazard. It could fail while you’re riding. Always prioritize safety. Replace any damaged parts immediately.
Summary
Choosing the right mount for your hybrid commuter bike involves several key considerations. Think about what you need to carry. Consider the weight, size, and type of items. Rear racks are strong and can handle heavy loads. Front racks are great for lighter, quick-access items. Handlebar bags are perfect for small, valuable items. Always check the weight limit of the mount. Don’t exceed this limit! Install the mount correctly. Follow the manufacturer’s instructions. Maintain the mount regularly. Clean it, lubricate it, and inspect it for damage. Knowing how to choose mount for hybrid commuter bike makes commuting easier and more enjoyable.
Conclusion
Choosing the right bike mount can make a big difference. It can make your commute easier and more enjoyable. Consider your needs and your bike. Select a mount that fits your bike and can handle the weight you need to carry. Install it correctly and maintain it regularly. Then, enjoy the freedom of carrying your belongings on your bike. Remember how to choose mount for hybrid commuter bike, and enjoy the ride!
Frequently Asked Questions
Question No 1: How do I know what size bike mount to get?
Answer: To figure out the right size bike mount, start by checking your bike’s specifications. Look for information on compatible mount types and sizes. Measure the available space on your bike frame or handlebars. This will help you choose a mount that fits without interfering with other components. Consider the size and weight of the items you plan to carry. A larger mount might be necessary for heavier loads. If you’re unsure, visit a local bike shop for expert advice. They can help you find the perfect mount for your needs. Remember, knowing how to choose mount for hybrid commuter bike ensures a safe and convenient ride.
Question No 2: Can I use any type of bag with a bike mount?
Answer: While you can technically try to attach any bag to a bike mount, it’s not always the best idea. Some bags are specifically designed for bike mounts. These bags usually have features like secure attachment points, waterproof materials, and reflective elements. Using a bag that’s not designed for bike mounts can be risky. It might not be secure, it could interfere with your riding, or it could get damaged. Look for bags that are compatible with your specific type of mount. Panniers are great for rear racks. Handlebar bags are perfect for handlebar mounts. Choose the right bag for the job to ensure a safe and enjoyable ride. Therefore, how to choose mount for hybrid commuter bike depends on the type of bag.
Question No 3: How do I prevent my bike mount from rusting?
Answer: Preventing rust on your bike mount is essential for longevity. Start by cleaning your mount regularly with a damp cloth. This will remove dirt, grime, and salt that can cause rust. Apply a rust-inhibiting lubricant to the metal parts of the mount. This will protect them from moisture. Store your bike in a dry place when not in use. This will prevent the mount from being exposed to the elements. If you live in a coastal area, you might need to take extra precautions. Saltwater can accelerate rust. Consider using a rust-resistant coating on your mount. Regular maintenance will keep your mount looking and performing its best. Therefore, how to choose mount for hybrid commuter bike also involves understanding proper maintenance.
Question No 4: What should I do if my bike mount is wobbly?
Answer: A wobbly bike mount can be dangerous. It’s important to address the problem immediately. First, check all the bolts and screws on the mount. Make sure they are tightened securely. If any bolts are missing, replace them. If the mount is still wobbly, check the mounting points on your bike frame. Make sure they are not damaged or stripped. If the mounting points are damaged, you might need to have them repaired by a bike shop. If the mount itself is damaged, it’s best to replace it. A wobbly mount can cause you to lose control of your bike. Don’t take the risk. Safety should always be your top priority. Knowing how to choose mount for hybrid commuter bike includes knowing when to replace it for safety reasons.
Question No 5: Can I install a bike mount myself, or should I get professional help?
Answer: Whether you can install a bike mount yourself depends on your skills and experience. If you’re comfortable using tools and following instructions, you might be able to install it yourself. However, if you’re not confident, it’s best to get professional help. A bike shop can install the mount for you. They have the tools and expertise to do the job correctly. A poorly installed mount can be dangerous. It could come loose while you’re riding. This could cause an accident. If you’re unsure, it’s always better to be safe than sorry. A professional installation will give you peace of mind. It’s important to ensure that when considering how to choose mount for hybrid commuter bike it is properly installed.
Question No 6: What are some popular brands of bike mounts?
Answer: There are many popular brands of bike mounts available. Some of the most well-known include Topeak, Thule, Axiom, and Blackburn. These brands are known for their quality, durability, and reliability. They offer a wide range of mounts to suit different needs and budgets. Do some research to find the best brand for you. Read reviews and compare prices. Consider the features that are important to you. Choose a brand that you trust. A reputable brand will stand behind its products. When considering how to choose mount for hybrid commuter bike, brand reputation matters.


