
How to Check Sealant-Safe Hose for Tubeless Setup: Easy!
Quick Summary: To check if a hose is sealant-safe for your tubeless setup, start by identifying the hose material. Sealant-safe hoses are typically made of EPDM rubber or specific types of silicone. Test a small, inconspicuous section of the hose with your tubeless sealant for 24 hours. If the hose doesn’t swell, crack, or become sticky, it’s likely sealant-safe. Always prioritize hoses labeled as “tubeless-ready” or “sealant-compatible” to avoid issues.
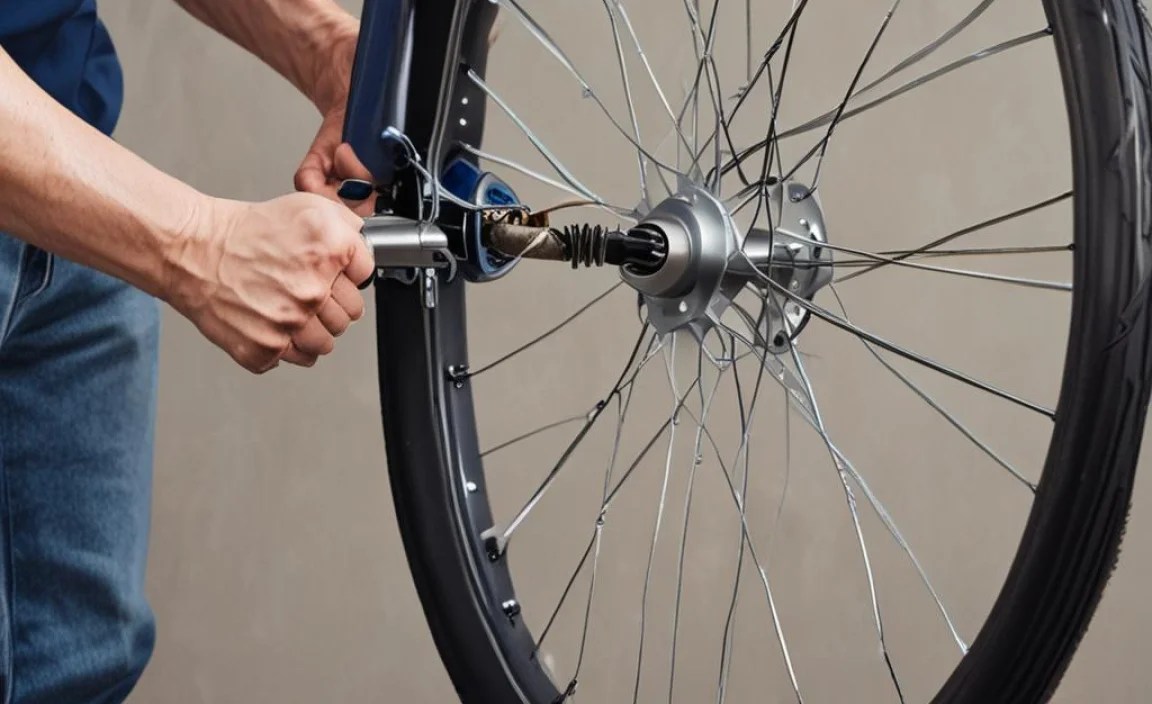
Setting up your bike with tubeless tires can seriously improve your ride. You get fewer flats, better grip, and a smoother feel. But there’s a tricky part: making sure your hoses—especially those connecting your valve to your pump—can handle the sealant. Using the wrong hose can lead to leaks, clogs, and a big mess. It’s like putting regular gas in a high-performance car; it just won’t work right. Don’t worry! This guide will walk you through how to check if your hose is sealant-safe, step by step. We’ll cover everything from identifying the right materials to testing your setup, so you can keep your tubeless system running smoothly.
Understanding Tubeless Sealant and Hose Compatibility

Before we dive into checking your hose, let’s understand why this is so important. Tubeless sealants contain chemicals like ammonia or latex designed to quickly seal punctures. These chemicals can react with certain hose materials, causing them to degrade, swell, or even crack. Imagine your tire deflating mid-ride because the hose connecting to your pump failed—not fun!
Why Hose Material Matters
The type of material your hose is made from is the most critical factor in determining its sealant compatibility. Here are some common materials and how they interact with tubeless sealants:
- EPDM Rubber: Excellent resistance to chemicals and works well with most tubeless sealants.
- Silicone: Generally sealant-safe, but check for specific compatibility as formulations vary.
- PVC (Polyvinyl Chloride): Often reacts poorly with sealants, leading to hardening and cracking.
- Natural Rubber: Can degrade and become sticky when exposed to ammonia-based sealants.
- Thermoplastic Polyurethane (TPU): Some formulations are compatible, but testing is crucial.
How Sealant Affects Hoses
Different sealants have different chemical compositions. Ammonia-based sealants, for example, are more aggressive and can cause more damage to incompatible hoses. Latex-based sealants are generally milder but can still cause issues over time. Always check the sealant manufacturer’s recommendations and warnings. For example, Stan’s NoTubes sealant is a popular choice, and they often provide compatibility information on their website.
Step-by-Step Guide: Checking Your Hose for Sealant Compatibility

Now, let’s get practical. Here’s a step-by-step guide to checking if your hose is sealant-safe.
Step 1: Identify the Hose Material
The first step is to figure out what your hose is made of. Here’s how:
- Look for Markings: Check the hose for any printed markings indicating the material (e.g., “EPDM,” “Silicone,” “PVC”).
- Consult the Manufacturer: If there are no markings, check the product documentation or the manufacturer’s website.
- Perform a Bend Test: EPDM and silicone hoses are usually more flexible and rubbery than PVC hoses, which tend to be stiffer.
- Consider the Source: If the hose came with a tubeless-specific pump or inflator, it’s more likely to be sealant-safe.
Step 2: Perform a Spot Test
If you’re unsure about the hose material, a spot test can give you more confidence. Here’s how to do it safely:
- Prepare a Small Sample: Cut a small, inconspicuous piece of the hose (about 1 inch long).
- Submerge in Sealant: Place the sample in a small container and completely submerge it in the tubeless sealant you intend to use.
- Wait 24 Hours: Leave the sample submerged for 24 hours to allow sufficient time for any reaction to occur.
- Inspect the Sample: After 24 hours, remove the sample and thoroughly inspect it. Look for:
- Swelling: An increase in size.
- Cracking: Any visible cracks or fissures.
- Stickiness: A tacky or gummy surface.
- Discoloration: Any changes in color.
- Evaluate: If you observe any of these signs, the hose is likely not sealant-safe. If the sample appears unchanged, it’s more likely to be compatible.
Step 3: Check for Hose Degradation Over Time
Even if the initial spot test looks good, sealant can still degrade the hose over time. Regular inspections are crucial.
- Regular Inspection: Inspect your hose every few weeks for signs of wear, cracking, or stickiness.
- Replace When Necessary: If you notice any degradation, replace the hose immediately to prevent leaks and failures.
Step 4: Consider a Long-Term Test (Optional)
For extra assurance, especially if you rely heavily on your tubeless setup, consider a long-term test.
- Set Up a Test Section: Connect a section of the hose to a valve with sealant inside.
- Monitor Over Several Weeks: Check the hose regularly (once a week) for signs of degradation over a longer period (e.g., 4-6 weeks).
- Document Changes: Keep a log of your observations to track any subtle changes that might indicate incompatibility.
Recommended Sealant-Safe Hose Materials

To make your life easier, here are some hose materials that are generally considered safe for use with tubeless sealants:
- EPDM (Ethylene Propylene Diene Monomer) Rubber: Known for its excellent chemical resistance and durability.
- Specific Silicone Formulations: Some silicone hoses are designed to be sealant-compatible. Always check the manufacturer’s specifications.
- Tubeless-Specific Hoses: Hoses marketed as “tubeless-ready” or “sealant-compatible” are designed to withstand the chemicals in tubeless sealants.
Tools and Equipment Needed

Before you start testing, gather the necessary tools and equipment.
- Small Knife or Cutter: For cutting a sample of the hose.
- Small Container: To hold the sealant and hose sample.
- Tubeless Sealant: The sealant you intend to use with your tubeless setup.
- Gloves: To protect your hands from the sealant.
- Safety Glasses: To protect your eyes from splashes.
- Rags or Paper Towels: For cleaning up any spills.
Troubleshooting Common Issues
Even with careful testing, you might encounter some issues. Here are some common problems and how to troubleshoot them.
Hose Swelling
Problem: The hose swells after contact with sealant.
Solution: The hose is not sealant-safe and needs to be replaced with a compatible material like EPDM or a tubeless-specific hose.
Hose Cracking
Problem: The hose develops cracks after exposure to sealant.
Solution: Replace the hose immediately. Cracks indicate significant degradation, and the hose is likely to fail.
Sealant Leaks
Problem: Sealant leaks from the hose connections.
Solution: Check the hose clamps or connections for tightness. If the hose itself is degrading, replace it.
Clogged Valves
Problem: Sealant clogs the valve due to hose degradation.
Solution: Disassemble and clean the valve. Replace the hose with a sealant-safe option to prevent future clogs.
Best Practices for Maintaining Sealant-Safe Hoses
To prolong the life of your sealant-safe hoses, follow these best practices:
- Regular Cleaning: Clean the hose and valve connections regularly to remove dried sealant.
- Proper Storage: Store your bike and pump in a cool, dry place away from direct sunlight to prevent hose degradation.
- Avoid Over-Tightening: When connecting the hose, avoid over-tightening the clamps or connections, as this can damage the hose.
- Use Recommended Sealants: Stick to sealants recommended by the hose and tire manufacturers to ensure compatibility.
Sealant-Safe Hose Options: A Quick Comparison
Choosing the right hose can save you headaches down the road. Here’s a comparison table of common materials:
| Hose Material | Sealant Compatibility | Pros | Cons |
|---|---|---|---|
| EPDM Rubber | Excellent | High chemical resistance, durable, flexible | Can be more expensive |
| Silicone (Specific Formulations) | Good (Check Compatibility) | Flexible, good temperature resistance | Can vary in chemical resistance |
| PVC | Poor | Inexpensive | Reacts poorly with sealants, cracks easily |
| Natural Rubber | Poor | Flexible | Degrades with ammonia-based sealants |
| TPU (Specific Formulations) | Variable (Test Required) | Lightweight, durable | Compatibility varies |
Real-World Examples and Case Studies
Let’s look at a couple of real-world examples to illustrate the importance of hose compatibility.
Case Study 1: The Commuter’s Nightmare
John, a daily commuter, set up his bike with tubeless tires using a PVC hose for his pump connection. After a few weeks, he noticed sealant leaking from the valve. Upon inspection, the hose had become brittle and cracked. John had to replace the hose with an EPDM version to solve the problem.
Case Study 2: The Mountain Biker’s Success
Sarah, a mountain bike enthusiast, used a tubeless-specific pump with an EPDM hose. She regularly checked the hose for signs of wear and cleaned the valve connections. After a year of riding, her hose was still in excellent condition, and she experienced no sealant-related issues.
The Environmental Impact of Hose Materials
When choosing a hose, consider the environmental impact of the material. EPDM and silicone are generally more environmentally friendly than PVC, which releases harmful chemicals during production and disposal. Opting for durable, long-lasting materials also reduces waste by minimizing the need for frequent replacements.
Cost Analysis: Investing in the Right Hose
While a sealant-safe hose might cost more upfront, it can save you money in the long run. Incompatible hoses can degrade quickly, leading to frequent replacements and potential damage to your tires and valves. Investing in a quality EPDM or tubeless-specific hose is a cost-effective choice in the long term.
FAQ: Your Questions Answered
What happens if I use a non-sealant-safe hose?
Using a non-sealant-safe hose can cause it to degrade, swell, crack, or become sticky. This can lead to leaks, clogs, and ultimately, hose failure.
How often should I check my hose for sealant compatibility?
You should perform an initial spot test before using the hose and then inspect it regularly (every few weeks) for signs of degradation.
Can I use any type of silicone hose with tubeless sealant?
Not all silicone hoses are sealant-safe. Check the manufacturer’s specifications to ensure compatibility or perform a spot test.
What are the signs of hose degradation?
Signs of hose degradation include swelling, cracking, stickiness, and discoloration.
Is EPDM rubber always sealant-safe?
EPDM rubber is generally considered sealant-safe due to its excellent chemical resistance. However, it’s always a good idea to perform a spot test to confirm compatibility with your specific sealant.
Can the type of sealant affect hose compatibility?
Yes, different sealants have different chemical compositions. Ammonia-based sealants are more aggressive and can cause more damage to incompatible hoses compared to latex-based sealants.
Where can I buy sealant-safe hoses?
You can purchase sealant-safe hoses from most bike shops or online retailers that sell bike parts and accessories. Look for hoses labeled as “tubeless-ready” or “sealant-compatible.”
Conclusion
Checking your hose for sealant compatibility is a small step that can save you from big headaches. By understanding the materials, performing simple tests, and maintaining your equipment, you can keep your tubeless setup running smoothly and enjoy the benefits of fewer flats and better performance. Always prioritize sealant-safe materials like EPDM rubber or specific silicone formulations, and remember to inspect your hoses regularly. Happy riding!


