
Easy How to Attach Hose to Air Gauge: The Smart Way
Quick Summary: Attaching a hose to an air gauge is usually straightforward. First, identify the correct fittings on both the hose and gauge. Then, align the threads and gently screw the hose onto the gauge until snug. For a secure, airtight connection, you might need Teflon tape or thread sealant. Always check for leaks after connecting by listening for hissing sounds or using soapy water.
Hey there, fellow cyclists! Raymond Ammons from BicyclePumper.com here. Ever struggled to get your bike tires properly inflated because you couldn’t connect your air hose to the gauge? It’s a common frustration, and let’s face it, a properly working air gauge is key to safe and enjoyable rides. No one wants to be stuck with a flat tire miles from home!
The good news is, connecting a hose to an air gauge doesn’t have to be a headache. In this guide, I’ll walk you through the process step-by-step, using simple language and clear instructions. We’ll cover everything from identifying the right fittings to ensuring a leak-proof seal. By the end, you’ll be able to confidently connect your hose and gauge, ensuring accurate pressure readings every time. Let’s get pumping!
Understanding Air Gauges and Hoses

Before we dive into the “how-to,” let’s cover some basics. Knowing the different types of air gauges and hoses will make the connection process much smoother.
Types of Air Gauges
Air gauges come in several forms, each designed for specific applications. Here are the most common types you’ll encounter:
- Analog Gauges: These gauges use a needle to display the pressure reading on a dial. They’re simple, reliable, and don’t require batteries.
- Digital Gauges: Digital gauges provide a precise numerical readout of the pressure. They often include features like backlight displays and multiple pressure units (PSI, BAR, kPa).
- Inline Gauges: These gauges are integrated directly into the air hose or pump. They offer convenient, real-time pressure monitoring while inflating.
- Standalone Gauges: These gauges are separate from the pump and hose. They usually have a threaded connection point for attaching a hose.
Types of Hoses
Air hoses also vary in material and construction. Here’s a rundown of the common types:
- Rubber Hoses: Rubber hoses are durable and flexible, making them suitable for a wide range of applications.
- PVC Hoses: PVC hoses are lightweight and resistant to chemicals. They’re a cost-effective option for general use.
- Braided Hoses: Braided hoses feature a reinforcing layer of braided material (usually nylon or steel) for added strength and durability. These are often used in high-pressure applications.
- Coiled Hoses: Coiled hoses are self-retracting, which helps keep your workspace tidy.
Understanding Fittings and Threads
The connection between the hose and gauge relies on fittings and threads. Here’s what you need to know:
- Fittings: These are the connectors on the end of the hose and gauge. Common types include threaded fittings, quick-connect fittings, and barb fittings.
- Threads: Threaded fittings use螺旋状 grooves to create a secure connection. Threads come in different sizes and types (e.g., NPT, BSP). It’s crucial to match the thread type and size for a proper fit.
A mismatch in thread type or size is the most common reason for leaks or connection failure. So, always double-check compatibility before attempting to connect the hose and gauge.
Tools and Materials You’ll Need

Before you start, gather the necessary tools and materials. Having everything on hand will make the process smoother and more efficient.
- Air Hose: Choose a hose that’s compatible with your air gauge and air source (e.g., air compressor, bike pump).
- Air Gauge: Select an accurate gauge with the appropriate pressure range for your application.
- Wrench or Pliers: You might need a wrench or pliers to tighten the fittings securely. Choose the right size to avoid damaging the fittings.
- Teflon Tape or Thread Sealant: Teflon tape (also known as PTFE tape) or thread sealant helps create a leak-proof seal between threaded fittings.
- Clean Rag: Use a clean rag to wipe away any dirt or debris from the fittings.
- Soapy Water (for leak testing): A mixture of soap and water can help you identify leaks after the connection is made.
Step-by-Step Guide: Attaching Hose to Air Gauge

Now, let’s get to the main event: attaching the hose to the air gauge. Follow these steps for a secure, leak-free connection.
Step 1: Prepare the Fittings
Before connecting anything, inspect the fittings on both the hose and the air gauge. Make sure they’re clean and free of any dirt, debris, or damage.
- Clean the Fittings: Use a clean rag to wipe down the threads and mating surfaces of both the hose and gauge fittings.
- Inspect for Damage: Check for any signs of damage, such as stripped threads, cracks, or corrosion. If you find any damage, replace the affected part.
Step 2: Apply Teflon Tape or Thread Sealant
To ensure a leak-proof seal, apply Teflon tape or thread sealant to the male threads of the fitting.
- Teflon Tape: Wrap the Teflon tape clockwise around the threads, overlapping each layer slightly. Apply 2-3 layers of tape.
- Thread Sealant: Apply a thin, even coat of thread sealant to the male threads. Be careful not to get sealant inside the fitting.
Pro Tip: Don’t overdo it with the Teflon tape or thread sealant. Too much can actually prevent the fittings from seating properly.
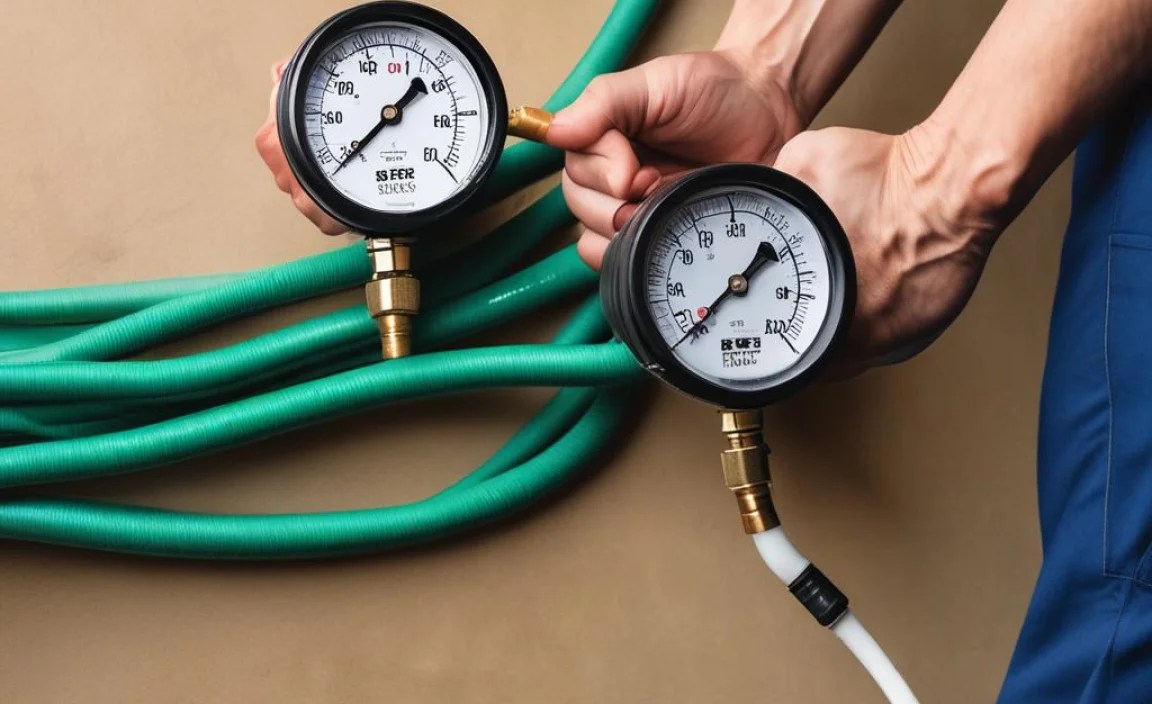
Step 3: Connect the Hose to the Gauge
Now, it’s time to connect the hose to the air gauge. Align the fittings carefully and start threading them together by hand.
- Align the Fittings: Make sure the threads are properly aligned before you start tightening.
- Hand-Tighten: Gently screw the hose fitting onto the gauge fitting by hand until it’s snug.
- Wrench-Tighten (if needed): If the connection feels loose, use a wrench or pliers to tighten it further. Be careful not to overtighten, as this can damage the fittings.
Important: Use the correct size wrench to avoid rounding off the corners of the fittings.
Step 4: Test for Leaks
After connecting the hose and gauge, it’s crucial to test for leaks. This will ensure that your connection is airtight and that you’re getting accurate pressure readings.
- Apply Soapy Water: Mix a small amount of dish soap with water in a spray bottle. Spray the soapy water around the connection point between the hose and gauge.
- Observe for Bubbles: Watch for any bubbles forming in the soapy water. Bubbles indicate an air leak.
- Listen for Hissing: If you don’t see any bubbles, listen closely for a hissing sound, which can also indicate a leak.
Step 5: Correct Any Leaks
If you find a leak, don’t panic! It’s usually an easy fix. Here’s what to do:
- Tighten the Connection: First, try tightening the connection slightly with a wrench or pliers.
- Reapply Teflon Tape or Thread Sealant: If tightening doesn’t solve the problem, disconnect the hose and gauge, and reapply Teflon tape or thread sealant. Make sure you’re applying it correctly and using the right amount.
- Inspect for Damage: If the leak persists, inspect the fittings for damage. Replace any damaged parts.
Troubleshooting Common Issues
Even with careful preparation, you might encounter some issues when connecting a hose to an air gauge. Here are some common problems and how to solve them:
| Issue | Possible Cause | Solution |
|---|---|---|
| Leak at the connection point | Loose connection, insufficient Teflon tape/sealant, damaged fittings | Tighten the connection, reapply Teflon tape/sealant, replace damaged fittings |
| Incompatible thread sizes | Mismatch between hose and gauge threads | Use a thread adapter or replace one of the fittings with a compatible size |
| Stripped threads | Overtightening the connection | Replace the fitting with stripped threads |
| Gauge not reading correctly | Faulty gauge, incorrect connection | Test the gauge with a known pressure source, ensure proper connection |
Tips for Maintaining Your Air Gauge and Hose

To keep your air gauge and hose in good working condition, follow these maintenance tips:
- Store Properly: Store your air gauge and hose in a clean, dry place away from direct sunlight and extreme temperatures.
- Clean Regularly: Wipe down the hose and gauge with a clean rag after each use to remove dirt and debris.
- Inspect Periodically: Regularly inspect the hose and gauge for signs of wear and tear, such as cracks, leaks, or damaged fittings.
- Replace as Needed: Replace the hose or gauge if you notice any significant damage or if they’re no longer performing accurately.
When to Seek Professional Help
While most hose-to-gauge connections are straightforward, there are situations where it’s best to seek professional help. Consider consulting a qualified mechanic or technician if:
- You’re unsure about the correct fittings or thread sizes.
- You’re dealing with high-pressure systems.
- You’ve tried troubleshooting the issue yourself and haven’t been able to resolve it.
FAQ: Common Questions About Attaching Hoses to Air Gauges
Here are some frequently asked questions about attaching hoses to air gauges:
- Q: What is Teflon tape, and why do I need it?
- A: Teflon tape (also known as PTFE tape) is a thin, white tape used to create a leak-proof seal between threaded fittings. It fills in any tiny gaps between the threads, preventing air or fluid from escaping.
- Q: Can I use thread sealant instead of Teflon tape?
- A: Yes, thread sealant is a viable alternative to Teflon tape. It’s a liquid or paste that fills the gaps between threads and hardens to create a seal. Choose a sealant that’s compatible with the materials of your hose and gauge.
- Q: How tight should I tighten the connection?
- A: Tighten the connection until it’s snug and feels secure. Avoid overtightening, as this can damage the fittings. If you’re using a wrench, tighten it just past hand-tight.
- Q: What do I do if I strip the threads on a fitting?
- A: If you strip the threads on a fitting, you’ll need to replace it. Stripped threads won’t create a proper seal and can lead to leaks.
- Q: How can I tell if my air gauge is accurate?
- A: To test the accuracy of your air gauge, compare its readings to those of a known accurate gauge. You can also take it to a professional for calibration.
- Q: Can I use any type of hose with my air gauge?
- A: No, you need to use a hose that’s compatible with your air gauge in terms of fitting type, thread size, and pressure rating. Using the wrong type of hose can lead to leaks or even dangerous failures.
- Q: What if I can’t find the right size adapter?
- A: If you’re having trouble finding the right adapter at local hardware stores or bike shops, try searching online retailers that specialize in pneumatic fittings and adapters. Be sure to accurately measure the thread sizes on both your hose and gauge to ensure a proper fit.
Conclusion
And there you have it! Attaching a hose to an air gauge is a simple process once you understand the basics. By following these steps and tips, you’ll be able to create a secure, leak-free connection every time. Remember to always double-check compatibility, use Teflon tape or thread sealant, and test for leaks after connecting. With a little practice, you’ll become a pro at maintaining your bike and ensuring accurate tire pressure for all your cycling adventures.
Happy riding, and remember to keep those tires properly inflated!


