
Easy SKS Multi-Valve Chuck Adjustment Guide
Quick Summary: Is your SKS multi-valve chuck leaking or not inflating your tires properly? You can adjust it! Use a small Phillips head screwdriver to tighten or loosen the screw inside the chuck. Turn clockwise to tighten for Presta valves, counter-clockwise for Schrader. Small adjustments make a big difference, so test after each tweak until you get a secure, leak-free fit.
Tired of wrestling with your bike pump? A loose or leaky SKS multi-valve chuck can turn a quick tire top-off into a frustrating battle. Many cyclists experience this – the chuck either won’t grip the valve properly, or it leaks air, making it impossible to reach the desired pressure. But don’t worry! Adjusting your SKS multi-valve chuck is easier than you think.
This guide will walk you through simple steps to fine-tune your chuck for optimal performance. We’ll cover how to identify the problem, the tools you’ll need, and exactly how to make those crucial adjustments. Get ready to say goodbye to frustrating leaks and hello to perfectly inflated tires every time.
Understanding the SKS Multi-Valve Chuck

The SKS multi-valve chuck is a clever design that handles both Presta and Schrader valves. It’s a standard feature on many high-quality bike pumps, known for its durability and ease of use. But even the best equipment needs a little TLC now and then.
Here’s a quick breakdown of how it works:
- Presta Valves: These are the skinny valves found on most road and high-performance bikes. The chuck grips the valve stem when you press it on and tighten the lever.
- Schrader Valves: These are the wider valves you’ll find on car tires and some mountain bikes. The chuck fits over the valve, and the internal pin depresses the valve core to allow airflow.
Over time, the internal components of the chuck can wear down or become misaligned, leading to leaks or difficulty engaging with the valve. That’s where adjustment comes in!
Identifying the Problem
Before you start twisting screws, let’s pinpoint exactly what’s going wrong. Here are a few common issues with the SKS multi-valve chuck:
- Air Leakage: You hear a hissing sound while pumping, especially around the chuck-valve interface.
- Difficulty Engaging: The chuck doesn’t easily attach to the valve, or it feels loose and wobbly.
- Inability to Reach Pressure: You pump and pump, but the tire pressure barely increases.
- Valve Damage: The chuck seems to be damaging the valve stem (rare, but possible).
Once you know the symptoms, you can target your adjustments more effectively.
Tools You’ll Need
Thankfully, you don’t need a whole workshop of tools for this task. Here’s what you’ll need:
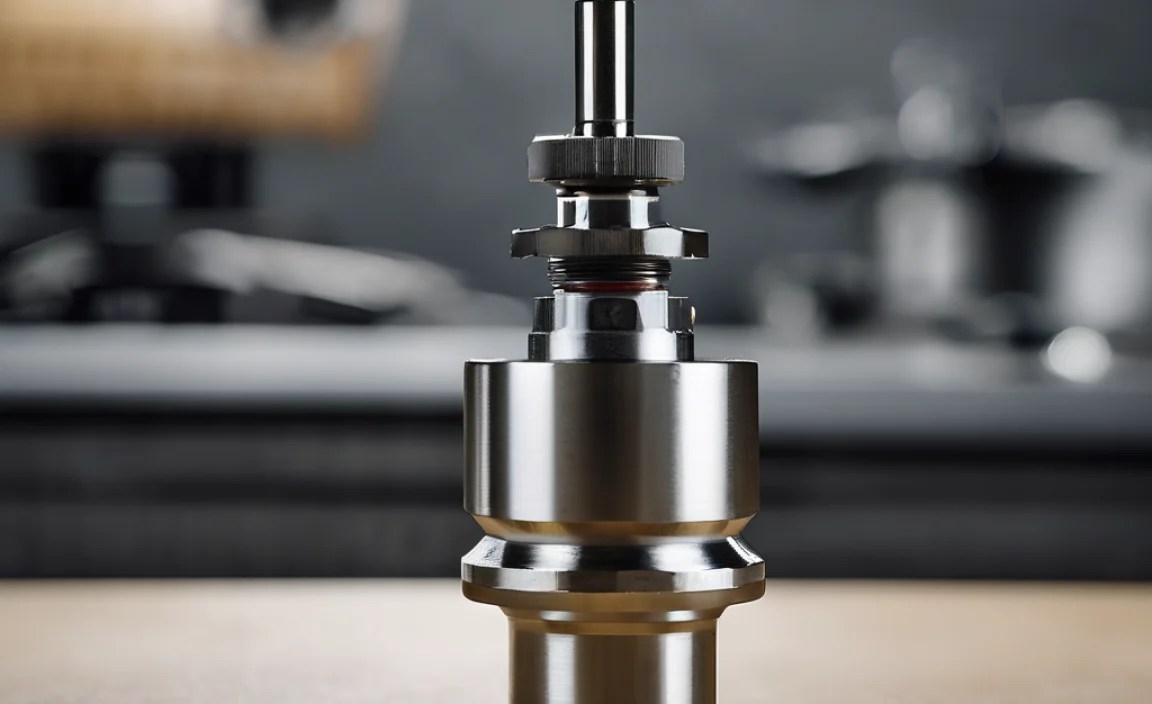
- Small Phillips Head Screwdriver: This is the key to adjusting the chuck. Make sure it’s small enough to fit into the adjustment screw inside the chuck.
- Bike Pump (with SKS Multi-Valve Chuck): Obviously!
- Test Tire: Have a tire handy to test the chuck after each adjustment.
- Rag or Paper Towel: For wiping away any dirt or grime.
Step-by-Step: Adjusting Your SKS Multi-Valve Chuck

Alright, let’s get down to business. Follow these steps carefully, and remember: small adjustments are key!
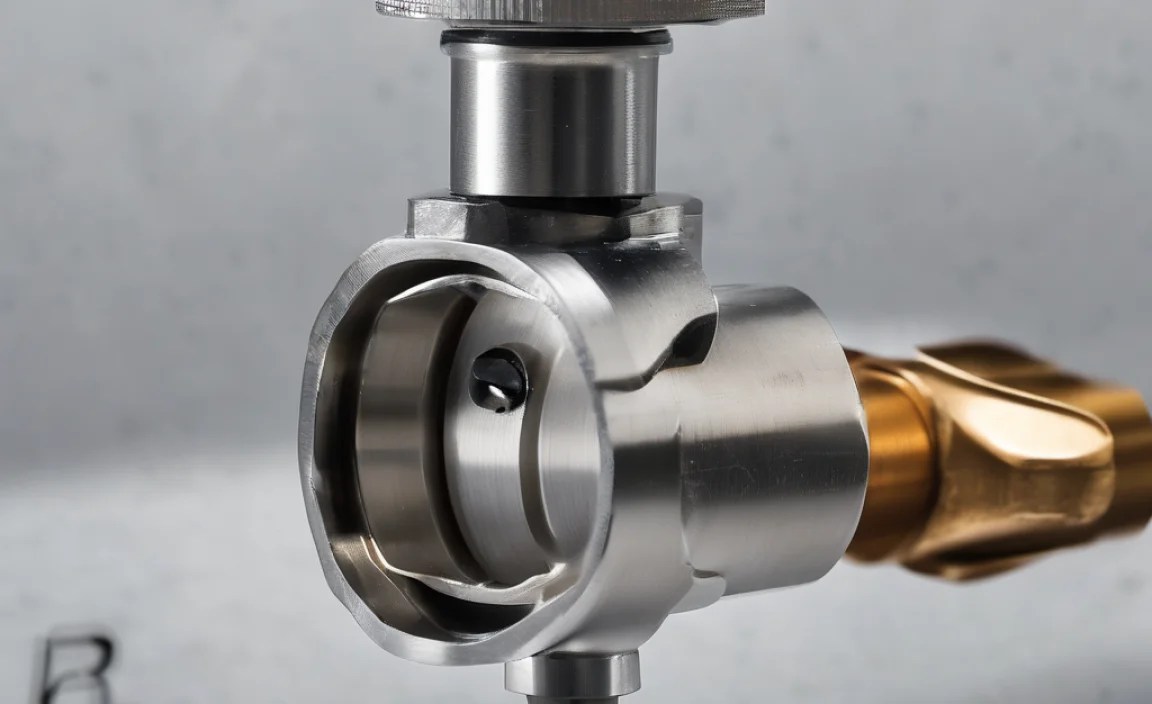
Step 1: Examine the Chuck
Take a close look at your SKS multi-valve chuck. Locate the small screw inside the chuck opening. This is your adjustment screw. Clean the chuck with a rag to remove any dirt or debris that might be interfering with the valve seal.
Step 2: Choose Your Valve Type
Decide whether you’re primarily using Presta or Schrader valves. The adjustment will be slightly different for each.
Step 3: Adjusting for Presta Valves
Presta valves require a tighter grip. Here’s how to adjust:
- Insert the Screwdriver: Carefully insert the Phillips head screwdriver into the adjustment screw.
- Tighten (Clockwise): Turn the screw *slightly* clockwise. We’re talking a tiny fraction of a turn – maybe 1/8 or 1/4 of a rotation.
- Test the Connection: Attach the chuck to a Presta valve and try inflating the tire. Check for leaks.
- Repeat if Necessary: If it’s still leaking, repeat steps 2 and 3, making even smaller adjustments each time. The goal is a snug, leak-free fit.
Step 4: Adjusting for Schrader Valves
Schrader valves generally need a slightly looser fit. Here’s the process:
- Insert the Screwdriver: Again, carefully insert the screwdriver into the adjustment screw.
- Loosen (Counter-Clockwise): Turn the screw *slightly* counter-clockwise. Just like with Presta valves, small adjustments are crucial.
- Test the Connection: Attach the chuck to a Schrader valve and try inflating the tire. Check for leaks and proper engagement.
- Repeat if Necessary: If the chuck is too tight (difficult to attach) or still leaking, repeat steps 2 and 3, making tiny adjustments.
Step 5: Fine-Tuning
This is where patience comes in. After each adjustment, thoroughly test the chuck on both Presta and Schrader valves (if you use both). Look for:
- Secure Fit: The chuck should attach easily and feel secure on the valve.
- No Leaks: Listen for hissing sounds and check for air escaping around the valve.
- Easy Inflation: You should be able to inflate the tire to the desired pressure without excessive effort.
Step 6: When to Stop
Over-tightening or loosening the screw can damage the chuck or make it unusable. If you’ve made several adjustments and still can’t get a good seal, it might be time to replace the chuck.
Troubleshooting Tips
Still having trouble? Here are a few extra tips to consider:
- Check Valve Cores: Make sure your valve cores are properly tightened. A loose valve core can cause leaks that seem like a chuck problem. Use a valve core tool to tighten them.
- Inspect Valve Condition: Examine your valves for damage or corrosion. A damaged valve might not seal properly, even with a perfectly adjusted chuck.
- Clean the Chuck: Periodically clean the chuck with a degreaser to remove any built-up grime.
- Consider Replacement: If your chuck is old or heavily worn, it might simply be time for a replacement. SKS sells replacement chucks that are easy to install.
Table: Troubleshooting SKS Multi-Valve Chuck Issues
| Problem | Possible Cause | Solution |
|---|---|---|
| Air leaking from chuck | Loose adjustment screw | Tighten screw (clockwise for Presta, counter-clockwise for Schrader) |
| Chuck won’t attach to valve | Adjustment screw too tight (Schrader) or valve is damaged | Loosen screw (counter-clockwise for Schrader); Inspect valve for damage |
| Difficulty inflating tire | Clogged chuck or damaged valve core | Clean chuck; Tighten or replace valve core |
| Chuck damages valve | Adjustment screw too tight (Presta) | Loosen screw (counter-clockwise) |
Table: SKS Multi-Valve Chuck Adjustment Summary
| Valve Type | Adjustment Direction | Effect |
|---|---|---|
| Presta | Clockwise (Tighten) | Increases grip on valve, reduces leaks |
| Schrader | Counter-Clockwise (Loosen) | Decreases grip on valve, improves engagement |
When to Consider Replacing the Chuck
While adjustment can often solve minor issues, there comes a time when replacement is the best option. Here are some signs that your SKS multi-valve chuck is beyond repair:
- Visible Damage: Cracks, breaks, or severe wear on the chuck body.
- Stripped Screw: The adjustment screw is stripped and can’t be tightened or loosened.
- Constant Leaks: You’ve tried adjusting the chuck multiple times, but it still leaks air consistently.
- Age: The chuck is several years old and has seen heavy use.
Replacing an SKS multi-valve chuck is relatively inexpensive and can save you a lot of frustration in the long run. Check out SKS’s website or your local bike shop for replacement options.
FAQ: SKS Multi-Valve Chuck Adjustment
Here are some frequently asked questions about adjusting your SKS multi-valve chuck:
Q: Why is my bike pump leaking air?
A: A common cause is a loose or misaligned chuck. Try adjusting the screw inside the chuck to improve the seal.
Q: Which way do I turn the screw for Presta valves?
A: Turn the screw clockwise (tighten) to increase the grip on Presta valves.
Q: What if the chuck is too tight on my Schrader valve?
A: Turn the screw counter-clockwise (loosen) to reduce the grip on Schrader valves.
Q: How often should I adjust my bike pump chuck?
A: Adjust it as needed, whenever you notice leaks or difficulty engaging with the valve. Regular cleaning can also help prevent problems.
Q: Can I use any screwdriver to adjust the chuck?
A: No, use a small Phillips head screwdriver that fits snugly into the adjustment screw. Using the wrong size can damage the screw.
Q: What if adjusting the chuck doesn’t fix the problem?
A: Check your valve cores, inspect your valves for damage, and clean the chuck thoroughly. If the problem persists, consider replacing the chuck.
Q: Where can I buy a replacement SKS multi-valve chuck?
A: You can find replacement chucks at most local bike shops or online retailers that sell SKS products.
Maintaining Your Bike Pump for Longevity
Adjusting your SKS multi-valve chuck is just one part of keeping your bike pump in top condition. Here are a few additional maintenance tips:
- Regular Cleaning: Wipe down your pump and chuck regularly to remove dirt and grime.
- Lubrication: Occasionally lubricate the pump’s internal components with a silicone-based lubricant.
- Storage: Store your pump in a dry place to prevent rust and corrosion.
- Inspect the Hose: Check the hose for cracks or leaks and replace it if necessary.
By following these simple maintenance tips, you can extend the life of your bike pump and ensure reliable performance for years to come. You might also consider a floor pump with a built-in pressure gauge like these found at REI for even greater accuracy.
Conclusion
Adjusting your SKS multi-valve chuck doesn’t have to be a daunting task. With a little patience and a small screwdriver, you can fine-tune your chuck for optimal performance and say goodbye to frustrating leaks. Remember, small adjustments are key, and don’t be afraid to experiment until you find the sweet spot. By following the steps in this guide, you’ll be able to keep your tires properly inflated and enjoy smooth, trouble-free rides for miles to come. Now get out there and pump it up!


