
Parts of a Bicycle Chuck Explained: Easy Guide!
Quick Summary: A bicycle chuck is the part of your pump that connects to the tire valve. It ensures an airtight seal for efficient inflation. Key parts include the chuck body, valve connector (Presta or Schrader), locking lever or threaded connection, and internal seals or O-rings. Understanding these parts helps with maintenance and choosing the right chuck for your needs.
Ever struggled to get your bike tires properly inflated? It’s a common frustration, and often the culprit is a faulty or incompatible bicycle chuck. The chuck is the crucial link between your pump and tire valve, and if it’s not working right, you’ll waste energy and struggle to reach the correct pressure. Don’t worry! In this guide, I’ll break down the parts of a bicycle chuck, explain how they work, and give you the knowledge to keep yours in top shape. We’ll cover everything from identifying different valve connectors to troubleshooting common issues. Let’s get started and make flat tires a thing of the past!
Understanding the Bicycle Chuck
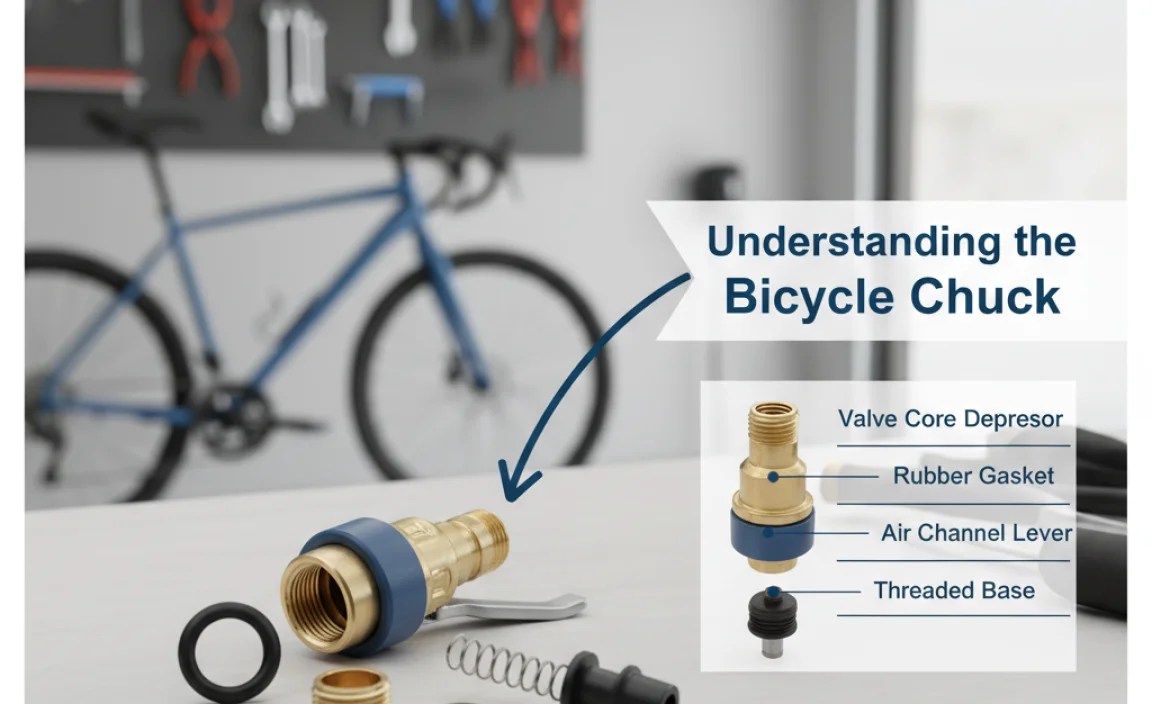
The bicycle chuck is a vital component of any bike pump. It’s the part that directly attaches to your tire’s valve, allowing air to flow in. Whether you’re using a floor pump or a portable hand pump, the chuck’s design and condition significantly impact how easily and effectively you can inflate your tires. Let’s dive into the different parts and their functions.
Key Parts of a Bicycle Chuck
A typical bicycle chuck consists of several parts, each playing a crucial role in achieving an airtight seal and efficient inflation:
- Chuck Body: The main housing that holds all the other components together.
- Valve Connector: The interface that attaches to the tire valve (either Presta or Schrader).
- Locking Mechanism: A lever or threaded connection that secures the chuck to the valve.
- Internal Seals/O-rings: Rubber or synthetic rings that create an airtight seal.
Chuck Body
The chuck body is usually made from metal (like aluminum or brass) or durable plastic. It provides structural support and houses the internal components. The quality of the chuck body affects the overall durability and lifespan of the chuck. A well-made body will withstand frequent use and resist damage from accidental drops or impacts.
Valve Connector
The valve connector is the most critical part, as it directly interfaces with the tire valve. There are two primary types of valve connectors:
- Presta: A narrow valve with a locking nut at the tip, commonly found on road bikes and high-performance bicycles.
- Schrader: A wider valve similar to those found on car tires, typically used on mountain bikes, hybrid bikes, and some older road bikes.
Some chucks are designed to work with only one type of valve, while others are dual-head or convertible, accommodating both Presta and Schrader valves. Dual-head chucks have separate openings for each valve type, while convertible chucks can be adjusted to fit either valve.
Locking Mechanism
The locking mechanism secures the chuck to the valve, ensuring an airtight seal during inflation. There are two main types of locking mechanisms:
- Lever-Type: Uses a lever to clamp the chuck onto the valve. These are quick and easy to use, but the seal may not be as secure as with a threaded connection.
- Threaded: Screws onto the valve, providing a very secure and airtight connection. These require more time to attach and detach but offer a more reliable seal, especially at high pressures.
Internal Seals/O-rings
Internal seals, typically O-rings made of rubber or synthetic materials, are essential for creating an airtight seal between the chuck and the valve. These seals prevent air leakage during inflation. Over time, these seals can wear out, crack, or dry rot, leading to leaks and reduced pumping efficiency. Regular maintenance and replacement of these seals are crucial for maintaining optimal performance.
Types of Bicycle Chucks

Bicycle chucks come in various designs, each with its own advantages and disadvantages. Understanding the different types can help you choose the best one for your needs.
Dual-Head Chucks
Dual-head chucks have separate openings for Presta and Schrader valves. This design eliminates the need to switch or adjust the chuck when inflating different types of tires. They are convenient and easy to use but can be bulkier than other types. The Park Tool PW-4 Dual Head Inflator is a popular example, known for its durability and ease of use.
Convertible Chucks
Convertible chucks can be adjusted to fit either Presta or Schrader valves. This is usually done by disassembling the chuck and reconfiguring the internal parts. While more versatile than single-head chucks, they can be more complex to use and may require tools for conversion. An example is the Topeak SmartHead DX3, which automatically adjusts to fit either valve type.
Thread-On Chucks
Thread-on chucks screw directly onto the valve, providing a very secure and airtight connection. These are commonly used in high-pressure applications, such as inflating road bike tires to 100+ PSI. They offer excellent sealing but take longer to attach and detach. The Silca Hiro V.2 is a premium example, known for its precision and durability.
Slip-On Chucks
Slip-on chucks slide onto the valve and are held in place by friction or a lever. These are quick and easy to use but may not provide as secure a seal as threaded chucks, especially at high pressures. They are commonly found on portable hand pumps and are ideal for quick inflation on the go.
Materials Used in Bicycle Chucks

The materials used in constructing a bicycle chuck greatly influence its durability, performance, and lifespan. Here’s a breakdown of common materials and their characteristics:
- Aluminum: Lightweight and corrosion-resistant, aluminum is often used for the chuck body and other structural components.
- Brass: Durable and resistant to corrosion, brass is commonly used for valve connectors and internal parts that require precision.
- Steel: Strong and durable, steel is used for parts that need to withstand high pressures and frequent use.
- Plastic: Lightweight and inexpensive, plastic is used for the chuck body and other non-critical components. High-quality plastics like reinforced nylon can offer good durability.
- Rubber/Synthetic Seals: Used for O-rings and other seals, these materials provide an airtight barrier and prevent leaks.
Maintaining Your Bicycle Chuck
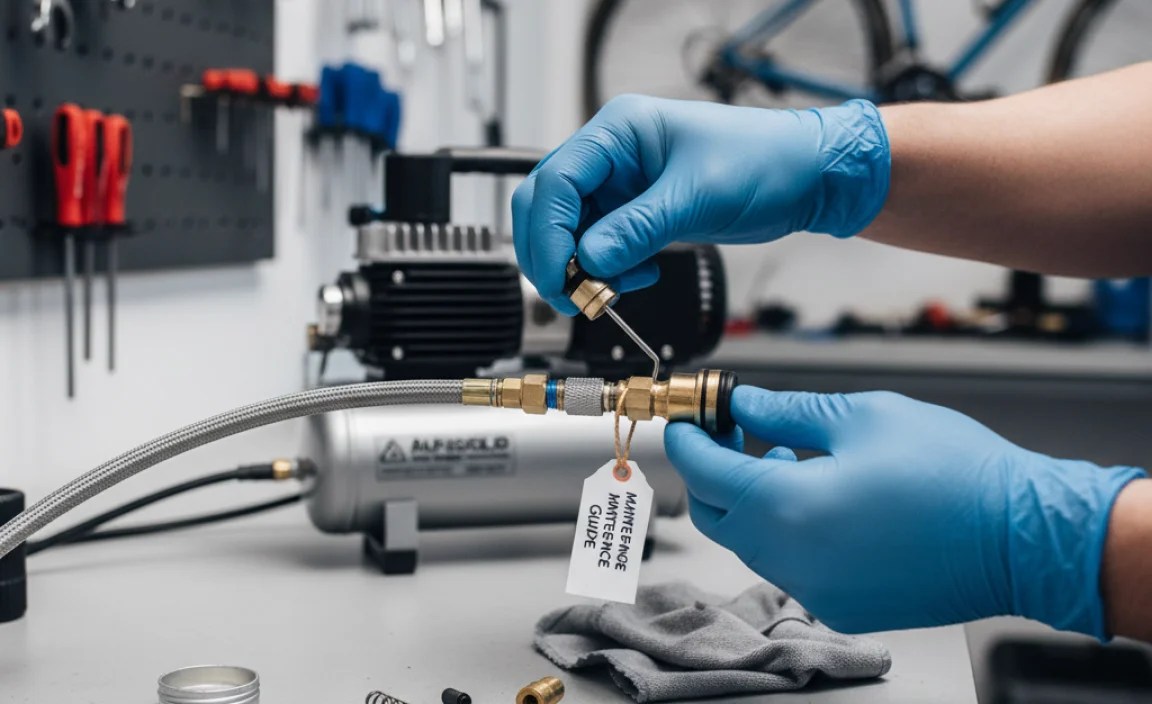
Proper maintenance is essential for keeping your bicycle chuck in good working condition. Regular cleaning, lubrication, and replacement of worn parts can significantly extend its lifespan and ensure reliable performance.
Cleaning
Dirt, grime, and debris can accumulate inside the chuck, affecting its performance and potentially damaging the valve. Clean the chuck regularly using a clean cloth or brush. For stubborn dirt, you can use a mild detergent and water solution. Rinse thoroughly and allow to dry completely before use.
Lubrication
Lubricating the internal parts of the chuck can help maintain smooth operation and prevent wear. Use a silicone-based lubricant, which is safe for rubber and plastic parts. Apply a small amount of lubricant to the valve connector and other moving parts. Avoid using petroleum-based lubricants, as they can damage rubber seals.
Replacing Seals
The O-rings and other seals inside the chuck are prone to wear and tear. Inspect them regularly for cracks, dryness, or damage. Replace worn seals as needed to maintain an airtight seal. Most pump manufacturers offer replacement seal kits for their chucks. Here’s a handy table to guide you on when to replace your chuck’s parts:
| Part | Frequency of Check | Replacement Indicator | Action |
|---|---|---|---|
| O-rings | Monthly | Cracked, dry, or visibly worn | Replace immediately |
| Valve Connector | Every 6 months | Bent, damaged, or not sealing properly | Replace as needed |
| Chuck Body | Annually | Cracks, breaks, or significant wear | Replace if damaged |
| Locking Lever | Every 3 months | Loose, broken, or not locking securely | Tighten or replace |
Troubleshooting Common Issues

Even with proper maintenance, you may encounter issues with your bicycle chuck. Here are some common problems and how to troubleshoot them:
- Air Leakage: If you hear or feel air leaking from the chuck while inflating, check the valve connector and seals. Make sure the chuck is properly attached to the valve and that the locking mechanism is secure. Replace worn or damaged seals.
- Difficulty Attaching/Detaching: If you have trouble attaching or detaching the chuck from the valve, clean and lubricate the valve connector. Make sure the valve is not bent or damaged. If using a threaded chuck, ensure the threads are clean and not stripped.
- Chuck Not Gripping Valve: If the chuck is not gripping the valve properly, check the locking mechanism. For lever-type chucks, make sure the lever is fully engaged. For threaded chucks, ensure the chuck is screwed on tightly. Adjust or replace the locking mechanism if necessary.
- Valve Damage: Forcing a chuck onto the wrong type of valve (e.g., trying to fit a Schrader chuck on a Presta valve) can damage the valve. Always use the correct chuck for the valve type.
Choosing the Right Bicycle Chuck
Selecting the right bicycle chuck depends on your needs and preferences. Consider the following factors when making your choice:
- Valve Type: Determine whether you need a Presta, Schrader, or dual-head chuck. If you have bikes with both valve types, a dual-head or convertible chuck may be the best option.
- Locking Mechanism: Choose between a lever-type or threaded locking mechanism. Lever-type chucks are faster and easier to use, while threaded chucks provide a more secure seal.
- Material: Look for a chuck made from durable materials like aluminum, brass, or steel. Avoid cheap plastic chucks, as they are more prone to breakage.
- Ease of Use: Consider how easy the chuck is to attach, detach, and operate. Look for features like ergonomic handles and clear markings.
- Pressure Rating: Ensure the chuck is rated for the pressures you intend to use. Road bike tires often require higher pressures than mountain bike tires.
- Brand Reputation: Choose a chuck from a reputable brand known for quality and reliability. Brands like Park Tool, Topeak, and Silca are popular choices among cyclists.
Top Bicycle Chuck Recommendations
Here are a few highly-rated bicycle chucks available on the market:
- Park Tool PW-4 Dual Head Inflator: A durable and reliable dual-head chuck that works with both Presta and Schrader valves.
- Topeak SmartHead DX3: A convertible chuck that automatically adjusts to fit either valve type.
- Silca Hiro V.2: A premium thread-on chuck known for its precision and airtight seal.
- Lezyne ABS-1 Pro Chuck: A versatile chuck with a lever-lock design and compatibility with both Presta and Schrader valves.
FAQ: Parts of a Bicycle Chuck Explained
Here are some frequently asked questions about bicycle chucks:
What is the difference between a Presta and Schrader valve?
Presta valves are narrow and have a locking nut at the tip, mainly found on road bikes. Schrader valves are wider, like car tire valves, common on mountain and hybrid bikes.
How do I know if my chuck is leaking?
If you hear hissing or feel air escaping while pumping, your chuck is likely leaking. Check the seals and connections for damage.
Can I use a car tire inflator on my bike?
Yes, if your bike has Schrader valves. For Presta valves, you’ll need an adapter to connect to the car inflator.
How often should I replace my pump chuck?
Replace your pump chuck every 1-2 years, or sooner if you notice leaks, damage, or difficulty inflating your tires.
What type of lubricant should I use on my pump chuck?
Use a silicone-based lubricant. Avoid petroleum-based lubricants, as they can damage rubber seals and O-rings.
Why is my pump chuck not staying on the valve?
Check if the locking mechanism is fully engaged. Clean the valve and chuck, and ensure the O-rings are in good condition. If it’s a threaded chuck, make sure it’s screwed on tight.
Can I convert my pump chuck from Schrader to Presta?
Some chucks are convertible, requiring disassembly and reconfiguration. Others are dual-head, with separate openings for each valve type. Check your chuck’s manual for instructions.
Conclusion
Understanding the parts of a bicycle chuck, how they work, and how to maintain them can significantly improve your cycling experience. By knowing the differences between valve types, locking mechanisms, and materials, you can choose the right chuck for your needs and keep it in top condition with regular maintenance. Don’t let a faulty chuck ruin your ride – with the knowledge in this guide, you’ll be able to keep your tires properly inflated and enjoy smooth, efficient cycling for years to come. Now you’re equipped to tackle any inflation issue and keep rolling!


