
Chuck Missing Gasket? Easy Fix Here!
Missing Gasket on Your Chuck? Here’s What To Do

Quick Summary: Finding a missing gasket on your chuck—especially on a bike pump—is a common issue. Usually, it means a simple replacement. Identify the gasket type, find a compatible replacement (often from a hardware store or bike shop), and install it carefully. This restores the chuck’s seal, letting you inflate tires properly again.
Ever tried pumping up your bike tires, only to find air leaking everywhere except into the tube? A missing gasket on your chuck is often the sneaky culprit. It’s a small part that makes a huge difference, and when it’s gone, your pump becomes about as useful as a screen door on a submarine. Don’t worry, this is a super common problem, and fixing it is usually quick and easy.
In this guide, I’ll walk you through identifying the missing gasket, finding the right replacement, and getting your chuck back in perfect working order. We’ll cover everything from simple O-rings to more specialized seals. By the end, you’ll be back to pumping with confidence, ready to hit the road or trail. Let’s get started!
Identifying the Missing Gasket
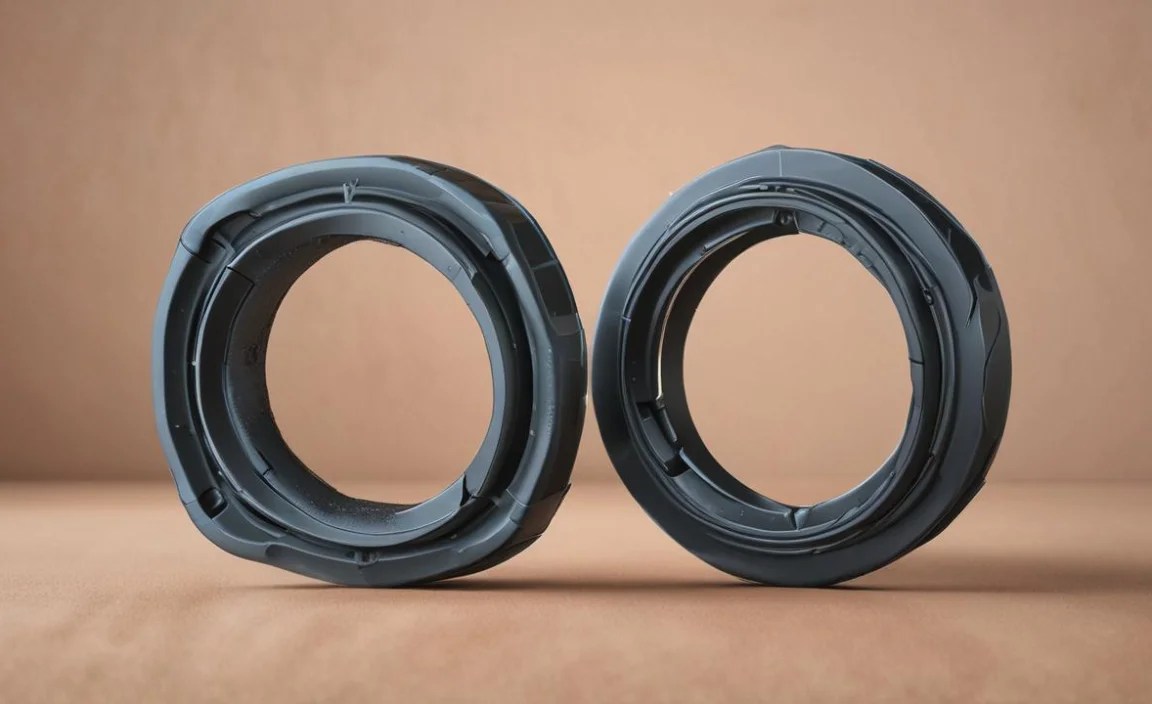
First things first, let’s figure out exactly what kind of gasket is missing from your chuck. Gaskets come in various shapes and sizes, and knowing what you’re looking for is half the battle. Here’s how to identify it:
Types of Chuck Gaskets
- O-Rings: These are circular rubber rings, the most common type found in many bike pumps. They create a seal by being compressed between two surfaces.
- Flat Gaskets: These are flat, disc-shaped gaskets, often made of rubber or plastic. They provide a seal over a flat surface.
- Cone-Shaped Gaskets: These gaskets are shaped like a cone and are used in specific types of chucks to fit snugly into a matching cone-shaped recess.
- Specialty Gaskets: Some chucks use uniquely shaped gaskets designed specifically for that model. These are less common but require careful identification.
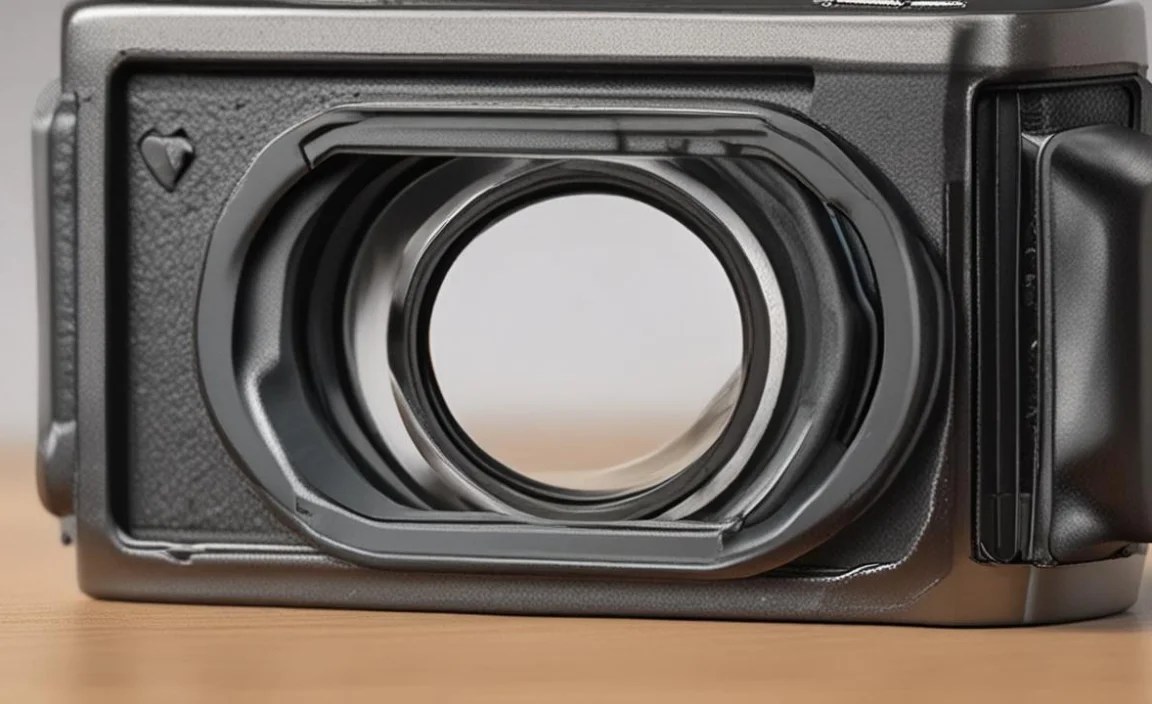
Where Was the Gasket Located?
Knowing where the gasket was originally located helps you understand its function and size. Common locations include:
- Inside the Chuck Head: This is the most frequent spot, where the gasket seals around the valve stem.
- At the Base of the Chuck: Where the chuck connects to the pump hose.
- Within the Chuck Mechanism: Some chucks have internal gaskets that control airflow.
Signs of a Missing Gasket
Here are some telltale signs that a gasket is missing:
- Air Leakage: The most obvious sign. You’ll hear and feel air escaping around the chuck while pumping.
- Reduced Pumping Efficiency: It takes more strokes to inflate the tire, or you can’t reach the desired pressure.
- Visible Gap: You might see an empty space where a gasket should be.
- Dry Rot or Crumbling: If you find small pieces of rubber or plastic, it could be a deteriorated gasket.
Finding a Replacement Gasket

Once you know what kind of gasket you need, it’s time to find a replacement. Here are the best places to look:
Local Bike Shops
Your local bike shop is the first place to check. They often carry replacement gaskets for common pumps and chucks. Plus, the staff can help you identify the correct size and type.
Pros: Expert advice, immediate availability.
Cons: May be limited to common sizes and brands.
Hardware Stores
Hardware stores are a great source for O-rings and flat gaskets. They have a wide variety of sizes and materials. Take the old gasket (or the chuck) with you to ensure a good match.
Pros: Wide selection, affordable prices.
Cons: Requires careful measurement and matching.
Online Retailers
Online retailers like Amazon, eBay, and specialty bike parts websites offer a vast selection of gaskets. You can often find specific replacement kits for your pump model.
Pros: Huge selection, easy to compare prices.
Cons: Shipping time, potential for returns if the wrong size.
Pump Manufacturer
Check the website of your pump’s manufacturer. They often sell replacement parts directly, ensuring a perfect fit.
Pros: Guaranteed compatibility.
Cons: May be more expensive, longer shipping times.
Measuring for the Right Size
If you’re buying a generic O-ring or flat gasket, accurate measurement is crucial. Here’s how to do it:
- Inner Diameter (ID): Measure the diameter of the hole in the center of the gasket.
- Outer Diameter (OD): Measure the diameter of the entire gasket.
- Thickness (Width): Measure the thickness of the gasket.
Use calipers for the most accurate measurements. If you don’t have calipers, a ruler with millimeter markings will work in a pinch.
| Measurement | Description | Tool |
|---|---|---|
| Inner Diameter (ID) | Diameter of the inner hole | Calipers or Ruler |
| Outer Diameter (OD) | Diameter of the entire gasket | Calipers or Ruler |
| Thickness | Width of the gasket | Calipers or Ruler |
Installing the New Gasket

With the replacement gasket in hand, it’s time to install it. Here’s a step-by-step guide:
Tools You’ll Need
- Replacement Gasket: The correct size and type.
- Small Screwdriver or Pick: For removing the old gasket (if present) and installing the new one.
- Grease or Silicone Lubricant: To help the gasket seat properly and extend its life.
- Clean Cloth: To wipe away any dirt or debris.
Step-by-Step Installation
- Disassemble the Chuck: Carefully take apart the chuck to access the gasket location. Note how the parts fit together.
- Remove the Old Gasket: Use a small screwdriver or pick to gently remove the old gasket. Be careful not to scratch or damage the surrounding surfaces. If the old gasket is brittle and breaks apart, make sure you remove all the pieces.
- Clean the Area: Wipe the area where the gasket sits with a clean cloth to remove any dirt, debris, or old grease.
- Lubricate the New Gasket: Apply a small amount of grease or silicone lubricant to the new gasket. This helps it slide into place and creates a better seal.
- Install the New Gasket: Carefully position the new gasket in its groove or recess. Use a small screwdriver or pick to gently push it into place. Ensure it sits flat and is not twisted or pinched.
- Reassemble the Chuck: Put the chuck back together, making sure all parts are correctly aligned. Tighten any screws or fasteners securely.
- Test the Chuck: Connect the chuck to your pump and inflate a tire. Check for air leaks around the gasket. If you hear or feel any leaks, disassemble the chuck and check the gasket’s position.
Tips for a Successful Installation
- Don’t Over-Lubricate: Too much grease can attract dirt and reduce the gasket’s effectiveness.
- Use the Right Tool: Avoid using sharp or pointed tools that could damage the gasket.
- Check Alignment: Make sure all parts of the chuck are properly aligned before tightening.
- Test Thoroughly: After installation, test the chuck at different pressures to ensure a reliable seal.
Troubleshooting Common Issues
Even with careful installation, you might encounter a few issues. Here’s how to troubleshoot them:
Air Leaks After Installation
Problem: Air is still leaking after installing the new gasket.
Solution:
- Check Gasket Position: Make sure the gasket is seated correctly and not pinched or twisted.
- Inspect Sealing Surfaces: Look for any scratches or damage on the surfaces that the gasket seals against.
- Tighten Connections: Ensure all screws and fasteners are tight, but don’t overtighten.
- Try a Different Lubricant: Some lubricants may not be compatible with certain gasket materials.
Difficulty Seating the Gasket
Problem: The gasket is difficult to push into place.
Solution:
- Use More Lubricant: A little extra lubricant can help the gasket slide into place.
- Check Gasket Size: Make sure you have the correct size gasket. If it’s too large, it won’t fit properly.
- Warm the Gasket: Warming the gasket slightly (e.g., with a hairdryer) can make it more pliable.
Gasket Deteriorates Quickly
Problem: The new gasket wears out or cracks soon after installation.
Solution:
- Use a Higher-Quality Gasket: Some gaskets are made from more durable materials than others.
- Avoid Harsh Chemicals: Clean the chuck with mild soap and water, avoiding harsh chemicals that can damage the gasket.
- Store Properly: Store your pump in a cool, dry place to prevent the gasket from drying out or cracking.
Maintaining Your Chuck and Gaskets
Proper maintenance can extend the life of your chuck and gaskets, preventing future problems. Here are some tips:
- Regular Cleaning: Clean your chuck regularly with mild soap and water to remove dirt and debris.
- Lubrication: Apply a small amount of silicone lubricant to the gasket every few months.
- Proper Storage: Store your pump in a cool, dry place away from direct sunlight.
- Inspect Regularly: Check the gasket for signs of wear or damage every few months.
Alternative Solutions
Sometimes, despite your best efforts, you might not be able to find or install a replacement gasket. Here are some alternative solutions:
Replacing the Entire Chuck
If the chuck is old or damaged, it might be easier to replace the entire chuck. Many bike shops and online retailers sell replacement chucks that are compatible with various pumps.
Pros: Simple solution, new components.
Cons: More expensive than replacing just the gasket.
Upgrading to a New Pump
If your pump is old or unreliable, consider upgrading to a new one. Modern pumps often have more durable chucks and better sealing mechanisms.
Pros: Improved performance, increased reliability.
Cons: Most expensive option.
FAQ: Chuck Gasket Edition
Question 1: Why does my bike pump keep leaking air?
Answer: Air leaks are often caused by a worn or missing gasket in the chuck. The gasket creates a seal around the tire valve, and if it’s damaged, air escapes. Inspect the gasket and replace it if necessary.
Question 2: Where can I buy replacement gaskets for my bike pump?
Answer: You can find replacement gaskets at local bike shops, hardware stores, and online retailers like Amazon or eBay. Check your pump manufacturer’s website for specific replacement parts.
Question 3: How do I know what size gasket I need for my chuck?
Answer: Measure the inner diameter, outer diameter, and thickness of the old gasket. If you don’t have the old gasket, measure the space where it sits in the chuck.
Question 4: Can I use any type of grease on the gasket?
Answer: No, use silicone grease. Petroleum-based grease can damage rubber gaskets. Silicone grease is safe and helps the gasket seal properly.
Question 5: How often should I replace the gasket on my bike pump?
Answer: Replace the gasket whenever you notice air leaks or reduced pumping efficiency. Regular inspection can help you catch problems early.
Question 6: What tools do I need to replace a gasket on a bike pump chuck?
Answer: You’ll typically need a small screwdriver or pick to remove the old gasket, a clean cloth to wipe the area, and silicone grease to lubricate the new gasket.
Question 7: Is it worth replacing a gasket, or should I just buy a new pump?
Answer: Replacing the gasket is usually worth it, especially if the pump is otherwise in good condition. It’s a cheap and easy fix. However, if the pump is very old or heavily damaged, a new pump might be a better investment.
Conclusion
A missing or damaged gasket on your chuck can be a frustrating problem, but it’s usually a simple fix. By identifying the type of gasket you need, finding a suitable replacement, and following the installation steps, you can restore your pump to perfect working order. Regular maintenance and prompt attention to any issues will keep your pump performing reliably for years to come.
So, next time you find yourself struggling to inflate your tires, don’t despair. Check that gasket, and you’ll likely be back on the road or trail in no time. Happy cycling!


