
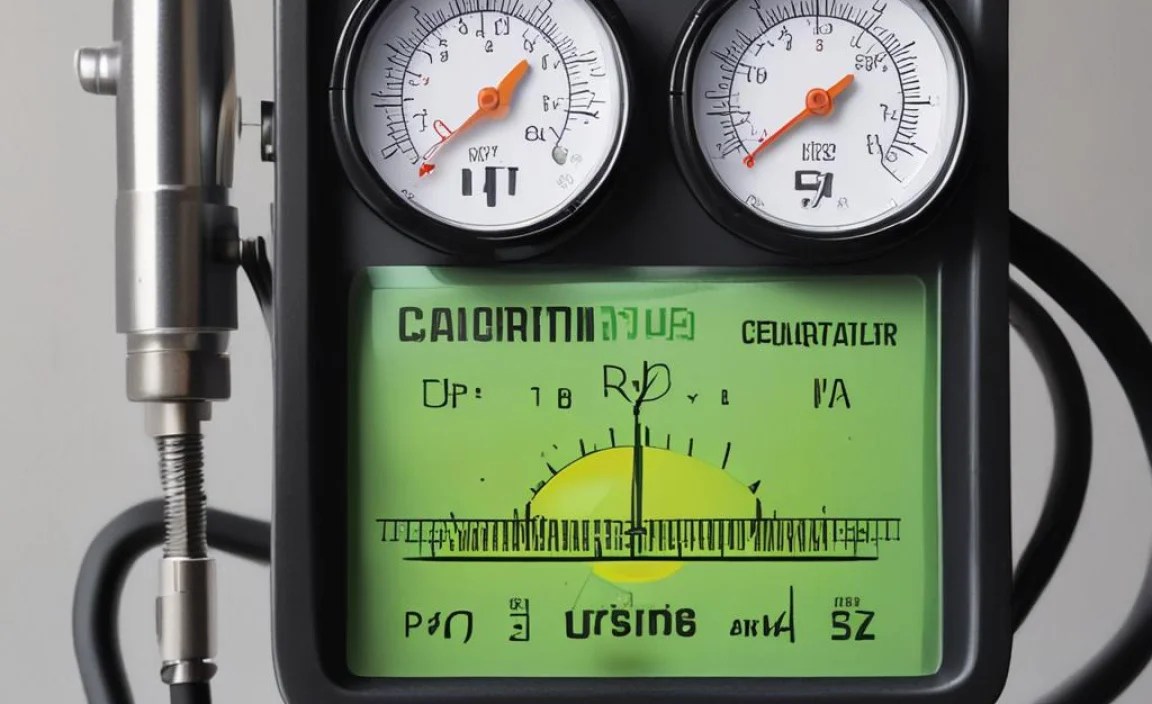
How to Calibrate Shock Pump Gauge: Easy Guide
Have you ever felt your bike wasn’t riding right? Maybe it felt too bumpy or too soft. The problem might be your shock pump gauge. Knowing how to calibrate shock pump gauge can keep your rides smooth. Let’s learn how to do it. It’s easier than you think!
Your bike’s suspension needs the right air pressure. A good gauge helps you get it just right. This keeps you safe and comfortable on any trail. Are you ready to become a suspension expert? Let’s get started.
Key Takeaways
- Regularly checking your shock pump gauge improves your bike’s performance.
- Calibrating your gauge ensures accurate pressure readings for safety.
- Use a reliable reference gauge to compare and adjust your shock pump.
- Proper calibration extends the life of your suspension components.
- Knowing how to calibrate shock pump gauge saves time and money.
Why Calibrate Your Shock Pump Gauge?

Have you ever wondered why your bike feels different even with the same settings? The answer might be a faulty shock pump gauge. A gauge that isn’t accurate can lead to poor performance and even damage your suspension. Calibration makes sure the readings on your gauge are correct. This helps you set the right air pressure in your shocks. When your shocks have the right pressure, your bike handles better. You’ll have more control and a smoother ride. It’s like giving your bike a tune-up for your suspension. Knowing how to calibrate shock pump gauge is a key part of bike maintenance. It helps you stay safe and have more fun on the trails. A calibrated gauge is a happy gauge!
- Accuracy ensures consistent performance.
- Calibration prevents suspension damage.
- Proper pressure improves bike handling.
- Regular checks enhance safety.
- It saves money on repairs.
- It gives you a smoother ride.
Think of your shock pump gauge like a ruler. If the ruler is off, your measurements will be wrong. The same goes for your gauge. If it’s not calibrated, the pressure readings won’t be right. This can cause your suspension to be too stiff or too soft. Neither is good for riding! Calibrating your gauge is like checking your ruler against another ruler. You want to make sure they both show the same measurement. This will give you confidence that your suspension is set up correctly. It’s a small step that makes a big difference in how your bike performs. How to calibrate shock pump gauge is a skill every serious rider should know.
Why Accuracy Matters
Imagine you’re baking a cake. If your measuring cups are off, the cake won’t turn out right. It might be too dry or too sweet. Your shock pump gauge is like a measuring cup for your suspension. If it’s not accurate, your suspension won’t perform as it should. Small changes in pressure can make a big difference in how your bike feels. Too much pressure can make the ride harsh. Too little pressure can make it feel squishy. An accurate gauge helps you find the sweet spot. You want your suspension to absorb bumps and keep your tires on the ground. This gives you better control and a more comfortable ride. How to calibrate shock pump gauge ensures your suspension is always dialed in.
The Importance of Consistency
Have you ever noticed how some days your bike feels amazing, and other days it feels terrible? Sometimes, it’s not just you; it could be your shock pump gauge. If the gauge isn’t consistent, you’ll get different readings each time you pump. This makes it hard to find the right pressure for your suspension. Calibrating your gauge helps keep your readings consistent. This means you can rely on the numbers you see. You’ll know that the pressure you set today will be the same as the pressure you set tomorrow. This consistency is key to getting the most out of your bike. It allows you to fine-tune your suspension and find the perfect settings for different trails. How to calibrate shock pump gauge helps you achieve this consistency.
Avoiding Costly Repairs
Ignoring your shock pump gauge can lead to bigger problems down the road. If you’re consistently using the wrong pressure, you can damage your suspension components. Over time, this can lead to costly repairs. Replacing shocks or forks can be expensive. Calibrating your gauge is a simple way to prevent these problems. By ensuring your pressure readings are accurate, you’ll avoid putting unnecessary stress on your suspension. This will help extend the life of your components and save you money in the long run. How to calibrate shock pump gauge is a smart investment in your bike’s future. It’s like changing the oil in your car; it’s a small task that prevents big problems.
Fun Fact or Stat: Did you know that a poorly calibrated shock pump can reduce your suspension’s performance by up to 30%?
Tools Needed to Calibrate Your Gauge

So, you want to calibrate your shock pump gauge? Great! First, you need the right tools. Having the right tools makes the job much easier. The most important tool is a reference gauge. A reference gauge is a gauge that you know is accurate. You’ll use it to compare your shock pump gauge against. Make sure your reference gauge is reliable. You’ll also need some adapters. Adapters help you connect the gauges together. Sometimes, the fittings are different sizes. A set of adapters will solve this problem. Finally, you might need some Teflon tape. Teflon tape helps seal the connections. This prevents air leaks. Air leaks can mess up your readings. Knowing how to calibrate shock pump gauge starts with having the right tools. With these tools, you’ll be ready to get started.
- Reference gauge for accuracy.
- Adapters for connecting gauges.
- Teflon tape to seal connections.
- A clean workspace.
- Patience and a steady hand.
- Proper safety glasses.
Think of these tools as ingredients for a recipe. If you’re missing an ingredient, the recipe won’t turn out right. The same goes for calibrating your gauge. If you don’t have the right tools, you won’t get accurate results. A good reference gauge is like a trusted friend. You know you can rely on it. Adapters are like puzzle pieces. They help you connect things that don’t normally fit together. Teflon tape is like a bandage. It seals up any leaks and keeps everything tight. Having these tools on hand will make the calibration process smooth and easy. You’ll be confident that you’re getting accurate readings. How to calibrate shock pump gauge becomes much easier with the right tools.
Choosing a Reference Gauge
Selecting a reference gauge is a crucial step. You need a gauge that you can trust. Look for a gauge that has been professionally calibrated. Some gauges come with a calibration certificate. This certificate proves that the gauge is accurate. Also, consider the pressure range of the gauge. Make sure it covers the range you need for your shocks. A digital gauge is often more accurate than an analog gauge. Digital gauges display the pressure with numbers. This makes it easier to read. Analog gauges use a needle to point to the pressure. It can be harder to read the exact pressure on an analog gauge. How to calibrate shock pump gauge depends on having a reliable reference gauge.
Finding the Right Adapters
Adapters are like the translators of the tool world. They let different parts connect to each other. When calibrating your shock pump gauge, you might find that the threads don’t match up. This is where adapters come in handy. Look for a set of adapters that includes different sizes and types of fittings. Some common types include NPT, BSP, and metric. Make sure the adapters are made of durable material like brass or steel. Plastic adapters can break easily. It’s also a good idea to have some extra O-rings on hand. O-rings help seal the connections and prevent leaks. With the right adapters, you’ll be able to connect your gauges and get accurate readings. How to calibrate shock pump gauge requires the right connections.
Using Teflon Tape Correctly
Teflon tape is your friend when it comes to preventing leaks. This white tape is used to seal threaded connections. To use it correctly, wrap the tape around the threads of the fitting. Wrap it in the direction that the fitting will be screwed in. This will prevent the tape from unraveling. Use enough tape to cover the threads, but don’t use too much. Too much tape can make it hard to tighten the fitting. When you tighten the fitting, the tape will compress and create a tight seal. This will prevent air from leaking out. Leaks can throw off your pressure readings and make it hard to calibrate your gauge. How to calibrate shock pump gauge relies on tight, leak-free connections.
Fun Fact or Stat: High-quality reference gauges can maintain accuracy within 0.25% of the full scale!
Step-by-Step Calibration Process
Now that you have your tools, it’s time to calibrate your shock pump gauge. First, connect your shock pump gauge to the reference gauge using the adapters. Make sure the connections are tight. Use Teflon tape to prevent leaks. Next, slowly pump air into the system. Watch both gauges carefully. Compare the readings on the two gauges. If they match, your shock pump gauge is accurate. If they don’t match, you’ll need to adjust your shock pump gauge. Some gauges have an adjustment screw. Use the screw to bring the reading in line with the reference gauge. If your gauge doesn’t have an adjustment screw, you may need to replace it. Repeat this process several times to ensure accuracy. Knowing how to calibrate shock pump gauge involves careful steps.
- Connect gauges with adapters.
- Slowly pump air.
- Compare readings.
- Adjust if needed.
- Repeat to confirm accuracy.
- Check for leaks.
Think of this process like tuning a guitar. You start by comparing the sound of your guitar to a reference note. If the notes don’t match, you adjust the tuning pegs until they do. The same goes for calibrating your gauge. You’re comparing the reading on your gauge to a reference gauge. If the readings don’t match, you adjust the gauge until they do. It’s a process of fine-tuning until everything is just right. Be patient and take your time. The more careful you are, the more accurate your results will be. How to calibrate shock pump gauge requires patience and attention to detail.
Connecting the Gauges
Connecting the gauges is like setting up a science experiment. You need to make sure everything is connected correctly. Start by identifying the correct adapters. You want adapters that fit snugly into both gauges. Use Teflon tape on the threads to prevent leaks. Wrap the tape in the right direction. Tighten the connections with a wrench. Be careful not to over-tighten them. Over-tightening can damage the gauges. Once the connections are tight, check for leaks. You can use soapy water to check for leaks. If you see bubbles, tighten the connection further. A good connection is key to accurate calibration. How to calibrate shock pump gauge starts with a solid setup.
Comparing the Readings
Comparing the readings is like being a detective. You’re looking for clues to see if your shock pump gauge is accurate. Slowly pump air into the system. Watch both gauges closely. Pay attention to the numbers. Do they match? If they’re close, your gauge is likely accurate. If they’re far apart, your gauge needs adjustment. Compare the readings at different pressure levels. Check at low, medium, and high pressures. This will give you a good idea of how accurate your gauge is across the entire range. Note any differences you see. These differences are called errors. How to calibrate shock pump gauge involves identifying and correcting these errors.
Making Adjustments
Making adjustments is like being a surgeon. You need to be precise and careful. Some shock pump gauges have an adjustment screw. This screw allows you to fine-tune the reading. Use a small screwdriver to turn the screw. Turn it slowly and watch the gauge. The reading should change as you turn the screw. Adjust the screw until the reading matches the reference gauge. If your gauge doesn’t have an adjustment screw, you may need to replace it. Some gauges can’t be calibrated. If you can’t adjust your gauge, it’s time for a new one. A reliable gauge is essential for proper suspension setup. How to calibrate shock pump gauge sometimes means replacing a faulty gauge.
Fun Fact or Stat: Some high-end shock pumps have built-in digital displays that automatically calibrate before each use!
Common Calibration Mistakes to Avoid

Calibrating your shock pump gauge can be tricky. There are some common mistakes you should avoid. One mistake is not using a reliable reference gauge. If your reference gauge is inaccurate, your calibration will be wrong. Another mistake is not sealing the connections properly. Air leaks can throw off your readings. Make sure to use Teflon tape and tighten the connections. A third mistake is pumping air too quickly. Pumping too quickly can cause the gauges to give inaccurate readings. Pump slowly and steadily. A fourth mistake is only checking at one pressure level. Check at multiple pressure levels to ensure accuracy across the entire range. Knowing how to calibrate shock pump gauge includes avoiding these mistakes.
- Using an unreliable reference gauge.
- Not sealing connections properly.
- Pumping air too quickly.
- Only checking at one pressure.
- Ignoring small discrepancies.
- Forgetting to repeat the process.
Think of these mistakes like potholes on a road. If you hit them, you’ll have a bumpy ride. Avoiding these mistakes will ensure a smooth calibration process. Using a reliable reference gauge is like having a good map. It will guide you in the right direction. Sealing the connections properly is like wearing a seatbelt. It will keep you safe. Pumping air slowly is like driving at a safe speed. It will prevent accidents. Checking at multiple pressure levels is like looking at the road from different angles. It will give you a better view. Avoiding these mistakes will help you get accurate results. How to calibrate shock pump gauge becomes easier when you avoid these pitfalls.
Using an Unreliable Reference
Using an unreliable reference is like using a broken compass. It will lead you in the wrong direction. Your reference gauge is the foundation of your calibration. If it’s not accurate, your entire process will be flawed. Before you start, make sure your reference gauge is calibrated. Some shops offer calibration services. You can also buy a calibrated gauge with a certificate. This certificate proves that the gauge is accurate. Don’t rely on cheap or untested gauges. They may not be accurate. Investing in a good reference gauge is worth the cost. It will ensure accurate results and prevent headaches down the road. How to calibrate shock pump gauge starts with a reliable reference.
Ignoring Small Discrepancies
Ignoring small discrepancies is like ignoring a small leak in your tire. It might not seem like a big deal at first, but it can lead to bigger problems later. Even small differences in pressure can affect your suspension’s performance. Pay attention to even the smallest differences between the gauges. If you see a consistent difference, adjust your shock pump gauge accordingly. Don’t assume that small differences are negligible. They can add up over time. Calibrating your gauge is about precision. Every little bit counts. How to calibrate shock pump gauge requires attention to detail.
Forgetting to Repeat the Process
Forgetting to repeat the process is like only checking your work once. You might miss something important. After you make adjustments, repeat the calibration process. This will ensure that your adjustments were accurate. Pump air into the system again. Compare the readings on both gauges. If they still don’t match, make further adjustments. Repeat this process until the readings are consistent. Repetition is key to accuracy. Don’t skip this step. It’s the final check that ensures your gauge is properly calibrated. How to calibrate shock pump gauge requires repetition for accuracy.
Fun Fact or Stat: Professional bike mechanics often calibrate their shock pumps every month to maintain peak accuracy!
Maintaining Your Calibrated Gauge

You’ve calibrated your shock pump gauge. Great! Now, you need to maintain it. Proper maintenance will keep your gauge accurate. Store your gauge in a safe place. Avoid dropping it or exposing it to extreme temperatures. Check your gauge regularly. Compare it to a reference gauge every few months. If you notice any discrepancies, recalibrate it. Also, check the hose and fittings. Make sure they’re tight and leak-free. Replace any worn or damaged parts. A well-maintained gauge will provide years of accurate service. Knowing how to calibrate shock pump gauge includes maintaining it properly.
| Maintenance Task | Frequency | Importance |
|---|---|---|
| Visual Inspection | Monthly | High |
| Comparison with Reference | Every 3 Months | High |
| Hose and Fitting Check | Every 6 Months | Medium |
| Recalibration | As Needed | High |
Think of maintaining your gauge like taking care of your teeth. If you brush and floss regularly, your teeth will stay healthy. If you maintain your gauge regularly, it will stay accurate. Storing your gauge in a safe place is like keeping your bike in a garage. It protects it from the elements. Checking your gauge regularly is like going to the dentist. It helps you catch problems early. Replacing worn parts is like getting a filling. It fixes small problems before they become big problems. Maintaining your gauge is a small investment that will pay off in the long run. How to calibrate shock pump gauge is only half the battle. You also need to maintain it.
Proper Storage Techniques
Proper storage is like putting your tools away in a toolbox. It keeps them safe and organized. When you’re not using your shock pump gauge, store it in a clean, dry place. Avoid storing it in direct sunlight or extreme temperatures. These conditions can damage the gauge. Keep it away from dust and dirt. Dust and dirt can clog the gauge and affect its accuracy. A good storage case will protect your gauge from damage. Some gauges come with a case. If yours doesn’t, you can buy one separately. Proper storage will extend the life of your gauge. How to calibrate shock pump gauge is best paired with proper storage.
Regular Inspection Schedule
A regular inspection schedule is like having a checklist for your bike. It helps you catch problems before they become serious. Set a schedule to inspect your shock pump gauge regularly. Check the hose for cracks or leaks. Check the fittings for tightness. Check the gauge face for damage. Compare the readings to a reference gauge. If you notice any problems, address them immediately. Don’t wait until the gauge fails completely. Regular inspections will help you maintain accuracy. How to calibrate shock pump gauge benefits from regular inspections.
Replacing Worn Components
Replacing worn components is like replacing the tires on your car. It keeps everything running smoothly. Over time, the components of your shock pump gauge can wear out. The hose can crack, the fittings can loosen, and the gauge itself can become inaccurate. If you notice any of these problems, replace the worn components. You can often find replacement parts online or at your local bike shop. Replacing worn components will keep your gauge accurate and reliable. How to calibrate shock pump gauge requires replacing worn parts.
Fun Fact or Stat: A well-maintained shock pump can last for over 5 years with regular use!
Advanced Calibration Techniques
Want to take your calibration skills to the next level? There are some advanced techniques you can use. One technique is to use a digital pressure calibrator. A digital pressure calibrator is a very accurate device. It can be used to calibrate both analog and digital gauges. Another technique is to use a pressure standard. A pressure standard is a device that provides a known pressure. You can use it to verify the accuracy of your reference gauge. A third technique is to perform a multi-point calibration. This involves checking the gauge at several different pressure levels. This will give you a more complete picture of its accuracy. Knowing how to calibrate shock pump gauge can involve advanced methods.
- Using a digital pressure calibrator.
- Employing a pressure standard.
- Performing multi-point calibration.
- Accounting for temperature effects.
- Using statistical analysis.
- Documenting calibration results.
Think of these techniques like adding extra features to your bike. They’re not essential, but they can improve performance. Using a digital pressure calibrator is like upgrading to electronic shifting. It’s more precise and accurate. Employing a pressure standard is like using a GPS. It helps you stay on track. Performing multi-point calibration is like getting a professional bike fit. It optimizes your performance. These advanced techniques will help you get the most out of your calibration. How to calibrate shock pump gauge can be enhanced with these methods.
Using a Digital Calibrator
A digital calibrator is like a super-accurate ruler. It gives you precise measurements. Digital calibrators use electronic sensors to measure pressure. These sensors are much more accurate than the mechanical components in an analog gauge. To use a digital calibrator, connect it to your shock pump gauge. The calibrator will display the pressure reading. Compare this reading to the reading on your gauge. If there’s a difference, adjust your gauge accordingly. Digital calibrators can be expensive, but they’re worth the investment if you need the highest level of accuracy. How to calibrate shock pump gauge can be made easier with digital tools.
Accounting for Temperature
Temperature can affect pressure readings. As the temperature increases, the pressure in your shocks will also increase. This is because the air molecules move faster at higher temperatures. When calibrating your shock pump gauge, try to do it at a consistent temperature. Avoid calibrating in direct sunlight or in a cold garage. If you need to calibrate in different temperatures, you can use a temperature correction factor. This factor will adjust the pressure reading to account for the temperature difference. How to calibrate shock pump gauge needs to consider environmental factors.
Documenting Results
Documenting your calibration results is like keeping a maintenance log for your bike. It helps you track your progress and identify any problems. Keep a record of the date, time, and temperature of each calibration. Also, record the readings on your shock pump gauge and the reference gauge. Note any adjustments you made. This record will help you track the accuracy of your gauge over time. If you notice any trends, you can take corrective action. Good documentation is essential for advanced calibration. How to calibrate shock pump gauge is complete with good records.
Fun Fact or Stat: Some professional racing teams use temperature-compensated gauges to ensure accurate suspension settings in all weather conditions!
Summary
Keeping your bike’s suspension dialed in is key for a smooth and safe ride. A crucial part of this is making sure your shock pump gauge is accurate. How to calibrate shock pump gauge involves using a reliable reference gauge and following a step-by-step process. You need the right tools, like adapters and Teflon tape, to connect the gauges properly. Remember to avoid common mistakes, such as using an unreliable reference or ignoring small discrepancies. Regular maintenance, including proper storage and inspection, will keep your gauge accurate for years. For advanced users, techniques like using a digital calibrator and accounting for temperature can further enhance accuracy. Accurate pressure readings lead to better bike handling and a more enjoyable riding experience.
Conclusion
Calibrating your shock pump gauge is a simple but important task. It ensures your suspension is set up correctly. This leads to better bike handling and a smoother ride. By following the steps outlined in this article, you can keep your gauge accurate and your suspension dialed in. Don’t underestimate the importance of a properly calibrated gauge. It can make a big difference in your riding experience. Knowing how to calibrate shock pump gauge empowers you to take control of your bike’s performance.
Frequently Asked Questions
Question No 1: How often should I calibrate my shock pump gauge?
Answer: You should calibrate your shock pump gauge at least every three to six months. If you use your bike frequently or ride in demanding conditions, you might want to calibrate it more often. Also, calibrate it if you notice any inconsistencies in your suspension performance. Regular calibration ensures accurate pressure readings. This helps maintain optimal bike handling and comfort. It’s a small task that can make a big difference in your riding experience. So, make it a part of your regular bike maintenance routine. Don’t wait until you notice a problem. Proactive maintenance is always the best approach.
Question No 2: What happens if I don’t calibrate my shock pump gauge?
Answer: If you don’t calibrate your shock pump gauge, it can become inaccurate over time. This can lead to incorrect pressure settings in your suspension. Riding with the wrong pressure can negatively affect your bike’s handling and comfort. Too much pressure can make the ride harsh and uncomfortable. Too little pressure can cause the suspension to bottom out. Inaccurate readings can also damage your suspension components over time. Regular calibration prevents these problems and ensures your suspension is always performing at its best. It’s a simple step that can save you time, money, and headaches in the long run.
Question No 3: Can I calibrate my shock pump gauge without a reference gauge?
Answer: While it’s technically possible to try, calibrating your shock pump gauge without a reference gauge is not recommended. A reference gauge is essential for ensuring accuracy. Without it, you have no way of knowing if your gauge is reading correctly. Trying to calibrate without a reference gauge is like trying to tune a guitar without a tuner. You might get close, but you’ll never be sure you’re perfectly in tune. Investing in a good reference gauge is worth the cost. It will give you the confidence that your suspension is set up correctly.
Question No 4: Where can I find a reliable reference gauge?
Answer: You can find reliable reference gauges at most bike shops or online retailers that sell cycling equipment. Look for gauges that are specifically designed for calibrating suspension pumps. These gauges are typically more accurate than general-purpose pressure gauges. Also, check for gauges that come with a calibration certificate. This certificate proves that the gauge has been tested and verified to be accurate. Some brands known for their accuracy include digital gauges from reputable manufacturers. Read reviews and compare prices before making a purchase. A good reference gauge is an investment in your bike’s performance.
Question No 5: Is it difficult to learn how to calibrate shock pump gauge?
Answer: No, learning how to calibrate shock pump gauge is not difficult. With the right tools and a little practice, anyone can do it. The process involves connecting your gauge to a reference gauge, comparing the readings, and making adjustments as needed. This article provides a step-by-step guide to help you through the process. There are also many online videos and tutorials that can provide additional guidance. Don’t be intimidated by the process. It’s easier than you think. Once you’ve done it a few times, you’ll become a pro.
Question No 6: What if my shock pump gauge doesn’t have an adjustment screw?
Answer: If your shock pump gauge doesn’t have an adjustment screw, it means you can’t manually calibrate it. In this case, if the gauge is inaccurate, you’ll need to replace it. Some gauges are designed to be disposable. They’re not meant to be calibrated. If you value accuracy, invest in a gauge that can be calibrated. These gauges typically have an adjustment screw that allows you to fine-tune the reading. Replacing a faulty gauge is a small price to pay for accurate suspension settings. It’s an essential part of maintaining your bike’s performance and safety.


