
Pump Gauge for Tubing: Find the Perfect Fit!
Quick Summary: A pump gauge for tubing is essential for accurately inflating tires or other inflatable items. To use one, connect the tubing to your pump and the item you’re inflating. Read the pressure on the gauge as you pump, ensuring you reach the recommended PSI. Proper usage guarantees optimal performance and prevents over-inflation.
Ever tried inflating a bike tire and wondered if you were putting in too much or too little air? It’s a common frustration. Without a reliable way to measure the pressure, you’re just guessing. Overinflating can lead to blowouts, while underinflating can make your ride sluggish. Luckily, a pump gauge for tubing solves this problem! It gives you the precise pressure readings you need to inflate your tires (or anything else) to the perfect level. This guide will walk you through exactly how to use one, step by step. Get ready for worry-free inflation and better performance!
Understanding Pump Gauges for Tubing

Before diving into the “how-to,” let’s clarify what a pump gauge for tubing is and why it’s such a useful tool.
What is a Pump Gauge for Tubing?
A pump gauge for tubing is a device that measures the pressure inside an inflatable object, such as a tire, ball, or inflatable toy. It connects to the pump via a tube or hose and provides a real-time reading of the pressure as you inflate. These gauges are designed to give accurate measurements, allowing you to inflate items to their optimal pressure.
Why Use a Pump Gauge?
Using a pump gauge offers several key benefits:
- Accuracy: Provides precise pressure readings, eliminating guesswork.
- Safety: Prevents over-inflation, reducing the risk of blowouts or damage to the inflatable item.
- Performance: Ensures optimal performance by inflating items to their recommended pressure. For example, properly inflated bike tires roll faster and offer better handling.
- Longevity: Helps extend the life of your inflatable items by preventing damage from improper inflation.
Types of Pump Gauges
Pump gauges come in several varieties, each with its own features and benefits:
- Analog Gauges: These gauges use a needle to indicate pressure on a dial. They are typically less expensive and don’t require batteries.
- Digital Gauges: Digital gauges display the pressure reading on an LCD screen. They often offer higher accuracy and additional features, such as the ability to switch between pressure units (PSI, BAR, kPa).
- Inline Gauges: These gauges are integrated directly into the pump’s hose or tubing. They provide a convenient way to monitor pressure while pumping.
- Standalone Gauges: These are separate devices that can be connected to the valve stem to check pressure. They are useful for checking pressure without having to pump.
Essential Tools and Materials
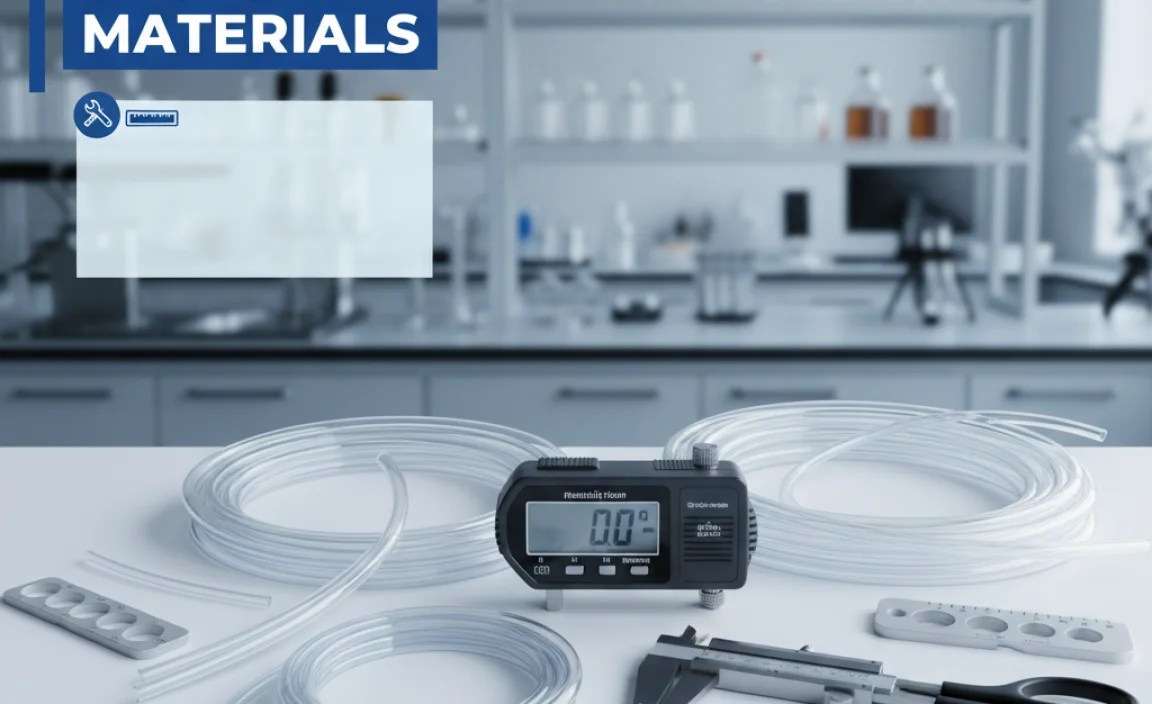
Before you start, gather the necessary tools and materials. This will make the process smoother and more efficient.
- Pump Gauge for Tubing: Choose a gauge that suits your needs and budget. Consider whether you prefer an analog or digital display.
- Air Pump: A compatible air pump is essential. Make sure the pump has a nozzle that fits the valve on your inflatable item.
- Inflatable Item: This could be a bike tire, sports ball, inflatable mattress, or any other item that requires inflation.
- Valve Adapter (if needed): Some valves require an adapter to connect to the pump. Ensure you have the correct adapter for your valve type (Presta, Schrader, or Dunlop).
- Clean Cloth: Use a clean cloth to wipe the valve and pump nozzle, ensuring a good seal and preventing dirt from entering.
Step-by-Step Guide: Using a Pump Gauge for Tubing

Follow these steps to accurately inflate your items using a pump gauge.
Step 1: Prepare the Inflatable Item
First, locate the valve on the item you want to inflate. Remove the valve cap (if there is one) and set it aside in a safe place. Inspect the valve for any dirt or damage. Use a clean cloth to wipe the valve if necessary.
Step 2: Connect the Pump Gauge to the Pump
Attach the tubing from the pump gauge to the air pump. Ensure the connection is secure to prevent air leaks. Most pump gauges have a standard fitting that easily connects to the pump’s hose or nozzle. If your pump has different attachments, select the one that fits the gauge tubing.
Step 3: Connect the Tubing to the Valve
Now, connect the other end of the pump gauge tubing to the valve on your inflatable item. The connection type will vary depending on the valve type:
- Schrader Valve: Press the pump nozzle straight onto the valve stem. You may need to flip a lever on the pump nozzle to secure the connection.
- Presta Valve: Unscrew the small nut at the top of the valve stem. Press the valve stem briefly to release a small amount of air. Then, press the pump nozzle onto the valve stem and flip the lever to secure it.
- Dunlop Valve: These are less common but similar to Presta valves. You may need a specific adapter for Dunlop valves.
Step 4: Begin Pumping
Start pumping air into the inflatable item. Watch the pressure gauge as you pump. The gauge will display the current pressure in PSI (pounds per square inch), BAR, or kPa (kilopascals), depending on the gauge settings.
Step 5: Monitor the Pressure
Pay close attention to the pressure reading on the gauge. Check the recommended pressure for your inflatable item. This information is usually printed on the item itself or in the user manual. For bike tires, the recommended pressure is typically printed on the sidewall of the tire.
Step 6: Inflate to the Correct Pressure
Continue pumping until the gauge reaches the recommended pressure. It’s better to slightly under-inflate than over-inflate. If you accidentally over-inflate, you can release some air by pressing the valve stem (for Presta and Dunlop valves) or using the pressure release button on the pump nozzle (for Schrader valves).
Step 7: Disconnect and Secure the Valve
Once you’ve reached the correct pressure, disconnect the pump nozzle from the valve. If you have a Presta valve, remember to tighten the small nut at the top of the valve stem. Replace the valve cap to protect the valve from dirt and damage.
Troubleshooting Common Issues
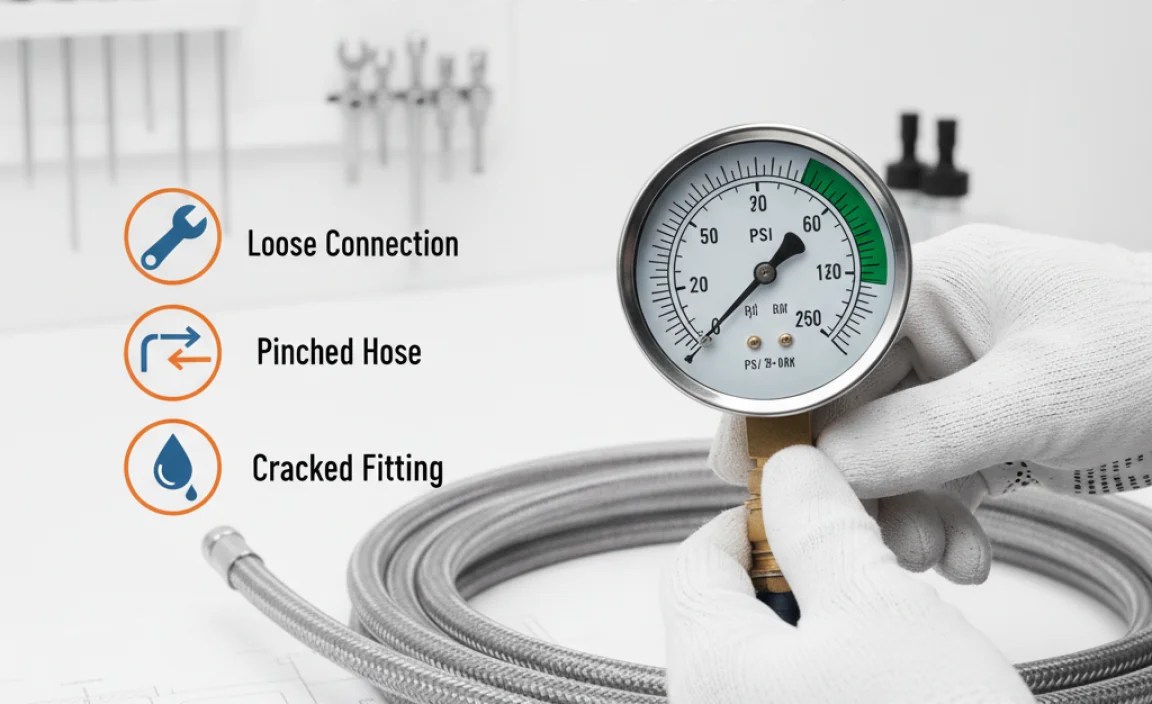
Even with the best equipment and instructions, you might encounter some issues. Here are a few common problems and how to solve them.
Problem: Air Leaks
Cause: Air leaks can occur at the connection between the pump nozzle and the valve, or between the gauge tubing and the pump.
Solution:
- Ensure the pump nozzle is securely attached to the valve. Try reattaching it and making sure the lever (if present) is properly engaged.
- Check the gauge tubing connections for tightness. Tighten any loose connections.
- Inspect the valve for damage. A damaged valve may need to be replaced.
Problem: Inaccurate Pressure Readings
Cause: Inaccurate readings can be due to a faulty gauge, incorrect gauge settings, or a worn-out valve.
Solution:
- Check the gauge settings to ensure it’s displaying the correct units (PSI, BAR, kPa).
- Compare the gauge reading with another gauge to check for accuracy. If the gauge is consistently inaccurate, it may need to be replaced.
- Inspect the valve for damage. A worn-out valve may not provide an accurate reading.
Problem: Difficulty Connecting to the Valve
Cause: Difficulty connecting can occur if the pump nozzle doesn’t fit the valve type, or if the valve is dirty or damaged.
Solution:
- Ensure you’re using the correct pump nozzle for your valve type (Schrader, Presta, or Dunlop). Use a valve adapter if necessary.
- Clean the valve with a clean cloth to remove any dirt or debris.
- Inspect the valve for damage. A damaged valve may need to be replaced.
Tips for Accurate Inflation

Follow these tips to ensure you get the most accurate and reliable pressure readings.
- Check Pressure Regularly: Check the pressure of your inflatable items regularly, especially before each use. Pressure can decrease over time due to leaks or temperature changes.
- Use a Reliable Gauge: Invest in a high-quality pump gauge from a reputable brand. A reliable gauge will provide more accurate and consistent readings.
- Calibrate Your Gauge: Some digital gauges allow you to calibrate them for maximum accuracy. Refer to the user manual for instructions on how to calibrate your gauge.
- Avoid Extreme Temperatures: Extreme temperatures can affect pressure readings. Avoid inflating items in direct sunlight or very cold environments.
- Refer to Manufacturer’s Recommendations: Always follow the manufacturer’s recommendations for inflation pressure. Over-inflation can damage the item, while under-inflation can reduce performance.
Maintaining Your Pump Gauge
Proper maintenance will extend the life of your pump gauge and ensure accurate readings.
- Store in a Safe Place: Store your pump gauge in a clean, dry place away from direct sunlight and extreme temperatures.
- Clean Regularly: Clean the gauge and tubing regularly with a clean cloth to remove any dirt or debris.
- Check for Damage: Inspect the gauge and tubing for any signs of damage, such as cracks, leaks, or loose connections. Replace any damaged parts immediately.
- Replace Batteries (if applicable): If you have a digital gauge, replace the batteries as needed. Low batteries can affect the accuracy of the readings.
Choosing the Right Pump Gauge
Selecting the right pump gauge for your needs depends on several factors. Here’s a guide to help you choose.
Factors to Consider
- Type of Inflatable Items: Consider the types of items you’ll be inflating. Some gauges are better suited for high-pressure items like bike tires, while others are better for low-pressure items like sports balls.
- Valve Type: Ensure the gauge is compatible with the valve types on your inflatable items (Schrader, Presta, or Dunlop).
- Accuracy: Look for a gauge with a high accuracy rating. Digital gauges typically offer higher accuracy than analog gauges.
- Display: Choose a display that is easy to read. Digital gauges often have a backlit display for better visibility.
- Durability: Select a gauge that is durable and can withstand regular use. Look for gauges made from high-quality materials.
- Budget: Pump gauges range in price from inexpensive analog models to more expensive digital models. Set a budget and choose a gauge that meets your needs without breaking the bank.
Recommended Pump Gauges
Here are a few recommended pump gauges based on different needs and budgets.
| Gauge Type | Brand/Model | Features | Price Range |
|---|---|---|---|
| Analog Gauge | Topeak Pocket Shock DXG | Compact, durable, high-pressure | $30-$40 |
| Digital Gauge | SKS Airchecker Digital Gauge | Accurate, easy-to-read display, PSI/BAR switchable | $40-$50 |
| Inline Gauge | Lezyne Digital Check Valve | Attaches directly to pump, digital display | $50-$60 |
| Standalone Gauge | Accu-Gage Tire Pressure Gauge | Simple, reliable, affordable | $15-$25 |
Advanced Techniques
For more experienced users, here are some advanced techniques for using a pump gauge.
Using a Gauge with a Suspension Fork
Many mountain bikes have suspension forks that require precise pressure settings. Use a high-pressure pump gauge specifically designed for suspension forks to achieve the correct pressure. These gauges often have a bleed valve for fine-tuning the pressure.
Setting Tire Pressure for Different Conditions
Adjusting tire pressure based on riding conditions can improve performance and comfort. Lower tire pressure provides better grip on loose surfaces, while higher pressure rolls faster on smooth surfaces. Experiment with different pressures to find what works best for you.
Using a Gauge for Tubeless Tires
Tubeless tires require a higher initial pressure to seat the tire bead on the rim. Use a pump with a high-volume chamber to quickly inflate the tire. Monitor the pressure with a gauge to ensure you don’t exceed the maximum recommended pressure.
Safety Precautions
Always follow these safety precautions when using a pump gauge.
- Wear Eye Protection: Wear safety glasses or goggles to protect your eyes from flying debris in case of a blowout.
- Avoid Over-Inflation: Never exceed the maximum recommended pressure for your inflatable item. Over-inflation can cause the item to explode.
- Inspect Equipment: Regularly inspect your pump gauge, pump, and inflatable items for any signs of damage. Replace any damaged parts immediately.
- Use in a Safe Area: Inflate items in a well-ventilated area away from flammable materials.
- Keep Away from Children: Store your pump gauge and pump out of reach of children.
FAQ Section
What does PSI mean?
PSI stands for pounds per square inch. It’s a unit of pressure commonly used to measure the inflation pressure of tires and other inflatable items.
How do I know the correct PSI for my bike tires?
The recommended PSI range is usually printed on the sidewall of your bike tires. Start within this range and adjust based on your riding conditions and preferences.
Can I use a car tire pressure gauge on my bike?
Yes, you can use a car tire pressure gauge on a bike if it’s compatible with the valve type (usually Schrader). However, bike-specific gauges are often more accurate for the lower pressures used in bicycle tires.
What’s the difference between Presta and Schrader valves?
Presta valves are narrower and typically found on road bikes and high-end mountain bikes. Schrader valves are wider and similar to those found on car tires. Each requires a compatible pump nozzle or adapter.
How often should I check my tire pressure?
It’s a good idea to check your tire pressure before each ride, or at least once a week. Tires can lose pressure over time, affecting performance and safety.
What happens if I over-inflate my tires?
Over-inflating your tires can lead to a harsh ride, reduced grip, and an increased risk of blowouts. Always stay within the recommended pressure range.
What happens if I under-inflate my tires?
Under-inflating your tires can result in a sluggish ride, increased rolling resistance, and a higher risk of pinch flats (for bikes with tubes). Make sure to inflate to at least the minimum recommended pressure.
Conclusion
Using a pump gauge for tubing might seem like a small detail, but it makes a huge difference in performance, safety, and the lifespan of your inflatable equipment. By following these steps and tips, you can ensure accurate inflation every time. Whether you’re a seasoned cyclist or just starting out, mastering the use of a pump gauge will give you confidence and control over your gear. So, grab your pump, gauge, and get ready to enjoy the benefits of perfectly inflated tires and equipment!


