
Best Pump for Tubeless Valves: Easy Inflation!
Having trouble getting your tubeless tires to inflate? A good pump designed for tubeless valves can make all the difference! This guide shows you how to choose the right pump and use it like a pro to seat those stubborn tubeless tires quickly and easily.
Setting up tubeless tires can be a real headache. You’ve got sealant everywhere, and the tire just won’t grip the rim. The biggest culprit is often your pump. A regular pump sometimes doesn’t deliver enough air fast enough to seat the tire. That’s where a pump designed specifically for tubeless valves comes in handy. It gives you that burst of air you need. In this guide, I’ll walk you through selecting the right pump and using it to get your tubeless tires inflated and ready to roll.
Understanding Tubeless Tire Systems

Before we dive into pumps, let’s quickly cover what makes tubeless tires different. Tubeless tires, as the name suggests, don’t use an inner tube. Instead, they create an airtight seal directly with the rim. This system offers several benefits:
- Fewer flats: Sealant inside the tire automatically seals small punctures.
- Lower pressure: You can run lower tire pressures for better grip and comfort without the risk of pinch flats.
- Improved rolling resistance: Without the friction between the tire and tube, you get a smoother, faster ride.
However, setting up tubeless tires can be tricky. The initial inflation requires a rapid burst of air to push the tire beads onto the rim’s “shelf” and create an airtight seal. This is where a specialized pump comes in.
Types of Pumps for Tubeless Valves

Several types of pumps can help you seat tubeless tires. Here’s a breakdown:
1. Tubeless Inflator Pumps (with a Charge Chamber)
These pumps have a separate chamber that you charge with air before releasing it all at once. This provides the high-volume burst needed to seat the tire.
Pros:
- Reliable and effective for seating stubborn tires.
- Often have a pressure gauge for accurate inflation.
Cons:
- Can be more expensive than standard floor pumps.
- Require a bit more effort to charge the chamber.
2. Standard Floor Pumps with a “Tubeless” Setting
Some floor pumps have a switch that allows you to choose between regular inflation and a high-volume “tubeless” mode. This mode delivers more air per stroke.
Pros:
- Versatile – can be used for both tubeless and standard tires.
- More affordable than dedicated tubeless inflator pumps.
Cons:
- May not be powerful enough for very stubborn tires.
- The “tubeless” setting can make regular inflation more difficult.
3. Air Compressors
An air compressor delivers a powerful, continuous stream of air. This is the method preferred by many bike shops.
Pros:
- Fast and effective for seating even the most difficult tires.
- Can be used for other tasks, like cleaning bike parts.
Cons:
- Expensive and takes up more space than other options.
- Requires a power outlet.
4. CO2 Inflators
CO2 inflators use cartridges of compressed carbon dioxide to quickly inflate a tire. While typically used for emergency repairs on the road, they can also be used to seat tubeless tires.
Pros:
- Compact and portable.
- Provide a very rapid burst of air.
Cons:
- Can be wasteful, as each cartridge is single-use.
- The rapid inflation can make it easy to over-inflate the tire.
- Can be expensive long term.
Key Features to Look for in a Tubeless Pump

When choosing a pump for tubeless valves, consider these features:
- High Volume: The pump should deliver a large volume of air per stroke to quickly seat the tire.
- Pressure Gauge: An accurate gauge is essential for achieving the correct tire pressure.
- Durable Construction: Look for a pump made from high-quality materials that will last.
- Stable Base: A wide, stable base prevents the pump from tipping over during use.
- Valve Compatibility: Ensure the pump head is compatible with both Presta and Schrader valves. Many pumps have a dual head or an adapter.
Step-by-Step Guide: Using a Tubeless Inflator Pump

Here’s how to use a tubeless inflator pump with a charge chamber:
1. Prepare the Wheel and Tire
- Clean the rim: Make sure the rim is clean and free of debris.
- Install the tubeless valve: Insert the tubeless valve into the rim and tighten the locking ring.
- Mount one side of the tire: Carefully mount one side of the tire onto the rim.
- Add sealant: Pour the recommended amount of tubeless sealant into the tire.
- Mount the second side of the tire: Mount the remaining side of the tire, being careful not to damage the rim or tire.
2. Position the Tire
- Ensure the tire bead is in the center of the rim channel: This helps with initial inflation.
- Check valve core: For stubborn setups, remove the valve core for increased airflow. Keep it handy!
3. Connect the Pump
- Attach the pump head to the valve: Make sure it’s securely attached to prevent air leaks.
4. Charge the Chamber
- Engage the charge chamber: Follow the pump’s instructions to engage the charge chamber.
- Pump until full: Pump the handle until the chamber is fully charged. This may take several strokes.
5. Release the Air
- Quickly release the air: Activate the release mechanism to send a burst of air into the tire. You should hear the tire beads snapping into place on the rim.
6. Inflate to the Desired Pressure
- Switch to regular inflation mode: If your pump has a separate inflation mode, switch to it.
- Inflate to the recommended pressure: Use the pressure gauge to inflate the tire to the desired pressure (check the tire sidewall for the recommended range).
7. Check for Leaks
- Listen for air leaks: Check around the rim and valve for any leaks.
- Shake the wheel: Swirl the sealant around inside the tire to coat any potential leak points.
- Re-inflate if necessary: If you find any leaks, re-inflate the tire and repeat the sealant distribution process.
8. If Necessary, Reinstall the Valve Core
- Carefully reinstall the valve core: Ensure it’s snug but not overtightened.
- Re-inflate to desired pressure: Top off the tire after reinstalling the valve core.
Troubleshooting Tips
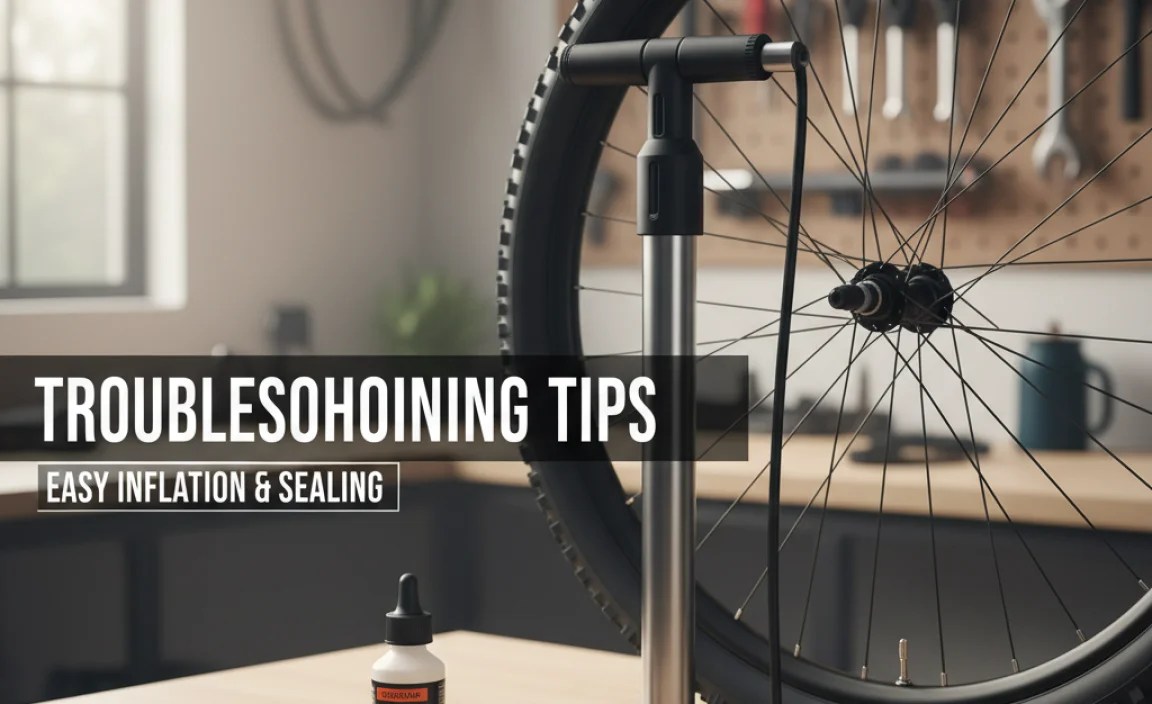
Sometimes, even with the right pump, you might encounter problems. Here are some troubleshooting tips:
- Tire won’t seat:
- Check the tire bead: Make sure the tire bead is clean and properly seated in the rim channel.
- Use soapy water: Apply soapy water to the tire bead to help it slide onto the rim.
- Remove the valve core: Removing the valve core increases airflow and can help seat stubborn tires. Remember to reinstall it after seating!
- Air leaks:
- Check the valve: Make sure the valve is properly installed and tightened.
- Add more sealant: Sometimes, you need a little extra sealant to seal small leaks.
- Inspect the tire: Look for any cuts or punctures in the tire.
- Pump not working:
- Check the pump head: Make sure the pump head is securely attached to the valve.
- Inspect the pump: Look for any damage to the pump or its components.
Alternative Inflation Methods
While a tubeless inflator pump is the best tool for the job, here are some alternative methods you can try:
- Air Compressor: If you have access to an air compressor, it can provide a powerful burst of air.
- CO2 Inflator: A CO2 inflator can quickly inflate a tire, but it can be wasteful and expensive.
Pump Maintenance
To keep your pump working properly, follow these maintenance tips:
- Clean the pump: Regularly clean the pump with a damp cloth to remove dirt and debris.
- Lubricate the pump: Lubricate the pump’s moving parts with a silicone-based lubricant.
- Inspect the pump head: Check the pump head for wear and tear and replace it if necessary.
Recommended Products
Here are a few highly-rated pumps for tubeless valves:
| Product | Type | Features | Price Range |
|---|---|---|---|
| Topeak JoeBlow Booster Pump | Tubeless Inflator | Integrated charge chamber, accurate gauge | $150-200 |
| Bontrager TLR Flash Charger Floor Pump | Tubeless Inflator | Charge chamber, auto-select head | $130-180 |
| Lezyne Digital Pressure Over Drive | Tubeless Inflator | Digital gauge, large volume | $200-250 |
| Park Tool PFP-7 Professional Mechanic Floor Pump | Standard Floor Pump with Tubeless Setting | Durable construction, versatile | $100-150 |
Best Practices for Tubeless Setups
Follow these best practices for successful tubeless setups:
- Use the correct rim and tire combination: Make sure your rims and tires are tubeless-compatible.
- Use high-quality tubeless tape: Apply tubeless tape carefully and ensure it’s properly sealed. Resources such as the Park Tool YouTube channel offer helpful tutorials.
- Use the recommended sealant: Use a high-quality tubeless sealant and follow the manufacturer’s recommendations for quantity.
- Inspect your tires regularly: Check your tires for wear and tear and replace them when necessary.
FAQ About Pumps for Tubeless Valves
1. Can I use a regular floor pump for tubeless tires?
Yes, you can, but it might not be effective for seating the tire initially. A pump designed for tubeless tires, with a charge chamber, will provide the necessary burst of air.
2. How much sealant should I use in my tubeless tires?
The amount of sealant depends on the tire size. Check the sealant manufacturer’s recommendations, but a good starting point is around 30-60ml for road tires and 60-120ml for mountain bike tires.
3. How often should I add sealant to my tubeless tires?
Sealant dries out over time, so you should add more every 3-6 months, depending on the climate and sealant type. Check the sealant level periodically and top it off as needed. For more information, websites like Continental Tires offer excellent resources.
4. What if my tubeless tire keeps losing air?
Check for leaks around the rim and valve. Add more sealant and re-inflate the tire. If the problem persists, inspect the tire for cuts or punctures. You may need to patch or replace the tire.
5. Can I use CO2 inflators for tubeless tires?
Yes, CO2 inflators can be used to seat and inflate tubeless tires, but they can cause the sealant to congeal more quickly. It’s best to use them for emergency repairs and then switch to regular air as soon as possible.
6. What is the ideal tire pressure for tubeless tires?
The ideal tire pressure depends on your weight, riding style, and the terrain. As a general guideline, road tires typically run between 60-90 PSI, while mountain bike tires are often between 20-35 PSI. Experiment to find the pressure that works best for you.
7. Do I need special tools for tubeless tire setup?
While not strictly necessary, a few tools can make the process easier. Tire levers, a valve core removal tool, and a sealant injector can be very helpful.
Conclusion
Setting up tubeless tires doesn’t have to be a frustrating experience. With the right pump and a little patience, you can enjoy the benefits of a tubeless system. Remember to choose a pump that delivers high volume, follow the steps outlined in this guide, and don’t be afraid to experiment with different techniques. With a bit of practice, you’ll be seating tubeless tires like a pro in no time, and you’ll be out on the trails or roads enjoying a smoother, faster, and more puncture-resistant ride. Happy cycling!


