
Best Pump for Mountain Bike Tires: Ride Easy!
Quick Summary:
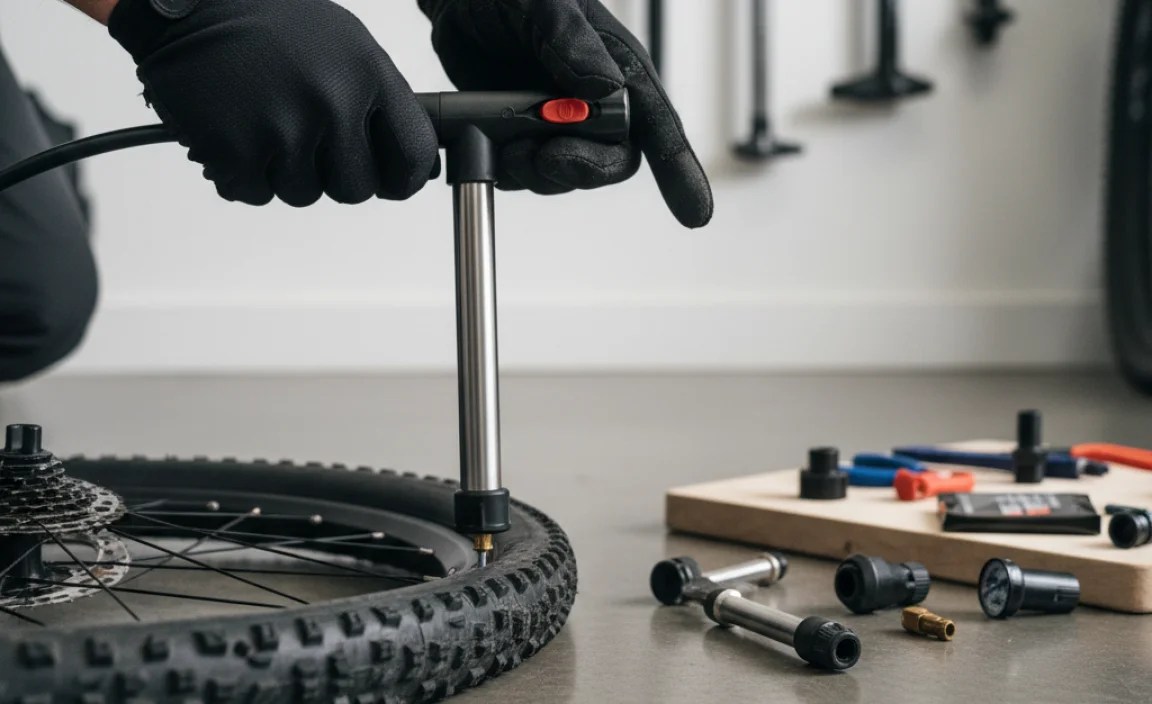
To pump mountain bike tires, you’ll need a floor pump or a portable pump with a pressure gauge. Connect the pump head securely to the valve (Presta or Schrader). Inflate to the recommended PSI (printed on your tire sidewall). For tubeless setups, a pump with a boost chamber can quickly seat the tire bead.
Mountain biking is an awesome way to explore trails and get a great workout. But nothing ruins a ride faster than a flat tire or improperly inflated tires. Getting your tire pressure just right is crucial for traction, comfort, and preventing pinch flats. Choosing the right pump and using it correctly can seem tricky, but don’t worry! It’s easier than you think.
This guide will walk you through everything you need to know about pumps for mountain bike tires, from choosing the right type to mastering the pumping technique. We’ll also cover tubeless setups and troubleshooting common issues. Get ready to keep those tires inflated and your rides rolling smoothly!
What Kind of Pump Do You Need for Mountain Bike Tires?

Choosing the right pump is the first step to properly inflated tires. There are two main types of pumps that mountain bikers use: floor pumps and portable pumps.
Floor Pumps
Floor pumps are designed for home use and offer the most efficient way to inflate your tires. They are larger, more stable, and allow you to use your body weight to generate higher pressures.
Pros of Floor Pumps:
- Efficiency: Inflates tires quickly and easily.
- Accuracy: Most floor pumps have a built-in pressure gauge for precise inflation.
- Durability: Built to last for years with proper care.
Cons of Floor Pumps:
- Not Portable: Too large to carry on rides.
- Higher Cost: Generally more expensive than portable pumps.
Portable Pumps
Portable pumps are designed to be carried with you on your rides. They are smaller and lighter, making them easy to pack in a backpack or mount on your bike frame.
Pros of Portable Pumps:
- Portability: Easy to carry on rides for quick repairs.
- Lightweight: Won’t weigh you down.
- Affordable: Less expensive than floor pumps.
Cons of Portable Pumps:
- Less Efficient: Requires more effort to inflate tires.
- Less Accurate: Some models lack a pressure gauge, making it harder to achieve precise inflation.
Considerations When Choosing a Pump
When selecting a pump, keep these factors in mind:
- Valve Type: Make sure the pump is compatible with your bike’s valve type (Presta or Schrader). Many pumps have dual heads to accommodate both.
- Pressure Gauge: A pressure gauge is essential for accurate inflation, especially for mountain bike tires where precise PSI is crucial.
- Volume vs. Pressure: Mountain bike tires require higher volume to fill the larger tire. Look for pumps designed for high-volume inflation.
Understanding Tire Valves

There are two main types of tire valves: Presta and Schrader. Knowing the difference is crucial for using the correct pump and achieving proper inflation.
Presta Valves
Presta valves are commonly found on higher-end bikes, including many mountain bikes. They are narrower than Schrader valves and have a locking nut at the top.
How to Identify a Presta Valve:
- Narrower than Schrader valves.
- Has a small locking nut at the tip that needs to be unscrewed before inflation.
How to Use a Presta Valve:
- Unscrew the locking nut at the top of the valve.
- Tap the valve tip to loosen it.
- Attach the pump head and inflate to the desired pressure.
- Remove the pump head and screw the locking nut back on.
Schrader Valves
Schrader valves are the same type of valve found on car tires. They are wider than Presta valves and have a spring-loaded pin in the center.
How to Identify a Schrader Valve:
- Wider than Presta valves.
- Has a spring-loaded pin in the center.
How to Use a Schrader Valve:
- Remove the valve cap.
- Attach the pump head and inflate to the desired pressure.
- Remove the pump head and replace the valve cap.
Step-by-Step Guide to Pumping Mountain Bike Tires

Now that you know about different pumps and valve types, let’s get into the actual pumping process. Follow these steps for proper inflation.
Step 1: Check Your Tire Pressure Recommendation
Look for the recommended PSI (pounds per square inch) range printed on the sidewall of your tire. This is a crucial starting point. Tire pressure is important for comfort and safety. Also, consider checking out online tire pressure calculators to get more specific recommendations based on your weight, riding style, and trail conditions.
Step 2: Prepare Your Pump and Valve
Make sure your pump head is compatible with your valve type. If you have a Presta valve, unscrew the locking nut and tap the valve tip to loosen it. Remove the valve cap on a Schrader valve.
Step 3: Attach the Pump Head
Firmly attach the pump head to the valve. For floor pumps, engage the lever to create a tight seal. For portable pumps, make sure the head is securely pressed onto the valve.
Step 4: Inflate the Tire
Begin pumping, using smooth, consistent strokes. Watch the pressure gauge to monitor the PSI. For floor pumps, use your body weight to generate more force. For portable pumps, brace yourself and use short, quick strokes.
Step 5: Check the Pressure
Once you reach the desired PSI, stop pumping and check the pressure gauge. Remove the pump head carefully to avoid losing air. For Presta valves, screw the locking nut back on. Replace the valve cap on Schrader valves.
Step 6: Fine-Tune (If Necessary)
After your initial ride, you might want to fine-tune the pressure based on how the bike feels. Lower pressure can improve traction on technical trails, while higher pressure can reduce rolling resistance on smoother surfaces.
Setting Up Tubeless Tires

Tubeless tires are increasingly popular among mountain bikers due to their ability to run lower pressures and reduce the risk of pinch flats. Setting them up requires a few extra steps.
What You’ll Need:
- Tubeless-ready tires
- Tubeless-ready rims
- Tubeless sealant
- Valve cores
- Tubeless tape
- A pump capable of delivering a high volume of air quickly (some pumps have a “boost chamber” specifically for this purpose)
Steps for Setting Up Tubeless Tires:
- Prepare the Rim: Clean the rim and apply tubeless tape, ensuring it’s smooth and covers the spoke holes.
- Install the Valve: Insert the tubeless valve into the rim and tighten the locking nut.
- Mount the Tire: Mount one side of the tire onto the rim.
- Add Sealant: Pour the recommended amount of tubeless sealant into the tire.
- Seat the Tire: Mount the other side of the tire onto the rim. This can be the trickiest part. Use a high-volume pump or a compressor to quickly inflate the tire and seat the bead. A “boost chamber” pump can be especially helpful.
- Inflate and Check: Inflate the tire to the recommended pressure and check for leaks. Rotate the wheel to distribute the sealant.
Tips for Seating Tubeless Tires:
- Use a Tire Lever: A tire lever can help you get the last bit of the tire over the rim.
- Apply Soapy Water: Soapy water can help the tire bead slide onto the rim more easily.
- Use a High-Volume Pump: A pump with a boost chamber or a compressor can deliver a large volume of air quickly to seat the bead.
Troubleshooting Common Pumping Problems
Even with the right pump and technique, you might encounter some issues. Here are some common problems and how to solve them.
Problem: Pump Won’t Attach to Valve
- Solution: Make sure the pump head is compatible with your valve type. Check for debris or damage in the pump head or valve.
Problem: Air Leaks When Pumping
- Solution: Ensure the pump head is securely attached to the valve. Check the pump head’s rubber seal for wear or damage. For Presta valves, make sure the locking nut is tightened.
Problem: Tire Won’t Inflate
- Solution: Check for punctures or damage to the tire. Make sure the valve core is not blocked or damaged. For tubeless setups, ensure the tire bead is properly seated on the rim.
Problem: Pressure Gauge is Inaccurate
- Solution: Test the gauge against another pump or gauge. If it’s consistently inaccurate, consider replacing the pump or gauge.
Maintaining Your Pump
To keep your pump working efficiently for years, proper maintenance is essential.
Cleaning
Regularly clean your pump with a damp cloth to remove dirt and grime. Pay special attention to the pump head and hose.
Lubrication
Lubricate the pump’s internal components with a silicone-based lubricant. This will keep the pump working smoothly and prevent wear.
Replacing Parts
Replace worn or damaged parts, such as the pump head seal or hose, as needed. Most pump manufacturers offer replacement parts.
Choosing the Right Tire Pressure
Finding the right tire pressure is crucial for optimal performance and comfort. Factors like rider weight, tire size, and trail conditions all play a role.
Factors Affecting Tire Pressure
- Rider Weight: Heavier riders need higher pressures to prevent pinch flats.
- Tire Size: Wider tires can be run at lower pressures.
- Trail Conditions: Softer, more technical trails require lower pressures for better traction.
- Riding Style: Aggressive riders may prefer higher pressures to avoid rim damage.
Starting Points for Tire Pressure
Here are some general guidelines for tire pressure, but always refer to the recommendations on your tire sidewall and adjust based on your experience.
| Tire Width | Rider Weight (lbs) | Recommended PSI |
|---|---|---|
| 2.2″ | 150-175 | 24-26 |
| 2.2″ | 175-200 | 26-28 |
| 2.2″ | 200+ | 28-30 |
| 2.4″ | 150-175 | 22-24 |
| 2.4″ | 175-200 | 24-26 |
| 2.4″ | 200+ | 26-28 |
Experiment and Fine-Tune
The best way to find the right tire pressure is to experiment and fine-tune based on your experience. Start with the recommended PSI and adjust up or down until you find the sweet spot for your riding style and trail conditions.
Recommended Pumps for Mountain Bike Tires
Here are a few recommended pumps for mountain bike tires, based on different needs and budgets.
Floor Pumps
- Lezyne Classic Floor Drive: Durable, accurate, and easy to use.
- Topeak JoeBlow Sport III: Reliable and affordable with a large pressure gauge.
- Serfas TCPG: Great value with a comfortable handle and stable base.
Portable Pumps
- Crankbrothers Sterling LG: Compact, lightweight, and efficient.
- Lezyne Micro Floor Drive HP: Combines the portability of a mini-pump with the efficiency of a floor pump.
- Topeak RaceRocket HP: Slim and lightweight with a built-in pressure gauge.
Essential Accessories for Tire Maintenance
In addition to a pump, there are a few other accessories that can make tire maintenance easier and more convenient.
Tire Levers
Tire levers are used to remove and install tires on the rim. Choose a durable set made from plastic or composite material to avoid damaging your rims.
Patch Kit
A patch kit is essential for repairing punctures on the trail. Look for a kit with self-adhesive patches for easy application.
Multi-Tool
A multi-tool with various Allen wrenches and screwdrivers can be invaluable for making adjustments to your bike on the trail, including tightening valve cores.
Pressure Gauge
A separate pressure gauge can be useful for verifying the accuracy of your pump’s gauge or for checking tire pressure on the trail.
FAQ About Pumps for Mountain Bike Tires
What PSI should I pump my mountain bike tires to?
The ideal PSI depends on your weight, tire size, and trail conditions. Check the tire sidewall for the recommended range, and start there. Most riders find that 22-30 PSI works well.
Can I use a car tire pump for my mountain bike?
Yes, if your bike has Schrader valves. However, car tire pumps often lack a precise pressure gauge, so it’s harder to get the exact PSI you need. A dedicated bike pump is recommended.
How often should I check my tire pressure?
Check your tire pressure before every ride. Tires can lose air over time, and maintaining the correct pressure is crucial for performance and safety.
What is the difference between Presta and Schrader valves?
Presta valves are narrow with a locking nut, common on higher-end bikes. Schrader valves are wider, like car tires, and have a spring-loaded pin. You need a compatible pump head for each.
What is tubeless sealant, and why do I need it?
Tubeless sealant is a liquid that you put inside tubeless tires. It seals small punctures as you ride, preventing flats. It’s essential for tubeless setups.
How do I know if my tires are tubeless-ready?
Tubeless-ready tires and rims are specifically designed to create an airtight seal. Look for the “tubeless-ready” designation on the tire and rim. You’ll also need tubeless tape and valves.
Why is it so hard to pump up my tires with a hand pump?
Hand pumps are small and require more effort. Make sure the pump head is securely attached, and use short, quick strokes. A mini floor pump can be easier to use.
Conclusion
Choosing the right pump and mastering the pumping technique are essential skills for any mountain biker. By understanding the different types of pumps, valve types, and tire pressure recommendations, you can keep your tires properly inflated for optimal performance and a smooth, enjoyable ride. Remember to experiment with tire pressure to find the sweet spot for your riding style and trail conditions, and don’t forget to maintain your pump for years of reliable service. Now get out there and enjoy the trails!


