
Ultimate Pump for 29er Tires: Ride Easier!
Quick Summary: Getting the right pump for your 29er tires is crucial for comfortable and efficient rides. You’ll need a pump capable of reaching the correct PSI, typically between 30-50 PSI for mountain bikes. Consider floor pumps for home use with a built-in pressure gauge for accuracy, and portable hand pumps or CO2 inflators for on-the-go adjustments during your rides. Using the correct pump ensures optimal tire pressure, improving performance and preventing flats.
Getting your 29er tires pumped up right can sometimes feel like a chore, but it’s super important for a good ride. Ever feel like you’re fighting your bike, or worse, get a flat tire miles from home? That’s often because of incorrect tire pressure. The right pump makes all the difference. With the right tool, you’ll get the perfect tire pressure every time.
In this guide, I’ll walk you through choosing the best pump for your 29er, show you how to use it properly, and share some tips to keep your tires in top shape. Let’s get started and make sure every ride is smooth and enjoyable!
Choosing the Right Pump for Your 29er Tires

Selecting the best pump for your 29er tires depends on your needs. Are you primarily inflating tires at home, or do you need something portable for the trail? Let’s break down the options.
Floor Pumps: The Home Mechanic’s Friend
Floor pumps are your best bet for home use. They offer stability, efficiency, and accuracy. Here’s what to look for:
- Pressure Gauge: A clear, easy-to-read gauge is essential. Look for one that displays both PSI (pounds per square inch) and bar (metric unit) readings.
- High Volume vs. High Pressure: For 29er tires, a high-volume pump is generally better. Mountain bike tires need more air volume at lower pressures (30-50 PSI), whereas road bike tires require high pressure.
- Durable Construction: Steel or aluminum barrels and bases offer better durability than plastic.
- Valve Compatibility: Most floor pumps come with dual-head designs compatible with both Presta and Schrader valves.
Recommendation: The Topeak JoeBlow Sport III is a reliable option with a large gauge and durable build. Another solid choice is the Lezyne Classic Floor Drive, known for its smooth action and accuracy.
Portable Pumps: On-the-Go Inflation
For trailside repairs, a portable pump is a must-have. These pumps are compact and lightweight, fitting easily into a backpack or mounting on your bike frame.
- Size and Weight: Look for a pump that is compact and lightweight. A pump around 9 inches long and under 6 ounces is ideal.
- Inflation Efficiency: Some portable pumps are more efficient than others. Look for models with telescoping designs or larger barrels to move more air per stroke.
- Mounting Options: Many portable pumps come with frame mounts. Ensure the mount is secure and fits your bike frame.
- Presta and Schrader Compatibility: As with floor pumps, ensure compatibility with both valve types.
Recommendation: The Lezyne Micro Floor Drive HP is a great option, combining the efficiency of a floor pump in a compact size. The Blackburn Chamber HV Mini Pump is another excellent choice, known for its high-volume inflation.
CO2 Inflators: Quick and Convenient
CO2 inflators are the fastest way to inflate a tire on the trail. They use compressed carbon dioxide cartridges to quickly fill your tire.
- Ease of Use: CO2 inflators are simple to use. Just screw in a cartridge and attach the inflator head to your valve.
- Speed: They inflate tires in seconds, saving you time and effort.
- Compact Size: CO2 inflators are very small and lightweight, making them easy to carry.
- Cost: CO2 cartridges are single-use items, so factor in the ongoing cost of replacement cartridges.
- Control: Regulating the CO2 flow can be tricky. Some inflators come with control valves to help prevent over-inflation.
Recommendation: The Genuine Innovations Ultraflate CO2 Inflator is a popular choice for its simplicity and reliability. The Lezyne Control Drive CO2 Inflator offers more control over the inflation process.
Pump Comparison Table
| Pump Type | Pros | Cons | Best Use |
|---|---|---|---|
| Floor Pump | Stable, efficient, accurate gauge | Not portable | Home use |
| Portable Pump | Compact, lightweight | Less efficient than floor pumps | Trailside repairs |
| CO2 Inflator | Fast, very compact | Requires cartridges, can be tricky to control | Quick trailside inflation |
Understanding Tire Pressure for 29er Bikes

Tire pressure is crucial for performance, comfort, and preventing flats. The ideal pressure depends on several factors, including:
- Tire Width: Wider tires can run at lower pressures.
- Rider Weight: Heavier riders need higher pressures.
- Terrain: Rougher terrain requires lower pressures for better traction and comfort.
- Riding Style: Aggressive riders may prefer lower pressures for better grip.
- Tubeless vs. Tubed: Tubeless tires can be run at lower pressures without the risk of pinch flats.
As a general guideline, most 29er mountain bike tires perform well between 25-40 PSI. However, it’s best to experiment to find what works best for you. Many tires have a recommended pressure range printed on the sidewall. Start within this range and adjust as needed.
Finding the Sweet Spot
Finding the right tire pressure is a balancing act. Too high, and you’ll have a harsh ride with less traction. Too low, and you risk pinch flats and increased rolling resistance.
Here’s a simple method to find your ideal tire pressure:
- Start with the recommended pressure: Inflate your tires to the middle of the recommended range printed on the tire sidewall.
- Test ride: Go for a ride on your usual trails. Pay attention to how the bike feels.
- Adjust pressure: If the ride feels harsh or you’re bouncing around, lower the pressure by 2-3 PSI. If the tires feel squishy or you’re getting pinch flats, increase the pressure by 2-3 PSI.
- Repeat: Continue adjusting the pressure until you find the sweet spot where the bike feels comfortable, has good traction, and doesn’t bottom out easily.
Step-by-Step Guide to Pumping Your 29er Tires

Now that you’ve chosen the right pump and understand tire pressure, let’s get to the actual pumping process.
Using a Floor Pump
- Prepare the Valve: Remove the valve cap from your tire. For Presta valves, loosen the valve nut.
- Attach the Pump Head: Securely attach the pump head to the valve. Ensure the lever on the pump head is in the open position when attaching, then close it to create a tight seal.
- Inflate the Tire: Begin pumping, using smooth, full strokes. Watch the pressure gauge to monitor the PSI.
- Reach the Desired Pressure: Inflate the tire to your desired pressure.
- Remove the Pump Head: Open the lever on the pump head and carefully remove it from the valve.
- Close the Valve: For Presta valves, tighten the valve nut. Replace the valve cap.
Using a Portable Pump
- Prepare the Valve: Remove the valve cap. For Presta valves, loosen the valve nut.
- Attach the Pump Head: Securely attach the pump head to the valve. Some portable pumps have a lever to create a tight seal.
- Inflate the Tire: Begin pumping. Portable pumps require more strokes than floor pumps, so be patient.
- Check the Pressure: Many portable pumps don’t have a gauge. Use a separate pressure gauge to check the PSI, or rely on feel.
- Reach the Desired Pressure: Inflate the tire to your desired pressure.
- Remove the Pump Head: Carefully remove the pump head from the valve.
- Close the Valve: For Presta valves, tighten the valve nut. Replace the valve cap.
Using a CO2 Inflator
- Prepare the Valve: Remove the valve cap. For Presta valves, loosen the valve nut.
- Attach the Inflator Head: Screw the CO2 cartridge into the inflator head. Then, attach the inflator head to the valve.
- Inflate the Tire: Depress the inflator to release the CO2. Control the flow to avoid over-inflation.
- Check the Pressure: CO2 inflators don’t provide a pressure reading. Check the pressure with a separate gauge or by feel.
- Close the Valve: For Presta valves, tighten the valve nut. Replace the valve cap.
Tips for Maintaining Your 29er Tires

Proper tire maintenance extends the life of your tires and ensures optimal performance. Here are some tips:
- Check Tire Pressure Regularly: Check your tire pressure before each ride.
- Inspect Tires for Damage: Look for cuts, abrasions, or bulges. Replace damaged tires immediately.
- Rotate Tires: If you notice uneven wear, rotate your tires to prolong their life.
- Clean Your Tires: Remove dirt and debris to improve grip and prevent damage.
- Store Your Bike Properly: Store your bike in a cool, dry place away from direct sunlight.
Troubleshooting Common Pumping Problems
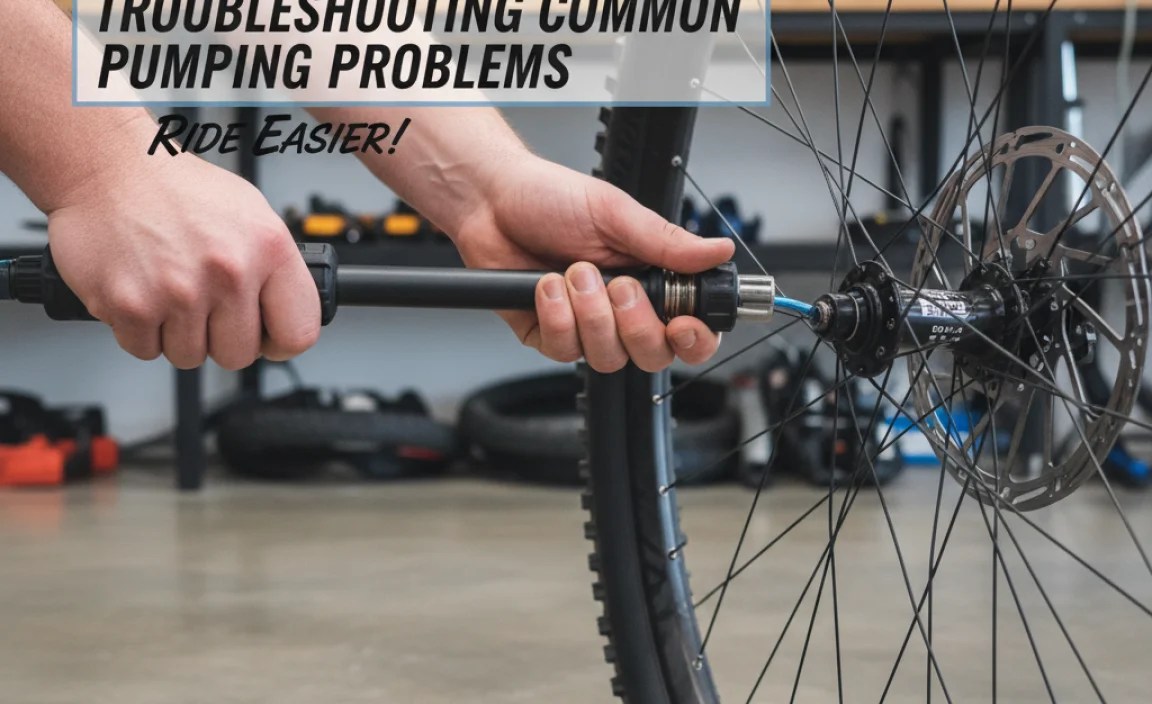
Even with the right pump, you might encounter some common issues. Here’s how to troubleshoot them:
- Pump Not Sealing: Ensure the pump head is securely attached to the valve. Check the rubber gasket inside the pump head for wear or damage.
- Air Leaking from Valve: Make sure the valve nut is tightened (for Presta valves). Clean the valve stem to remove dirt or debris.
- Difficulty Pumping: Check for kinks or obstructions in the pump hose. Lubricate the pump piston if it feels stiff.
- Gauge Not Working: Replace the gauge or the entire pump if the gauge is inaccurate.
FAQ About Pumping 29er Tires
What PSI should I pump my 29er tires to?
The ideal PSI for your 29er tires typically falls between 25-40 PSI. Check the tire sidewall for the manufacturer’s recommended range and adjust based on your weight, riding style, and terrain.
Can I use a road bike pump for my 29er tires?
Yes, you can, but it might not be the most efficient. Road bike pumps are designed for high pressure, while 29er tires need higher volume. A high-volume pump will inflate your tires faster.
How often should I check my tire pressure?
It’s best to check your tire pressure before each ride. Tires can lose pressure over time, affecting performance and increasing the risk of flats.
What’s the difference between Presta and Schrader valves?
Presta valves are narrow and commonly found on higher-end bikes. Schrader valves are wider and similar to those on car tires. Most pumps are compatible with both types.
Can I over-inflate my tires?
Yes, over-inflating your tires can lead to a harsh ride and increase the risk of a blowout. Always stay within the recommended pressure range.
What is a pinch flat?
A pinch flat occurs when the tire is under-inflated, and the tube gets pinched between the rim and the ground upon impact, causing a puncture.
Are tubeless tires better for 29ers?
Tubeless tires offer several advantages, including the ability to run lower pressures without the risk of pinch flats, improved traction, and self-sealing capabilities for small punctures.
Conclusion
Choosing the right pump and maintaining proper tire pressure are essential for enjoying your 29er to the fullest. Whether you opt for a reliable floor pump for home use, a portable pump for trailside repairs, or the quick convenience of a CO2 inflator, understanding the basics of tire inflation will enhance your riding experience. Remember to check your tire pressure regularly, inspect your tires for damage, and adjust the pressure to suit your riding conditions. With these tips, you’ll be rolling smoothly and confidently on every ride.


