Gauge Built Pump Types: Powerful Guide
Quick Summary: Gauges on bike pumps help you inflate your tires to the correct pressure. There are mainly two types: analog gauges, which use a needle to show pressure, and digital gauges, which display the pressure on a screen. Some pumps have the gauge built into the pump body, while others have it located near the chuck (the part that attaches to the tire valve). Knowing the type and location of your gauge ensures accurate inflation for a smoother, safer ride.
Ever struggled to get your bike tires just right? Too soft, and you’re sluggish. Too hard, and the ride is bumpy. The key is accurate inflation, and that’s where a good pump with a reliable gauge comes in. But with so many pumps out there, understanding the different types of gauges and how they’re built into the pump can be confusing. Don’t worry! We’ll break down the common gauge types and their placement on bike pumps. By the end of this guide, you’ll know exactly what to look for to keep your tires perfectly inflated.
Understanding Bike Pump Gauges

A bike pump gauge is your best friend when it comes to achieving the optimal tire pressure. Too much or too little air can impact your ride quality, speed, and even the risk of punctures. Let’s explore the different types of gauges you’ll find on bike pumps.
Analog Gauges
Analog gauges are the traditional type, featuring a needle that moves along a scale to indicate pressure. They’re simple, reliable, and don’t require batteries.
How Analog Gauges Work
Inside an analog gauge, there’s a Bourdon tube, a curved, hollow tube that straightens out slightly as pressure increases. This movement is mechanically linked to the needle, causing it to move across the scale. The scale is typically marked in both PSI (pounds per square inch) and BAR (a metric unit of pressure).
Pros of Analog Gauges:
- No batteries needed
- Generally more affordable
- Easy to read in bright sunlight
Cons of Analog Gauges:
- Can be less precise than digital gauges
- May be harder to read for those with poor eyesight
- More susceptible to damage from drops or impacts
Digital Gauges
Digital gauges offer a modern alternative, displaying the pressure electronically on a screen. They often provide more precise readings and additional features.
How Digital Gauges Work
Digital gauges use a pressure sensor that converts the air pressure into an electrical signal. This signal is then processed and displayed on the screen as a numerical value. They often include features like backlighting, multiple unit options (PSI, BAR, kPa), and memory functions.
Pros of Digital Gauges:
- Highly accurate and precise
- Easy to read in low-light conditions
- Often includes extra features like memory and multiple units
Cons of Digital Gauges:
- Requires batteries
- Can be more expensive than analog gauges
- May be harder to read in direct sunlight (depending on the screen type)
Gauge Placement on Bike Pumps

The location of the gauge on your bike pump also plays a role in how easy it is to use and how accurately you can read the pressure. Here are the common placements:
Base-Mounted Gauges
Base-mounted gauges are located at the base of the pump, often integrated into the footplate. This is a common design for floor pumps.
Pros of Base-Mounted Gauges:
- Stable and easy to read while pumping
- Typically larger and easier to see
- Less likely to be damaged during pumping
Cons of Base-Mounted Gauges:
- Requires you to bend down to read the pressure
- Can be less convenient for quick pressure checks
Handle-Mounted Gauges
Handle-mounted gauges are positioned near the handle of the pump, making them easy to see while pumping. This is less common than base-mounted gauges, but can be found on some floor and mini pumps.
Pros of Handle-Mounted Gauges:
- Easy to read without bending over
- Convenient for monitoring pressure while pumping
Cons of Handle-Mounted Gauges:
- Can be smaller and harder to read than base-mounted gauges
- May be more vulnerable to damage
In-Line Gauges
In-line gauges are located along the hose, close to the chuck (the part that attaches to the tire valve). These are often found on mini pumps and some high-end floor pumps.
Pros of In-Line Gauges:
- Provides a direct pressure reading at the valve
- Can be more accurate, as it minimizes pressure loss in the hose
- Often found on portable pumps
Cons of In-Line Gauges:
- Can be small and harder to read, especially on mini pumps
- May require a separate stand or support to read accurately
- Can be more exposed to damage
Choosing the Right Gauge and Pump Type

Selecting the right gauge and pump type depends on your needs and preferences. Consider these factors:
Accuracy
For critical applications like road cycling or racing, where precise tire pressure is essential, a digital gauge is often the best choice. Independent tests, like those performed by BikeRadar, often highlight the accuracy differences between analog and digital pumps.
Ease of Use
If you prioritize ease of use and readability, a base-mounted analog gauge might be preferable. The larger display and stable position make it easy to monitor pressure while pumping.
Portability
For on-the-go adjustments, a mini pump with an in-line gauge is a practical option. While the gauge may be smaller, it provides a convenient way to check pressure during rides. Look for pumps with secure mounting brackets to attach to your bike frame.
Budget
Analog gauges are generally more affordable than digital gauges. If you’re on a budget, an analog pump can still provide accurate and reliable performance.
Comparing Gauge and Pump Types: A Quick Reference Table
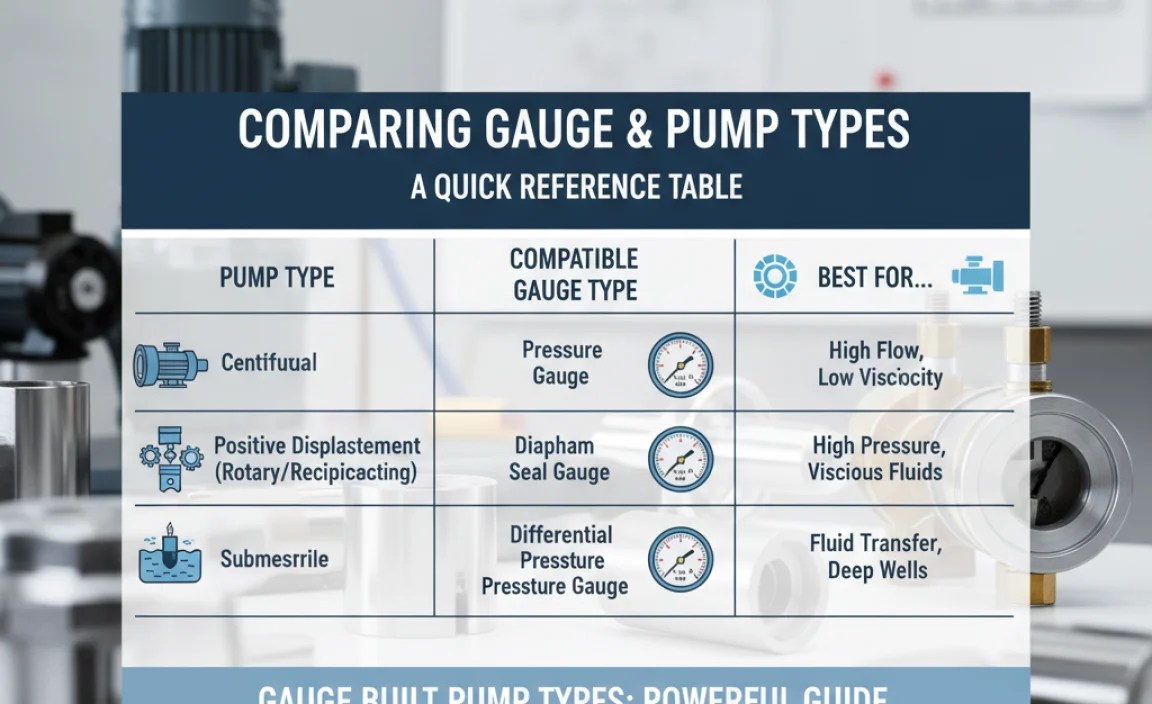
To help you make the right choice, here’s a comparison table summarizing the key features of each gauge and pump type:
| Gauge Type | Placement | Pros | Cons | Best For |
|---|---|---|---|---|
| Analog | Base-Mounted | Affordable, easy to read, no batteries | Less precise, requires bending | General use, budget-conscious riders |
| Digital | Base-Mounted | Highly accurate, easy to read, extra features | More expensive, requires batteries | Road cycling, precise pressure needs |
| Analog | In-Line | Direct pressure reading, portable | Smaller, can be harder to read | On-the-go adjustments, mini pumps |
| Digital | In-Line | Highly accurate, portable | More expensive, requires batteries, smaller | Serious cyclists, portable precision |
Maintaining Your Bike Pump Gauge

To ensure your bike pump gauge remains accurate and reliable, follow these maintenance tips:
- Handle with care: Avoid dropping or subjecting your pump to rough handling, as this can damage the gauge mechanism.
- Store properly: Store your pump in a clean, dry place to prevent corrosion and damage to the gauge.
- Check for leaks: Inspect the hose and connections regularly for leaks, as these can affect the accuracy of the gauge.
- Calibrate if needed: Some digital gauges allow for calibration. Refer to the manufacturer’s instructions for calibration procedures. Analog gauges generally can’t be calibrated at home.
Step-by-Step: Using a Bike Pump with a Gauge
Let’s walk through how to use a bike pump with a gauge to inflate your tires to the correct pressure. This applies to both analog and digital gauges, and different pump types.
Step 1: Know Your Tire Pressure
Find the recommended tire pressure range printed on the sidewall of your tire. It will usually be indicated in PSI (pounds per square inch) and BAR (metric unit).
Step 2: Connect the Pump
Attach the pump chuck securely to your tire valve (Presta or Schrader). Make sure the connection is tight to prevent air leaks.
Step 3: Start Pumping
Begin pumping in a smooth, steady motion. Watch the gauge as the pressure increases.
Step 4: Monitor the Gauge
Keep an eye on the gauge and stop pumping when you reach the desired pressure. If using an analog gauge, get your eyes level with the gauge to avoid parallax error (reading the gauge at an angle, which can distort the reading).
Step 5: Disconnect the Pump
Carefully disconnect the pump chuck from the valve. Some air may escape during disconnection, but this is normal.
Step 6: Check the Pressure
After disconnecting, double-check the tire pressure with a separate gauge if you want to be absolutely sure. This is especially useful if you’re using a mini-pump with a smaller gauge.
Troubleshooting Gauge Issues
Sometimes, you might encounter issues with your bike pump gauge. Here are some common problems and how to address them:
- Gauge not reading: Check the pump connections and make sure the chuck is securely attached to the valve. If using a digital gauge, check the batteries.
- Inaccurate readings: Ensure the gauge is properly calibrated (if applicable). Compare the reading with another gauge to verify accuracy.
- Gauge is stuck: Tap the gauge gently to see if the needle or display frees up. If the problem persists, the gauge may need repair or replacement.
- Air leaks: Check the hose and connections for leaks. Tighten any loose fittings or replace damaged parts.
For more in-depth troubleshooting, consider resources like Park Tool’s repair guides, which offer detailed instructions and diagrams for bike maintenance.
FAQ: Bike Pump Gauges
Here are some frequently asked questions about bike pump gauges:
- Q: What’s the difference between PSI and BAR?
- A: PSI (pounds per square inch) and BAR are both units of pressure. 1 BAR is approximately equal to 14.5 PSI. Most bike pumps display both units.
- Q: How accurate are analog gauges?
- A: Analog gauges are generally accurate within a few PSI. However, they can be less precise than digital gauges, especially at lower pressures.
- Q: Do digital gauges need calibration?
- A: Some digital gauges may require occasional calibration to maintain accuracy. Check the manufacturer’s instructions for calibration procedures.
- Q: Can I replace the gauge on my bike pump?
- A: Yes, in many cases, you can replace the gauge on your bike pump. Contact the pump manufacturer or a local bike shop for replacement parts and instructions.
- Q: What tire pressure should I use?
- A: The recommended tire pressure range is usually printed on the sidewall of your tire. Factors like rider weight, road conditions, and riding style can influence the ideal pressure. As a general guideline, wider tires can be run at lower pressures, while narrower tires require higher pressures.
- Q: Are more expensive pumps more accurate?
- A: Not always, but generally, higher-quality pumps tend to have more accurate and durable gauges. The build quality of the pump and the gauge itself are important factors.
- Q: What is parallax error when reading an analog gauge?
- A: Parallax error is the error in reading an instrument due to the observer’s eye not being directly in line with the indicator and scale. To avoid this, always look straight at the gauge when taking a reading.
Conclusion
Choosing the right bike pump with the right gauge doesn’t have to be a headache. Whether you prefer the simplicity of an analog gauge or the precision of a digital one, understanding the different types and their placement will help you make an informed decision. Remember to consider accuracy, ease of use, portability, and your budget. With the right pump and a little practice, you’ll be able to keep your tires perfectly inflated for a smooth, safe, and enjoyable ride, every time. Now get out there and pump it up!