
How to Use Mini Pump for Mountain Bike Tires: Easy Guide
Quick Summary: Using a mini pump for mountain bike tires is straightforward. First, securely attach the pump head to your tire’s valve (Presta or Schrader). Then, brace the pump against the ground and use your body weight for leverage to efficiently inflate the tire. Check the pressure with a gauge to avoid over or under-inflation. Remember, mini pumps are for topping off or emergency repairs, not for full inflation.
Dealing with a flat tire on the trail can be frustrating, especially when you’re miles from civilization. A mini pump is a mountain biker’s best friend in these situations. While they might not be as efficient as a floor pump, knowing how to properly use a mini pump can get you back on your bike and rolling again. This guide will walk you through the process, step-by-step, so you can confidently inflate your mountain bike tires using a mini pump.
We’ll cover everything from choosing the right pump and identifying your valve type to the best techniques for efficient inflation. Let’s get started and turn those trailside troubles into manageable moments!
Choosing the Right Mini Pump
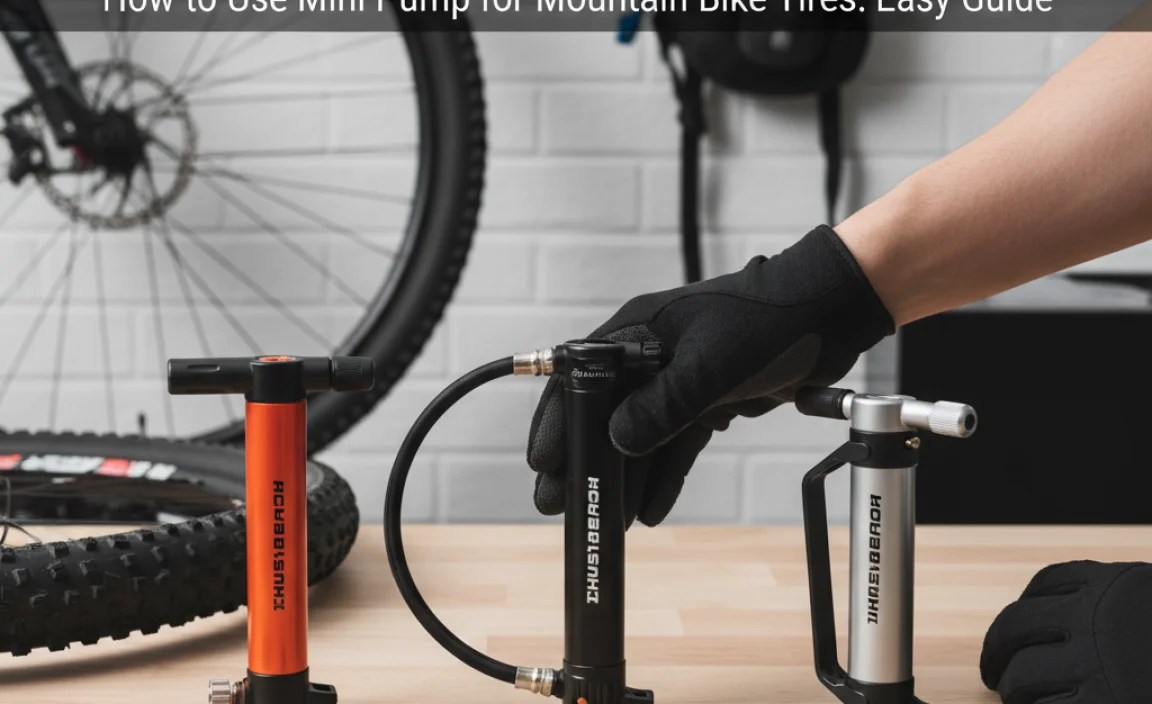
Not all mini pumps are created equal. Consider these factors when selecting a pump for your mountain bike:
- Valve Compatibility: Ensure the pump works with both Presta and Schrader valves. Some pumps have reversible heads, while others automatically detect the valve type.
- Inflation Power: Look for a pump with sufficient volume per stroke (cc/stroke) to inflate mountain bike tires efficiently. A higher volume will get you to your desired PSI faster.
- Size and Weight: Mini pumps are designed to be portable. Choose one that’s compact and lightweight enough to carry comfortably in your pack or mount on your bike frame.
- Durability: Opt for a pump made from high-quality materials like aluminum alloy for long-lasting performance.
- Gauge (Optional): Some mini pumps include a built-in pressure gauge. While not essential, a gauge can help you achieve the correct tire pressure.
Understanding Tire Valves: Presta vs. Schrader

Mountain bikes typically use either Presta or Schrader valves. Knowing the difference is crucial for proper inflation.
- Presta Valves: These have a slender profile with a locking nut at the tip. Before inflating, you must unscrew the nut to allow airflow.
- Schrader Valves: These are wider and similar to those found on car tires. They have a spring-loaded pin in the center.
Most mini pumps are designed to work with both valve types. Some have a dual-head design, while others require you to disassemble and reassemble the head to switch between Presta and Schrader.
Essential Gear for Tire Inflation

Before you head out on the trail, make sure you have these essential items:
- Mini Pump: A reliable mini pump that’s compatible with your tire valves.
- Spare Tube or Tire Repair Kit: In case of a flat tire.
- Tire Levers: To remove the tire from the rim.
- Multi-Tool: A multi-tool with various Allen wrenches and screwdrivers can be helpful for other repairs.
- Pressure Gauge (Optional): To accurately measure tire pressure.
Step-by-Step Guide: How to Use a Mini Pump

Follow these steps to inflate your mountain bike tires using a mini pump:
Step 1: Prepare the Valve
For Presta valves:
- Unscrew the locking nut at the tip of the valve.
- Tap the valve stem briefly to loosen it. You should hear a small hiss of air.
For Schrader valves: No preparation is needed.
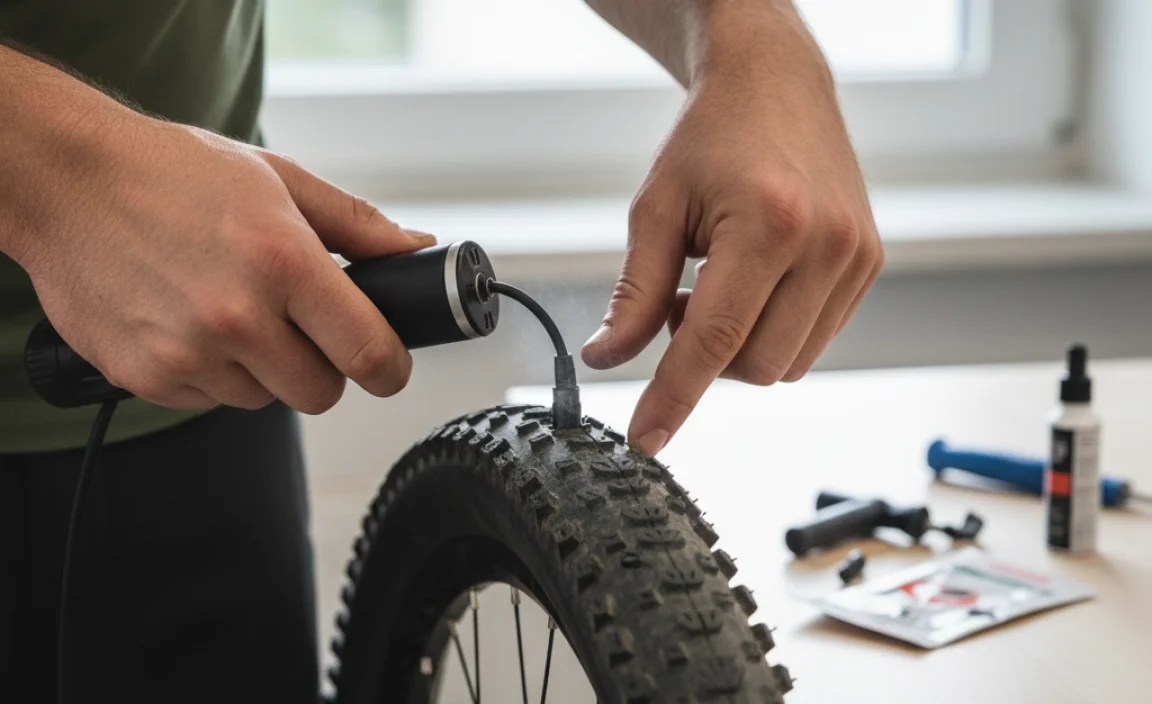
Step 2: Attach the Pump Head
Make sure the pump head is configured for the correct valve type (Presta or Schrader). Most pumps will have markings or instructions indicating which configuration to use.
- Presta Valves: Gently push the pump head onto the valve stem until it’s fully seated. Some pumps have a locking lever that you need to engage to secure the connection.
- Schrader Valves: Push the pump head straight onto the valve until it’s snug.
Step 3: Begin Pumping
This is where technique matters. Here’s how to maximize your pumping efficiency:
- Brace the Tire: Place the tire on the ground and brace it with your legs or feet. This provides stability and allows you to use your body weight for leverage.
- Grip the Pump: Hold the pump handle firmly with both hands.
- Use Your Body Weight: Instead of just using your arm strength, lean into the pump and use your body weight to push the handle down.
- Maintain a Steady Rhythm: Pump in a smooth, consistent motion. Avoid jerky movements, which can damage the valve.
- Check the Connection: Periodically check that the pump head is securely attached to the valve. A loose connection will result in air leakage.
Step 4: Monitor Tire Pressure
If your pump has a built-in gauge, monitor the pressure as you pump. If not, you can use a separate pressure gauge to check the pressure periodically.
Refer to the recommended tire pressure printed on the sidewall of your tire. Mountain bike tires typically range from 25 to 35 PSI, but this can vary depending on your weight, riding style, and terrain.
Step 5: Detach the Pump Head
Once you’ve reached the desired pressure, carefully detach the pump head from the valve.
- Presta Valves: If your pump has a locking lever, disengage it. Then, gently pull the pump head straight off the valve. Screw the locking nut back onto the valve stem.
- Schrader Valves: Pull the pump head straight off the valve.
Step 6: Check for Leaks
Listen for any hissing sounds around the valve stem. If you hear a leak, reattach the pump head and pump a few more strokes. If the leak persists, you may need to replace the tube.
Troubleshooting Common Issues
Here are some common problems you might encounter when using a mini pump and how to fix them:
- Pump Won’t Attach: Make sure the pump head is configured for the correct valve type (Presta or Schrader). Check for any debris or damage in the pump head or valve.
- Air Leaking: Ensure the pump head is securely attached to the valve. If the connection is loose, try repositioning the pump head or using a different pump.
- Difficult to Pump: This could be due to a clogged valve or a damaged pump. Try cleaning the valve or lubricating the pump.
- Can’t Reach Desired Pressure: Mini pumps have limited volume per stroke, so it can take a while to reach higher pressures. Be patient and persistent. If you’re still struggling, consider using a CO2 inflator as an alternative.
Tips for Efficient Pumping
Follow these tips to maximize your pumping efficiency:
- Use Your Body Weight: Lean into the pump and use your body weight to push the handle down. This will save your arms and make the process easier.
- Maintain a Steady Rhythm: Pump in a smooth, consistent motion. Avoid jerky movements, which can waste energy.
- Brace the Tire: Place the tire on the ground and brace it with your legs or feet. This will provide stability and allow you to use more force.
- Keep the Pump Clean: Regularly clean your pump to remove dirt and debris. This will help it function more efficiently.
- Lubricate the Pump: Apply a small amount of lubricant to the pump’s moving parts to keep it working smoothly.
Mini Pump vs. CO2 Inflator: Which is Right for You?
Both mini pumps and CO2 inflators have their pros and cons. Here’s a comparison to help you decide which is right for you:
| Feature | Mini Pump | CO2 Inflator |
|---|---|---|
| Reliability | Very Reliable (Manual) | Reliant on Cartridge |
| Cost | Low (One-Time Purchase) | Ongoing (Cartridge Replacement) |
| Inflation Speed | Slow | Fast |
| Portability | Compact | Compact |
| Environmental Impact | Low | Higher (Cartridge Disposal) |
Mini pumps are a reliable and cost-effective option for inflating tires, but they can be slow. CO2 inflators are faster, but they require you to carry cartridges and can be more expensive in the long run.
Maintaining Your Mini Pump
Proper maintenance will extend the life of your mini pump. Here’s how to care for your pump:
- Clean Regularly: Wipe down your pump with a damp cloth after each use to remove dirt and debris.
- Lubricate Moving Parts: Apply a small amount of lubricant to the pump’s moving parts to keep it working smoothly.
- Store Properly: Store your pump in a dry place to prevent rust and corrosion.
- Inspect Regularly: Check your pump for any signs of damage, such as cracks or leaks. Replace any worn or damaged parts.
Recommended Tire Pressure for Mountain Bikes
Finding the right tire pressure is essential for optimal performance and comfort. Here’s a general guide to recommended tire pressures for mountain bikes:
| Riding Condition | Tire Pressure (PSI) |
|---|---|
| Hardpack Trails | 25-30 |
| Loose or Sandy Trails | 22-28 |
| Muddy Trails | 20-25 |
These are just general guidelines. Experiment with different tire pressures to find what works best for you and your riding style. Also consider consulting resources like REI’s expert advice on mountain bike tires.
FAQ: Mini Pump for Mountain Bike Tires
Here are some frequently asked questions about using mini pumps for mountain bike tires:
Can I use a mini pump to fully inflate my mountain bike tires?
While possible, it’s not ideal. Mini pumps are best for topping off tires or emergency repairs. It takes a lot of effort to reach higher pressures with a mini pump. A floor pump is more efficient for full inflation.
How do I know if my mini pump is compatible with my tire valves?
Check the pump’s packaging or instructions. Most mini pumps are designed to work with both Presta and Schrader valves. Some have a dual-head design, while others require you to switch the internal components.
What’s the ideal tire pressure for my mountain bike?
The ideal tire pressure depends on your weight, riding style, and terrain. Refer to the recommended tire pressure printed on the sidewall of your tire. Start with that pressure and adjust as needed. Most mountain bike tires range from 25 to 35 PSI.
How do I prevent air from leaking when I detach the pump head?
Make sure the pump head is securely attached to the valve before you start pumping. When detaching, pull the pump head straight off the valve. Avoid twisting or bending the valve stem.
Can I use a mini pump on tubeless tires?
Yes, you can use a mini pump on tubeless tires. However, it may be more difficult to seat the tire bead without a high-volume pump or CO2 inflator. Carry tire plugs for quick repairs on the trail.
My mini pump is getting hard to pump. What should I do?
Clean and lubricate your pump. Dirt and debris can cause the pump to become stiff. Apply a small amount of lubricant to the pump’s moving parts to keep it working smoothly.
How often should I maintain my mini pump?
Maintain your mini pump regularly, especially if you use it frequently or ride in muddy conditions. Clean and lubricate the pump every few months, or as needed.
Conclusion
Mastering the use of a mini pump is a crucial skill for any mountain biker. While it might take a bit of practice to perfect your technique, the ability to inflate your tires on the trail can save you from long walks home. Remember to choose the right pump, understand your tire valves, and follow the steps outlined in this guide. With a little patience and persistence, you’ll be back on your bike and enjoying the ride in no time. So get out there, explore the trails, and ride with confidence, knowing you’re prepared for whatever the trail throws your way!


