
How to Repair Mini Pump Air Hose: Easy Fix!
Quick Summary: Repairing a mini pump air hose usually involves identifying the damage, cutting away the damaged section, and reconnecting the hose using a hose clamp or a new connector. Sometimes, you might need to replace the entire hose. This guide shows you how to fix common mini pump hose issues so you can get back to riding quickly.
Ever been ready to ride, only to find your mini pump’s air hose is cracked or leaking? It’s a common problem, and it can be super frustrating. A damaged hose means your tire won’t inflate, leaving you stranded. But don’t worry! Fixing it is often easier than you think. This guide walks you through simple steps to repair or replace your mini pump air hose, saving you time and money. We’ll cover everything from identifying the problem to getting your pump working like new again.
Understanding Mini Pump Air Hose Problems
Before diving into the repair process, it’s important to understand what can go wrong with your mini pump’s air hose. Common issues include cracks, leaks, and general wear and tear. Knowing the cause helps you choose the right fix.
Common Types of Damage
- Cracks: These often appear near the pump head or where the hose bends frequently.
- Leaks: You might hear air hissing or feel air escaping when pumping.
- Wear and Tear: Over time, the hose material can degrade, becoming brittle and prone to damage.
- Connector Issues: The connection between the hose and the pump or valve head can loosen or break.
Why Hoses Fail
Several factors contribute to hose failure:
- UV Exposure: Sunlight can degrade the rubber or plastic over time.
- Flexing: Repeated bending and flexing weaken the material.
- Temperature Changes: Extreme temperatures can cause the hose to become brittle or soft.
- Improper Storage: Storing the pump in a way that kinks or stresses the hose can lead to damage.
Tools and Materials You’ll Need

Gathering the right tools and materials makes the repair process smoother and more efficient. Here’s a list of what you’ll likely need:
- Sharp Knife or Hose Cutter: For cutting the hose cleanly.
- Hose Clamps: To secure the hose to the pump and valve head.
- Replacement Hose (if needed): Purchase a compatible hose from a bike shop or online retailer.
- Screwdrivers: Depending on your pump model, you may need these to disassemble parts.
- Pliers: For tightening hose clamps or removing stubborn connectors.
- Heat Gun or Hair Dryer (optional): To soften the hose for easier installation.
- Soapy Water: To help identify leaks after the repair.
Step-by-Step Guide to Repairing Your Mini Pump Air Hose

Follow these steps to repair your mini pump air hose. Each step includes clear instructions and helpful tips to ensure a successful repair.
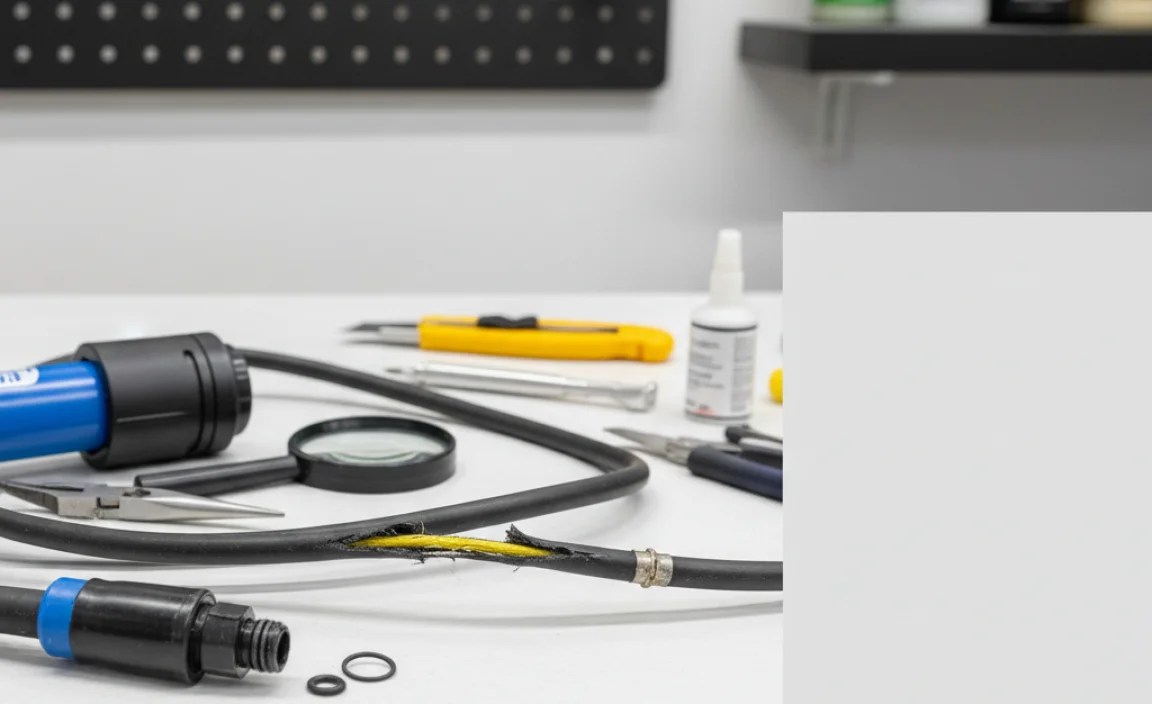
Step 1: Inspect the Hose
Carefully examine the entire length of the hose to identify any cracks, leaks, or damaged areas. Pay close attention to the areas near the pump head and valve connector, as these are common points of failure.
- Visual Inspection: Look for visible cracks, cuts, or worn spots.
- Leak Test: Inflate a tire and listen for hissing sounds, or apply soapy water to the hose to identify leaks. Bubbles will form where air is escaping.
Step 2: Cut Away the Damaged Section
If you find a small crack or leak, you can often repair the hose by cutting away the damaged section. Use a sharp knife or hose cutter to make a clean cut on either side of the damaged area.
- Mark the Cut Points: Use a marker to indicate where you’ll cut the hose. Make sure to remove all visible damage.
- Make the Cuts: Use a sharp knife or hose cutter to make clean, even cuts. A clean cut ensures a good seal when you reconnect the hose.
Step 3: Reconnect the Hose
After cutting away the damaged section, you’ll need to reconnect the hose to the pump and valve head. This can be done using hose clamps or a new connector, depending on your pump’s design.
Using Hose Clamps
- Slide the Clamp On: Slide a hose clamp onto each end of the cut hose.
- Attach the Hose: Insert the hose ends onto the pump and valve head connectors.
- Tighten the Clamps: Use a screwdriver to tighten the hose clamps, securing the hose to the connectors. Make sure the clamps are tight enough to prevent leaks, but not so tight that they damage the hose.
Using a New Connector
- Remove the Old Connector: If your pump uses a connector, remove the old one by unscrewing or unclipping it.
- Attach the New Connector: Attach the new connector to the hose, following the manufacturer’s instructions.
- Secure the Connection: Make sure the connector is securely attached to both the hose and the pump or valve head.
Step 4: Test the Repair
After reconnecting the hose, test the repair to ensure it’s airtight. Inflate a tire and check for leaks around the repaired area.
- Inflate a Tire: Connect the pump to a tire and inflate it to the recommended pressure.
- Check for Leaks: Listen for hissing sounds or apply soapy water to the repaired area to check for leaks. If you find any leaks, tighten the hose clamps or recheck the connector.
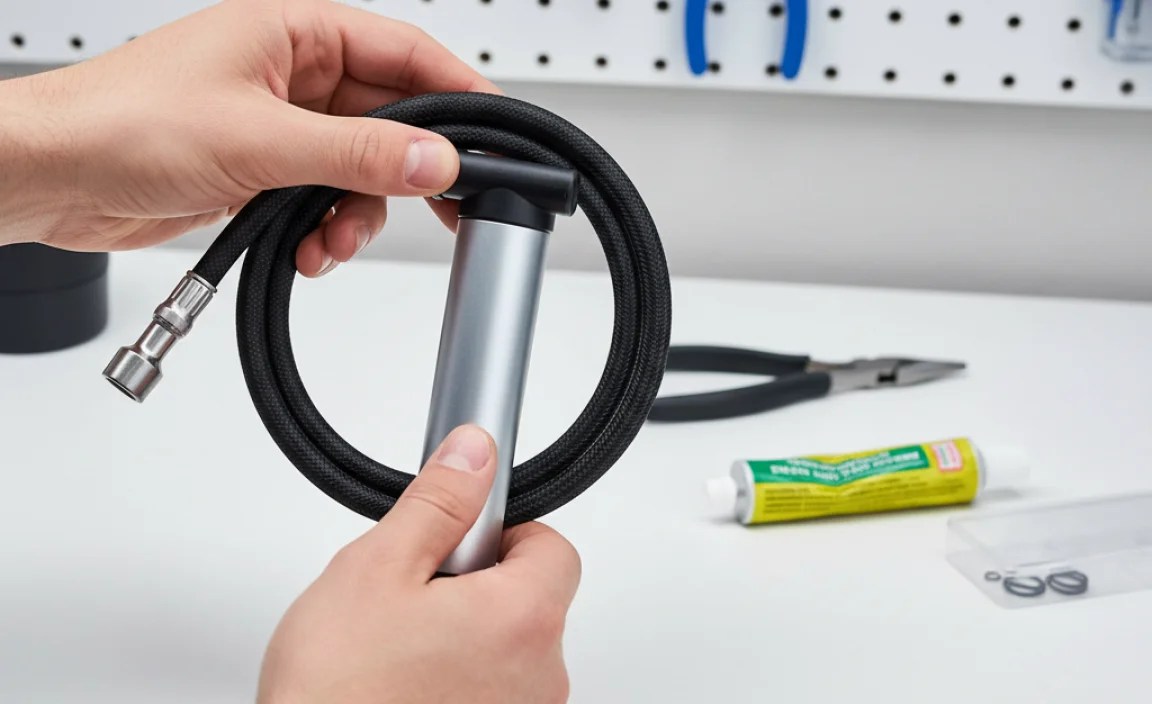
Step 5: Replace the Hose (If Necessary)
If the hose is too damaged or brittle to repair, you may need to replace it entirely. Purchase a replacement hose that is compatible with your mini pump model.
- Remove the Old Hose: Disconnect the old hose from the pump and valve head. You may need to use a screwdriver or pliers to remove any clamps or connectors.
- Install the New Hose: Attach the new hose to the pump and valve head, using hose clamps or connectors as needed.
- Test the New Hose: Inflate a tire and check for leaks to ensure the new hose is properly installed.
Tips for Preventing Future Hose Damage
Preventing damage is always better than repairing it. Here are some tips to keep your mini pump air hose in good condition:
- Store Your Pump Properly: Avoid storing the pump in direct sunlight or extreme temperatures. Store it in a cool, dry place where the hose won’t be kinked or stressed.
- Avoid Over-Flexing the Hose: Be careful not to bend or twist the hose excessively when using the pump.
- Regularly Inspect the Hose: Check the hose for signs of wear and tear on a regular basis. Catching problems early can prevent them from becoming major issues.
- Use a Protective Sleeve: Consider using a protective sleeve or cover to shield the hose from UV exposure and physical damage.
Choosing the Right Replacement Hose

If you need to replace your mini pump air hose, it’s important to choose the right one. Here are some factors to consider:
- Compatibility: Make sure the replacement hose is compatible with your mini pump model. Check the manufacturer’s specifications or consult with a bike shop professional.
- Material: Look for a hose made from durable, high-quality materials that can withstand repeated use and exposure to the elements.
- Length: Choose a hose that is the right length for your pump. A hose that is too short may be difficult to use, while a hose that is too long can be cumbersome.
- Flexibility: Select a hose that is flexible enough to bend easily without kinking or cracking.
Troubleshooting Common Issues
Even with careful repair, you might encounter some issues. Here’s how to troubleshoot common problems:
Leak Still Present After Repair
If you still detect a leak after repairing the hose, double-check the following:
- Clamp Tightness: Ensure the hose clamps are tight enough to create a secure seal.
- Hose Alignment: Make sure the hose is properly aligned with the connectors.
- Connector Condition: Check the connectors for damage or wear. Replace them if necessary.
Pump Not Inflating Tire
If your pump isn’t inflating the tire, consider these potential causes:
- Valve Compatibility: Ensure the pump head is properly connected to the tire valve (Presta or Schrader).
- Valve Core: Check if the valve core is loose or damaged. Tighten or replace it as needed.
- Pump Internals: The internal components of the pump may be worn or damaged. Consider servicing or replacing the pump.
Hose Kinking
A kinked hose can restrict airflow and make it difficult to inflate a tire. Try these solutions:
- Straighten the Hose: Gently straighten the hose to remove the kink.
- Use a Heat Gun: If the kink is stubborn, use a heat gun or hair dryer to warm the hose and make it more pliable.
- Replace the Hose: If the hose is severely kinked or damaged, it may be best to replace it.
Maintaining Your Mini Pump for Longevity
Regular maintenance can significantly extend the life of your mini pump. Here are some maintenance tips:
- Clean the Pump: Periodically clean the pump with a damp cloth to remove dirt and debris.
- Lubricate Moving Parts: Apply a small amount of lubricant to the moving parts of the pump to keep them working smoothly.
- Check Seals and O-Rings: Inspect the seals and O-rings for wear and tear. Replace them as needed to maintain a good seal.
- Store Properly: Store the pump in a cool, dry place to protect it from the elements.
Table: Mini Pump Hose Repair Comparison
| Repair Method | Tools Required | Skill Level | Cost | Pros | Cons |
|---|---|---|---|---|---|
| Cutting and Reconnecting with Clamps | Knife/Cutter, Hose Clamps, Screwdriver | Beginner | Low | Simple, Cost-Effective | May Not Work for Severe Damage, Can Shorten Hose |
| Replacing Connector | Screwdrivers, Pliers, New Connector | Intermediate | Medium | Restores Original Functionality, More Durable | Requires Specific Connector, Can Be Tricky to Install |
| Replacing Entire Hose | Screwdrivers, Pliers, New Hose | Intermediate | Medium | Like New Performance, Addresses Widespread Damage | Requires Correct Hose Size, More Involved |
Table: Common Mini Pump Problems and Solutions
| Problem | Possible Cause | Solution |
|---|---|---|
| Hose Leak | Cracks, Wear, Loose Clamps | Inspect Hose, Tighten Clamps, Replace Hose |
| Pump Not Inflating | Valve Mismatch, Loose Valve Core, Internal Damage | Check Valve Type, Tighten/Replace Valve Core, Service/Replace Pump |
| Hose Kinking | Improper Storage, Excessive Bending | Straighten Hose, Use Heat Gun, Replace Hose |
| Connector Failure | Wear, Damage | Replace Connector |
FAQ: Repairing Mini Pump Air Hoses
Here are some frequently asked questions about repairing mini pump air hoses:
Can I use any type of hose as a replacement?
No, you should use a hose specifically designed for mini pumps. These hoses are made to withstand the pressure and are compatible with the pump’s connectors.
How do I know what size replacement hose to buy?
Check your pump’s manual or the manufacturer’s website for the correct hose size. You can also measure the old hose before replacing it.
What if I can’t find a replacement hose for my specific pump model?
Contact the pump manufacturer or a local bike shop. They may be able to recommend a compatible hose or offer alternative solutions.
Is it worth repairing a mini pump, or should I just buy a new one?
Repairing a mini pump is often cost-effective, especially if the damage is minor. However, if the pump is old or heavily damaged, it may be more economical to buy a new one.
How often should I inspect my mini pump’s air hose?
You should inspect your mini pump’s air hose at least once a month, or more frequently if you use the pump regularly. Regular inspections can help you catch problems early and prevent them from becoming major issues.
Can I use super glue to repair a cracked hose?
While super glue might offer a temporary fix, it’s not a reliable long-term solution. Super glue can become brittle and fail under pressure. It’s best to use hose clamps or replace the hose for a more durable repair.
What’s the best way to store my mini pump to prevent hose damage?
Store your mini pump in a cool, dry place away from direct sunlight. Avoid kinking or bending the hose when storing the pump. Consider using a pump bag or case to protect it from physical damage.
Conclusion
Repairing a mini pump air hose is a straightforward task that can save you money and keep you on the road. By following these steps, you can address common hose problems and keep your pump in good working condition. Whether you’re cutting away a damaged section, reconnecting the hose with clamps, or replacing the entire hose, the key is to take your time and ensure a secure, airtight connection. Regular maintenance and proper storage will also help prevent future damage, ensuring your mini pump is always ready when you need it. So, grab your tools, follow these tips, and get back to enjoying your ride with confidence!


