
How to Connect Hose to Hand Pump: Easy Guide
Quick Summary:
Connecting a hose to a hand pump is simple! First, identify the correct adapter for your hose and pump. Attach the adapter to the pump’s outlet if needed. Then, securely push or screw the hose onto the adapter or directly onto the pump. Ensure a tight fit to avoid leaks, and you’re ready to pump!
Ever struggled to get your hose properly attached to your hand pump? It’s a common frustration, whether you’re inflating a bike tire, watering your garden, or draining a small pool. A loose connection can lead to wasted effort and water spraying everywhere, turning a simple task into a messy ordeal.
But don’t worry! Connecting a hose to a hand pump is easier than you think. This guide will walk you through each step, ensuring a secure, leak-free connection every time. We’ll cover everything from identifying the right fittings to troubleshooting common issues, so you can get the job done quickly and efficiently. Let’s get started!
Understanding Hand Pumps and Hoses

Before diving into the connection process, let’s cover the basics of hand pumps and hoses. Knowing the different types and their features will help you choose the right equipment and ensure a proper fit.
Types of Hand Pumps
Hand pumps come in various designs, each suited for specific tasks. Here are some common types:
- Bicycle Pumps: Designed for inflating bike tires, these pumps often feature a Presta or Schrader valve adapter.
- Water Pumps: Used for transferring water from one place to another, such as draining a pool or watering plants.
- Air Pumps: General-purpose pumps for inflating inflatable items like balls, mattresses, and toys.
Types of Hoses
Hoses also vary in material, diameter, and purpose. Here are some common types:
- Garden Hoses: Typically made of rubber or vinyl, these hoses are used for watering plants and general outdoor tasks.
- PVC Hoses: Lightweight and flexible, PVC hoses are often used for drainage and irrigation.
- Braided Hoses: Reinforced with braided fibers, these hoses are more durable and can withstand higher pressure.
Common Hose and Pump Connections
Understanding the different types of connections is crucial for ensuring a secure fit. Here are some common connections you might encounter:
- Threaded Connections: These connections use screw threads to create a tight seal. Common thread types include National Pipe Thread (NPT) and garden hose thread (GHT).
- Slip-On Connections: These connections rely on friction to hold the hose in place. They often require a hose clamp for added security.
- Quick-Connect Fittings: These fittings allow you to quickly attach and detach hoses without tools.
Tools and Materials You’ll Need

Before you start, gather the necessary tools and materials to make the process smoother and more efficient. Here’s a list of what you might need:
- Hand Pump: The type of pump you need depends on the task at hand. Make sure it’s in good working condition.
- Hose: Choose a hose that’s appropriate for the pump and the intended use.
- Hose Clamps: These are used to secure the hose to the pump or adapter, preventing leaks.
- Adapters: Depending on the pump and hose, you might need an adapter to connect them.
- Thread Seal Tape (Teflon Tape): This tape is used to create a watertight seal on threaded connections.
- Wrench or Pliers: These tools can be helpful for tightening hose clamps or threaded connections.
- Screwdriver: Needed for tightening screw-type hose clamps.
- Utility Knife or Scissors: For cutting the hose if necessary.
Step-by-Step Guide to Connecting a Hose to a Hand Pump

Now, let’s get into the step-by-step process of connecting a hose to a hand pump. Follow these instructions carefully to ensure a secure and leak-free connection.
Step 1: Identify the Correct Connection Type
The first step is to identify the type of connection on both the hand pump and the hose. Look for threads, slip-on fittings, or quick-connect mechanisms. This will determine the type of adapter or fitting you need.
Step 2: Gather Necessary Adapters and Fittings
If the hose and pump don’t have compatible connections, you’ll need to gather the appropriate adapters. Here are some common scenarios:
- Threaded to Threaded: Use a threaded adapter that matches the thread size and type of both the pump and the hose.
- Threaded to Slip-On: Use an adapter with a threaded end for the pump and a slip-on end for the hose.
- Slip-On to Slip-On: Use a barbed adapter to connect two slip-on hoses.
Step 3: Prepare the Hose and Pump
Before connecting the hose, make sure both the hose and pump are clean and free of debris. This will help ensure a tight seal. If the hose end is damaged or frayed, use a utility knife or scissors to cut it cleanly.
Step 4: Apply Thread Seal Tape (If Applicable)
If you’re using a threaded connection, apply thread seal tape to the male threads. Wrap the tape around the threads in the direction they tighten, overlapping each layer slightly. This will help create a watertight seal and prevent leaks. Typically, two to three wraps are sufficient. Make sure the tape is applied smoothly and evenly.
Step 5: Connect the Adapter to the Pump (If Applicable)
If you’re using an adapter, connect it to the pump first. Tighten the adapter securely, using a wrench or pliers if necessary. Be careful not to overtighten, as this could damage the threads. The adapter should fit snugly and without any wobble.
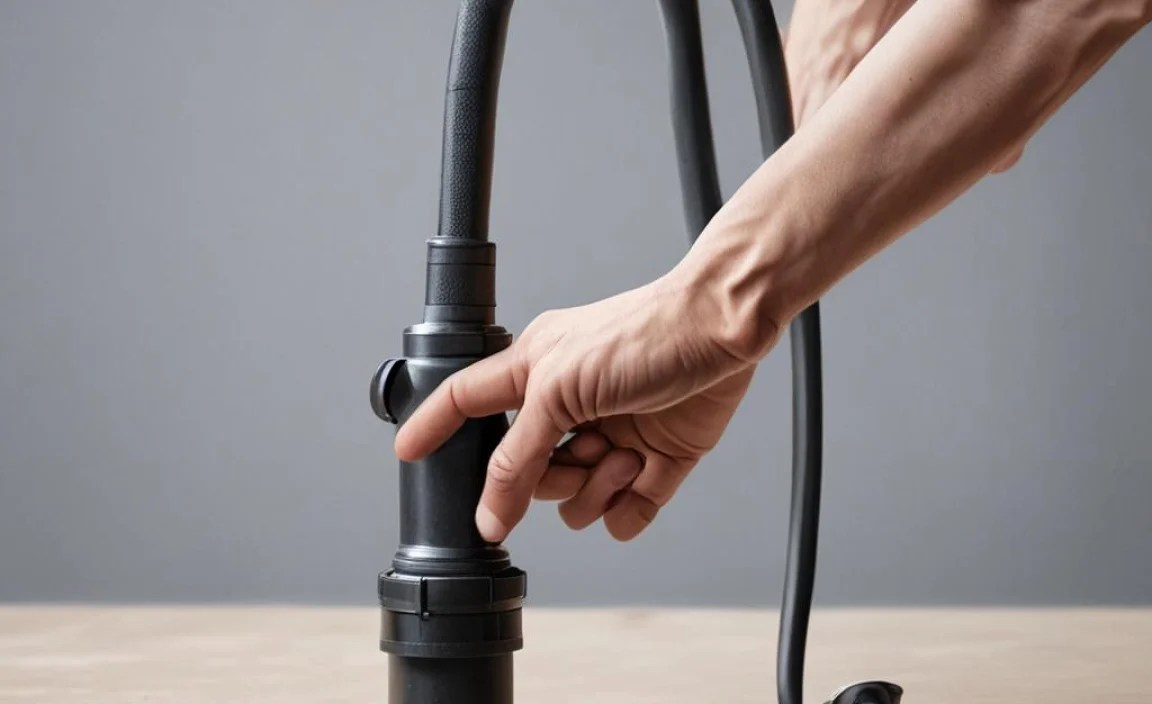
Step 6: Attach the Hose to the Pump or Adapter
Now it’s time to attach the hose to the pump or adapter. Here’s how to do it for different connection types:
- Threaded Connection: Screw the hose onto the pump or adapter, turning it clockwise until it’s snug. Avoid overtightening.
- Slip-On Connection: Slide the hose onto the pump or adapter until it’s fully seated. Then, secure it with a hose clamp.
- Quick-Connect Fitting: Follow the manufacturer’s instructions to attach the hose to the fitting. This usually involves pressing a button or lever.
Step 7: Secure the Connection with a Hose Clamp (If Applicable)
If you’re using a slip-on connection, secure the hose with a hose clamp. Slide the clamp over the hose and position it near the end of the pump or adapter. Then, tighten the clamp using a screwdriver or wrench. The clamp should be snug but not so tight that it damages the hose.
Step 8: Test the Connection for Leaks
After connecting the hose, test the connection for leaks. Turn on the pump and check for any water or air escaping from the connection point. If you see a leak, tighten the connection or add more thread seal tape. Repeat this process until the connection is leak-free.
Troubleshooting Common Issues
Even with careful preparation, you might encounter some issues when connecting a hose to a hand pump. Here are some common problems and how to solve them:
Leaking Connections
A leaking connection is one of the most common problems. Here’s how to troubleshoot it:
- Check the Thread Seal Tape: Make sure the thread seal tape is applied correctly and that there are enough layers.
- Tighten the Connection: Use a wrench or pliers to tighten the connection, but be careful not to overtighten.
- Inspect the Hose Clamp: Ensure the hose clamp is properly positioned and tightened.
- Replace Damaged Parts: If the hose or adapter is damaged, replace it with a new one.
Incorrect Fittings
Using the wrong fittings can also cause problems. Here’s what to do:
- Verify Compatibility: Make sure the fittings are compatible with both the pump and the hose.
- Check Thread Sizes: Ensure the thread sizes match.
- Use Adapters: If necessary, use adapters to connect different types of fittings.
Hose Slipping Off
If the hose keeps slipping off the pump or adapter, try these solutions:
- Use a Hose Clamp: Always use a hose clamp to secure slip-on connections.
- Rough Up the Surface: Lightly roughen the surface of the pump or adapter with sandpaper to provide better grip.
- Use a Barbed Fitting: A barbed fitting can provide a more secure connection for slip-on hoses.
Tips for Maintaining Your Hand Pump and Hoses

Proper maintenance can extend the life of your hand pump and hoses and ensure they perform optimally. Here are some tips:
- Store Hoses Properly: Avoid leaving hoses in direct sunlight or extreme temperatures. Store them coiled or on a hose reel to prevent kinks and damage.
- Clean Regularly: Clean your hand pump and hoses regularly to remove dirt and debris. Use a mild detergent and water.
- Inspect for Damage: Periodically inspect your hand pump and hoses for signs of damage, such as cracks, leaks, or frayed ends. Replace damaged parts promptly.
- Lubricate Moving Parts: Lubricate the moving parts of your hand pump with a silicone-based lubricant to keep them working smoothly.
- Drain Hoses After Use: After each use, drain the water from your hoses to prevent freezing and damage.
Choosing the Right Equipment
Selecting the right hand pump and hose for your needs is essential for efficient and reliable performance. Here are some factors to consider:
Hand Pump Considerations
- Type of Pump: Choose a pump that’s designed for the specific task you need to perform, whether it’s inflating tires, transferring water, or inflating inflatable items.
- Pressure Rating: Consider the pressure rating of the pump. Higher pressure ratings are needed for tasks like inflating high-pressure tires.
- Build Quality: Look for a pump made from durable materials that can withstand regular use.
- Ergonomics: Choose a pump with a comfortable handle and easy-to-use controls.
Hose Considerations
- Material: Choose a hose made from a material that’s appropriate for the intended use. Rubber hoses are durable and flexible, while PVC hoses are lightweight and cost-effective.
- Diameter: Consider the diameter of the hose. Larger diameter hoses can deliver more water or air, but they can also be heavier and more difficult to handle.
- Length: Choose a hose that’s long enough for your needs, but not so long that it becomes unwieldy.
- Pressure Rating: Ensure the hose has a pressure rating that’s higher than the maximum pressure of your pump.
Recommended Products
Here are a few recommended products to consider when selecting a hand pump and hose:
| Product | Description | Pros | Cons |
|---|---|---|---|
| Lezyne Floor Drive Pump | High-pressure floor pump for inflating bike tires. | Accurate gauge, durable construction, easy to use. | More expensive than other pumps. |
| Flexzilla Garden Hose | Lightweight and flexible garden hose. | Doesn’t kink, easy to handle, durable. | Can be more expensive than standard hoses. |
| Superior Pump 91250 Utility Pump | Submersible utility pump for draining water. | Powerful, reliable, easy to set up. | Requires a power source. |
Safety Precautions
When working with hand pumps and hoses, it’s important to take safety precautions to prevent injuries and damage. Here are some tips:
- Wear Safety Glasses: Protect your eyes from flying debris or water spray.
- Avoid Overtightening: Overtightening connections can damage threads and cause leaks.
- Use Proper Tools: Use the right tools for the job to avoid damaging the pump or hose.
- Disconnect When Not in Use: Disconnect the hose from the pump when not in use to prevent pressure buildup.
- Store Safely: Store your hand pump and hoses in a safe place where they won’t be damaged or cause a tripping hazard.
FAQ: Connecting Hose to Hand Pump
What if my hose is too loose on the pump?
If your hose is too loose, use a hose clamp to secure it. Make sure the clamp is properly tightened to prevent leaks. You might also need to use an adapter to ensure a snug fit.
Can I use any type of hose with my hand pump?
No, you should use a hose that is compatible with your hand pump’s connection type and pressure rating. Using the wrong hose can lead to leaks or damage to the pump.
How do I know what size adapter I need?
Check the thread size or diameter of both the hose and the pump. You can usually find this information in the product specifications or by measuring the connections with a caliper. Then, choose an adapter that matches those sizes.
What is thread seal tape, and why should I use it?
Thread seal tape (also known as Teflon tape) is a thin, non-adhesive tape used to create a watertight seal on threaded connections. It helps prevent leaks by filling in any gaps between the threads.
How often should I replace my hose?
Replace your hose if you notice any signs of damage, such as cracks, leaks, or frayed ends. Even if there’s no visible damage, it’s a good idea to replace your hose every few years to ensure optimal performance.
What should I do if my pump is making a strange noise?
If your pump is making a strange noise, it could be a sign of a problem with the internal components. Check for any loose parts or debris, and lubricate the moving parts. If the noise persists, consider taking the pump to a repair shop or replacing it.
How can I prevent my hose from kinking?
To prevent your hose from kinking, store it properly by coiling it neatly or using a hose reel. Avoid leaving it in direct sunlight or extreme temperatures, which can make it more susceptible to kinking.
Conclusion
Connecting a hose to a hand pump doesn’t have to be a daunting task. By understanding the different types of pumps, hoses, and connections, you can easily achieve a secure, leak-free fit. Remember to gather the necessary tools and materials, follow the step-by-step instructions, and troubleshoot any common issues that may arise.
With the right equipment and a little bit of know-how, you can efficiently tackle any pumping task, whether it’s inflating your bike tires, watering your garden, or draining a pool. So, go ahead and put these tips into practice, and enjoy the convenience and reliability of a properly connected hose and hand pump. Happy pumping!


