
How to Check Pressure in Water Hand Pump: Easy Guide
Quick Summary:
To check the pressure in your water hand pump, you’ll need a pressure gauge that fits the pump’s outlet. First, attach the gauge securely. Then, operate the pump a few strokes to build pressure. Read the pressure on the gauge. If it’s not reaching your desired level, there might be leaks or issues with the pump’s internal components.
Ever wondered if your water hand pump is working as efficiently as it should? It’s a common concern, especially when you rely on it for clean water. Knowing how to check the pressure can save you from unexpected issues and ensure you always have a reliable water source. Don’t worry; it’s simpler than you might think!
In this guide, I’ll walk you through the easy steps to check the pressure in your water hand pump. You’ll learn what tools you need, how to use them, and what to do if the pressure isn’t right. By the end, you’ll have the confidence to maintain your pump like a pro. Let’s dive in!
Understanding Water Hand Pumps

Water hand pumps are simple, reliable devices for moving water. They’re often used in rural areas, off-grid setups, or as a backup water source. Understanding how they work helps you maintain them effectively.
How Water Hand Pumps Work
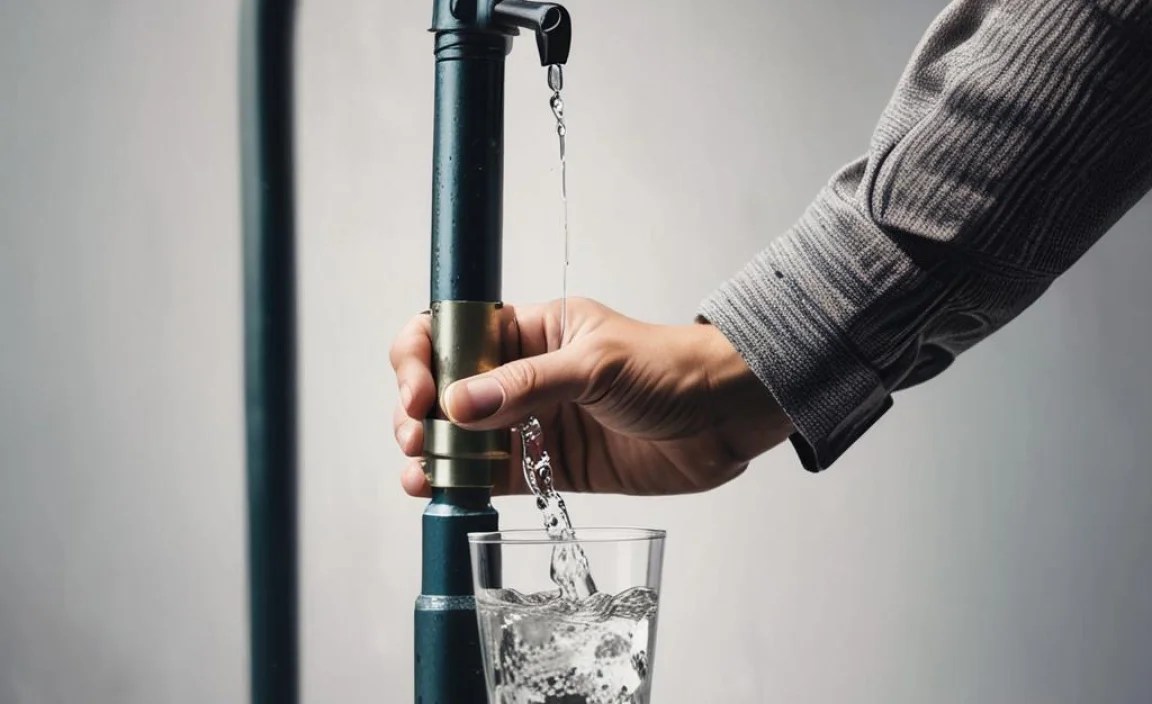
A water hand pump typically consists of a handle, a piston, a cylinder, and valves. When you move the handle, the piston moves up and down inside the cylinder. This creates a vacuum that draws water into the cylinder through an inlet valve. As the piston moves in the opposite direction, it forces the water out through an outlet valve and up to the spout.
Why Checking Pressure is Important
Checking the pressure in your water hand pump is crucial for several reasons:
- Ensuring Efficiency: Proper pressure ensures the pump delivers water efficiently.
- Detecting Issues Early: Low pressure can indicate leaks or worn parts.
- Preventing Damage: Consistent low pressure can strain the pump, leading to more significant problems.
- Maintaining Water Quality: Proper pressure helps maintain a consistent flow, reducing the risk of stagnant water.
Tools and Materials You’ll Need

Before you start, gather the necessary tools and materials. This will make the process smoother and more efficient.
- Pressure Gauge: A gauge that fits your pump’s outlet is essential. Look for one with a range suitable for your pump’s expected pressure.
- Wrench: You might need a wrench to tighten or loosen fittings.
- Teflon Tape: This helps create a watertight seal on threaded connections.
- Bucket: To catch any water that might spill.
- Clean Cloths: For wiping up spills and cleaning parts.
- Safety Glasses: To protect your eyes from splashes or debris.
- Gloves: To keep your hands clean and protected.
Step-by-Step Guide to Checking Water Hand Pump Pressure

Follow these steps to check the pressure in your water hand pump accurately.
Step 1: Prepare the Pump
First, make sure the pump is clean and accessible. Remove any debris or obstructions around the pump area.
- Clean the Area: Wipe down the pump and surrounding area with a clean cloth.
- Inspect for Damage: Look for any visible signs of damage, such as cracks or leaks.
- Gather Your Tools: Have all your tools and materials within easy reach.
Step 2: Attach the Pressure Gauge
Next, attach the pressure gauge to the pump’s outlet. This is where the water exits the pump.
- Locate the Outlet: Identify the outlet where water flows out of the pump.
- Apply Teflon Tape: Wrap Teflon tape around the threads of the outlet to ensure a tight seal.
- Connect the Gauge: Screw the pressure gauge onto the outlet. Tighten it with a wrench, but be careful not to overtighten.
Step 3: Operate the Pump
Now, operate the pump to build pressure. Use a normal pumping motion.
- Pump the Handle: Start pumping the handle as you normally would.
- Observe the Gauge: Watch the pressure gauge as you pump. The needle should rise as pressure builds.
- Continue Pumping: Keep pumping until the pressure stabilizes or reaches its maximum.
Step 4: Read the Pressure Gauge
Once the pressure stabilizes, read the gauge to determine the current pressure.
- Note the Reading: Record the pressure reading on the gauge.
- Compare to Specifications: Check the pump’s specifications to see if the pressure is within the expected range.
- Identify Issues: If the pressure is too low, there might be a problem with the pump or its components.
Step 5: Troubleshoot Low Pressure
If the pressure is lower than expected, troubleshoot the potential causes.
- Check for Leaks: Inspect all connections and fittings for leaks. Tighten any loose connections.
- Inspect Valves: The pump’s valves might be worn or damaged. Replace them if necessary.
- Check the Piston: The piston seal might be worn, causing pressure loss. Replace the seal or the entire piston.
- Clear Blockages: Check for any blockages in the pump or the water source.
Step 6: Re-test the Pressure
After troubleshooting, re-test the pressure to ensure the issue is resolved.
- Repeat Steps 3 and 4: Operate the pump and read the pressure gauge again.
- Verify Improvement: Check if the pressure has improved and is now within the expected range.
- Make Further Adjustments: If the pressure is still low, continue troubleshooting until the problem is resolved.
Maintaining Your Water Hand Pump

Regular maintenance is key to keeping your water hand pump in good working condition. Here are some tips:
- Regular Cleaning: Clean the pump regularly to remove dirt and debris.
- Lubrication: Lubricate moving parts to reduce friction and wear.
- Inspect Regularly: Inspect the pump for leaks, cracks, or worn parts.
- Replace Parts: Replace worn or damaged parts promptly to prevent further damage.
- Protect from Freezing: In cold climates, protect the pump from freezing to prevent damage.
Common Issues and Solutions
Here are some common issues you might encounter with your water hand pump and how to solve them.
| Issue | Possible Cause | Solution |
|---|---|---|
| Low Pressure | Leaks, worn valves, worn piston seal | Check and tighten connections, replace valves or piston seal |
| No Water Flow | Blockage, airlock, faulty valves | Clear blockages, prime the pump, replace valves |
| Hard to Pump | Lack of lubrication, worn parts | Lubricate moving parts, replace worn parts |
| Water Leaks | Loose connections, damaged seals | Tighten connections, replace seals |
Tips for Extending the Life of Your Pump
Follow these tips to extend the life of your water hand pump:
- Use a Filter: Install a filter to prevent debris from entering the pump.
- Avoid Overloading: Do not pump too quickly or forcefully, as this can strain the pump.
- Store Properly: If the pump is not in use, store it in a dry, protected location.
- Follow Manufacturer’s Instructions: Always follow the manufacturer’s instructions for maintenance and operation.
Choosing the Right Pressure Gauge
Selecting the right pressure gauge is essential for accurate readings. Here’s what to consider:
- Pressure Range: Choose a gauge with a range that matches your pump’s expected pressure.
- Accuracy: Look for a gauge with good accuracy to ensure reliable readings.
- Connection Type: Make sure the gauge has the correct connection type to fit your pump’s outlet.
- Durability: Choose a gauge that is durable and resistant to corrosion.
Safety Precautions
Always follow these safety precautions when working with water hand pumps:
- Wear Safety Glasses: Protect your eyes from splashes or debris.
- Wear Gloves: Keep your hands clean and protected.
- Disconnect Power: If the pump is electric, disconnect the power before performing maintenance.
- Follow Instructions: Always follow the manufacturer’s instructions for safety and operation.
Troubleshooting Guide
Here’s a quick troubleshooting guide to help you diagnose and fix common issues.
| Problem | Possible Causes | Solutions |
|---|---|---|
| Pump won’t prime | Airlock, leaky foot valve | Prime the pump, check/replace foot valve |
| Weak water stream | Low water level, clogged screen | Check water source, clean the screen |
| Pump handle hard to move | Lack of lubrication, corrosion | Lubricate the pump, clean corroded parts |
| Water has a funny taste | Contamination in well/pump | Sanitize well/pump, test water quality |
Resources and Further Reading
Here are some helpful resources for more information on water hand pumps:
FAQ Section
What is the ideal pressure for a water hand pump?
The ideal pressure for a water hand pump varies depending on the model and its intended use. Generally, a pressure of 30-50 PSI (pounds per square inch) is considered normal for household use. Check your pump’s manual for specific recommendations.
How often should I check the pressure in my water hand pump?
It’s a good idea to check the pressure in your water hand pump every 3-6 months. Regular checks help you catch potential issues early and keep your pump running efficiently.
Can I use any pressure gauge for my water hand pump?
No, you should use a pressure gauge that is specifically designed for water systems. These gauges are calibrated to accurately measure water pressure and are typically made of materials that won’t corrode in contact with water.
What does it mean if my water hand pump has low pressure?
Low pressure in a water hand pump can indicate several issues, such as leaks in the system, a worn-out pump piston, or a clogged water inlet. Troubleshoot by checking for leaks and inspecting the pump’s internal components.
How do I fix a leak in my water hand pump system?
To fix a leak, first, identify the source of the leak. Then, tighten any loose connections. If the leak persists, you may need to replace worn-out seals or fittings. Teflon tape can also help create a watertight seal on threaded connections.
What are the signs that my water hand pump needs maintenance?
Signs that your water hand pump needs maintenance include low water pressure, reduced water flow, unusual noises during operation, and visible leaks. Regular inspection and prompt repairs can prevent more significant problems.
Is it safe to drink water from a hand pump that hasn’t been used in a while?
It’s generally not recommended to drink water from a hand pump that hasn’t been used in a while without testing it first. Stagnant water can harbor bacteria and other contaminants. Flush the pump thoroughly and consider testing the water quality before drinking it.
Conclusion
Checking the pressure in your water hand pump is a straightforward task that can save you time and money in the long run. By following these steps, you can ensure your pump is working efficiently and catch any potential issues early. Remember, regular maintenance and prompt repairs are key to keeping your water hand pump in good working condition for years to come. Happy pumping!


