
How to Calibrate Hand Pump Pressure Gauge: Easy Guide
Calibrating your hand pump pressure gauge is easy! Use a reliable reference gauge to check your pump’s accuracy. Adjust the pump’s internal settings until it matches the reference. This ensures your tires are always inflated to the correct pressure, improving safety and performance.
Have you ever wondered if your bike tires are truly inflated to the pressure you see on your hand pump? It’s a common concern! An inaccurate gauge can lead to under-inflated tires, causing sluggish rides and pinch flats, or over-inflated tires, increasing the risk of blowouts. Don’t worry, you can easily calibrate your hand pump at home. This guide will walk you through the process, step-by-step. Soon, you’ll have the confidence that your tires are always perfectly inflated. Let’s get started and ensure every ride is smooth and safe!
Why Calibrating Your Hand Pump Matters

A pressure gauge on your hand pump is a handy tool, but it’s not always accurate right out of the box. Over time, it can drift due to wear and tear, temperature changes, or simply being bumped around. Here’s why taking the time to calibrate it is crucial:
- Safety: Correct tire pressure ensures optimal braking and handling, reducing the risk of accidents.
- Performance: Properly inflated tires roll faster and more efficiently, making your rides more enjoyable.
- Tire Longevity: Maintaining the recommended pressure prevents premature wear and extends the life of your tires.
- Pinch Flat Prevention: Accurate pressure reduces the chance of pinch flats, saving you from roadside repairs.
Tools You’ll Need

Before you start, gather these essential tools:
- Your Hand Pump: The pump you want to calibrate.
- Reference Gauge: A reliable, high-quality pressure gauge. Digital gauges are often more accurate than analog ones. Some good options include those from Topeak or SKS.
- Adjustable Wrench or Pliers: Depending on your pump’s design, you might need these to access the calibration mechanism.
- Screwdrivers: Both Phillips head and flathead screwdrivers may be needed, depending on the pump.
- Rag or Cloth: To protect surfaces and wipe away any dirt.
Step-by-Step Guide to Calibrating Your Hand Pump
Follow these steps to ensure your hand pump’s gauge is accurate:
Step 1: Find a Reliable Reference Gauge
The most important tool for calibration is a reliable reference gauge. This will be your standard for comparison. Digital gauges are generally more accurate and easier to read than analog gauges. Make sure your reference gauge is in good working condition and has a known accuracy.
Step 2: Prepare Your Hand Pump
Inspect your hand pump for any obvious damage or leaks. Clean the area around the gauge to ensure you can clearly see the readings. If your pump has a digital display, make sure the batteries are fresh.
Step 3: Connect Both Gauges
Connect both your hand pump and the reference gauge to the same tire or test fixture. Many high-end pumps have adapters or dual heads that allow simultaneous connection. If not, you can inflate the tire with one, quickly disconnect, and immediately connect the other to minimize pressure loss.
Step 4: Inflate to a Mid-Range Pressure
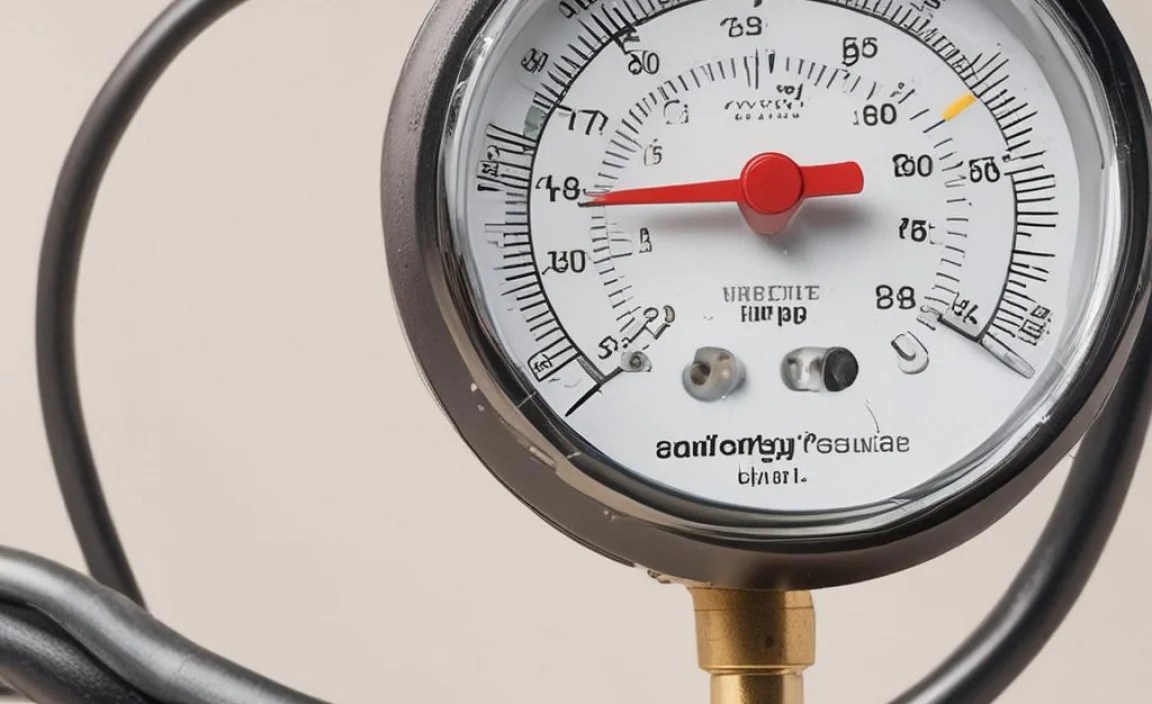
Using your hand pump, inflate the tire to a pressure in the middle of the gauge’s range. For example, if your gauge reads up to 160 PSI, inflate to around 80 PSI. This provides a good baseline for comparison. Inflate slowly and steadily to get an accurate reading.
Step 5: Compare the Readings
Carefully compare the readings on your hand pump’s gauge and the reference gauge. Note the difference. This difference is the amount your pump’s gauge is off. For example, if your hand pump reads 85 PSI and the reference gauge reads 80 PSI, your pump is reading 5 PSI high.
Step 6: Locate the Calibration Mechanism
The location of the calibration mechanism varies depending on the pump model. It is often a small screw or dial located on the back or side of the gauge. Some pumps may require you to remove the gauge from the pump body to access the calibration mechanism. Consult your pump’s manual if you’re unsure where to find it.
Step 7: Adjust the Gauge
Using a small screwdriver or wrench, carefully adjust the calibration mechanism. The goal is to make the reading on your hand pump’s gauge match the reading on the reference gauge. Make small adjustments and re-compare the readings until they match as closely as possible. Here’s a breakdown:
- If your pump reads too high: Adjust the mechanism to lower the reading.
- If your pump reads too low: Adjust the mechanism to increase the reading.
Step 8: Re-test at Different Pressures
After making an adjustment, re-test the gauges at different pressure levels (low, medium, and high) to ensure accuracy across the range. This helps to identify any non-linear errors in your pump’s gauge. Make further adjustments as needed to achieve consistent accuracy.
Step 9: Secure the Calibration Mechanism
Once you’re satisfied with the accuracy, carefully secure the calibration mechanism. Some pumps have a locking screw or nut to prevent accidental adjustments. Make sure everything is tightened properly to maintain the calibration.
Common Calibration Issues and How to Solve Them

Even with careful calibration, you might encounter some common issues. Here’s how to troubleshoot them:
| Issue | Possible Cause | Solution |
|---|---|---|
| Gauge is consistently off by the same amount | Calibration mechanism is not properly adjusted. | Carefully readjust the calibration mechanism, making small changes and retesting until the readings match. |
| Gauge is accurate at low pressures but inaccurate at high pressures (or vice versa) | Non-linear error in the gauge. | Adjust the calibration at the pressure range you use most frequently. Some gauges cannot be perfectly calibrated across the entire range. |
| Gauge fluctuates or is unstable | Loose connections, worn seals, or a damaged gauge. | Check all connections and tighten them. Replace any worn seals. If the gauge is damaged, consider replacing the entire pump or gauge. |
| Cannot find the calibration mechanism | The pump may not have an adjustable gauge, or the mechanism may be hidden. | Consult the pump’s manual or contact the manufacturer for assistance. If there’s no adjustment, consider using an external gauge. |
| Reference gauge and pump gauge still differ after calibration | Your reference gauge might also be inaccurate. | Check your reference gauge against another reliable gauge or have it professionally calibrated. |
Maintaining Your Calibrated Hand Pump
Once your hand pump is calibrated, proper maintenance will help keep it accurate for longer. Here are some tips:
- Store your pump properly: Keep it in a clean, dry place away from extreme temperatures.
- Avoid dropping the pump: Impacts can damage the gauge and throw off the calibration.
- Check the gauge periodically: Re-calibrate your pump every few months, or more often if you use it frequently.
- Replace worn parts: Seals, hoses, and gauge components can wear out over time, affecting accuracy.
Choosing the Right Hand Pump
If you’re in the market for a new hand pump, consider these factors to ensure you get one that’s accurate and reliable:
- Gauge Quality: Look for pumps with high-quality gauges that are known for accuracy. Digital gauges are often a good choice.
- Calibration Features: Some pumps have built-in calibration mechanisms, making it easier to fine-tune the accuracy.
- Build Quality: A well-built pump will be more durable and less likely to develop leaks or other issues that affect accuracy.
- Reviews: Read reviews from other cyclists to get an idea of the pump’s real-world performance and accuracy.
Understanding Pressure Units: PSI vs. BAR
Bike pumps and gauges often display pressure in both PSI (pounds per square inch) and BAR (a metric unit of pressure). It’s important to understand these units and how they relate to each other:
- PSI (Pounds per Square Inch): This is the most common unit for measuring tire pressure in the United States.
- BAR: This is a metric unit of pressure commonly used in Europe and other parts of the world.
Here’s the conversion:
- 1 BAR = 14.5038 PSI
- 1 PSI = 0.0689 BAR
Many gauges display both units, allowing you to easily switch between them. Knowing the conversion can be helpful if you’re using a gauge that only displays one unit or if you’re following recommendations in a different unit.
Digital vs. Analog Gauges: Which is Better?
When it comes to accuracy, digital gauges generally have the edge. Here’s a comparison:
| Feature | Digital Gauge | Analog Gauge |
|---|---|---|
| Accuracy | Generally more accurate, often within +/- 1 PSI. | Accuracy can vary, typically +/- 2-3 PSI or more. |
| Readability | Easy-to-read digital display. | Can be harder to read, especially in low light or for those with vision issues. |
| Features | Often includes features like backlight, multiple units (PSI, BAR, kPa), and memory. | Simpler design with fewer features. |
| Durability | Can be more susceptible to damage from impacts and moisture. | Generally more rugged and durable. |
| Cost | Typically more expensive. | Typically less expensive. |
Ultimately, the best choice depends on your needs and budget. If accuracy is your top priority, a digital gauge is the way to go. If you prefer a more rugged and affordable option, an analog gauge can still be a good choice, especially if you calibrate it regularly.
Advanced Calibration Techniques
For those seeking even greater accuracy, here are some advanced techniques:
- Multiple Reference Gauges: Use two or more reference gauges and compare their readings. If they agree, you can be more confident in their accuracy.
- Professional Calibration: Consider having your reference gauge professionally calibrated by a metrology lab. This will provide a traceable standard of accuracy.
- Temperature Compensation: Temperature can affect pressure readings. If you’re calibrating in a different temperature than you typically ride in, you may need to compensate for the difference.
External Links
- Park Tool – Tire Pressure Recommendations
- Bicycle Tutor – Tire Pressure
- Sheldon Brown – Tire Pressure
FAQ: Calibrating Hand Pump Pressure Gauge
Why is my bike pump showing the wrong pressure?
Your bike pump may show the wrong pressure due to gauge drift, wear and tear, temperature changes, or manufacturing defects. Regular calibration can correct these inaccuracies.
How often should I calibrate my bike pump?
Calibrate your bike pump every few months, or more often if you use it frequently or notice inconsistent readings. This ensures accurate tire pressure for safe and efficient rides.
What is a reference gauge?
A reference gauge is a highly accurate pressure measuring device used to check and calibrate other gauges. Digital reference gauges are preferred for their precision.
Can I calibrate a digital bike pump gauge?
Yes, many digital bike pumps have calibration features. Follow the manufacturer’s instructions to adjust the gauge and ensure accurate pressure readings.
What tools do I need to calibrate my bike pump?
You’ll need your hand pump, a reliable reference gauge, adjustable wrench or pliers, and screwdrivers. These tools help you access and adjust the calibration mechanism.
How do I know if my reference gauge is accurate?
Check your reference gauge against another reliable gauge or have it professionally calibrated by a metrology lab to ensure its accuracy.
What if I can’t find the calibration mechanism on my pump?
Consult your pump’s manual or contact the manufacturer for assistance. If there’s no adjustment, consider using an external gauge to verify pressure.
Conclusion
Calibrating your hand pump’s pressure gauge is a simple yet crucial task for any cyclist. By following these steps, you can ensure your tires are always inflated to the correct pressure, improving your safety, performance, and tire longevity. Don’t let an inaccurate gauge compromise your rides. Take the time to calibrate your pump, and enjoy the peace of mind that comes with knowing your tires are perfectly inflated every time. Happy riding!


