How to Identify a Leaking Bike Valve: Easy Check!
Quick Summary: Finding a leaky bike valve is simple! First, listen for hissing. Then, wet the valve with soapy water and watch for bubbles. Check the valve core is tight with a valve core tool. Examine the valve stem for damage. Replace the valve core or tube if needed. Regular checks prevent flat tires and keep you rolling smoothly!
Is your bike tire losing air faster than you can pump it? A leaky valve could be the culprit. It’s a common problem that can turn a fun ride into a frustrating walk. Don’t worry, you don’t need to be a bike mechanic to fix it. This guide will show you easy ways to spot a leaking valve. We’ll cover simple tests, tools you might need, and quick fixes to get you back on the road. Let’s get started and keep those tires inflated!
Why Bike Valves Leak

Bike valves are simple, but several things can cause them to leak. Knowing the common causes helps you find and fix the problem faster. Here are the main reasons why your bike valve might be leaking:
- Loose Valve Core: The valve core is a small, removable part inside the valve stem. If it’s not tightened properly, air can escape.
- Damaged Valve Core: Over time, the valve core can wear out or get damaged. Dirt, corrosion, or bending can prevent it from sealing correctly.
- Valve Stem Damage: The valve stem itself can get damaged from impacts or improper inflation. Cracks or bends in the stem can cause leaks.
- Rim Issues: Sometimes, the problem isn’t the valve itself, but the rim around it. A damaged or corroded rim can prevent the valve from sealing properly.
- Old Tube: Over time, the inner tube can degrade, leading to leaks around the valve stem.
Understanding these common causes is the first step in diagnosing and fixing a leaky bike valve. Now, let’s look at how to identify a leak.
How to Identify a Leaking Bike Valve
Finding a leak early can save you from a flat tire on the road. Here are several methods to check your bike valve for leaks. Each method is simple and can be done at home with basic tools.
Method 1: The Listening Test
The easiest way to start is by simply listening. Bring your ear close to the valve and listen for a hissing sound. Even a faint hiss indicates air escaping. This method works best in a quiet environment where you can clearly hear any leaks.
Method 2: The Soapy Water Test
This is a reliable way to find even small leaks. Here’s how to do it:
- Mix Soap and Water: In a small container, mix a few drops of dish soap with water.
- Apply to Valve: Use a small brush or your finger to apply the soapy water to the valve stem and the area where it meets the rim.
- Watch for Bubbles: Look closely for bubbles forming. Even tiny bubbles indicate a leak.
The soapy water test is effective because the soap reduces the surface tension of the water, making it easier to spot small air leaks.
Method 3: The Submersion Test
If you suspect a leak but can’t find it with soapy water, try submerging the inflated tire in water. This method is a bit more involved but can reveal hard-to-find leaks.
- Inflate the Tire: Make sure the tire is properly inflated.
- Submerge in Water: Submerge the tire, section by section, in a tub or bucket of water.
- Look for Bubbles: Watch for bubbles coming from the valve area. Mark the spot where you see bubbles.
This test is useful for finding leaks in both the valve and the tire itself. Just be sure to dry the tire thoroughly after the test.
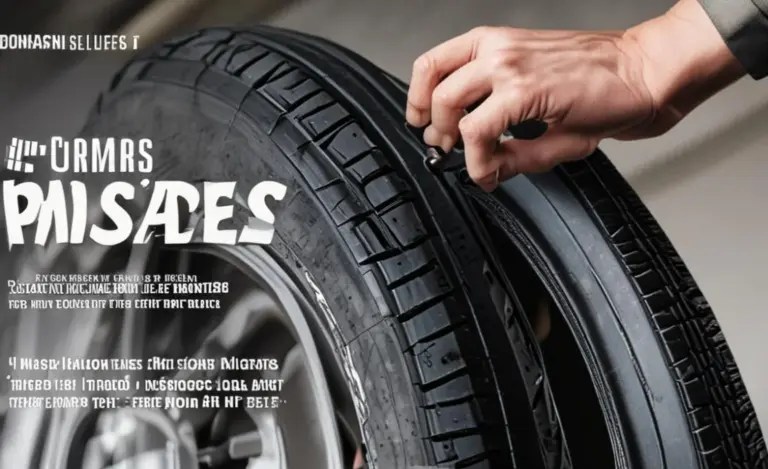
Method 4: Checking the Valve Core
The valve core is a common culprit for leaks. Here’s how to check and tighten it:
- Remove the Valve Cap: Unscrew the valve cap from the valve stem.
- Use a Valve Core Tool: Insert a valve core tool into the valve.
- Tighten the Core: Gently tighten the valve core. Be careful not to overtighten, as this can damage it.
A loose valve core is a frequent cause of leaks, so this simple check can often solve the problem.
Method 5: Inspecting the Valve Stem
The valve stem can sometimes get damaged, leading to leaks. Here’s what to look for:
- Cracks or Bends: Check the valve stem for any visible cracks or bends.
- Damage at the Base: Examine the base of the valve stem where it meets the inner tube for any signs of damage or separation.
If you find any damage to the valve stem, it’s a sign that you may need to replace the inner tube.
Tools You’ll Need

Having the right tools makes the job easier and prevents damage to your bike. Here’s a list of essential tools for identifying and fixing leaky bike valves:
- Valve Core Tool: This small tool is used to tighten or remove the valve core. It’s a must-have for any cyclist.
- Soap and Water: A simple mix of dish soap and water is perfect for finding small leaks.
- Small Brush: Use a small brush to apply soapy water to the valve area. An old toothbrush works well.
- Bucket or Tub: For the submersion test, you’ll need a bucket or tub large enough to submerge the tire.
- Bike Pump: Keep your bike pump handy to inflate the tire after testing and repairs.
- Wrench or Pliers: Needed to unscrew stubborn valve caps or to get a better grip on the valve core tool if needed.
- Spare Inner Tube: If the valve stem is damaged or the inner tube is old, you’ll need a spare inner tube for replacement.
With these tools, you’ll be well-equipped to handle most bike valve issues. Now, let’s discuss the different types of bike valves.
Different Types of Bike Valves

Bike valves come in three main types: Presta, Schrader, and Dunlop. Each has its own design and features. Knowing the differences helps you choose the right pump and tools.
Presta Valves
Presta valves are commonly found on road bikes and high-performance bikes. They are narrower than Schrader valves and have a locking nut at the tip.
- Pros: Lightweight, maintain higher pressure, and easy to inflate.
- Cons: More delicate, require an adapter for some pumps, and can be bent or broken more easily than Schrader valves.
Schrader Valves
Schrader valves are similar to those found on car tires. They are wider and more robust than Presta valves.
- Pros: Durable, compatible with most pumps, and easy to inflate.
- Cons: Heavier than Presta valves and not suitable for very high-pressure tires.
Dunlop Valves
Dunlop valves are less common and mostly found on older or European bikes. They are similar to Presta valves but without the locking nut.
- Pros: Simple design, easy to maintain, and can be inflated with a standard pump.
- Cons: Not suitable for high-pressure tires and can be difficult to find replacement parts.
Here’s a table summarizing the key differences:
| Valve Type | Common Use | Pros | Cons |
|---|---|---|---|
| Presta | Road bikes, high-performance bikes | Lightweight, high pressure | Delicate, requires adapter for some pumps |
| Schrader | Mountain bikes, hybrid bikes | Durable, compatible with most pumps | Heavier, not for very high pressure |
| Dunlop | Older bikes, European bikes | Simple design, easy to maintain | Not for high pressure, hard to find parts |
Choosing the right valve type depends on your bike, riding style, and personal preference. Now, let’s look at how to fix a leaking valve.
How to Fix a Leaking Bike Valve

Once you’ve identified a leak, you can take steps to fix it. Here are some common solutions for different types of valve leaks:
Tightening the Valve Core
A loose valve core is a common cause of leaks. Use a valve core tool to tighten it. Turn the tool clockwise until the core is snug, but don’t overtighten it.
Replacing the Valve Core
If tightening the valve core doesn’t stop the leak, the core may be damaged. Replacing it is a simple fix. Use the valve core tool to remove the old core and install a new one.
Replacing the Inner Tube
If the valve stem is damaged or the inner tube is old, you’ll need to replace the entire inner tube. Here’s a quick overview:
- Remove the Wheel: Take the wheel off the bike.
- Deflate the Tire: Completely deflate the tire.
- Remove the Tire: Use tire levers to carefully remove one side of the tire from the rim.
- Remove the Tube: Pull out the old inner tube.
- Install the New Tube: Insert the new inner tube, making sure the valve stem is properly aligned with the hole in the rim.
- Reinstall the Tire: Carefully put the tire back on the rim, using tire levers if needed.
- Inflate the Tire: Inflate the tire to the recommended pressure.
Replacing the inner tube is a straightforward process that can solve many valve-related issues. For a more detailed guide, check out resources like the Park Tool website.
Using Valve Extenders
Valve extenders are used to extend the length of Presta valves, especially on deep-section rims. If you have valve extenders, make sure they are properly installed and tightened. Leaks can occur if the extender is loose or not sealed correctly.
Preventing Future Leaks
Preventing leaks is better than fixing them. Here are some tips to keep your bike valves in good condition and avoid future problems:
- Regularly Check Tire Pressure: Maintaining proper tire pressure reduces stress on the valve and tube.
- Use Valve Caps: Valve caps protect the valve core from dirt and damage.
- Inspect Valves Regularly: Check your valves for signs of damage or wear.
- Replace Old Tubes: Old inner tubes can become brittle and prone to leaks. Replace them every year or two, depending on usage.
- Store Bike Properly: Store your bike in a cool, dry place to prevent corrosion and damage to the valves.
By following these tips, you can extend the life of your bike valves and enjoy a smoother, more reliable ride.
Advanced Troubleshooting
Sometimes, the cause of a leak isn’t obvious. Here are some advanced troubleshooting steps to consider:
Checking the Rim Tape
The rim tape protects the inner tube from the spoke holes. If the rim tape is damaged or misaligned, it can cause punctures and leaks around the valve. Inspect the rim tape and replace it if necessary. Make sure it covers all the spoke holes completely.
Examining the Tire
Sometimes, a small piece of debris can get lodged in the tire and cause a slow leak. Carefully examine the inside and outside of the tire for any sharp objects or damage. Remove any debris and consider replacing the tire if it’s severely damaged.
Using Sealant
If you’re using tubeless tires, sealant can help prevent and repair small leaks. Make sure the sealant is fresh and properly installed. Check the sealant level regularly and add more as needed.
Professional Help
If you’ve tried all the above steps and still can’t find or fix the leak, it may be time to seek professional help. A bike mechanic can diagnose and repair more complex issues that you may not be able to handle on your own. Find a reputable bike shop in your area for assistance.
Common Mistakes to Avoid
When working on bike valves, it’s easy to make mistakes that can cause further problems. Here are some common pitfalls to avoid:
- Overtightening the Valve Core: Overtightening can damage the valve core and make it harder to remove later.
- Using the Wrong Tools: Using the wrong tools can damage the valve or rim. Always use the correct valve core tool and tire levers.
- Forgetting the Valve Cap: Valve caps protect the valve from dirt and damage. Always replace the valve cap after inflating the tire.
- Ignoring Small Leaks: Even small leaks can lead to flat tires. Address any leaks as soon as you find them.
- Using Damaged Tubes: Using damaged inner tubes can be risky. Patch small holes temporarily, but replace badly damaged tubes.
FAQ: Leaky Bike Valves
Why is my bike tire losing air so quickly?
A quick loss of air often points to a leak in the valve, tire, or tube. Check the valve core is tight, inspect for damage, and use soapy water to find the leak.
How often should I check my bike tire pressure?
Check your tire pressure before every ride. Proper inflation prevents flats and ensures a smooth, efficient ride. Use a reliable bike pump with a gauge.
Can I use a car tire pump on my bike?
Yes, if your bike has Schrader valves, like car tires. For Presta valves, you’ll need an adapter. Be careful not to overinflate, as bike tires need higher pressure.
What is a valve core tool, and why do I need one?
A valve core tool is a small tool used to tighten or remove valve cores. It’s essential for fixing leaks and maintaining your bike valves. You can find them at any bike shop.
How do I know if my inner tube needs to be replaced?
Replace your inner tube if it’s old, damaged, or has multiple patches. Signs of wear include brittleness, cracks, and difficulty holding air. Replace every 1-2 years for best performance.
What type of valve is best for my bike?
Presta valves are great for road bikes needing high pressure. Schrader valves are robust for mountain and hybrid bikes. Choose based on your bike and riding style.
Can I fix a leaking valve stem?
If the valve stem is damaged, it’s best to replace the entire inner tube. Trying to repair a damaged stem is usually not reliable and could lead to further issues.
Conclusion
Identifying and fixing a leaky bike valve is a skill every cyclist should have. By following the steps outlined in this guide, you can quickly diagnose and resolve most valve-related issues. Regular maintenance, proper tools, and a little knowledge can keep your tires inflated and your rides enjoyable. So, grab your valve core tool, check those tires, and keep on rolling! Remember, a well-maintained bike is a happy bike, and a happy bike means a happy rider.