
How to Attach Bike Mount to Aero Bike for Triathlon: Easy!
Do you love triathlons? Do you have an aero bike? Then you might wonder about carrying your water. You also might need to carry repair tools. So, how to attach bike mount to aero bike for triathlon? It can be tricky! Aero bikes are fast, but they have less space. Let’s learn how to add what you need.
Key Takeaways
- Attaching a bike mount lets you carry water and tools.
- Aero bikes need special mounts due to their frame shape.
- Use aero-specific mounts to keep your bike aerodynamic.
- Straps and zip ties can help secure mounts safely.
- Knowing how to attach bike mount to aero bike for triathlon is key.
Understanding Aero Bike Mount Challenges
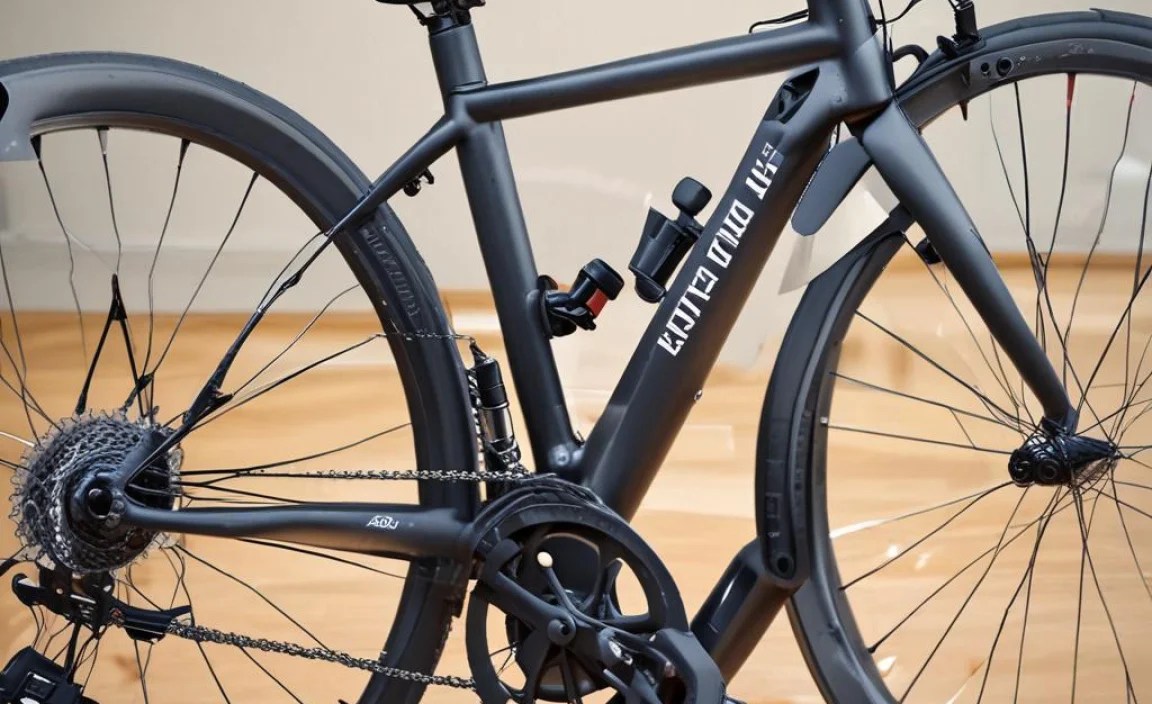
Aero bikes are made for speed. Their sleek design helps you cut through the wind. But this shape makes it hard to add things. Regular bikes have round tubes. You can easily clamp things on. Aero bikes have flat or oddly shaped tubes. This means standard mounts might not fit. You need to find special mounts. These mounts fit the unique shape of aero bikes. Think about where you want to put the mount. Common spots are the seat post or behind the saddle. Check that the mount won’t get in your way while you ride. Also, make sure it’s easy to reach your water bottle. Practice grabbing the bottle before your race. This helps you stay safe and fast.
- Aero bikes have special frame shapes.
- Standard mounts often don’t fit aero bikes.
- Consider mount placement for easy access.
- Practice reaching for your water bottle.
- Choose mounts that keep your bike aero.
- Check the mount does not interfere when pedaling
Choosing the right mount is key. Look for mounts made for aero bikes. These mounts often use straps or special clamps. Some use zip ties to stay in place. Read reviews to see what other riders say. A good mount should be strong and not move around. It should also be light. You don’t want to add extra weight to your bike. Weight can slow you down during a race. Make sure the mount won’t scratch your frame. Some mounts have rubber pads to protect the paint. Taking the time to find the right mount will save you trouble later. It will also keep you comfortable and fast on race day.
Why Aero Bikes Are Different
Have you ever seen a bird flying? Their wings are shaped to cut through the air. Aero bikes are like that. Their frames are designed to reduce drag. Drag is what slows you down when you ride. Aero bikes have flat tubes and smooth lines. This helps the air flow around the bike better. But these special shapes make it hard to attach things. Regular bike frames are round. You can easily clamp things to them. Aero bike frames are not round. This means you need special mounts. These mounts fit the aero shape. They let you carry water and tools without slowing down. So, an aero bike is fast, but it needs special gear.
Common Mounting Locations
Where can you put a mount on an aero bike? There are a few good spots. The seat post is a popular place. You can attach a mount behind your saddle. This is good for carrying water bottles. Another spot is on the frame itself. Some aero bikes have special spots for mounts. These spots are designed to be aero. They won’t slow you down. Think about what you need to carry. If you need two water bottles, use a mount behind the saddle. If you only need one, the frame might work. Make sure the mount is easy to reach while you ride. Practice grabbing your water bottle before your race. This helps you stay safe and fast.
Potential Problems and Solutions
Sometimes, mounts can cause problems. They might move around while you ride. This can be annoying and even dangerous. To fix this, make sure the mount is tight. Use straps or zip ties to hold it in place. Check the mount before each ride. Make sure nothing is loose. Another problem is scratching your frame. To avoid this, use mounts with rubber pads. These pads protect the paint on your bike. Also, make sure the mount doesn’t get in your way. You don’t want it to rub against your legs. If it does, try moving it to a different spot. With a little care, you can avoid these problems.
Fun Fact or Stat: Studies show that using aero water bottle mounts can save up to 90 seconds over a 40km bike leg in a triathlon!
Choosing the Right Mount for Your Bike

Picking the right mount is important. There are many kinds of mounts. Some are made for water bottles. Others are for tool kits or spare tires. Think about what you need to carry. Then, look for a mount that fits. Make sure it is made for aero bikes. Read reviews to see what other riders think. A good mount should be strong and light. It should stay in place while you ride. It should also be easy to use. You want to be able to grab your water bottle quickly. Look for mounts that are easy to adjust. This way, you can get the perfect fit. A good mount will make your ride safer and more fun.
- Consider what you need to carry on your bike.
- Look for mounts made for aero bikes.
- Read reviews to see what other riders say.
- Choose a mount that is strong and light.
- Make sure the mount is easy to use.
- Adjustable mounts offer a custom fit.
Think about how the mount attaches to your bike. Some mounts use straps. Others use clamps or zip ties. Straps are good because they are easy to adjust. Clamps are strong and hold the mount in place. Zip ties are light and cheap. But they might not be as strong. Make sure the mount won’t damage your frame. Some mounts have rubber pads to protect the paint. Also, check the mount’s weight. You don’t want to add too much weight to your bike. This can slow you down. With a little research, you can find the perfect mount for your needs.
Types of Bike Mounts
Bike mounts come in many shapes and sizes. Some are for water bottles. These are often called bottle cages. Others are for tool kits or spare tires. These are called saddlebags or toolboxes. There are also mounts for computers and lights. Each type of mount has its own pros and cons. Bottle cages should be easy to reach. Saddlebags should be big enough to hold your gear. Computer mounts should be easy to read. Light mounts should be strong and secure. Think about what you need to carry. Then, choose the right type of mount. This will make your ride safer and more enjoyable.
Materials and Durability
Bike mounts are made from different materials. Some are made from plastic. Others are made from metal, like aluminum or carbon fiber. Plastic mounts are cheap and light. But they might not be as strong. Metal mounts are stronger and more durable. But they can be heavier and more expensive. Carbon fiber mounts are light and strong. But they are the most expensive. Think about how often you will use the mount. If you ride a lot, choose a durable mount. If you only ride sometimes, a plastic mount might be fine. Also, check the mount for rust or wear. Replace it if it’s damaged.
Weight Considerations
Weight matters when you are racing. A heavy bike can slow you down. So, choose a light mount. Plastic and carbon fiber mounts are the lightest. Aluminum mounts are heavier. But they are still lighter than steel mounts. Think about how much weight you are adding to your bike. Even a few ounces can make a difference. Also, consider the weight of what you are carrying. A full water bottle is heavier than an empty one. A tool kit can also add weight. Try to keep your bike as light as possible. This will help you ride faster and longer.
Fun Fact or Stat: Carbon fiber bike mounts can weigh as little as 15 grams, about the same as three teaspoons of sugar!
Step-by-Step Guide: Attaching the Mount
Ready to put the mount on your bike? First, gather your tools. You will need a screwdriver or Allen wrench. You might also need straps or zip ties. Read the instructions that came with the mount. This will tell you how to attach it. Find the right spot on your bike frame. Clean the area with a cloth. This will help the mount stick better. If you are using straps, wrap them around the frame. Tighten them until the mount is secure. If you are using zip ties, thread them through the mount. Then, tighten them and cut off the extra length. Make sure the mount is not moving around. If it is, tighten the straps or zip ties more. Double-check everything before you ride.
- Gather your tools and read the instructions.
- Clean the bike frame where you will attach the mount.
- Use straps or zip ties to secure the mount tightly.
- Ensure the mount does not move during your ride.
- Double-check the mount before each ride.
- Ask a bike shop for help if you are unsure.
Test the mount before you go on a long ride. Put your water bottle or tool kit in the mount. Ride around the block to see if it stays in place. If it moves, tighten the straps or zip ties. You might need to adjust the mount. Make sure it is not rubbing against your legs. You want to be comfortable while you ride. Also, check that you can reach your water bottle easily. Practice grabbing it while you are riding. This will help you stay safe during a race. With a little practice, you will be able to attach the mount like a pro.
Preparing Your Bike Frame
Before you attach the mount, get your bike ready. Clean the frame with a damp cloth. This will remove any dirt or grime. Dirt can make it hard for the mount to stick. If there is old tape or glue, remove it. You can use a special cleaner for this. Be careful not to scratch the paint. Once the frame is clean, let it dry. Then, you are ready to attach the mount. Make sure the frame is in good condition. If there are cracks or dents, don’t attach the mount there. Find a different spot that is strong and stable. A clean and strong frame will help the mount stay in place.
Using Straps and Zip Ties Correctly
Straps and zip ties are useful for attaching mounts. Straps are easy to adjust. You can tighten them or loosen them as needed. Zip ties are cheap and light. But they are not as easy to adjust. When using straps, wrap them tightly around the frame. Make sure they are not twisted. When using zip ties, thread them through the mount. Then, pull them tight. Cut off the extra length with scissors. Be careful not to cut yourself. Don’t over-tighten the straps or zip ties. This can damage your frame. Check the straps and zip ties before each ride. Make sure they are still tight and secure.
Ensuring a Secure Fit
A secure fit is important for safety. You don’t want the mount to move around while you ride. This can be distracting and dangerous. To ensure a secure fit, tighten the straps or zip ties. Check the mount before each ride. If it moves, tighten it more. You can also use rubber pads to help the mount stick. These pads add extra grip. Make sure the mount is not rubbing against your legs. If it is, adjust its position. You want to be comfortable while you ride. A secure and comfortable mount will make your ride more enjoyable.
Fun Fact or Stat: A loose bike mount can cause a crash. Always double-check your gear before riding!
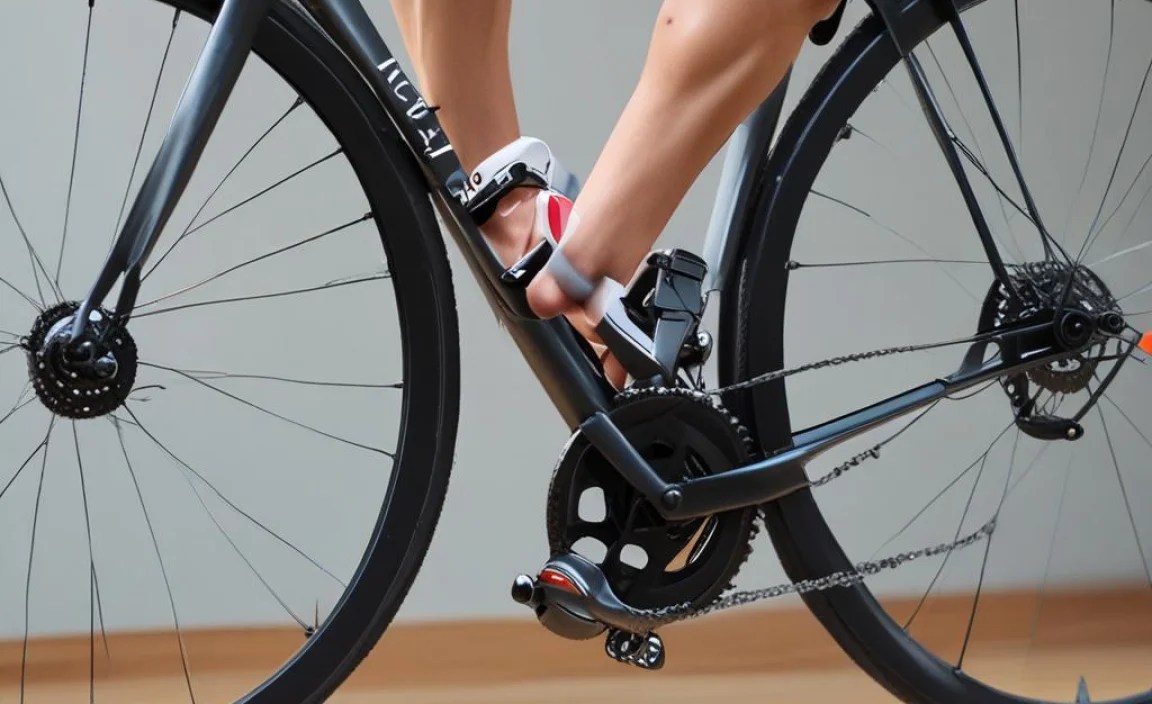
Aero Considerations for Mount Placement
When you put a mount on your aero bike, think about the air. Aero bikes are fast because they cut through the wind. But if you put a mount in the wrong spot, it can slow you down. Try to put the mount behind you. This way, the wind won’t hit it as much. Some mounts are made to be aero. They are shaped to reduce drag. Look for these mounts when you shop. Also, think about the size of the mount. A big mount will catch more wind than a small one. Try to use the smallest mount that will hold what you need. Every little bit helps when you are racing.
- Place mounts in areas that minimize wind resistance.
- Use aero-shaped mounts to reduce drag.
- Choose the smallest mount that fits your needs.
- Consider how the mount affects airflow around the bike.
- Test different placements to find the most aerodynamic spot.
- Keep the mount close to the frame.
Test your mount in different conditions. Ride on a windy day to see if it affects your speed. You can also use a computer to measure your speed. See how fast you go with and without the mount. This will help you find the best spot for it. Remember, even small changes can make a big difference. Aero bikes are all about speed. So, take the time to get it right. Your hard work will pay off on race day. You’ll be faster and more efficient on your aero bike.
Understanding Aerodynamics
Aerodynamics is the study of how air moves around things. When you ride a bike, you push through the air. The air pushes back on you. This is called drag. Drag slows you down. Aero bikes are designed to reduce drag. They have smooth shapes and flat tubes. This helps the air flow around the bike easily. When you add a mount, it can change the airflow. A poorly placed mount can create more drag. This will slow you down. So, it’s important to think about aerodynamics when you attach a mount.
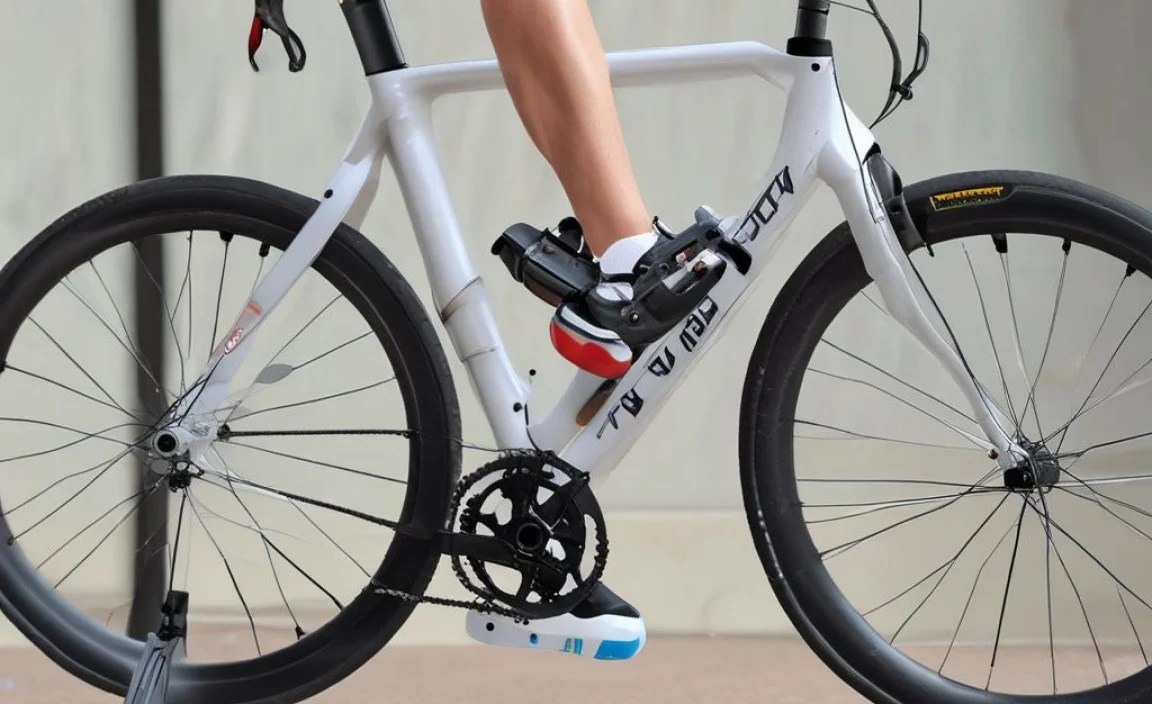
Optimal Mounting Positions
Where is the best place to put a mount on your aero bike? The answer depends on your bike and the mount. But there are some general guidelines. Try to put the mount behind you. This will shield it from the wind. The seat post is a good spot. You can attach a mount behind the saddle. Another good spot is on the frame, near the bottom bracket. Some aero bikes have special mounting points. These are designed to be aerodynamic. Avoid putting the mount in front of the bike. This will catch the wind and slow you down.
Testing and Adjustments
The best way to find the right spot is to test. Ride your bike with the mount in different positions. Use a computer to measure your speed. See which position is the fastest. You can also use a wind tunnel. This is a special room that tests aerodynamics. But this is usually only for pros. For most riders, a simple speed test is enough. Make small adjustments to the mount. See how each change affects your speed. Keep testing until you find the perfect spot. This might take some time, but it’s worth it. A small change can make a big difference in your race time.
Fun Fact or Stat: Professional cyclists spend hours in wind tunnels to find the most aerodynamic positions and equipment!
Maintenance and Safety Checks
Taking care of your mount is important. Check it before each ride. Make sure it is tight and secure. If it’s loose, tighten the straps or zip ties. Look for any signs of wear and tear. Cracks, rust, or broken parts can be dangerous. Replace the mount if it’s damaged. Also, clean the mount regularly. Dirt and grime can make it wear out faster. Use a damp cloth to wipe it down. Avoid using harsh chemicals. These can damage the mount. A little care will keep your mount in good condition. It will also keep you safe on the road.
- Check the mount before each ride for looseness.
- Look for signs of wear and tear on the mount.
- Clean the mount regularly to prevent damage.
- Replace damaged mounts immediately.
- Ensure the mount does not interfere with your pedaling.
- Tighten screws and straps periodically.
Make sure your water bottle is secure. A loose water bottle can fall out while you ride. This can be dangerous for you and other riders. Use a bottle cage that holds the bottle tightly. Test it by shaking the bike. If the bottle moves, try a different cage. Some cages have a special grip to hold the bottle. Also, check the bottle for cracks or leaks. A leaky bottle can make a mess. It can also make the road slippery. Replace the bottle if it’s damaged. A safe and secure water bottle will make your ride more enjoyable.
Regular Inspections
Get in the habit of checking your mount often. Before each ride, give it a quick look. Make sure nothing is loose or broken. Pay attention to the straps or zip ties. Are they still tight? Are they frayed or worn? Check the mount itself. Are there any cracks or bends? If you see anything that doesn’t look right, fix it before you ride. A regular inspection can prevent problems. It can also keep you safe on the road. Make it a part of your pre-ride routine.
Cleaning and Care Tips
Cleaning your mount is easy. Just use a damp cloth and some mild soap. Wipe down the mount to remove dirt and grime. Avoid using harsh chemicals or solvents. These can damage the plastic or metal. Pay attention to the small parts. Dirt can build up in the screws or hinges. Use a small brush to clean these areas. Once you’re done, rinse the mount with water. Let it dry completely before you ride. A clean mount will last longer and work better.
Troubleshooting Common Issues
Sometimes, things go wrong. The mount might come loose while you’re riding. The water bottle might fall out. The straps might break. If this happens, don’t panic. Pull over to the side of the road. Assess the situation. If the mount is loose, tighten it. If the bottle is gone, you might need to stop for water. If the straps are broken, you might need to replace them. Carry a small repair kit with you. This will help you fix minor problems on the road. With a little preparation, you can handle most common issues.
Fun Fact or Stat: Regularly cleaning your bike and its components can extend their lifespan by up to 50%!
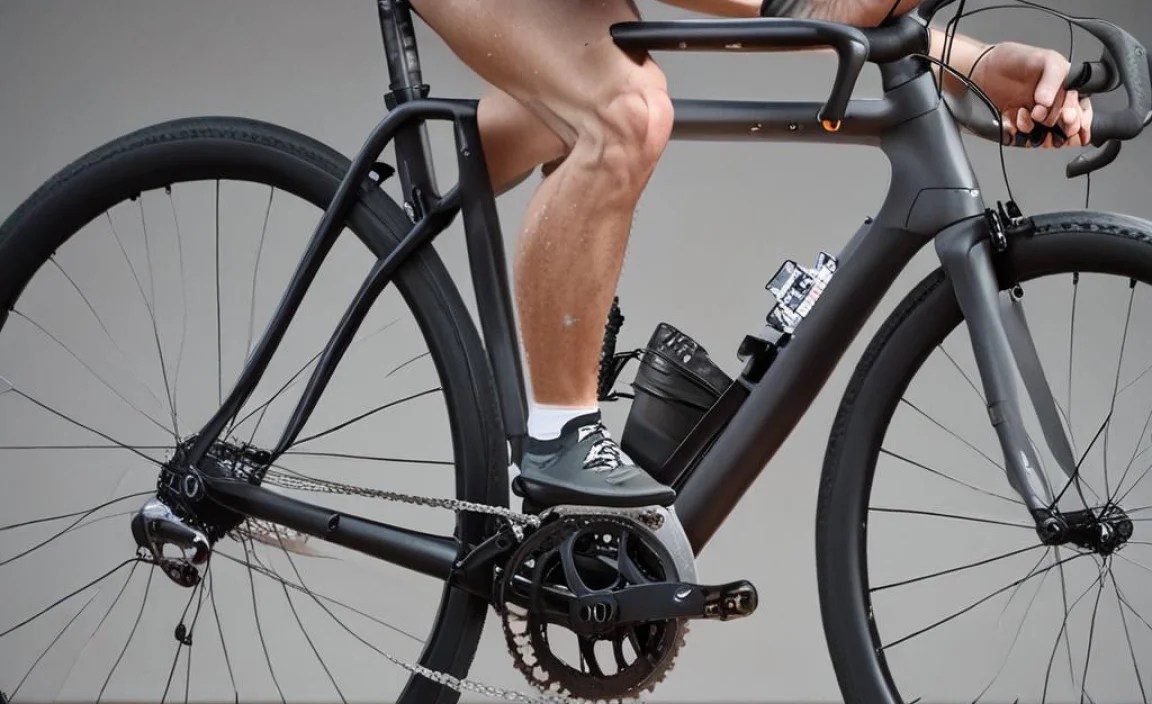
Alternative Mounting Solutions
If you can’t find a mount that fits your aero bike, don’t worry. There are other ways to carry your gear. One option is to use a hydration pack. This is a backpack that holds water. It has a tube that you can drink from. Another option is to use a frame bag. This is a bag that attaches to the frame of your bike. It can hold tools, food, or other supplies. You can also use a saddlebag. This is a bag that attaches under your seat. It’s good for carrying small items. Think about what you need to carry. Then, choose the solution that works best for you.
- Use a hydration pack to carry water on your back.
- Attach a frame bag to your bike for tools and snacks.
- Try a saddlebag for small items under your seat.
- Consider carrying extra water bottles in your jersey pockets.
- Explore handlebar-mounted bags for easy access.
- Use aero bottles that fit standard cages.
Some riders like to carry water bottles in their jersey pockets. This is a simple and cheap solution. But it can be uncomfortable. The bottles can bounce around while you ride. Also, it can be hard to reach the bottles. Another option is to use special aero bottles. These bottles are shaped to be aerodynamic. They fit in standard bottle cages. This is a good way to carry water without slowing down. Experiment with different solutions. Find what works best for you and your bike.
Hydration Packs
Hydration packs are a popular choice for long rides. They let you carry a lot of water without using bottle cages. The pack sits on your back. It has a tube that you can drink from. This makes it easy to stay hydrated while you ride. Hydration packs come in different sizes. Choose one that fits your needs. Make sure it’s comfortable to wear. Some packs have extra pockets for tools and food. This is convenient for long races. Hydration packs can be hot in warm weather. But they are a good option for many riders.
Frame and Saddlebags
Frame and saddlebags are great for carrying gear. Frame bags attach to the frame of your bike. They can hold tools, food, or extra clothes. Saddlebags attach under your seat. They are good for carrying small items like a spare tube or a multi-tool. Choose a bag that is the right size for your needs. Make sure it’s easy to attach and remove. Some bags are waterproof. This is important if you ride in the rain. Frame and saddlebags are a convenient way to carry your gear. They keep your pockets free and your bike uncluttered.
Jersey Pockets and Aero Bottles
Jersey pockets are a simple way to carry water bottles. Most cycling jerseys have three pockets in the back. You can put a water bottle in each pocket. This is a cheap and easy solution. But it can be uncomfortable. The bottles can bounce around. Also, it can be hard to reach the bottles. Aero bottles are a special type of water bottle. They are shaped to be aerodynamic. They fit in standard bottle cages. This is a good way to carry water without slowing down. If you don’t want to use a mount, try jersey pockets or aero bottles.
Fun Fact or Stat: Some professional triathletes use aero bottles filled with special energy drinks to optimize performance!
Summary
Attaching a bike mount to an aero bike for a triathlon needs care. Aero bikes are fast. Their special shapes need special mounts. You must choose the right mount for your bike. Make sure it fits well and is strong. Use straps or zip ties to keep it in place. Think about where you put the mount. It should not slow you down. Check the mount often. Make sure it’s safe before each ride. If you can’t find a good mount, try other options. You can use a hydration pack or a frame bag. By following these tips, how to attach bike mount to aero bike for triathlon will be much easier.
Conclusion
Adding a bike mount to your aero bike can be tricky. Aero bikes are designed for speed. It is important to choose the right mount. Make sure it fits well and does not slow you down. Check the mount often to stay safe. With the right tools and knowledge, how to attach bike mount to aero bike for triathlon becomes simple. Enjoy your ride and race!
Frequently Asked Questions
Question No 1: What is an aero bike?
Answer: An aero bike is a bicycle made to be very fast. It cuts through the air easily. The tubes are shaped in a special way. This shape reduces drag. Drag is what slows you down when you ride. Aero bikes are popular for triathlons. They help racers go faster. They are different from regular bikes. Regular bikes are not as focused on speed. Aero bikes need special parts and mounts to keep them fast. Knowing how to attach bike mount to aero bike for triathlon is important for all triathletes.
Question No 2: Why are aero bikes hard to mount accessories on?
Answer: Aero bikes have flat or oddly shaped tubes. These tubes are made to reduce drag. But they make it hard to attach things. Regular bikes have round tubes. You can easily clamp things on. Aero bikes need special mounts. These mounts fit the unique shape of the tubes. You might need to use straps or zip ties. These help hold the mount in place. It takes more work to add things to an aero bike. But it’s worth it for the speed. If you use the correct methods for how to attach bike mount to aero bike for triathlon, you’ll be fine.
Question No 3: What kind of bike mount should I use for my aero bike?
Answer: You should use a mount made for aero bikes. These mounts are designed to fit the special tube shapes. Look for mounts that use straps or zip ties. These will help hold the mount in place. Read reviews to see what other riders say. A good mount should be strong and light. It should also be easy to use. You want to be able to grab your water bottle quickly. Make sure the mount won’t scratch your frame. Some mounts have rubber pads to protect the paint. Follow these suggestions and know how to attach bike mount to aero bike for triathlon will be easy.
Question No 4: Where is the best place to put a bike mount on my aero bike?
Answer: The best place depends on your bike. But there are some common spots. The seat post is a popular place. You can attach a mount behind your saddle. This is good for carrying water bottles. Another spot is on the frame itself. Some aero bikes have special spots for mounts. These spots are designed to be aero. They won’t slow you down. Think about what you need to carry. Make sure the mount is easy to reach while you ride. Keep in mind how to attach bike mount to aero bike for triathlon includes the location on the frame.
Question No 5: How do I keep the bike mount from moving around on my aero bike?
Answer: Make sure the mount is tight. Use straps or zip ties to hold it in place. Check the mount before each ride. Make sure nothing is loose. If it moves, tighten the straps or zip ties more. You might need to adjust the mount. Make sure it is not rubbing against your legs. You want to be comfortable while you ride. A secure mount is important for safety. Knowing how to attach bike mount to aero bike for triathlon will save you time and effort.
Question No 6: Can I use a regular bike mount on an aero bike?
Answer: It’s not a good idea to use a regular bike mount on an aero bike. Regular mounts are made for round tubes. Aero bikes have flat or oddly shaped tubes. The regular mount might not fit well. It might move around or even damage your frame. It’s best to use a mount made for aero bikes. These mounts are designed to fit the special tube shapes. They will hold your gear safely and securely. Don’t risk using the wrong mount. Your speed and safety depend on knowing how to attach bike mount to aero bike for triathlon.


