
How to Use Gauge for Multiple Bikes? Easy Guide
Have you ever seen a bike tire that looks flat? Do you know how much air should be in your tires? It’s important to check your tire pressure. A gauge can help you do this. But how to use gauge for multiple bikes? It’s easier than you think!
Different bikes need different amounts of air. Using a gauge ensures your tires are just right. Let’s learn how to use one for all your bikes!
Keeping your tires properly inflated is important for safety. It also makes biking more fun. Let’s get started!
Key Takeaways
- Using a tire gauge ensures safe and efficient riding on all bikes.
- Always check the recommended PSI on your bike’s tire sidewall.
- A gauge helps prevent over-inflation, which can cause tire damage.
- Adjust tire pressure based on your weight and riding conditions.
- Learning how to use gauge for multiple bikes saves time and money.
Understanding Bike Tire Gauges

A bike tire gauge is a tool that measures the air pressure in your tires. It tells you if your tires have enough air. This pressure is measured in PSI (pounds per square inch). Knowing the PSI helps you inflate your tires correctly. There are different types of gauges. Some are digital, and some are analog. Digital gauges show the pressure on a screen. Analog gauges have a needle that points to the pressure. Both types work well. The most important thing is to use one regularly. Checking your tire pressure helps you avoid flats. It also makes your bike easier to ride. So, understanding your gauge is the first step! This simple tool is your key to better bike rides on any type of bicycle you own.
- Digital gauges show the exact pressure.
- Analog gauges are simple and reliable.
- A gauge prevents under-inflation and over-inflation.
- Check your gauge’s battery if it’s digital.
- Store your gauge in a safe, dry place.
Using a bike tire gauge might seem tricky, but it’s really not. Once you know how it works, you can keep all your bikes in top shape. Think of it like this: your tires are like balloons. Too little air, and they’re floppy. Too much air, and they might pop! A gauge helps you find that perfect balance. Regular use extends the life of your tires. It also makes your rides safer and more enjoyable. Whether you have a mountain bike, a road bike, or a kid’s bike, a gauge is your best friend. It’s a small tool that makes a big difference!
Fun Fact or Stat: Studies show that properly inflated tires can improve your cycling efficiency by up to 10%!
Why Use a Bike Tire Gauge?
Why should you even bother with a bike tire gauge? Well, imagine trying to ride a bike with flat tires. It would be hard, right? Under-inflated tires make it harder to pedal. They also make you slower. Over-inflated tires can be dangerous. They can burst if they have too much pressure. A gauge helps you avoid both of these problems. It tells you exactly how much air is in your tires. This makes your rides smoother and safer. Plus, properly inflated tires last longer. So, using a gauge saves you money in the long run. It’s a small tool that offers big benefits. Are you ready to make your rides better? A gauge is the way to go!
Analog vs. Digital Gauges
Choosing between an analog and digital gauge can be tough. Analog gauges are simple. They don’t need batteries. They show the pressure with a needle. Digital gauges use a screen. They give you an exact number. Some people like the simplicity of analog. Others prefer the precision of digital. Both types work well. It really comes down to personal preference. Do you like old-school tools? Go for analog. Do you like high-tech gadgets? Choose digital. Either way, a gauge is a must-have for every cyclist. Which type will you pick?
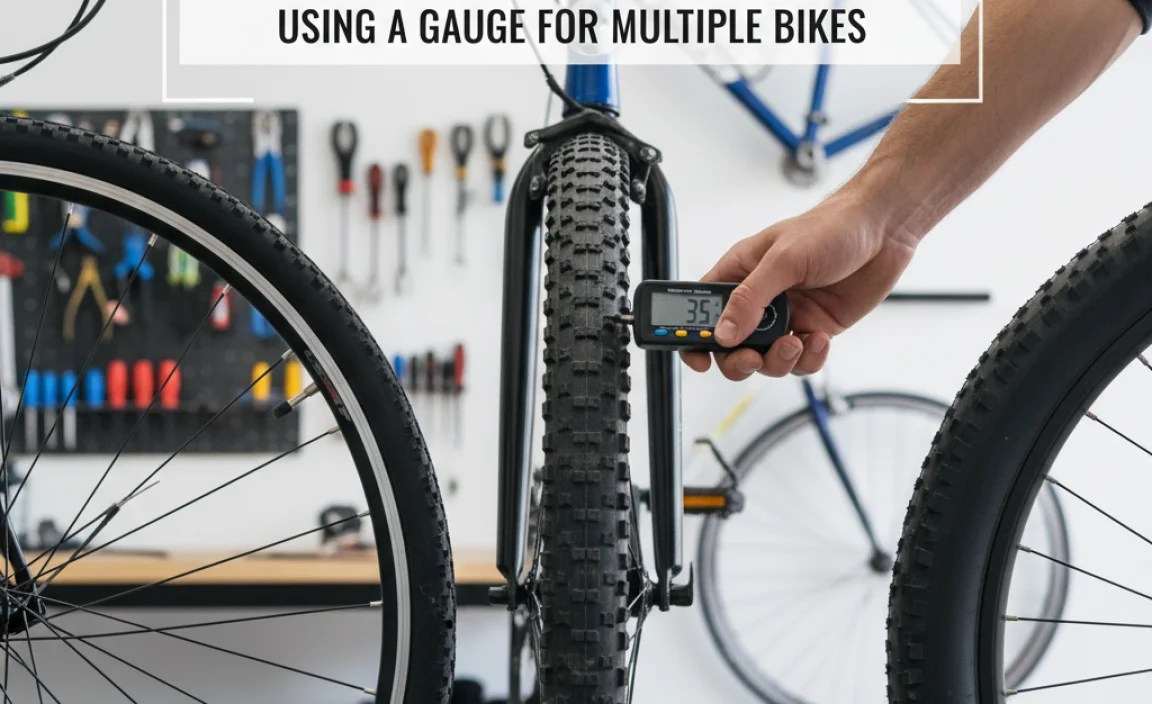
Reading the Gauge Correctly
Knowing how to use gauge for multiple bikes starts with reading it right. The gauge will show a number. This number tells you the PSI. Look at your tire’s sidewall. It will show a range of PSI. This range tells you the minimum and maximum pressure. You want to keep your tire pressure within this range. If the gauge reads lower than the minimum, add air. If it reads higher than the maximum, let some air out. Practice reading your gauge a few times. Soon, you’ll be a pro! Remember, the correct PSI makes your rides safer and more fun. So, take the time to learn how to read your gauge accurately.
Finding the Right Tire Pressure

Finding the right tire pressure is key for a smooth ride. It’s not just about filling your tires until they look full. Different bikes and tires need different pressures. Road bikes usually need higher pressure. Mountain bikes need lower pressure. Look at the sidewall of your tire. It will tell you the recommended PSI range. Start with the middle of that range. Then, adjust based on your weight and riding style. Heavier riders might need more pressure. Lighter riders might need less. Experiment to find what feels best for you. How to use gauge for multiple bikes effectively involves understanding these individual needs. This ensures each bike performs its best. Don’t be afraid to try different pressures. Just stay within the recommended range.
- Check the tire sidewall for PSI range.
- Adjust pressure for your weight.
- Consider the type of riding you’ll do.
- Use a gauge to check your pressure.
- Adjust in small increments.
Getting the tire pressure just right can feel like a bit of a science experiment. But don’t worry; it’s not as complicated as it sounds. Think of it like Goldilocks and the Three Bears. You don’t want your tires to be too hard or too soft. You want them to be just right! This perfect pressure will give you the best combination of speed, comfort, and grip. Plus, it will help prevent flats. So, take the time to find the sweet spot for each of your bikes. Your body will thank you. Your bike will thank you. And you’ll enjoy your rides even more!
Fun Fact or Stat: Tire pressure can change with the weather. Lower the pressure on hot days and raise it on cold days.
Understanding PSI Ranges
What does PSI even mean? PSI stands for pounds per square inch. It’s a measure of pressure. The PSI range on your tire tells you the safe limits. Don’t go below the minimum. Don’t go above the maximum. Staying within this range is important for safety. It also affects how your bike performs. Lower PSI gives you more grip. Higher PSI makes you faster. Experiment to find what works best for you. But always stay within the recommended range. How to use gauge for multiple bikes means understanding these ranges for each bike. Knowing this helps you make the right choices for every ride. So, pay attention to those numbers!
Adjusting for Rider Weight
Your weight affects your tire pressure. Heavier riders need more pressure. Lighter riders need less. Why? Because heavier riders put more force on the tires. More pressure helps the tires support that weight. Lighter riders don’t need as much pressure. Too much pressure can make the ride uncomfortable. A good rule of thumb is to add or subtract 1-2 PSI for every 10 pounds of body weight. But always stay within the tire’s recommended range. Adjusting for your weight makes a big difference. It can improve your comfort and control. So, don’t forget to factor in your weight when inflating your tires.
Considering Riding Conditions
The type of riding you do also matters. Are you riding on smooth roads? Or bumpy trails? Smooth roads call for higher pressure. Higher pressure makes you faster. Bumpy trails need lower pressure. Lower pressure gives you more grip. It also makes the ride more comfortable. Think about where you’ll be riding. Then, adjust your tire pressure accordingly. If you’re not sure, start with the middle of the recommended range. You can always adjust it later. Considering riding conditions is key. It helps you get the most out of your bike. So, plan ahead and choose the right pressure.
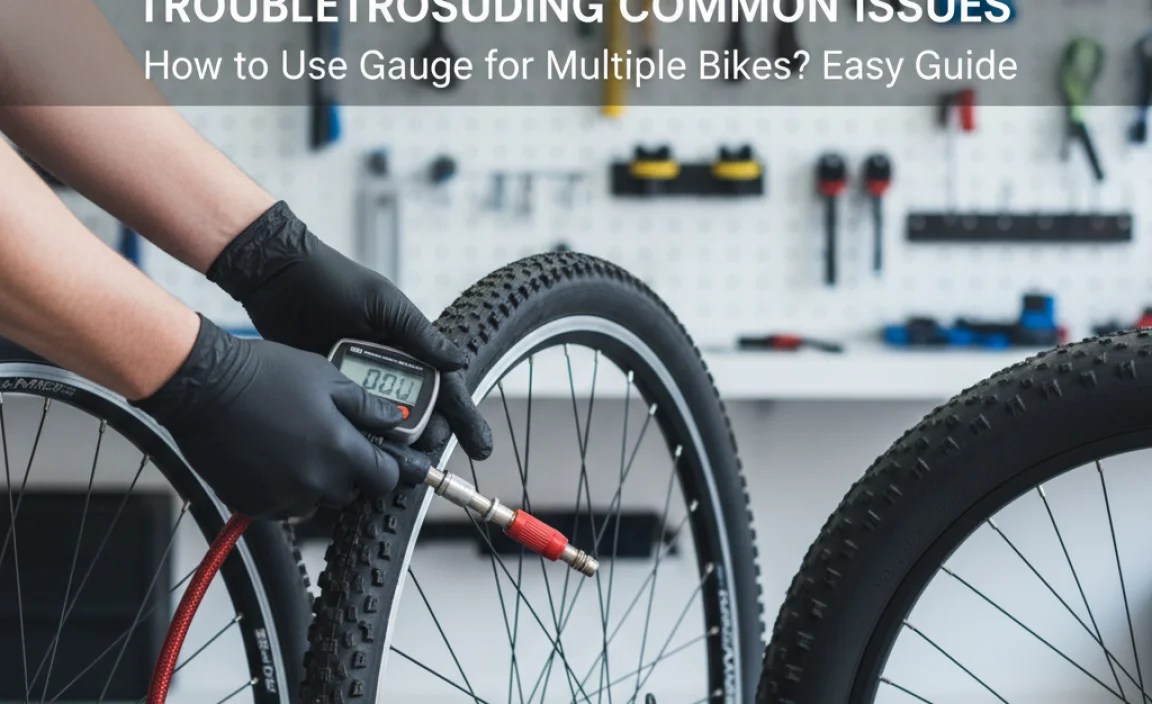
Step-by-Step Guide to Using a Gauge
Ready to learn how to use gauge for multiple bikes? Here’s a simple guide. First, find the valve on your tire. It’s usually covered by a cap. Remove the cap. Next, attach the gauge to the valve. Make sure it’s on tight. You should hear a hissing sound if it’s not sealed properly. Now, read the pressure on the gauge. Compare it to the recommended PSI on your tire. If the pressure is too low, add air with a pump. If it’s too high, release some air. Check the pressure again with the gauge. Repeat until you reach the desired PSI. Finally, remove the gauge and replace the valve cap. That’s it! You’ve successfully used a gauge. Practice makes perfect, so keep trying.
- Remove the valve cap.
- Attach the gauge to the valve.
- Read the pressure on the gauge.
- Adjust the pressure as needed.
- Replace the valve cap.
Using a bike tire gauge is like learning a new dance. At first, it might feel a little awkward. But with practice, you’ll get the hang of it. The most important thing is to take your time. Don’t rush the process. Make sure the gauge is securely attached to the valve. This will give you an accurate reading. Also, don’t be afraid to experiment with different pressures. Find what feels best for you. Remember, the goal is to make your rides more enjoyable. And a properly inflated tire is the first step to a great ride. So, grab your gauge and get started!
Fun Fact or Stat: Properly inflated tires can reduce your risk of flats by up to 50%!
Preparing Your Bike
Before you grab your gauge, get your bike ready. Make sure your tires are clean. Dirt can get into the valve. This can affect the reading. Also, check the valve itself. Make sure it’s not damaged. A damaged valve can leak air. This will make it hard to get an accurate reading. Finally, have your pump ready. You’ll need it to add air. A little preparation goes a long way. It makes the process easier and more accurate. So, take a few minutes to get your bike ready. Your gauge will thank you!
Attaching the Gauge
Attaching the gauge correctly is key. Line up the gauge with the valve. Press it on firmly. You should feel a tight seal. If you hear air leaking, adjust the gauge. Make sure it’s straight. Sometimes, you need to wiggle it a little. The goal is to get a good seal. This ensures an accurate reading. Practice attaching the gauge a few times. Soon, you’ll be a pro. Remember, a good seal is essential. It’s the first step to getting the right pressure.
Reading and Adjusting
Once the gauge is attached, read the pressure. Compare it to the recommended PSI. If the pressure is too low, add air. Use your pump to add air. Check the pressure again. Repeat until you reach the desired PSI. If the pressure is too high, release some air. Press the valve stem to let air out. Check the pressure again. Adjust in small increments. This helps you avoid over-inflating. Take your time and be patient. Getting the right pressure takes practice. But it’s worth it. A properly inflated tire makes all the difference.
Maintaining Your Bike Tire Gauge

A bike tire gauge is a useful tool. Taking care of it will make it last longer. Store your gauge in a safe place. Keep it away from dirt and moisture. Check the battery if you have a digital gauge. Replace it when needed. Clean your gauge regularly. Use a soft cloth to wipe it down. Avoid using harsh chemicals. They can damage the gauge. Also, handle your gauge with care. Dropping it can damage the internal parts. A little maintenance goes a long way. It will keep your gauge working properly for years to come. How to use gauge for multiple bikes relies on having a functional gauge. So, treat it well!
- Store the gauge in a safe place.
- Replace the battery in digital gauges.
- Clean the gauge regularly.
- Handle the gauge with care.
- Check for damage regularly.
Think of your bike tire gauge like your toothbrush. You use it regularly to keep things in good shape. And just like your toothbrush, your gauge needs a little TLC to stay in top condition. A clean gauge is a happy gauge. Dirt and grime can interfere with its accuracy. So, give it a quick wipe down after each use. Also, be mindful of where you store it. Avoid leaving it in direct sunlight or extreme temperatures. These conditions can damage the delicate components inside. A well-maintained gauge will give you accurate readings every time. And that’s what you want for all your bikes!
Fun Fact or Stat: A well-maintained bike tire gauge can last for 5-10 years!
Cleaning Your Gauge
Cleaning your gauge is easy. Use a soft, dry cloth. Wipe away any dirt or grime. Avoid using water or soap. These can damage the internal parts. Pay special attention to the valve connector. This part gets dirty easily. A clean gauge is more accurate. It also lasts longer. Make it a habit to clean your gauge regularly. It’s a small step that makes a big difference. How often should you clean it? After each use is ideal. But at least once a month is a good start.
Storing Your Gauge
Where you store your gauge matters. Keep it in a dry place. Avoid damp or humid areas. Moisture can damage the internal parts. Store it in a case if you have one. This protects it from dust and dirt. Keep it away from extreme temperatures. Heat and cold can affect its accuracy. A garage or shed is usually a good option. Just make sure it’s not too hot or cold. Proper storage extends the life of your gauge. It also keeps it working properly. So, choose a good spot for your gauge.
Checking for Damage
Regularly check your gauge for damage. Look for cracks or dents. Make sure the valve connector is secure. Check the battery compartment if it’s digital. Look for corrosion or leaks. If you see any damage, replace the gauge. A damaged gauge is not accurate. It can give you false readings. This can be dangerous. It’s better to be safe than sorry. Replace your gauge if it’s damaged. Your safety is worth it. A new gauge is a small price to pay for peace of mind.
Troubleshooting Common Issues
Sometimes, things go wrong. Your gauge might not work properly. The reading might be inaccurate. Or the gauge might not attach to the valve. Don’t worry! These problems are usually easy to fix. First, check the battery if it’s digital. A dead battery is a common issue. Next, make sure the gauge is clean. Dirt can interfere with the reading. Also, check the valve on your tire. Make sure it’s not damaged. A damaged valve can leak air. If you’re still having problems, try a different gauge. This will help you determine if the problem is with the gauge or the tire. Knowing how to use gauge for multiple bikes also means knowing how to fix common problems. With a little troubleshooting, you’ll be back on the road in no time!
- Check the battery in digital gauges.
- Clean the gauge and tire valve.
- Inspect the tire valve for damage.
- Try a different gauge to isolate the issue.
- Consult a bike mechanic if needed.
Imagine your bike tire gauge is like a detective. It’s there to help you solve the mystery of your tire pressure. But sometimes, even the best detectives need a little help. If your gauge is giving you trouble, don’t give up. There are usually simple solutions. Think of it like this: is the gauge getting a clear signal? Is the valve on your tire cooperating? Are there any sneaky culprits like dirt or a weak battery? By checking these things, you can usually solve the case. And if you’re still stumped, don’t hesitate to call in the experts. A bike mechanic can help you get to the bottom of the problem.
Fun Fact or Stat: Most bike tire gauge problems can be solved with simple cleaning or a battery replacement!
Inaccurate Readings
Inaccurate readings can be frustrating. First, make sure the gauge is clean. Dirt can interfere with the reading. Also, check the battery if it’s digital. A weak battery can cause problems. Make sure the gauge is properly attached. A loose connection can lead to errors. If you’re still getting inaccurate readings, try a different gauge. This will help you determine if the problem is with the gauge or the tire. Don’t trust a gauge that gives you wrong information. Replace it if necessary. Your safety is worth it.
Gauge Won’t Attach
Sometimes, the gauge won’t attach to the valve. This can be due to a damaged valve. Check the valve for cracks or bends. Also, check the gauge’s connector. Make sure it’s not blocked or damaged. Try wiggling the gauge gently. Sometimes, it just needs a little encouragement. If it still won’t attach, try a different gauge. This will help you determine if the problem is with the gauge or the tire. Don’t force the gauge. You could damage the valve or the gauge. Be gentle and patient.
Air Leaking
Air leaking is a common problem. It usually means the gauge is not properly sealed. Make sure the gauge is firmly attached. Try wiggling it gently. If air is still leaking, check the valve. It might be damaged. A damaged valve won’t seal properly. You might need to replace the valve. Also, check the gauge’s connector. Make sure it’s clean and free of debris. Dirt can prevent a good seal. A good seal is essential for accurate readings. So, take the time to troubleshoot air leaks.
Choosing the Right Bike Pump
A good bike pump is essential. You need it to add air to your tires. There are two main types of pumps. Floor pumps and hand pumps. Floor pumps are larger. They are easier to use. They have a gauge built in. This makes it easy to see the pressure. Hand pumps are smaller. They are portable. You can take them with you on rides. However, they don’t always have a gauge. So, you might need a separate gauge. Choose a pump that works for you. Consider your needs and your budget. How to use gauge for multiple bikes also depends on having a reliable pump. A good pump and a good gauge are a winning combination!
| Feature | Floor Pump | Hand Pump |
|---|---|---|
| Size | Large | Small |
| Ease of Use | Easy | More Difficult |
| Portability | Not Portable | Portable |
| Gauge Included | Usually | Sometimes |
Think of your bike pump as your trusty sidekick. It’s always there to help you keep your tires inflated and ready to roll. But just like any good sidekick, your pump needs to be reliable and easy to use. A floor pump is like the superhero of bike pumps. It’s powerful, efficient, and often comes with a built-in gauge. A hand pump is more like a pocket-sized gadget. It’s convenient for on-the-go emergencies but might require a little more effort to use. The best pump for you depends on your needs and your riding style. So, choose wisely and get ready to pump it up!
Fun Fact or Stat: Floor pumps can inflate a tire up to 160 PSI, while hand pumps typically max out at 80-90 PSI.
Floor Pumps
Floor pumps are great for home use. They are stable and easy to use. They have a long hose. This makes it easy to reach the tire valve. They also have a large handle. This makes pumping easier. Most floor pumps have a built-in gauge. This lets you see the pressure as you pump. Floor pumps are a good investment. They will last for years. They make inflating your tires a breeze. If you have multiple bikes, a floor pump is a must-have. It simplifies how to use gauge for multiple bikes.
Hand Pumps
Hand pumps are perfect for on-the-go repairs. They are small and lightweight. You can carry them in your backpack. Or mount them on your bike frame. Hand pumps require more effort to use. They don’t always have a gauge. So, you might need a separate gauge. Hand pumps are a good backup. They are essential for long rides. They can save you from being stranded with a flat tire. Keep a hand pump with you at all times.
Pump Head Types
There are different types of pump heads. Some fit Presta valves. Some fit Schrader valves. Presta valves are common on road bikes. Schrader valves are common on mountain bikes. Some pumps have a dual head. This means they fit both types of valves. Make sure your pump head fits your valves. Otherwise, you won’t be able to inflate your tires. A good pump head is essential. It makes inflating your tires easier and faster. Choose a pump with the right head for your bikes.
Summary
Using a bike tire gauge is important for safe and efficient riding. It helps you maintain the correct tire pressure. This makes your rides smoother and more enjoyable. How to use gauge for multiple bikes involves understanding the different pressure requirements. Each bike has its own needs. Remember to check the tire sidewall for the recommended PSI range. Adjust the pressure based on your weight and riding conditions. A well-maintained gauge will last for years. It will give you accurate readings every time. With a little practice, you’ll be a pro at using a bike tire gauge.
Conclusion
Learning how to use gauge for multiple bikes is simple. Knowing the correct tire pressure is important. It keeps you safe and makes riding fun. Remember to check your tires often. Use your gauge to keep them properly inflated. A little effort goes a long way. Happy riding!
Frequently Asked Questions
Question No 1: How often should I check my tire pressure?
Answer: You should check your tire pressure before every ride. This ensures your tires are properly inflated. It also helps you avoid flats and accidents. Checking before each ride only takes a few minutes. It’s a simple habit that can make a big difference. If you ride frequently, check at least once a week. Even if you don’t ride often, check at least once a month. Tires lose air over time. So, regular checks are important. A quick check with your gauge can give you peace of mind.
Question No 2: What happens if my tires are over-inflated?
Answer: Over-inflated tires can be dangerous. They are more likely to burst. This can cause an accident. Over-inflation also makes the ride uncomfortable. The tires will be too stiff. They won’t absorb bumps as well. This can lead to a jarring ride. It can also damage your rims. Use your gauge to avoid over-inflation. Always stay within the recommended PSI range. If you accidentally over-inflate, release some air. Check the pressure again with your gauge. Safety first!
Question No 3: What happens if my tires are under-inflated?
Answer: Under-inflated tires can also be a problem. They make it harder to pedal. You’ll have to work harder to go the same distance. Under-inflation also increases the risk of flats. The tire is more likely to pinch the tube. This can cause a pinch flat. Under-inflated tires also wear out faster. They will need to be replaced sooner. Use your gauge to avoid under-inflation. Keep your tires within the recommended PSI range. This will make your rides easier and safer. So, pump them up!
Question No 4: Can I use the same gauge for all my bikes?
Answer: Yes, you can use the same gauge for all your bikes. As long as the gauge is compatible with your tire valves. Most gauges work with both Presta and Schrader valves. However, it’s always a good idea to check. Make sure the gauge is in good condition. A damaged gauge might not give accurate readings. So, inspect it regularly. Knowing how to use gauge for multiple bikes is the same process for each bike, but always check the recommended PSI on the tires.
Question No 5: How do I know what PSI is right for my tires?
Answer: The correct PSI is printed on the tire sidewall. Look for a range of numbers. For example, “50-80 PSI”. This means the tire should be inflated between 50 and 80 PSI. Start with the middle of the range. Then, adjust based on your weight and riding conditions. Heavier riders might need more pressure. Lighter riders might need less. Experiment to find what feels best for you. But always stay within the recommended range. Your gauge will help you find the sweet spot.
Question No 6: What if my gauge doesn’t have a PSI reading?
Answer: Some gauges only show pressure in BAR or kPa. These are different units of measurement. You can convert them to PSI using a conversion chart. Or an online calculator. There are many free resources available. Just search for “BAR to PSI conversion”. Or “kPa to PSI conversion”. It’s important to know the PSI. This will help you inflate your tires correctly. If your gauge doesn’t have a PSI reading, find a way to convert the units. Otherwise, you won’t know how to use gauge for multiple bikes properly.


