
How to Convert Schrader Chuck to Presta? Easy Guide
Quick Summary: Converting a Schrader chuck to Presta is usually as simple as flipping an internal rubber grommet or using an adapter. Most modern pumps have a dual-sided chuck. If yours doesn’t, Presta-to-Schrader adapters are inexpensive and easy to use. Some pumps may require replacing the entire chuck, but this is less common.
Ever tried pumping up your bike tires only to realize your pump’s chuck doesn’t fit your valve? It’s a common frustration, especially when switching between bikes or dealing with different valve types. Schrader and Presta valves are the two main types you’ll find on bikes, and luckily, adapting your pump is usually a quick fix. You don’t need to be a bike mechanic to make this conversion.
This guide will walk you through the simple steps to convert your Schrader chuck to work with Presta valves, ensuring you’re always ready to ride. We’ll cover identifying your pump type, flipping internal parts, using adapters, and even replacing the chuck if necessary. Let’s get started and make sure you’re never caught with a flat and the wrong pump connection!
Understanding Schrader and Presta Valves

Before diving into the conversion process, let’s quickly understand the difference between Schrader and Presta valves. Knowing their characteristics will help you identify which one you’re dealing with and why the conversion is necessary.
Schrader Valves
Schrader valves are the same type you find on car tires. They are wider, sturdier, and have a spring-loaded pin in the center. Here’s what you need to know:
- Common Usage: Typically found on mountain bikes, hybrid bikes, and some lower-end road bikes.
- Durability: More resistant to damage and easier to use.
- Air Pressure: Can handle high pressure, but are less precise than Presta valves.
Presta Valves
Presta valves are narrower and have a valve core that you need to unscrew before inflation. Here’s a quick rundown:
- Common Usage: Predominantly used on road bikes and high-performance bicycles.
- Inflation: Requires unscrewing the valve core before inflation and screwing it back in afterward.
- High Pressure: Designed for higher pressure, which is crucial for road bikes.
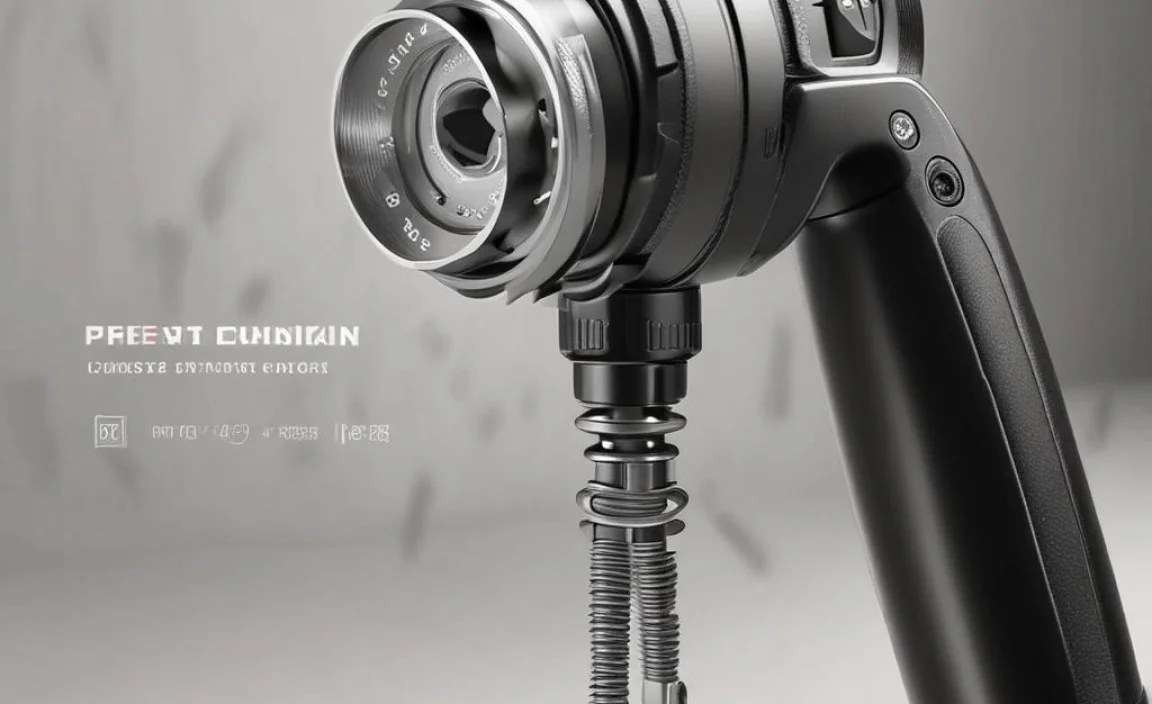
Identifying Your Pump Chuck Type
The first step in converting your Schrader chuck is to identify what type of pump chuck you have. There are generally three types:
- Dual-Head Chucks: These have two separate openings, one for Schrader and one for Presta.
- Convertible Chucks: These have a single opening that can be adjusted to fit either valve type.
- Single-Head Schrader Chucks: These are designed exclusively for Schrader valves and require an adapter or replacement.
Take a close look at your pump chuck. If it has two openings, you’re in luck! If it has one, check if it can be adjusted. If it’s a single opening with no adjustments, you’ll need an adapter or a new chuck.
Converting a Convertible Chuck

Many modern pumps come with a convertible chuck. Converting these is usually straightforward. Here’s how:
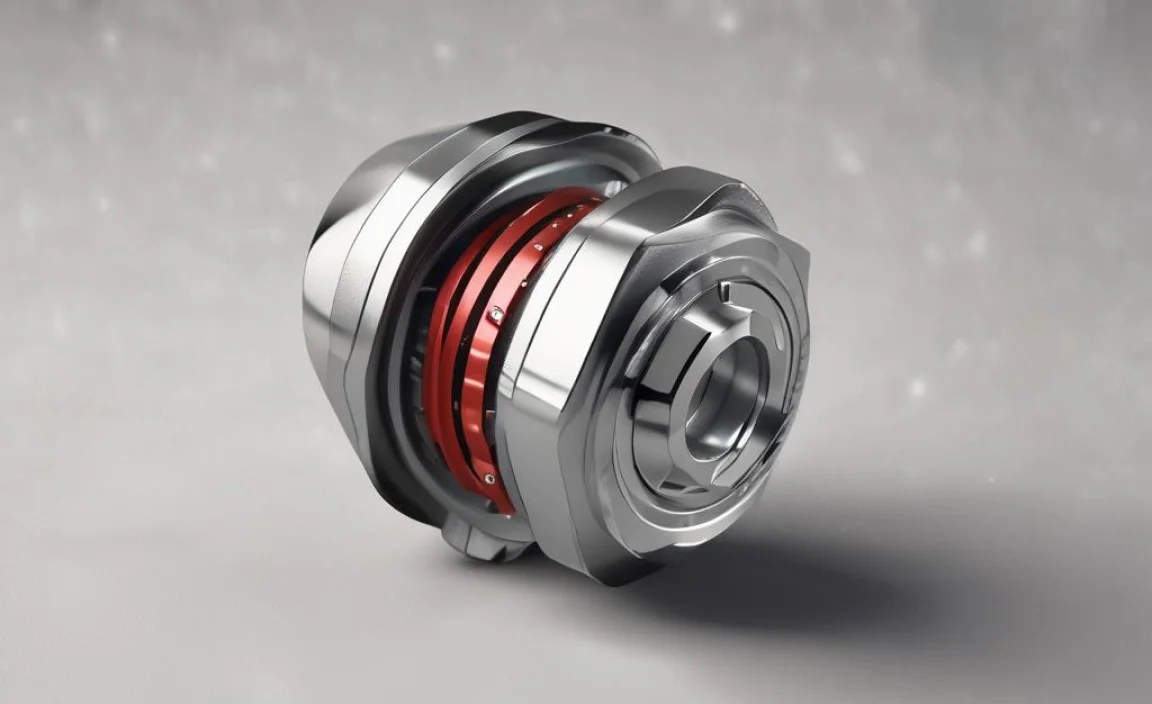
- Locate the Internal Parts: Look inside the chuck. You should see a rubber grommet or plastic insert.
- Remove or Flip the Grommet: Depending on the design, you may need to remove the grommet and flip it, or simply rotate it. Some grommets have different sized openings on each side.
- Reassemble: Put the chuck back together, ensuring the grommet is correctly positioned for Presta valves.
Here’s a table showing common convertible chuck types and their conversion steps:
| Chuck Type | Conversion Method | Tools Needed |
|---|---|---|
| Rubber Grommet | Flip or rotate the grommet | None |
| Plastic Insert | Remove and reinsert with the correct side facing out | Small screwdriver or pick |
Using a Presta-to-Schrader Adapter

If your pump only has a Schrader chuck, a Presta-to-Schrader adapter is a simple and inexpensive solution. These adapters screw onto the Presta valve, allowing you to use a Schrader chuck to inflate the tire.
- Screw on the Adapter: Attach the adapter to the Presta valve. Make sure it’s snug but not overtightened.
- Inflate: Use your Schrader chuck to inflate the tire as you normally would.
- Remove the Adapter: After inflation, remove the adapter and store it for future use.
Presta-to-Schrader adapters are small and easy to carry, making them a convenient option for on-the-go inflation. You can find them at most bike shops or online retailers like Amazon. They typically cost only a few dollars.
Replacing the Pump Chuck
If your pump chuck is not convertible and you don’t want to use an adapter, you can replace it with a dual-head or convertible chuck. This requires a bit more work but provides a more permanent solution.
Tools You’ll Need
- New pump chuck (dual-head or convertible)
- Wrench or pliers
- Hose clamp (if needed)
- Screwdriver (if needed)
Steps to Replace the Chuck
- Remove the Old Chuck: Use a wrench or pliers to loosen the clamp or fitting that secures the old chuck to the pump hose.
- Detach the Chuck: Pull the old chuck off the hose. It might be a tight fit, so use some force if necessary.
- Attach the New Chuck: Slide the new chuck onto the hose. Ensure it’s securely in place.
- Secure the Chuck: Tighten the clamp or fitting to secure the new chuck to the hose.
Here’s a detailed breakdown of the replacement process:
| Step | Description | Tips |
|---|---|---|
| 1. Remove Old Chuck | Loosen the clamp or fitting with a wrench or pliers. | Be careful not to damage the hose. |
| 2. Detach Chuck | Pull the old chuck off the hose. | If it’s stuck, try twisting it while pulling. |
| 3. Attach New Chuck | Slide the new chuck onto the hose. | Ensure it’s fully seated. |
| 4. Secure Chuck | Tighten the clamp or fitting. | Don’t overtighten, as this can damage the hose or chuck. |
Troubleshooting Common Issues
Sometimes, even after converting your chuck, you might encounter issues. Here are some common problems and how to fix them:
- Air Leaking: If you hear air leaking, make sure the chuck is properly seated on the valve. Also, check the rubber grommet inside the chuck for damage.
- Difficulty Inflating: If you’re having trouble inflating the tire, ensure the Presta valve is fully unscrewed. Also, check the pump hose for any kinks or leaks.
- Adapter Issues: If using an adapter, make sure it’s screwed on tightly and that the Schrader chuck is securely attached to the adapter.
Maintaining Your Pump Chuck
Proper maintenance can extend the life of your pump chuck and ensure it works correctly. Here are some tips:
- Regular Cleaning: Clean the chuck regularly to remove dirt and debris. Use a damp cloth and mild detergent.
- Inspect for Damage: Check the chuck for cracks, wear, and damage. Replace it if necessary.
- Lubricate: Apply a small amount of silicone grease to the rubber grommet to keep it supple and prevent air leaks.
Choosing the Right Bike Pump
Investing in a good quality bike pump can make a big difference in your cycling experience. Here are some factors to consider when choosing a pump:
- Type of Pump: Floor pumps are great for home use, while mini-pumps are more portable for on-the-go inflation.
- Valve Compatibility: Choose a pump that is compatible with both Schrader and Presta valves, either with a dual-head chuck or a convertible chuck.
- Pressure Gauge: A pressure gauge is essential for accurate inflation. Look for a pump with an easy-to-read gauge.
- Build Quality: Choose a pump made from durable materials that will last for years.
Here’s a comparison of different types of bike pumps:
| Pump Type | Pros | Cons | Best For |
|---|---|---|---|
| Floor Pump | Easy to use, high volume, accurate pressure gauge | Less portable | Home use |
| Mini-Pump | Portable, lightweight | Requires more effort, less accurate pressure gauge | On-the-go inflation |
| CO2 Inflator | Fast inflation | Requires CO2 cartridges, can be wasteful | Emergency situations |
Essential Tools for Bike Maintenance
Having the right tools can make bike maintenance much easier. Here are some essential tools every cyclist should have:
- Bike Pump: As we’ve discussed, a good pump is essential for maintaining proper tire pressure.
- Tire Levers: These help you remove tires from the rim for repairs.
- Multi-Tool: A multi-tool includes various wrenches, screwdrivers, and other tools in a compact package.
- Chain Tool: This is used to break and rejoin the chain for maintenance and repairs.
- Wrenches and Allen Keys: These are needed for adjusting various components on your bike.
FAQ: Converting Schrader to Presta
Here are some frequently asked questions about converting Schrader chucks to Presta:
1. Why do some bikes use Presta valves instead of Schrader?
Presta valves are often used on road bikes because they can handle higher pressures and are lighter than Schrader valves.
2. Can I convert a Presta valve to a Schrader valve?
While you can’t directly convert a Presta valve to a Schrader valve, you can drill out the rim to accommodate a Schrader valve. However, this is generally not recommended as it can weaken the rim.
3. Are Presta valves better than Schrader valves?
It depends on the application. Presta valves are better for high-pressure tires, while Schrader valves are more durable and easier to use.
4. How do I know if my pump chuck is convertible?
Check for multiple openings or an adjustable grommet inside the chuck. If you see these features, your chuck is likely convertible.
5. Can I use a CO2 inflator with a Presta valve?
Yes, most CO2 inflators come with adapters that allow you to use them with both Schrader and Presta valves.
6. What if my Presta valve is too short for the pump chuck?
You can use a valve extender to make the Presta valve longer and easier to reach with the pump chuck.
7. Where can I buy a Presta-to-Schrader adapter?
You can find Presta-to-Schrader adapters at most bike shops or online retailers like Amazon.
Conclusion
Converting a Schrader chuck to Presta doesn’t have to be a headache. Whether you’re flipping a grommet, using a simple adapter, or replacing the entire chuck, the process is manageable with a few basic tools and steps. By understanding the differences between valve types and knowing your pump options, you can keep your tires properly inflated and enjoy smooth, hassle-free rides. So, grab your pump, follow these steps, and get back on the road with confidence!


