
How to Fix Short Cycling Well Pump When the Tank Seems Empty
Quick Summary: Short cycling happens when your well pump turns on and off too frequently, often because the pressure tank isn’t holding enough water. To fix it, start by checking the air pressure in the tank. If it’s low, add air. Also, look for leaks in the tank or pipes. Replace any faulty parts to keep your pump running smoothly and efficiently.
Is your well pump driving you crazy by turning on and off every few seconds? This annoying problem, called short cycling, usually means your well pump’s pressure tank isn’t doing its job. It’s like your bike tire constantly losing air! If the tank feels empty, it’s a sign something’s wrong. Don’t worry, you can usually fix this yourself with a few simple steps. This guide will walk you through checking and fixing your well pump system, so you can get back to having reliable water pressure without the constant pump noise. Let’s get started!
Understanding Short Cycling and Your Well Pump System


Before we dive into fixing the problem, let’s understand what’s happening. Short cycling is when your well pump rapidly turns on and off. This isn’t normal. A healthy well pump should run for a while to fill the pressure tank and then stay off until the pressure drops again. When it short cycles, it puts extra stress on the pump motor, which can lead to it wearing out much faster.
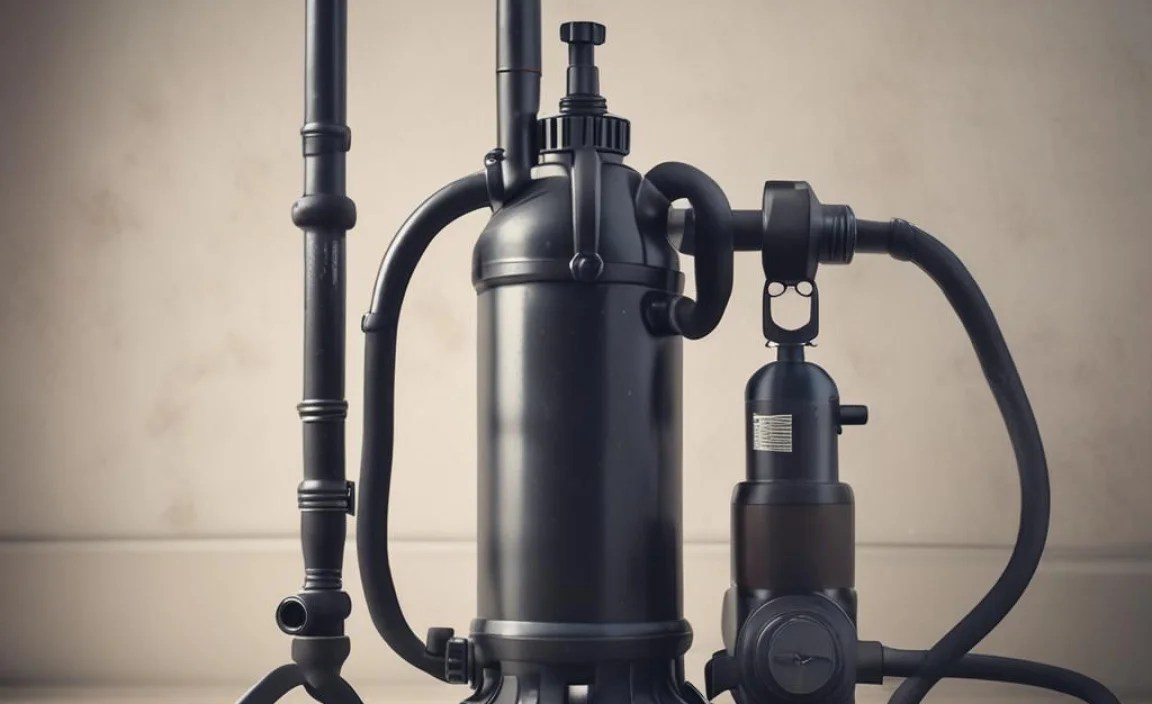
Here’s a quick look at the key parts of your well pump system:
- Well Pump: The workhorse that pulls water from your well.
- Pressure Tank: A storage tank that holds water under pressure, so the pump doesn’t have to turn on every time you open a faucet.
- Pressure Switch: This senses the water pressure and tells the pump when to turn on and off.
- Pipes and Fittings: These carry water from the well to your house.
When the pressure tank seems empty, it often means the air cushion inside the tank is gone. This air cushion is crucial for maintaining pressure and preventing short cycling. Without it, the pump turns on and off rapidly, trying to keep up with even small water demands.
Tools and Materials You’ll Need


Before you start, gather these tools and materials. Having everything ready will make the job much smoother.
- Air compressor or bicycle pump with a pressure gauge
- Tire pressure gauge
- Wrench (for pipe fittings)
- Screwdriver (Phillips and flathead)
- Teflon tape
- Bucket and towels
- Replacement pressure switch (if needed)
- Replacement pressure tank (if needed)
Step-by-Step Guide to Fixing Short Cycling

Now, let’s get to work. Follow these steps to diagnose and fix the short cycling problem. Safety first: always turn off the power to the pump before starting any work.
Step 1: Turn Off the Power and Water
Locate the circuit breaker that controls the well pump and turn it off. This prevents any electrical accidents. Then, turn off the water supply to your house. There should be a main shut-off valve near the pressure tank.
Step 2: Drain the Pressure Tank
Open a faucet at the lowest point in your house (like an outdoor spigot or a basement sink). This will drain the water from the pressure tank and relieve the pressure in the system. Let the water run until it stops flowing.
Step 3: Check the Air Pressure in the Tank
Find the Schrader valve on the top of the pressure tank. It looks just like the valve on your car or bike tire. Use a tire pressure gauge to check the air pressure. The pressure should be 2 PSI below the cut-in pressure of your well pump. For example, if your pump’s cut-in pressure is 40 PSI, the tank should have 38 PSI of air.
Here’s a simple formula:
Tank Air Pressure = Pump Cut-In Pressure – 2 PSI
Step 4: Add Air to the Tank (If Needed)
If the air pressure is too low, use an air compressor or bicycle pump to add air through the Schrader valve. Keep checking the pressure with the gauge until it reaches the correct level. If water comes out of the valve when you check the pressure, it means the bladder inside the tank is likely broken and needs replacement. We’ll cover that later.
Step 5: Check for Leaks
Inspect the pressure tank, pipes, and fittings for any signs of leaks. Look for drips, wet spots, or corrosion. Pay close attention to the joints where pipes connect. Even small leaks can cause pressure loss and lead to short cycling.
Step 6: Repair Any Leaks
If you find a leak, here’s how to fix it:
- Tighten Fittings: Use a wrench to tighten any loose fittings. Sometimes, this is all it takes to stop a leak.
- Replace Teflon Tape: If tightening doesn’t work, remove the fitting, clean the threads, and wrap them with new Teflon tape before reassembling. Teflon tape creates a watertight seal.
- Replace Damaged Pipes: If a pipe is cracked or corroded, replace it with a new section of pipe and fittings. Make sure to use Teflon tape on all threaded connections.
Step 7: Check the Pressure Switch
The pressure switch is a small electrical device that senses the water pressure and tells the pump when to turn on and off. Over time, it can become faulty and cause short cycling. Here’s how to check it:
- Inspect the Contacts: Turn off the power to the pump. Remove the cover of the pressure switch. Look at the electrical contacts inside. If they are corroded or burned, the switch may need replacement.
- Test the Switch (Advanced): Use a multimeter to test the continuity of the switch. When the pressure is below the cut-in point, the switch should show continuity (a closed circuit). When the pressure is above the cut-out point, it should show no continuity (an open circuit). If it doesn’t behave this way, replace the switch. If you’re not comfortable with electrical testing, it’s best to call a qualified electrician.
Step 8: Replace the Pressure Switch (If Needed)
If the pressure switch is faulty, replace it with a new one. Here’s how:
- Turn Off Power and Water: As always, turn off the power to the pump and the water supply.
- Disconnect Wires: Disconnect the wires from the old pressure switch. Label them first so you know where to connect them on the new switch. Take a photo for reference, if needed.
- Unscrew the Old Switch: Unscrew the old pressure switch from the pipe fitting. Be prepared for a little water to spill out.
- Install the New Switch: Wrap Teflon tape around the threads of the new pressure switch and screw it into the pipe fitting. Tighten it securely with a wrench.
- Reconnect Wires: Reconnect the wires to the new pressure switch, matching the labels or your reference photo.
Step 9: Check the Pressure Tank Bladder
If you’ve checked the air pressure and water came out of the Schrader valve, the bladder inside the pressure tank is likely ruptured. The bladder separates the air and water inside the tank. When it fails, the tank becomes waterlogged, and the pump short cycles.
To confirm, you can also try this:
- Tap on the Tank: Tap on the sides of the tank. If it sounds full of water from top to bottom, the bladder is probably gone. A healthy tank should sound hollow at the top (where the air is) and full at the bottom (where the water is).
Step 10: Replace the Pressure Tank (If Needed)
If the bladder is broken, the best solution is to replace the entire pressure tank. Here’s how:
- Turn Off Power and Water: Turn off the power to the pump and the water supply.
- Drain the Old Tank: Drain any remaining water from the old tank by opening a faucet at the lowest point in your house.
- Disconnect the Old Tank: Disconnect the pipes from the old tank. You may need to use a wrench to loosen the fittings. Be prepared for some water to spill out.
- Install the New Tank: Place the new tank in the same location as the old one. Connect the pipes to the new tank, using Teflon tape on all threaded connections. Tighten the fittings securely with a wrench.
- Pressurize the Tank: Before turning the pump back on, make sure the new tank has the correct air pressure (2 PSI below the pump’s cut-in pressure).
Step 11: Restore Power and Water
Once you’ve fixed any leaks, replaced the pressure switch or tank (if needed), and made sure the air pressure is correct, it’s time to restore power and water to your system.
- Turn on the Water Supply: Slowly open the main water shut-off valve.
- Turn on the Power: Go to the circuit breaker and turn the power to the well pump back on.
Step 12: Monitor the Pump and Pressure
Watch the pump as it starts to fill the pressure tank. It should run continuously until the pressure reaches the cut-out point (usually 60 PSI). Then, it should turn off. Open a faucet and let some water run. The pump should stay off until the pressure drops to the cut-in point (usually 40 PSI), then turn back on. If the pump cycles normally, you’ve fixed the problem. If it’s still short cycling, double-check your work and consider calling a professional.
Troubleshooting Tips
Sometimes, even after following these steps, you might still have issues. Here are some extra troubleshooting tips:
- Clogged Well Screen: If your well screen is clogged with sediment, it can restrict water flow and cause the pump to work harder. Consider having your well professionally cleaned.
- Incorrect Pressure Switch Settings: Make sure the cut-in and cut-out pressure settings on your pressure switch are correct. They are usually adjustable with screws under the cover of the switch. Refer to your pump’s manual for the correct settings.
- Wiring Issues: Check the wiring connections to the pump and pressure switch. Loose or corroded connections can cause problems. If you’re not comfortable working with electricity, call a qualified electrician.
Preventative Maintenance
Preventing short cycling is better than fixing it. Here are some tips to keep your well pump system in good shape:
- Check Air Pressure Regularly: Check the air pressure in your pressure tank every 3-6 months. Adjust it as needed to maintain the correct level.
- Inspect for Leaks: Periodically inspect the pressure tank, pipes, and fittings for leaks. Fix any leaks promptly to prevent pressure loss and water damage.
- Flush Sediment: If you have a lot of sediment in your water, flush your pressure tank periodically to remove it. This can help prevent clogs and extend the life of the tank.
- Consider a Well Inspection: Have your well professionally inspected every few years to check for any potential problems, such as a clogged well screen or a failing pump.
Cost Considerations
Here’s a breakdown of potential costs associated with fixing short cycling:
| Item | Estimated Cost |
|---|---|
| Teflon Tape | $5 – $10 |
| Pressure Switch | $20 – $50 |
| Pressure Tank (30-gallon) | $150 – $300 |
| Professional Well Service Call | $100 – $300+ |
Fixing short cycling yourself can save you money on service calls. However, if you’re not comfortable with any of these steps, it’s always best to call a qualified well service technician.
Understanding Pressure Tank Sizes
Choosing the right size pressure tank is crucial for efficient well pump operation. Here’s a table to guide you:
| Household Size | Recommended Tank Size (Gallons) |
|---|---|
| 1-2 people | 20-30 |
| 3-4 people | 30-40 |
| 5+ people | 40+ |
A larger tank reduces pump cycling, extending its lifespan and saving energy. However, consider available space and budget when selecting a tank.
FAQ: Short Cycling Well Pump
Q: Why is my well pump turning on and off so quickly?
A: This is called short cycling and usually happens when the pressure tank can’t hold enough water or the air charge is low. It could also be due to leaks or a faulty pressure switch.
Q: How do I check the air pressure in my pressure tank?
A: First, turn off the pump and drain the tank. Then, use a tire pressure gauge on the Schrader valve (like a tire valve) on top of the tank. The pressure should be 2 PSI below your pump’s cut-in pressure.
Q: What should I do if water comes out of the air valve on my pressure tank?
A: If water comes out, it means the bladder inside the tank is likely ruptured. You’ll need to replace the entire pressure tank.
Q: Can a leaky pipe cause short cycling?
A: Yes, even small leaks can cause pressure loss, leading to the pump turning on and off more frequently. Check all pipes and fittings for any signs of leaks.
Q: How often should I check my well pump system?
A: It’s a good idea to check the air pressure in your pressure tank every 3-6 months and inspect for leaks regularly. A professional well inspection every few years can also help catch potential problems early.
Q: Is it okay to try fixing my well pump myself?
A: Many simple well pump issues, like checking air pressure or replacing a pressure switch, can be done yourself. However, if you’re not comfortable with electrical work or plumbing, it’s best to call a professional.
Q: What size pressure tank do I need?
A: The right size depends on your household’s water usage. A general guideline is 20-30 gallons for 1-2 people, 30-40 gallons for 3-4 people, and 40+ gallons for 5+ people.
Conclusion
Fixing a short cycling well pump might seem daunting, but with a little patience and these step-by-step instructions, you can often solve the problem yourself. Remember to prioritize safety by turning off the power and water before you start. Regular maintenance, like checking air pressure and inspecting for leaks, can prevent future issues and extend the life of your well pump system. If you ever feel unsure or the problem persists, don’t hesitate to call a qualified professional. With a little effort, you can keep your water flowing smoothly and your pump running efficiently for years to come. Happy fixing!


