
How to Cycle a Fuel Pump on a 1987 Oldsmobile Delta 88
Quick Summary: Cycling the fuel pump on your 1987 Delta 88 involves forcing the pump to run briefly to prime the fuel system, especially after it’s been sitting or you’ve done fuel system work. You can do this by jumping the fuel pump relay, which sends power directly to the pump, ensuring the engine gets the fuel it needs to start reliably. Always follow safety precautions when working with electrical and fuel systems.
Having trouble starting your 1987 Oldsmobile Delta 88? A common culprit, especially if the car has been sitting for a while, is a lack of fuel pressure. The fuel pump needs to prime the system before the engine can fire up. Manually cycling the fuel pump can solve this problem quickly. Don’t worry, it’s a straightforward process! This guide will walk you through each step, so you can get your classic car running smoothly again. We’ll cover everything from locating the fuel pump relay to safely cycling the pump, ensuring your Delta 88 is ready to hit the road.
Understanding Why You Might Need to Cycle the Fuel Pump

Before we dive into the “how-to,” let’s understand why cycling the fuel pump might be necessary. Here are a few common scenarios:
- The car has been sitting for an extended period: Fuel can drain back into the tank, leaving the fuel lines empty.
- You’ve replaced the fuel filter or pump: Air can get into the system, preventing proper fuel delivery.
- Troubleshooting a no-start condition: Cycling the pump helps determine if fuel delivery is the issue.
Cycling the fuel pump essentially forces the pump to run, pushing fuel through the lines and priming the system for starting. It’s a simple way to address fuel-related starting problems.
Tools and Materials You’ll Need

Gather these items before you begin:
- Jumper wire: A short length of wire with alligator clips or spade connectors on each end.
- Wiring diagram (for 1987 Oldsmobile Delta 88): Crucial for identifying the correct fuel pump relay. You can find these online or in a repair manual.
- Multimeter (optional): For testing voltage and continuity.
- Safety glasses: Protect your eyes.
- Gloves: Keep your hands clean and protected.
- Rag or shop towel: For wiping up any spills.
Having these tools on hand will make the process smoother and safer.
Step-by-Step Guide to Cycling the Fuel Pump

Follow these steps carefully to cycle the fuel pump on your 1987 Delta 88:
Step 1: Locate the Fuel Pump Relay
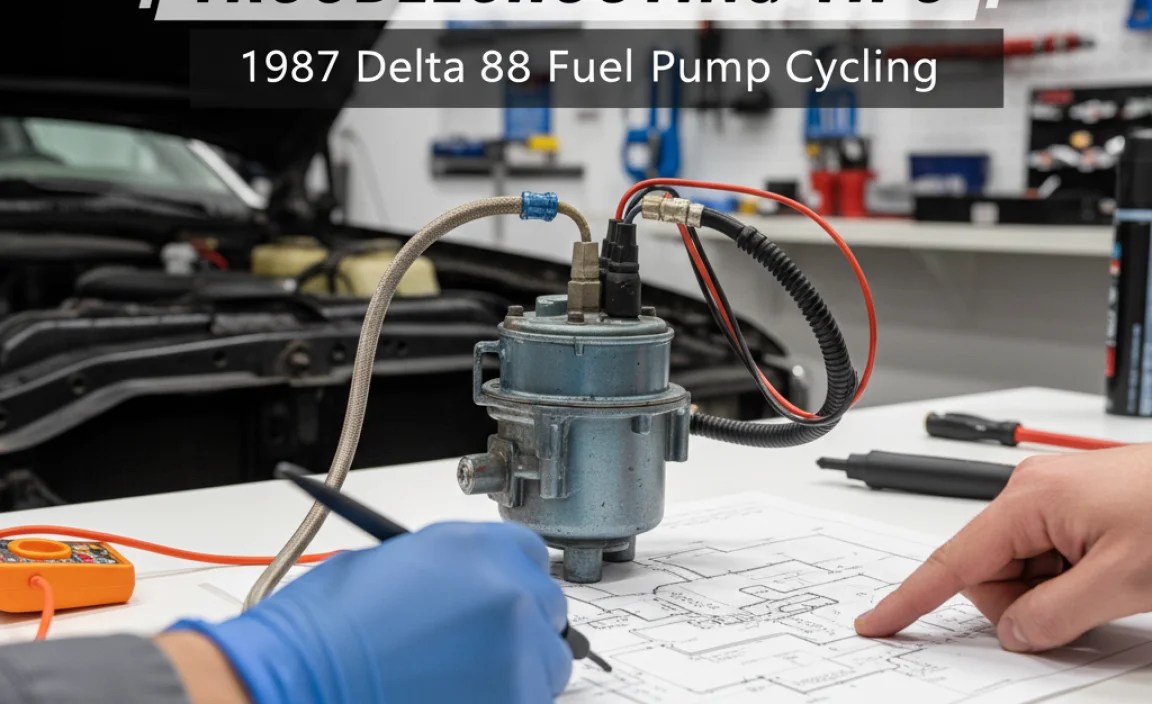
The fuel pump relay is usually located in the fuse box, which is typically under the dashboard or in the engine compartment. Refer to your 1987 Delta 88’s wiring diagram to pinpoint the exact location. The diagram will show the relay’s position and label it clearly.
Why is the wiring diagram so important? Because fuse box layouts can vary slightly depending on the car’s options or production date. Using the wrong relay could damage other components.
Step 2: Identify the Correct Terminals
Once you’ve located the relay, you need to identify the terminals that control the fuel pump. Again, your wiring diagram is your best friend here. Look for the terminals that connect directly to the fuel pump and the power source.
Typically, you’ll be looking for:
- Power terminal: This terminal receives power from the battery.
- Fuel pump terminal: This terminal sends power to the fuel pump.
Sometimes, these terminals are labeled on the relay itself or on the fuse box diagram. If not, the wiring diagram will show you which terminals correspond to the fuel pump circuit.
Step 3: Prepare the Jumper Wire
Take your jumper wire and make sure the connections (alligator clips or spade connectors) are clean and secure. This will ensure a good connection when you jump the relay terminals.
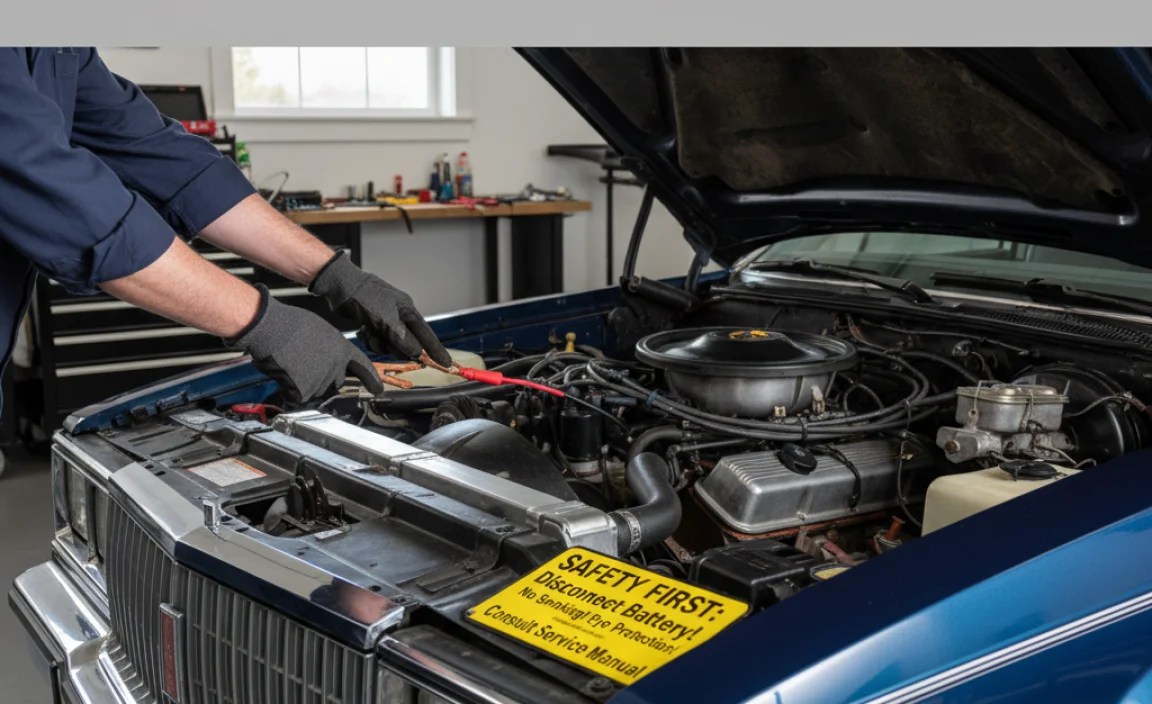
Step 4: Disable the Ignition
Before jumping any terminals, make absolutely sure the ignition is switched off. This prevents any accidental starting or electrical surges that could damage the system. Remove the key from the ignition switch for added safety.
Step 5: Jump the Relay Terminals
Now, carefully connect the jumper wire between the power terminal and the fuel pump terminal. This bypasses the relay and sends power directly to the fuel pump, causing it to run.
Important: Only jump the terminals for a few seconds at a time (2-3 seconds max). Repeatedly running the pump for extended periods without fuel flowing through it can damage the pump.
Step 6: Listen for the Fuel Pump
When you jump the terminals, you should hear the fuel pump running. It will likely be a whirring or buzzing sound coming from the fuel tank area (usually near the rear of the car). If you don’t hear the pump, double-check your connections and the wiring diagram to make sure you’re jumping the correct terminals.
Step 7: Repeat as Needed
Cycle the fuel pump a few times, waiting a few seconds between each cycle. This will help prime the fuel system and build pressure. After a few cycles, try starting the car. If it starts, congratulations! If not, proceed to the troubleshooting section below.
Step 8: Remove the Jumper Wire
Once you’ve successfully started the car (or finished troubleshooting), remove the jumper wire from the relay terminals. Replace the fuel pump relay in its socket.
Troubleshooting Tips
What if cycling the fuel pump doesn’t solve the problem? Here are some troubleshooting tips:
- No sound from the fuel pump:
- Check the fuel pump fuse. A blown fuse could prevent the pump from running.
- Inspect the fuel pump wiring for any damage or loose connections.
- The fuel pump itself might be faulty and need replacement.
- Car still won’t start after cycling the pump:
- Check the fuel filter. A clogged filter can restrict fuel flow.
- Inspect the fuel lines for any leaks or damage.
- Consider other potential causes of a no-start condition, such as ignition problems or a faulty crankshaft position sensor.
If you’re still having trouble, it’s best to consult a qualified mechanic. Fuel system issues can be complex, and a professional can diagnose the problem accurately.
Safety Precautions
Working with fuel and electrical systems can be dangerous. Follow these safety precautions to protect yourself and your vehicle:
- Work in a well-ventilated area: Fuel vapors are flammable and can be harmful to breathe.
- Disconnect the negative battery cable: This prevents accidental electrical shocks or sparks.
- Wear safety glasses and gloves: Protect your eyes and skin from fuel and other contaminants.
- Have a fire extinguisher nearby: In case of a fuel leak or fire.
- Never smoke or work near open flames: Fuel is highly flammable.
By following these safety precautions, you can minimize the risk of accidents and injuries.
Fuel Pump Relay Jumper Chart
Here’s a table to help you visualize the process of jumping the fuel pump relay. Remember to always consult your vehicle’s specific wiring diagram for accurate terminal identification.
| Step | Action | Description |
|---|---|---|
| 1 | Locate Fuel Pump Relay | Find the fuel pump relay in the fuse box using your wiring diagram. |
| 2 | Identify Terminals | Identify the power and fuel pump terminals on the relay. |
| 3 | Disable Ignition | Turn off the ignition and remove the key. |
| 4 | Jump Terminals | Connect the jumper wire between the power and fuel pump terminals for 2-3 seconds. |
| 5 | Listen for Pump | Listen for the fuel pump running near the fuel tank. |
| 6 | Repeat as Needed | Cycle the pump a few times, then try starting the car. |
| 7 | Remove Jumper | Remove the jumper wire and replace the relay. |
Alternative Methods for Priming the Fuel System
While jumping the fuel pump relay is a common method, here are a couple of alternative approaches:
- Using a scan tool: Some scan tools have a function to activate the fuel pump. This is a safer and more controlled method than jumping the relay.
- Turning the ignition key on and off repeatedly: Turning the key to the “on” position (without starting the engine) activates the fuel pump for a brief period. Repeating this several times can prime the system.
These methods might not be as effective as jumping the relay in all cases, but they’re worth trying if you’re uncomfortable with the jumper wire method. However, for older cars like the 1987 Delta 88, scan tool functionality may be limited.
Maintaining Your 1987 Delta 88’s Fuel System
Preventative maintenance is key to keeping your classic car running smoothly. Here are some tips for maintaining the fuel system:
- Replace the fuel filter regularly: A clogged fuel filter can strain the fuel pump and reduce fuel efficiency. Check your owner’s manual for the recommended replacement interval.
- Use fuel stabilizer: If you plan to store your car for an extended period, add fuel stabilizer to the tank to prevent fuel degradation.
- Inspect fuel lines regularly: Look for any signs of leaks, cracks, or damage. Replace any damaged lines immediately.
- Keep the fuel tank full: This helps prevent condensation from forming inside the tank, which can lead to rust and fuel contamination.
Regular maintenance will help extend the life of your fuel system and prevent costly repairs.
Common Issues with the 1987 Delta 88 Fuel System
Here’s a table outlining some common fuel system issues specific to the 1987 Delta 88 and potential solutions:
| Issue | Possible Cause | Solution |
|---|---|---|
| Hard starting or no start | Fuel pump failure, clogged fuel filter, faulty fuel pump relay | Replace fuel pump, replace fuel filter, replace fuel pump relay |
| Poor fuel economy | Clogged fuel filter, faulty oxygen sensor, leaking fuel injectors | Replace fuel filter, replace oxygen sensor, clean or replace fuel injectors |
| Rough idle | Leaking vacuum lines, dirty fuel injectors, faulty idle air control valve | Replace vacuum lines, clean fuel injectors, replace idle air control valve |
| Fuel leaks | Cracked fuel lines, leaking fuel pump, leaking fuel injectors | Replace fuel lines, replace fuel pump, replace fuel injectors |
FAQ: Cycling Fuel Pump on a 1987 Delta 88
Here are some frequently asked questions about cycling the fuel pump on a 1987 Oldsmobile Delta 88:
What does “cycling the fuel pump” mean?
Cycling the fuel pump means manually forcing the fuel pump to run briefly to prime the fuel system. This is usually done by bypassing the fuel pump relay to send power directly to the pump.
Why would I need to cycle the fuel pump?
You might need to cycle the fuel pump if your car has been sitting for a long time, if you’ve replaced the fuel filter or pump, or if you’re troubleshooting a no-start condition. It helps ensure the fuel lines are filled with fuel.
Is it safe to jump the fuel pump relay?
Yes, it’s generally safe if you follow the correct procedure and safety precautions. Always disconnect the negative battery cable, work in a well-ventilated area, and avoid creating sparks near fuel.
How long should I jump the relay terminals for?
Only jump the terminals for a few seconds (2-3 seconds max) at a time. Repeatedly running the pump for extended periods without fuel flowing through it can damage the pump.
What if I don’t hear the fuel pump running when I jump the relay?
Double-check your connections and the wiring diagram to make sure you’re jumping the correct terminals. Also, check the fuel pump fuse to see if it’s blown. If the fuse is good and you still don’t hear the pump, the fuel pump itself might be faulty.
Can I damage my car by cycling the fuel pump?
If done incorrectly, you could potentially damage the fuel pump or other electrical components. Always follow the correct procedure and consult your vehicle’s wiring diagram. Avoid running the pump for extended periods without fuel flowing through it.
What other problems can cause a no-start condition besides fuel issues?
Other potential causes include ignition problems (faulty spark plugs, ignition coil, or distributor), a dead battery, a faulty starter motor, or a problem with the engine’s computer (ECU).
Conclusion
Cycling the fuel pump on your 1987 Oldsmobile Delta 88 can be a simple and effective way to address fuel-related starting problems. By following this step-by-step guide and taking the necessary safety precautions, you can get your classic car back on the road in no time. Remember to consult your vehicle’s wiring diagram for accurate terminal identification, and don’t hesitate to seek professional help if you’re uncomfortable working with fuel or electrical systems. Happy motoring!
“`


